Table Of Contents:
- Key Takeaways
- Why Benchtop Resurfacing Is the Ideal Kitchen Upgrade
- Essential Materials and Tools for Resurfacing
- Preparing Your Kitchen for Benchtop Resurfacing
- Preparing Your Kitchen for Benchtop Resurfacing
- Step by Step Benchtop Resurfacing Guide
- Customizing Your Resurfaced Benchtop
- Maintaining Your Newly Resurfaced Benchtop
- Conclusion
Are you tired of your kitchen benchtop looking worn and outdated? Many homeowners overlook the benefits of benchtop resurfacing, which can not only enhance the appearance but also prevent water damage. In this guide, you’ll discover the essential materials needed, like a putty knife, and the step-by-step process for lamination. By following these steps, you’ll gain a beautiful, durable surface that reduces wear and keeps your kitchen looking new. Let’s dive in and transform your kitchen together!
Key Takeaways
- benchtop resurfacing is a cost-effective alternative to complete replacement
- it reduces waste and promotes environmental sustainability
- proper surface preparation ensures a successful resurfacing project
- regular maintenance keeps your resurfaced benchtop looking new and functional
- customization options allow you to reflect your personal style in your kitchen
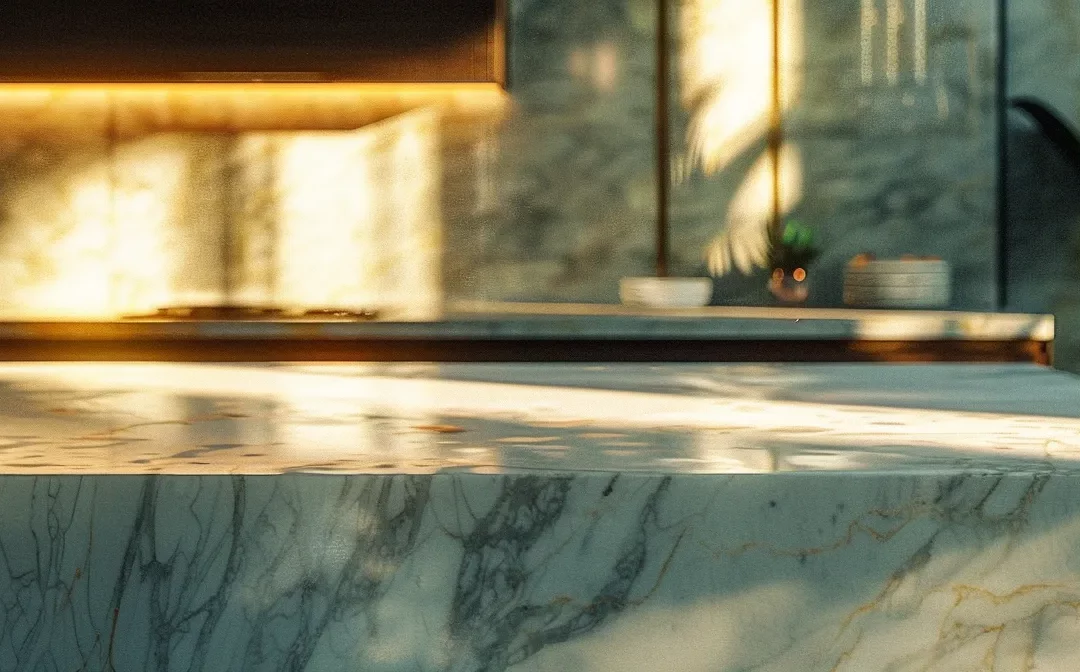
Why Benchtop Resurfacing Is the Ideal Kitchen Upgrade
Benchtop resurfacing offers multiple advantages over complete replacement, providing you with a budget-friendly transformation that enhances your kitchen. This method addresses concerns like moisture and humidity, ensuring a durable finish. Additionally, resurfacing reduces waste, making it an environmentally sustainable choice. Discover how to elevate your kitchen with effective and practical solutions.
Advantages Over Complete Benchtop Replacement
Benchtop resurfacing is a smart choice when compared to complete replacement. It minimizes stress and disruption during your kitchen upgrade process. You can avoid the mess and extensive time that a full remodel brings, ensuring a smoother transition into your newly transformed space.
This method effectively addresses issues such as corrosion and leaks in your current benchtop. Instead of tearing everything out, resurfacing focuses on improving what you already have, reinforcing the surface against inevitable wear and moisture exposure without the hassles of a major renovation.
Moreover, resurfacing is a more environmentally friendly option. By opting to resurface rather than replace, you significantly reduce waste that would otherwise end up in a landfill. You can enjoy a refreshed look for your kitchen while being conscious of the impact your choices have on the environment, making it both practical and sustainable:
Budget-Friendly Transformation Options
Benchtop resurfacing is a cost-effective solution that significantly enhances the look of your kitchen without breaking the bank. You can refresh your surfaces by addressing issues like dirt and minor scratches, making them look brand new. This process not only saves you money but also avoids the need for additional costs associated with full-scale renovations.
When you consider your kitchen’s ventilation and overall layout, resurfacing allows you to keep existing fixtures such as valves and connections intact. If your benchtop has minor damages that affect its functionality, a skilled professional can take care of these with a simple adjustment, using tools like a screwdriver to tighten fittings. This way, you maintain the integrity of your kitchen’s design while enhancing its appearance.
The transformation options with benchtop resurfacing are practical and straightforward. You can choose from a range of colors and finishes to suit your style, allowing for an upgrade that complements your existing décor. By opting for resurfacing over full replacement, you access multiple benefits while minimizing disruption during the process:
- Cost-effective upgrade
- Preservation of existing features
- Quick installation with minimal mess
- Wide array of design choices
Environmental Benefits of Resurfacing
Choosing benchtop resurfacing is an environmentally responsible decision that reduces waste. Unlike a complete benchtop replacement, which often sends old materials to landfills, resurfacing allows you to retain much of the existing structure. You contribute to a lower environmental impact by polishing up existing surfaces instead of tearing everything out and starting over.
Another benefit of resurfacing pertains to energy efficiency. By keeping the original benchtop, you minimize the energy used in producing new materials. This method also helps maintain room temperature stability, as the existing materials typically have better insulation than new alternatives. Hence, resurfacing not only refreshes your kitchen but also keeps energy costs in check.
Furthermore, resurfacing materials are often designed for longevity and durability, meaning they last longer than some new options available in the market. You may find that resurfacing can effectively mask minor damages, such as chips in the surface that could expose moisture to tile structures underneath. By keeping the integrity of your kitchen intact, you avoid future waste and promote sustainability in your home renovation efforts:
Upgrading your kitchen with benchtop resurfacing is just the start. Next, you’ll want to know the essential materials and tools you need to achieve a flawless finish.
Essential Materials and Tools for Resurfacing
To successfully resurface your kitchen benchtop, you need to focus on choosing the right resurfacing products that suit your materials, like granite. Essential tools, including a washer for cleaning surfaces and brushes for applying the coat, will ensure a smooth process. Additionally, don’t forget about safety gear to protect yourself from dust and stains during the project.
Choosing the Right Resurfacing Products
When choosing resurfacing products for your kitchen benchtop, it’s crucial to select high-quality materials that match the existing surface. For instance, if your benchtop is made of granite, a resin specifically designed for stone surfaces will provide the best adhesion and longevity. Investing in the right products saves you time and effort in the long run, as well as ensuring a finish that withstands everyday wear and tear.
Consider the length of the project when selecting materials. A reliable resurfacing product should offer quick curing times without sacrificing quality. For instance, if you expect minimal downtime, look for products that can set and be used within a short period. This approach allows you to continue using your kitchen with minimal disruption while ensuring that the resurfacing process goes smoothly.
Don’t overlook the importance of thorough cleaning, which is where the right soap and water supply come into play. Properly washing the surface before application ensures that dirt and grease don’t interfere with the adhesion of the resurfacing product. Using a suitable cleaning agent can enhance the product’s effectiveness, leading to a longer-lasting, beautifully finished benchtop that enhances your kitchen’s overall look.
Must-Have Tools for a Smooth Process
To achieve a smooth resurfacing process, having the right tools on hand is essential. Invest in high-quality brushes that can apply your chosen cleaning agent evenly across the benchtop surface. This ensures that the new finish adheres properly and that every crevice of your kitchen, regardless of material—be it wood or stone—receives the attention it needs during your renovation.
In addition to brushes, consider using a durable washer for thoroughly cleaning your surfaces before applying any resurfacing products. This tool helps eliminate grease and dirt that can affect adhesion, leading to a more successful outcome. Whether you are working around a sink or various fixtures, a washer can enhance the efficiency of your preparation process, making the entire renovation task less labor-intensive.
Lastly, don’t forget to use protective gear such as gloves and goggles to safeguard yourself from dust and potential stains during the resurfacing project. Proper precautions not only ensure your safety but also help maintain a clean working area. By using these must-have tools, you set the stage for a successful kitchen transformation that enhances both aesthetics and functionality.
Safety Gear to Protect Yourself
When you embark on a benchtop resurfacing project, prioritizing safety should be your first step. Using gloves will provide protection against abrasive materials and chemicals while working with various resurfacing products. These materials can be harsh and may cause skin irritation, so ensuring your hands are well-protected helps maintain your comfort and health throughout the process.
Additionally, wearing safety goggles is crucial to shield your eyes from dust and potential splashes of resurfacing substances. This is especially important when using tools that generate pressure, as airborne particles can result in discomfort or injury. By taking this simple precaution, you can focus on the task at hand without worrying about the risks to your vision.
Lastly, consider using a dust mask to guard against mold spores or fine particles while resurfacing. Some products may release fumes or small particles that can be harmful when inhaled. Ensuring that you’re equipped with proper ventilation and a quality mask can significantly enhance your safety, enabling a smoother and safer kitchen transformation.
You’ve gathered the right tools and materials; now it’s time to focus on what comes next. Preparing your kitchen for benchtop resurfacing sets the stage for a transformation that you won’t want to miss.
Preparing Your Kitchen for Benchtop Resurfacing
Preparing Your Kitchen for Benchtop Resurfacing
To ensure a successful benchtop resurfacing project, start by clearing and protecting surrounding areas, including the floor. Address any cracks and imperfections in the solid surface to create a smooth foundation for your new finish. Clean the surface thoroughly with an appropriate cleaner, and take plumbing tips into account to prevent issues during the process. Prepare for effective surface sanding to achieve optimal results.
Clearing and Protecting Surrounding Areas
To begin your benchtop resurfacing project, it’s essential to clear and protect the surrounding areas of your kitchen. Start by removing all items from your countertops, including appliances, utensils, and any decor. This not only gives you ample space to work but also prevents any scratches or damage to your belongings during the remodel.
Next, protect your flooring and nearby surfaces. Use drop cloths or plastic sheets to cover the floor and any furniture that can’t be moved. This step is crucial because resurfacing materials, such as epoxy, can create spills or drips. Taking this precaution will save you from potential cleanup efforts and ensure that your kitchen remains in good condition throughout the process.
Finally, evaluate the condition of the initial surface. Look for any cracks that may require a quick fix with an iron screw or mineral filler before you start the resurfacing. Addressing these imperfections ahead of time will pave the way for a smoother finish and a successful transformation of your kitchen:
- Remove all items from countertops
- Cover the flooring and nearby surfaces
- Check for cracks and repair them
Repairing Cracks and Imperfections
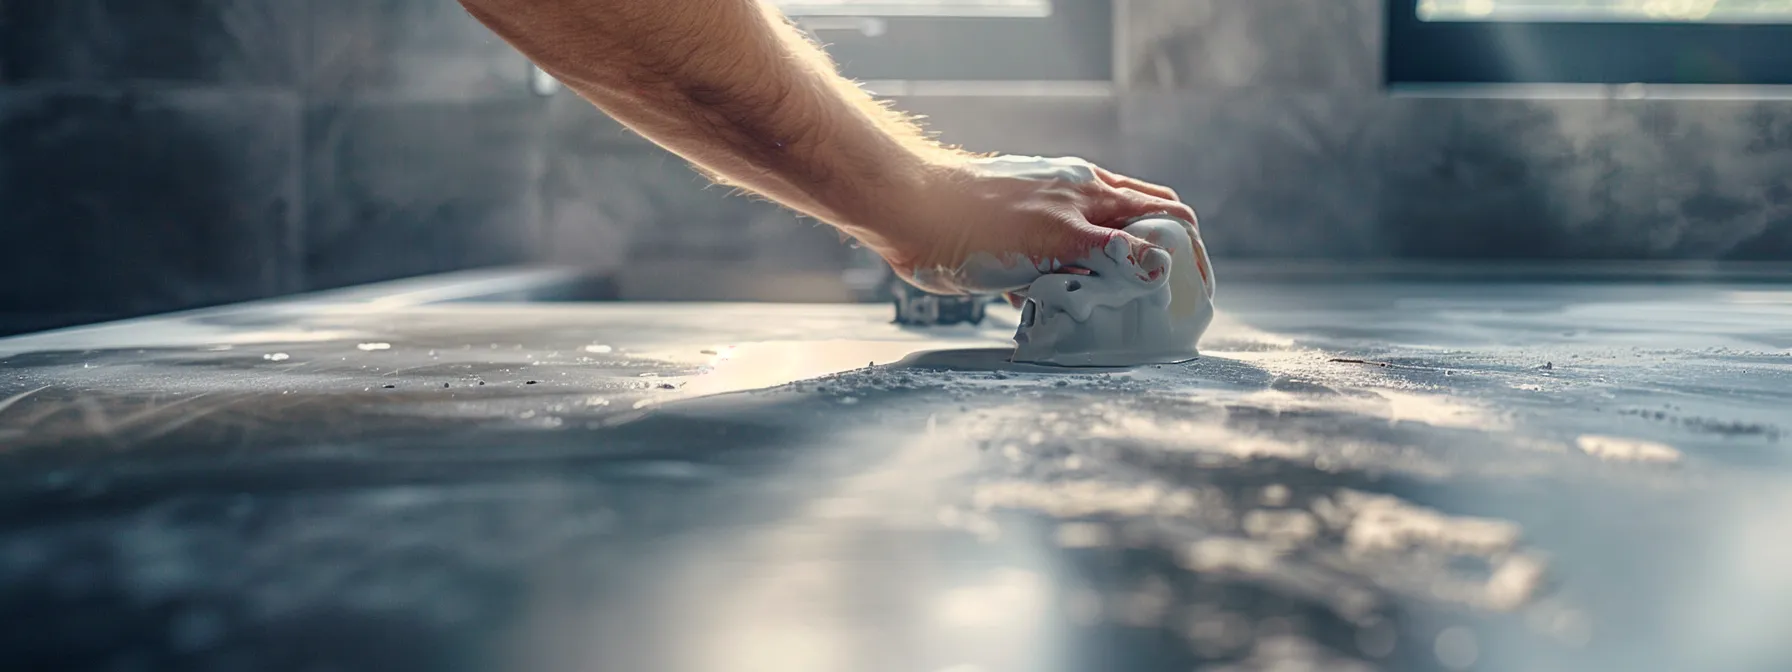
Before you start benchtop resurfacing, it’s vital to repair any cracks and imperfections that could affect the final outcome. Use a plastic filler specifically designed for the material of your benchtop to ensure strong adhesion. Apply the filler carefully, ensuring it occupies the entire crack, and level it off with a putty knife for a smooth finish.
After filling in the cracks, allow the material to cure fully. Once it’s set, use a razor blade to carefully remove any excess filler that may extend beyond the surface of the benchtop. This will create a seamless transition between the filled area and the surrounding material, contributing to a polished look during resurfacing.
Don’t forget to remove any debris from the surface before applying the resurfacing coating. Thoroughly cleaning the area not only enhances adhesion but also ensures that wear and tear do not compromise the new finish. After these preparations, you are well on your way to achieving an impressive kitchen transformation:
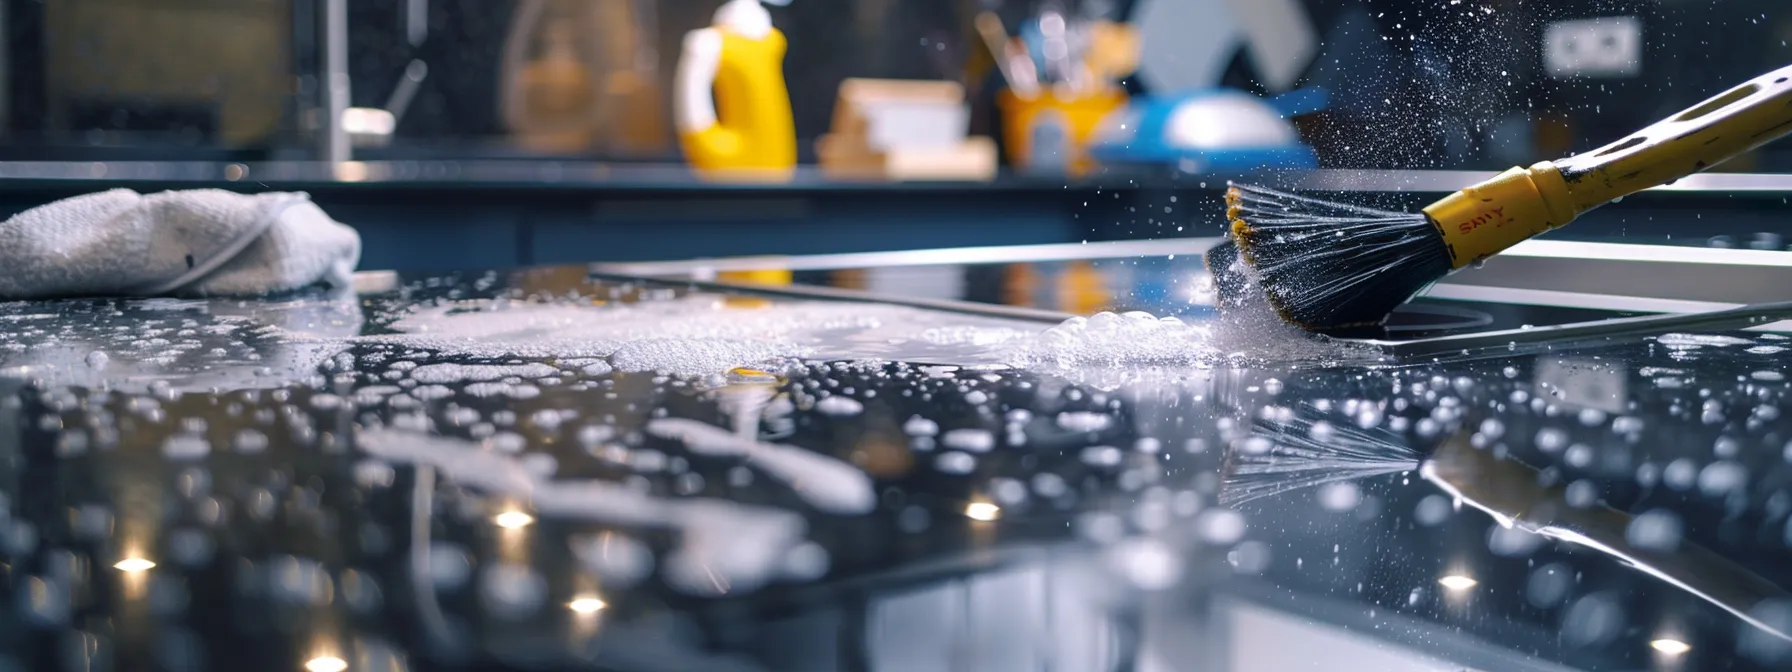
Cleaning the Surface for Optimal Results
Cleaning the surface of your countertop is a critical step in achieving a flawless benchtop resurfacing. Start by removing any dust, dirt, and grease accumulated on the surface; this ensures that the resurfacing products adhere properly. Use a degreaser or a mild soap solution, making sure to scrub thoroughly while paying particular attention to the edges and seams where residue often builds up.
Once you’ve removed dirt and grease, your next step is to prepare the surface for optimum results by sanding it down. Use high-grit sandpaper to gently roughen the surface of the quartz or plywood, promoting better adhesion for the new finish. Sanding ensures that any imperfections, such as scratches or dents, are smoothed out, making your resurfaced countertop look seamless and professional.
After sanding, you must clean the surface once more to eliminate sanding dust. A damp cloth can be effective for this purpose; ensure the countertop is completely dry before applying any resurfacing materials. Proper preparation, including cleaning, sanding, and drying, contributes significantly to the longevity and durability of your benchtop, ensuring that your kitchen transformation is successful:
Tips for Effective Surface Sanding
When preparing for surface sanding during your benchtop resurfacing project, start by selecting the right type of sandpaper, such as high-grit options. If your benchtop has minor imperfections, even small leaks can become larger issues if not properly addressed. By choosing the appropriate grit, you ensure that your surface is roughened adequately, promoting better adhesion for the new resurfacing material.
As you sand, focus on applying consistent pressure but avoid over-sanding one area to prevent uneven surfaces. If your benchtop is made from materials that may chip, like silicon, make sure to be gentle along the edges. This careful approach prevents damage and helps maintain the integrity of your kitchen design, ensuring the final result looks polished and professional.
After completing the sanding process, thoroughly clean the surface to remove any dust or debris before applying the resurfacing product. Failing to do so can lead to an uneven finish and reduce the lifespan of your newly resurfaced area. Effective sanding and meticulous cleaning serve as essential steps, not just for aesthetic purposes but also for the durability of your kitchen transformation in the realm of Bathrooms and Kitchens, reinforcing the importance of quality in your Creative Design Services.
You’ve prepared your kitchen, and now it’s time to get to work. Follow this step-by-step guide, and you’ll see how simple resurfacing can bring new life to your benchtop.
Step by Step Benchtop Resurfacing Guide
This step-by-step guide walks you through the essential processes for successfully resurfacing your kitchen benchtop. You’ll learn how to apply the primer coat, utilize effective techniques for spreading the resurfacing compound, and create a smooth, even surface. Additionally, we’ll cover drying times, what to expect during the curing process, and finishing your project with a durable protective sealant.
Applying the Primer Coat
Applying the primer coat is a crucial step in benchtop resurfacing that helps ensure a strong bond between the existing surface and the resurfacing material. Begin by selecting a high-quality primer compatible with your benchtop material, such as granite or laminate. Use a clean brush or roller to apply the primer evenly, covering all areas of the benchtop to promote consistent adhesion for the resurfacing compound.
While applying the primer, focus on even coverage to avoid any areas where the resurfacing material may not adhere properly. This attention to detail helps prevent peeling or bubbling once the surface is fully finished. Allow the primer to dry according to manufacturer recommendations before proceeding to the next step. Patience during this phase can save you from future headaches caused by improper adhesion.
Once the primer coat is dry, it acts as a protective barrier, ensuring the longevity of your resurfacing job. Take the time to assess the surface before moving on; look for any imperfections that need addressing. This step also reinforces the importance of preparation in your kitchen transformation, setting you up for a successful resurfacing experience that meets both aesthetic and functional needs.
Techniques for Spreading the Resurfacing Compound
When you are ready to spread the resurfacing compound, ensure you have a clean and well-prepared surface. Start by using a quality trowel or spreader to apply the compound evenly across the benchtop. Begin at one end and work your way to the other, taking care to cover all areas thoroughly to achieve a consistent finish.
As you apply the resurfacing compound, maintain a steady hand to avoid creating air pockets or uneven spots. It’s important to use smooth, sweeping strokes, allowing the compound to fill in any cracks or imperfections in the surface. This attention to detail will help ensure that you achieve a professional-looking result that enhances the overall aesthetic of your kitchen.
After applying the compound, check for any areas that may require additional coverage. If you notice any low spots or thin patches, simply add more compound and smooth it out. Taking this additional step will contribute to a durable and aesthetically pleasing surface that complements your kitchen’s design, ensuring that your resurfacing project meets your expectations for both function and style.
Creating a Smooth and Even Surface
Creating a smooth and even surface is essential for achieving a professional result during your benchtop resurfacing project. As you apply the resurfacing compound, focus on using consistent pressure and technique to eliminate any imperfections. This careful attention ensures that the compound fills in all cracks and voids, contributing to a flawless appearance for your kitchen upgrade.
After applying the resurfacing material, take the time to inspect the surface for any low areas or uneven spots. If you notice these imperfections, you can easily add more compound to those sections and smooth it out. This practice is important because it helps to ensure that the final finish not only looks great but also stands up to daily use.
Finally, patience plays a role in this process. Allow the resurfacing compound to cure according to the manufacturer’s instructions before applying any additional layers or finishes. Following these guidelines will result in a durable surface that enhances the overall aesthetics of your kitchen, giving you the refreshed and modern look you desire.
Drying Times and What to Expect
Understanding drying times is vital for your benchtop resurfacing project. After applying the resurfacing compound, it typically requires a curing time of around 24 hours. This allows the material to set properly, ensuring a durable finish that can withstand daily use in your kitchen.
During the drying process, it’s important to maintain proper ventilation in the area. This helps dissipate any fumes and speeds up the curing time. You should also avoid placing any objects on the benchtop until the surface is fully cured to prevent any potential damage or indentations.
After the initial drying period, you can expect that the resurfaced benchtop will feel firm and ready for light use. However, complete curing may take up to a week, depending on the specific product used. Patience is key during this phase to achieve the best results:
Finishing With a Protective Sealant
Finishing your benchtop resurfacing project with a protective sealant is a crucial step that enhances durability and longevity. A high-quality sealant creates a barrier against stains, moisture, and heat, protecting the surface of your newly resurfaced kitchen benchtop. This final touch not only preserves the beauty of your work but also ensures it withstands everyday use, so you can enjoy your transformed kitchen for years to come.
When applying the protective sealant, ensure the resurfaced surface is completely cured and clean. Use a clean brush or roller to apply the sealant evenly across the entire benchtop. Taking your time during this step will lead to a smooth finish that complements all the hard work you have put into resurfacing your kitchen, ensuring it looks polished and professional.
After sealing, allow the surface to dry fully before using the benchtop. Follow the manufacturer’s guidelines for curing time, as this will vary based on the type of sealant used. By taking care to finish the project correctly, you will create a stunning, durable surface that’s not only functional but also elevates your kitchen’s overall aesthetic appeal:
- Apply a high-quality protective sealant
- Ensure the benchtop is clean and completely cured
- Use a brush or roller for even coverage
- Allow the sealant to dry completely before use
You’ve resurfaced your benchtop with care. Now, let’s explore how to add your personal touch to make it truly yours.
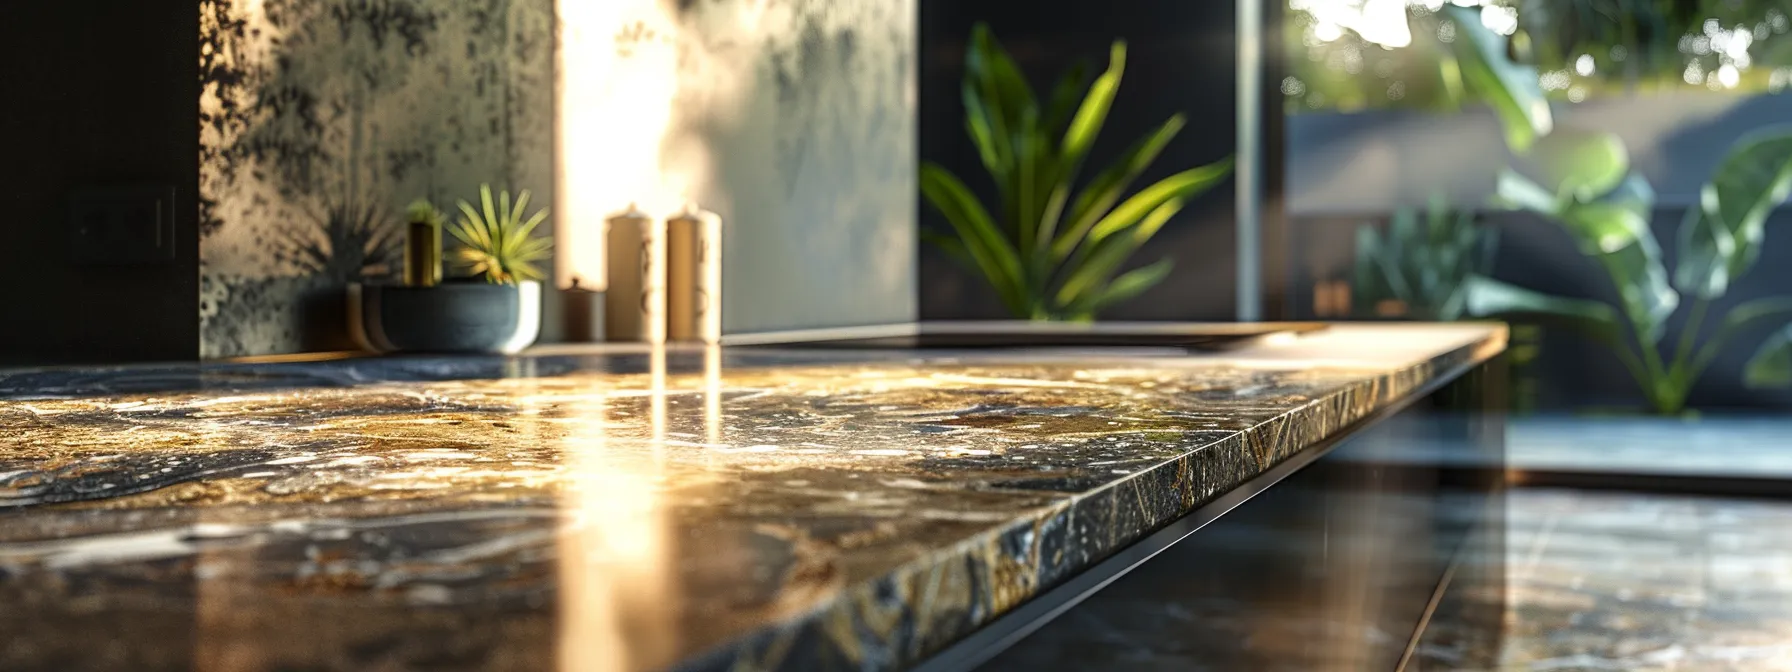
Customizing Your Resurfaced Benchtop

Customizing Your Resurfaced Benchtop
Customizing your resurfaced benchtop allows you to create a space that reflects your personal style. Start by selecting colors and finishes that match your kitchen decor. You can also explore adding decorative elements or textures to enhance its aesthetic appeal. Additionally, consider incorporating functional enhancements to improve usability, making your kitchen both beautiful and efficient.
Selecting Colours and Finishes
When selecting colors and finishes for your resurfaced benchtop, consider how these choices will harmonize with your existing kitchen decor. Think about the overall theme of your kitchen; a sleek, modern space may benefit from a glossy finish in neutral tones, while a rustic kitchen might be enhanced by warmer shades and textured finishes. By contemplating these aspects, you ensure that your new benchtop complements the entire room and adds to its aesthetic appeal.
It’s also important to take into account practical factors such as durability and ease of maintenance. For example, darker colors can help disguise minor stains or scratches, making them a practical choice for busy kitchens. On the other hand, lighter finishes can create an airy feel but may require more upkeep. Balancing aesthetics with functionality will help you choose the best options for your resurfacing project.
Finally, involve your family in the decision-making process if you’re sharing your kitchen with others. Explore various color swatches and finishes together to find a design that everyone loves. This collaboration not only helps create a kitchen that reflects your style but also fosters a sense of ownership among household members, enhancing their connection to the newly transformed space:
Adding Decorative Elements or Textures
When customizing your resurfaced benchtop, adding decorative elements or textures can significantly enhance its visual appeal. Consider incorporating contrasting color accents to create a striking focal point or implement subtle textures that add depth to the design. These enhancements allow you to express your personal style while maintaining a cohesive look with your kitchen decor.
Using decorative elements, such as edge profiles or unique finishes, can elevate the functionality and aesthetics of your benchtop. For instance, selecting a textured finish can help hide fingerprints or minor scratches, making it both practical and beautiful. You can also opt for a glossy or matte finish depending on your kitchen’s overall theme; glossy surfaces may lend a modern touch, while matte finishes can provide a softer, more elegant feel.
Don’t hesitate to experiment with various materials or overlays during the resurfacing process. Adding materials like metal accents or patterned overlays can create an eye-catching, personalized look. These choices not only enhance the kitchen’s design but also reflect your individuality, ensuring your benchtop stands out as a central feature of your kitchen transformation.
Incorporating Functional Enhancements
Incorporating functional enhancements during your benchtop resurfacing can significantly improve the usability of your kitchen. Consider adding built-in cutting boards or integrated drainage racks that cater to your cooking habits. These enhancements not only optimize your workspace but also streamline meal preparation, making your kitchen more efficient and user-friendly.
Another practical option is to create additional storage solutions within your benchtop design. By integrating pull-out drawers or concealed compartments, you can maximize your kitchen’s functionality while keeping it visually appealing. Having easy access to kitchen tools and utensils will help reduce clutter on your counters, enhancing the overall organization.
Finally, consider installing power outlets on your benchtop surface to support small appliances. This practical addition keeps cords organized and accessible, allowing you to use your kitchen gadgets more conveniently. Being strategic about these enhancements will transform your resurfaced benchtop into a highly functional space that meets your everyday needs:
Customizing your resurfaced benchtop brings new life to your kitchen. Now, learn how to keep that freshness alive with proper maintenance.
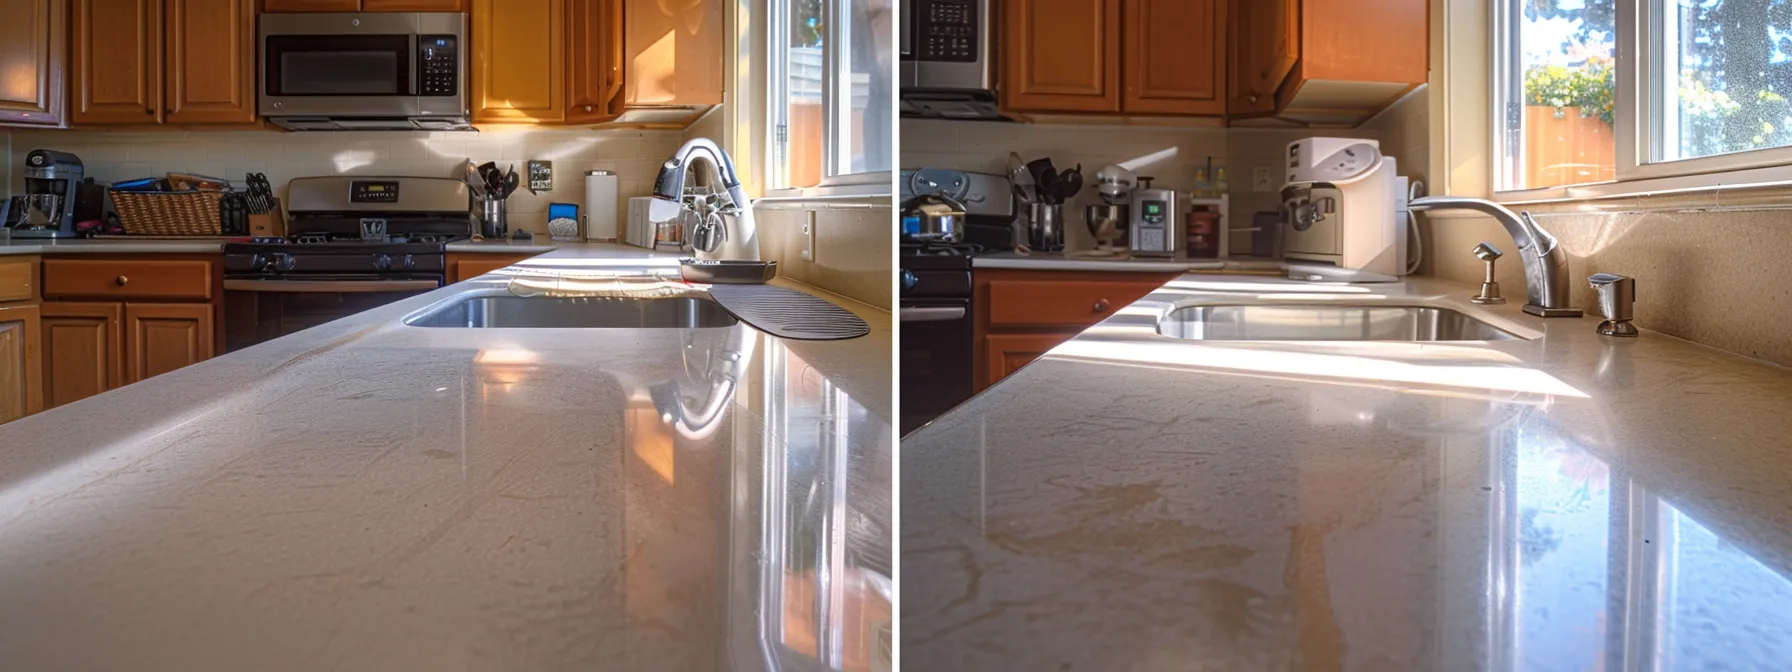
Maintaining Your Newly Resurfaced Benchtop

To keep your newly resurfaced benchtop looking its best, focus on daily care practices that maintain its shine and durability. Learn about the ideal products to use and which to avoid to ensure a long-lasting finish. Additionally, you’ll discover how to handle minor repairs and touch-ups effectively, preserving the beauty and functionality of your kitchen transformation.
Daily Care Practices
To maintain your newly resurfaced benchtop, start with daily cleaning using a mild soap and water solution. This simple practice removes dirt and spills without damaging the surface, ensuring it remains in excellent condition. Avoid harsh chemicals or abrasive sponges that can scratch or weaken the new finish.
It’s also crucial to immediately wipe up any spills, especially liquids that could stain or seep into seams. By taking quick action, you protect the integrity of the resurfaced surface and keep it looking fresh. Regularly inspecting for any minor damages or scratches helps you address issues early on, maintaining the overall appearance of your kitchen benchtop.
Finally, consider applying a specialized polish suitable for resurfaced surfaces periodically. This practice can boost the shine and enhance the protective layer, ensuring longevity for your kitchen upgrade. By incorporating these daily care practices, you’ll keep your benchtop looking vibrant and functional for years to come.
Products to Use and Avoid
To maintain your newly resurfaced benchtop, it’s important to use mild soap and warm water for regular cleaning. These gentle cleaning solutions effectively remove spills and dirt without risking damage to the surface. Avoid using harsh chemicals, as they can weaken the bond of the resurfacing material and reduce its lifespan.
For added shine and protection, consider using a specialized polish designed for resurfaced surfaces. Such products often contain ingredients that restore luster while reinforcing the protective layer. It’s critical to verify the product is appropriate for your specific benchtop material to ensure optimal results and avoid any potential issues.
On the other hand, stay clear of abrasive sponges or scrubbers as they can scratch the finish, leading to irreversible damage. Opt for soft cloths or sponges to preserve the appearance of your benchtop. By selecting the right products, you can safeguard your kitchen investment and enjoy a beautiful, functional space for years to come.
Handling Minor Repairs and Touch-Ups
Handling minor repairs and touch-ups on your resurfaced benchtop is essential for maintaining its appearance and functionality. For small scratches or chips, you can use a repair kit that matches your benchtop material. These kits typically include a filler that closely resembles the original surface, allowing you to restore the area effectively without the need for extensive work.
When addressing any blemishes or stains, you should act promptly to prevent lasting damage. A simple cleaning solution or gentle abrasive can help you minimize the appearance of minor imperfections. Remember to test any product on a small, inconspicuous area first to ensure it won’t interfere with the resurfaced finish.
Regularly performing touch-ups also helps you address wear over time, keeping your kitchen looking fresh. You can enhance the durability of your benchtop by applying a specialized sealant after repairs, which provides an added layer of protection. By staying proactive with minor repairs, you ensure that your resurfaced kitchen benchtop maintains its beauty and longevity, making it a valuable focal point in your home.
Conclusion
Benchtop resurfacing is a practical and budget-friendly way to transform your kitchen without the hassle of a complete remodel. You can enhance your kitchen’s aesthetic while addressing issues like moisture and wear, all while minimizing waste and environmental impact. By following the right steps and utilizing quality materials, you achieve a durable and visually appealing surface that meets your needs. Embrace benchtop resurfacing to rejuvenate your kitchen and enjoy its renewed beauty for years to come.