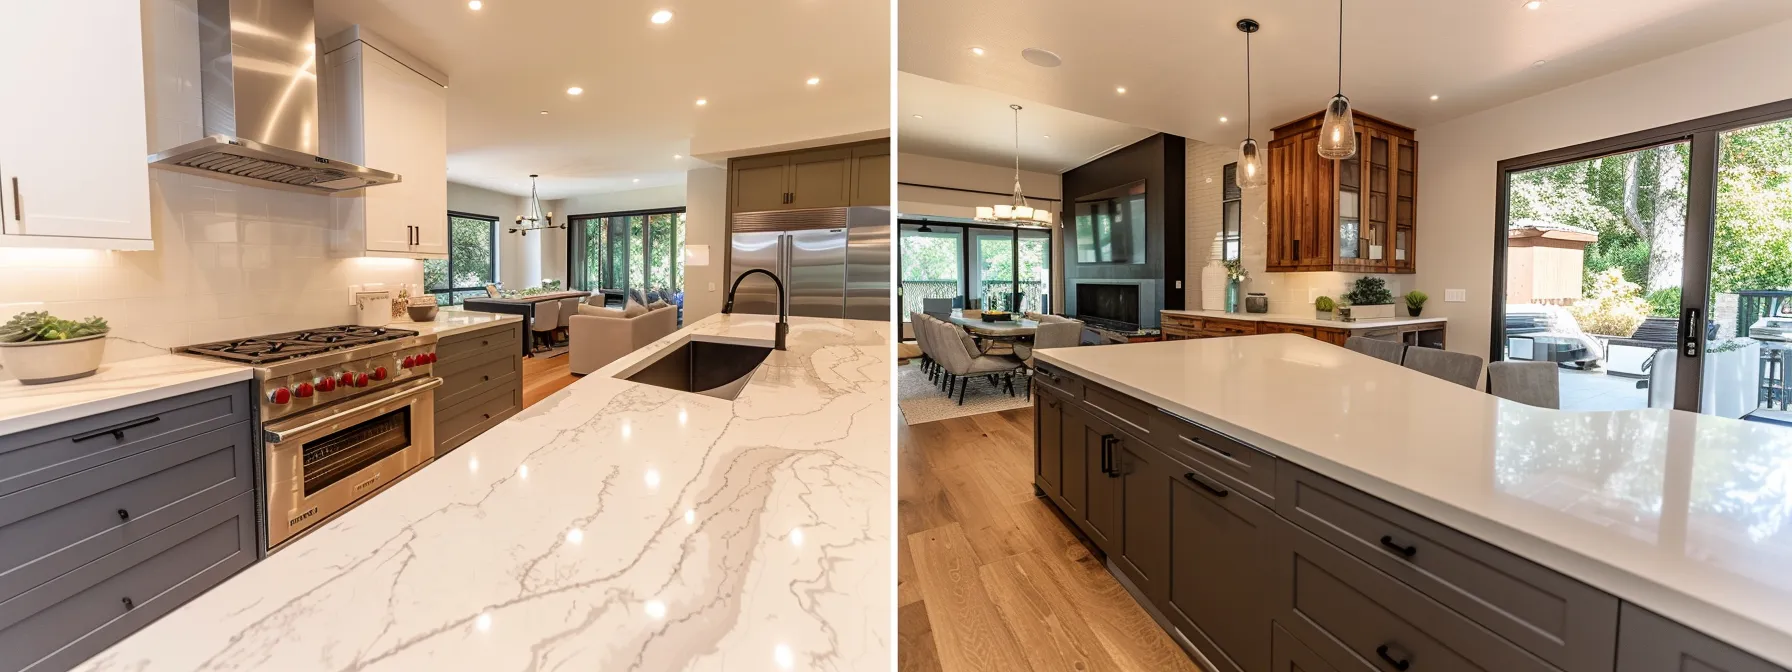
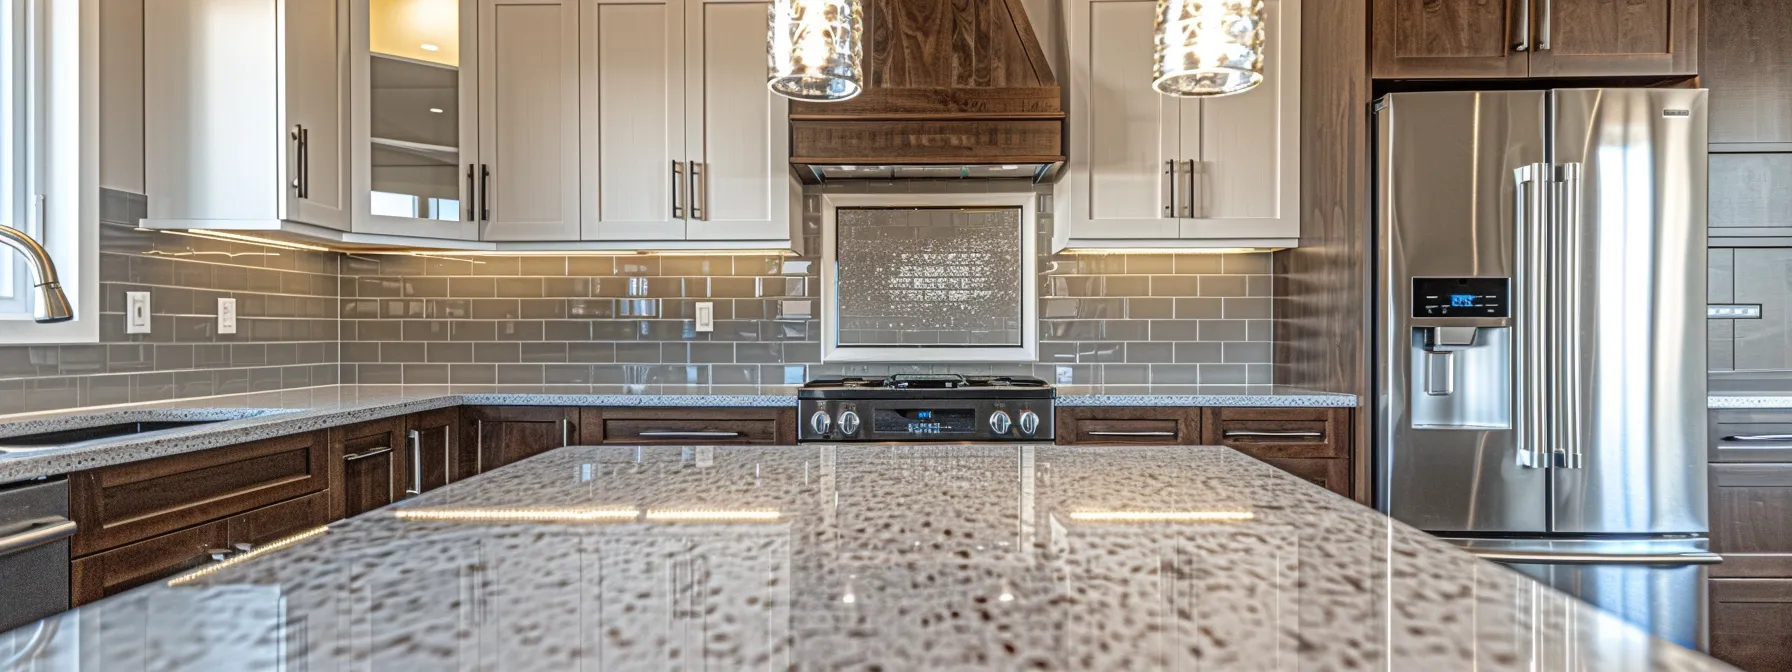
Proven Maintenance Strategies for Your Newly Resurfaced Kitchen
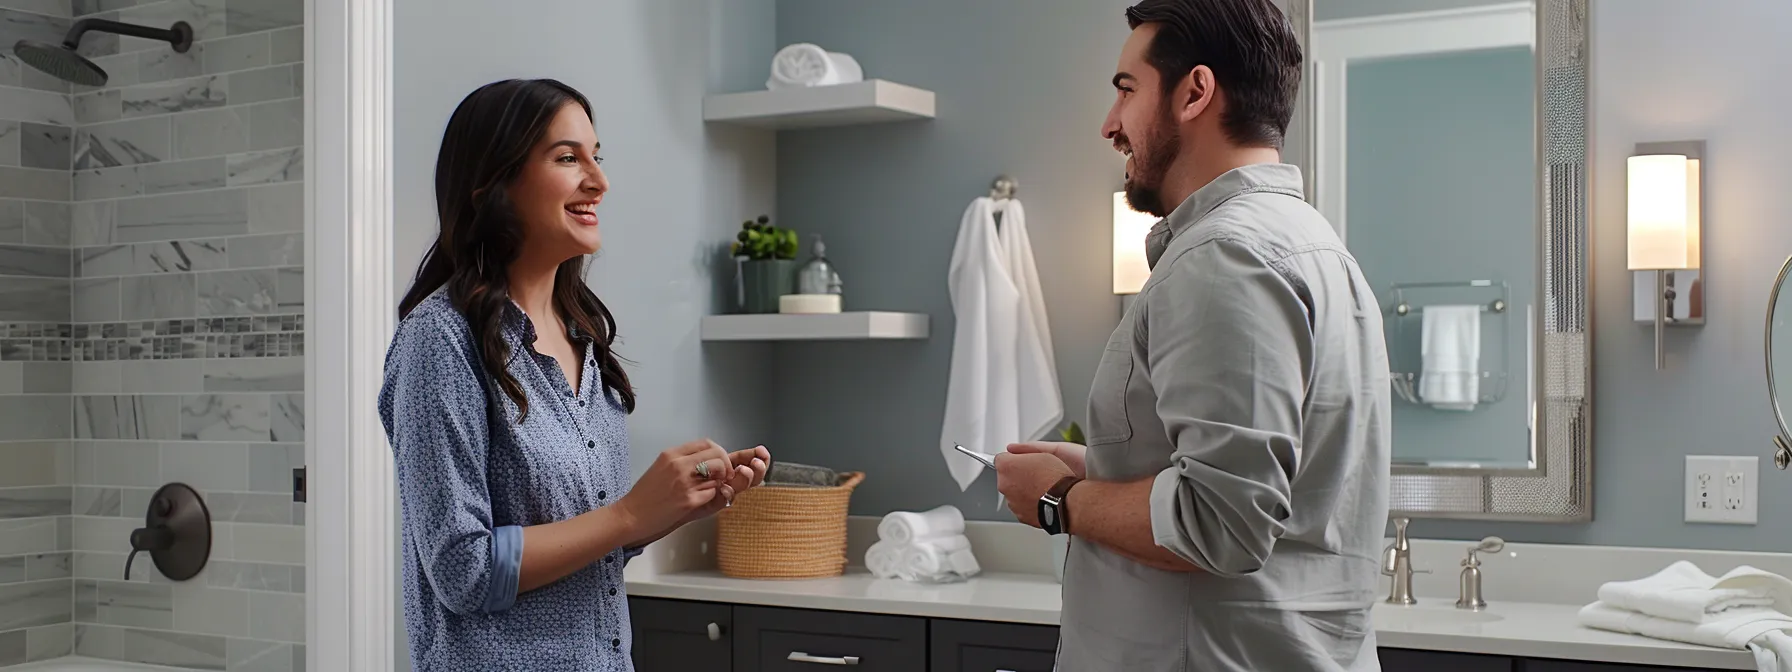
Investing in kitchen renovations is a significant decision, and when you partner with a reliable service like Bathrooms & Kitchens Renovations, your new space will come with a robust warranty, backed by the Master Builders Association of Victoria. As you enjoy your beautifully resurfaced kitchen, it’s essential to implement proven maintenance strategies to keep it looking pristine. Addressing issues like stains promptly and understanding how to care for your surfaces will ensure your investment stands the test of time. Don’t let minor wear and tear diminish the appeal of your kitchen. Keep reading to discover effective maintenance strategies that will safeguard your newly renovated space and enhance its longevity!
The Basics: Don’t Wait Until They Are Showing Wear to Care
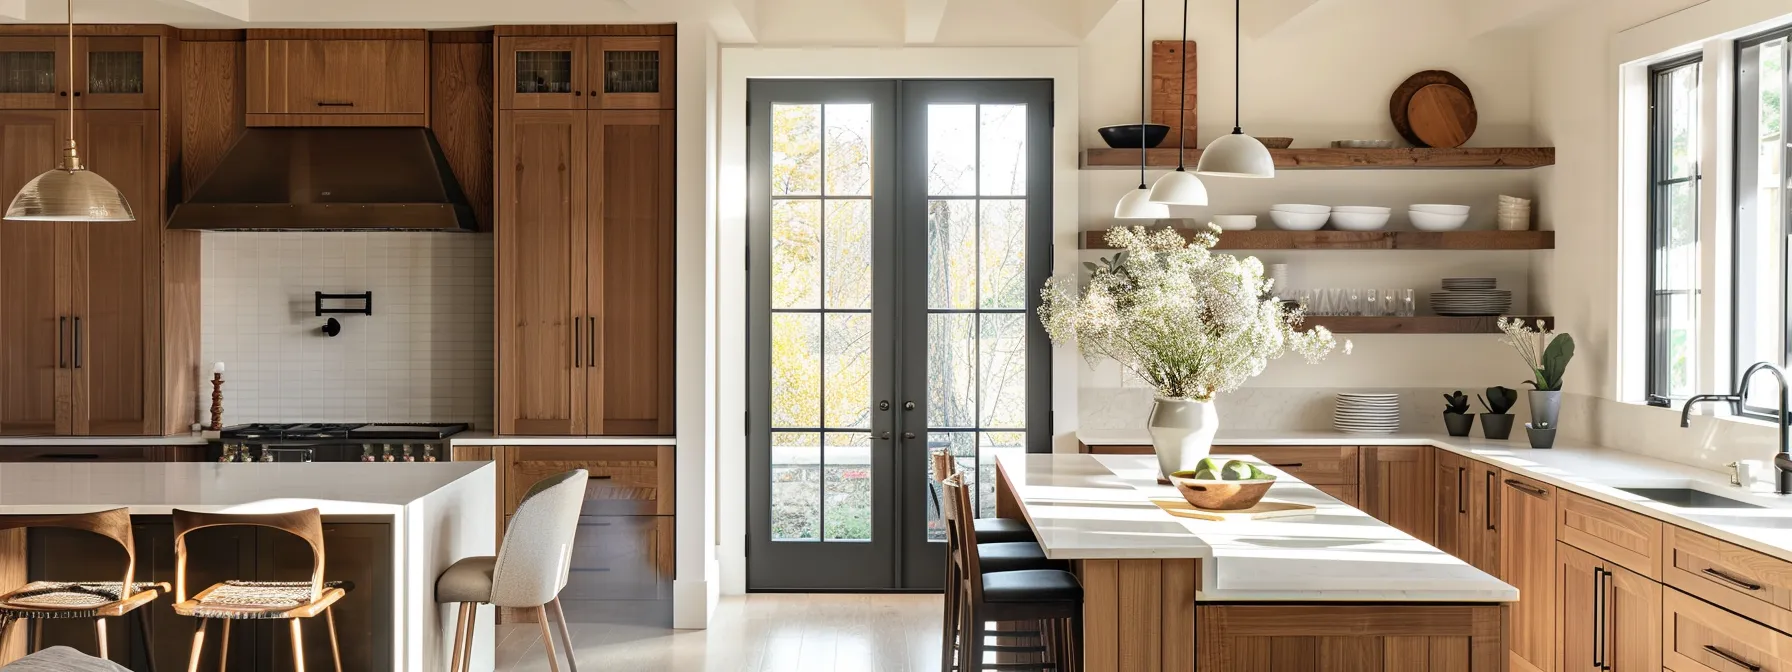
Maintaining your newly resurfaced kitchen is key to ensuring its longevity and beauty. I emphasize the importance of establishing a daily light cleaning routine to keep dust and dirt at bay, which can accumulate if left unattended. Using soft cloths, like wool, and gentle cleansers, such as vinegar, helps prevent scratches and damage to surfaces. I always recommend implementing spot cleaning immediately after spills occur; prompt action can prevent stains and further wear. Moreover, educating all household members on proper care practices ensures that everyone contributes to maintaining the kitchen’s pristine condition. Consistency in these simple strategies can save you from extensive repairs down the line.
Establish a Daily Light Cleaning Routine
To maintain the beauty of your newly resurfaced kitchen renovations, I recommend adopting a daily light cleaning routine that includes the use of a soft cloth and gentle cleansers. Avoid using aggressive tools like a scouring pad, which can damage finishes, especially when using petroleum-based products. Instead, focus on gently wiping surfaces, including drawers and countertops, to keep them looking sharp and prevent the need for more intensive cleaning later on.
Use Soft Cloths and Gentle Cleansers
When it comes to maintaining surfaces in your kitchen renovations, especially around the oven and cooktop, using soft cloths and gentle cleansers is vital. I find that products containing vinegar work exceptionally well without risking damage to wood veneer finishes or other materials. This approach not only keeps your kitchen sparkling clean but also preserves the integrity of the surfaces, ensuring they survive countless baking sessions.
Use soft cloths to avoid scratches.
Choose gentle cleansers that won’t harm finishes.
Focus on high-use areas like the oven and cooktop.
Keep wood veneer surfaces protected from harsh chemicals.
Implement Spot Cleaning Immediately After Spills Occur
When I see a spill in my resurfaced kitchen renovations, I make it a priority to address it instantly. For instance, if a drop of nail polish accidentally lands on the countertop, using a microfiber cloth designed for easy absorption can effectively lift it away before it has a chance to set. Similarly, crumbs from a loaf of bread can quickly be wiped up; I often finish this quick clean with a light layer of wax to help maintain the surface’s shine and protect against future stains Master Builders Association of Victoria.
Educate Household Members on Proper Care Practices
It’s vital that everyone in the household understands how to properly care for a resurfaced kitchen. I make it a point to share specific techniques, such as using gentle mineral-based cleaners instead of harsh chemicals, especially on delicate surfaces like wood stains. Whether it’s wiping down stainless steel appliances after making a batch of french toast or quickly addressing dirt before it sets, these practices keep our kitchen looking its best and prolong its life.
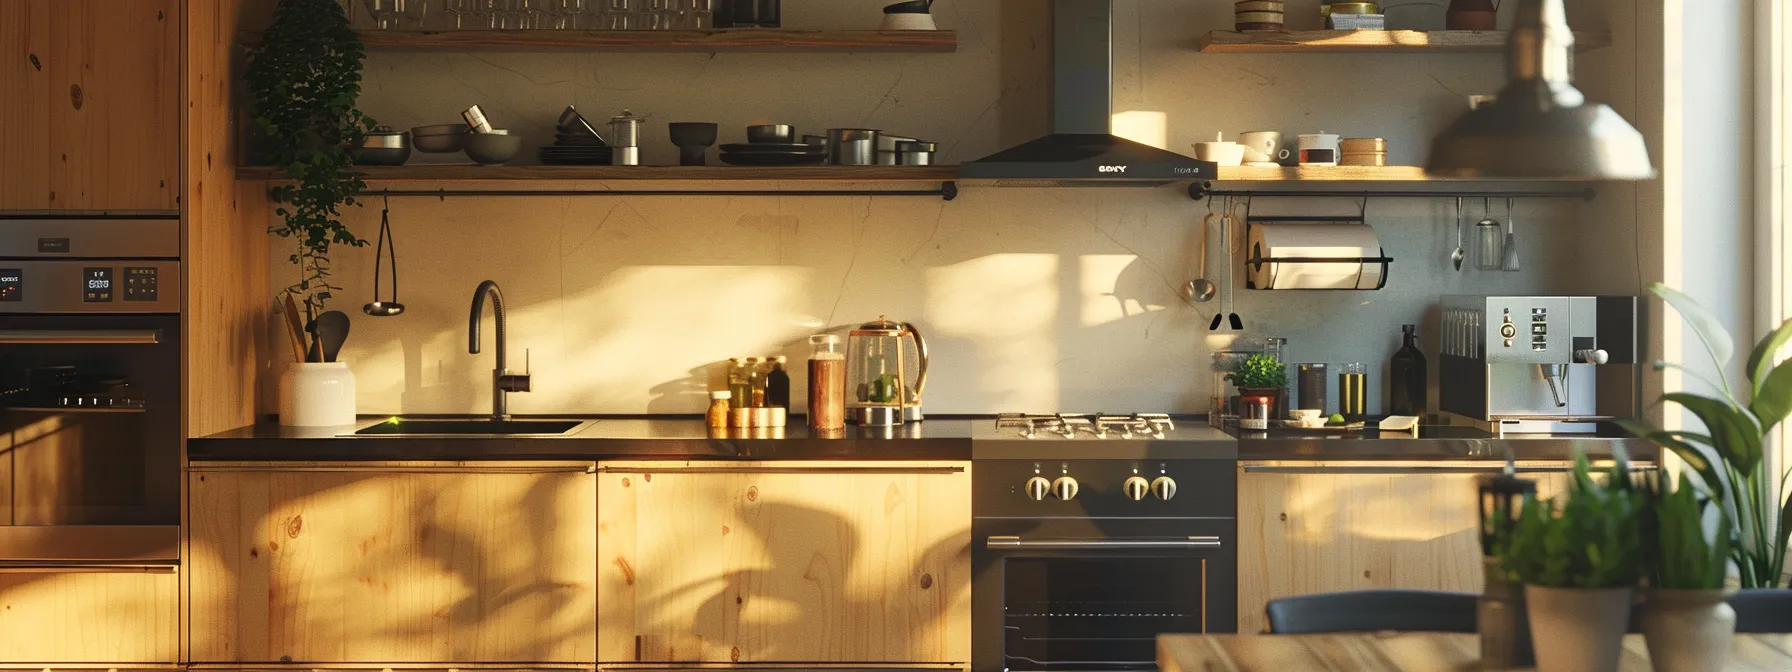
Deep Cleaning: Periodic Interventions
To ensure the lasting beauty and functionality of your resurfaced kitchen, I prioritize scheduling regular in-depth cleaning sessions. This routine allows me to tackle built-up grime and stains that daily maintenance might miss. I carefully choose the right products—avoiding any abrasive cleaners that could risk damage to cabinetry surfaces. Focusing on high-traffic areas, especially around appliances and sinks, is crucial as these spots often accumulate spills and residue. For tough stains that refuse to budge, I don’t hesitate to consider professional cleaning services; their expertise can be invaluable. When tackling these deeper challenges, I make sure to have tools like brushes on hand for effective scrubbing and ensure I communicate with family members by sharing my email address for any questions they may have about our cleaning practices.
Schedule Regular in-Depth Cleaning Sessions
In my experience, scheduling regular in-depth cleaning sessions is essential for maintaining the aesthetic appeal and functionality of a resurfaced kitchen. I find that creating a cleaning mixture of warm water and a gentle cleanser works wonders for removing stubborn stains, such as those that may result from cookingsweet potato dishes. Using a paper towel to wipe surfaces, especially in areas where grain spills can occur, ensures that my kitchen remains not only visually striking in line with my interior design choices but also hygienic for my family.
Choose the Right Products for Deep Cleaning Without Damage
Choosing the right products for deep cleaning is crucial to preserve the beauty of my newly resurfaced kitchen after a renovation. I often opt for a gentle dishwashing liquid mixed with warm water as it effectively tackles grease without damaging surfaces. For cleaning around the sink, I make sure to select a mild detergent that breaks down oil and stains while being safe for the various materials present in my kitchen.
Pay Attention to Areas Around Appliances and Sinks
Areas around appliances and sinks can quickly become collectors of grime if not addressed regularly. I use a soft sponge to carefully clean these high-use spots, ensuring I reach under the stove and behind the cutting board where food particles often hide. For stainless steel surfaces, a gentle polish not only cleans but also maintains the protective polyurethane finish, helping to resist future stains.
Use a soft sponge for cleaning around appliances and sinks.
Focus on high-traffic areas like the stove to prevent grime buildup.
Apply gentle polish to stainless steel to maintain its finish.
Ensure cleanliness around the cutting board to avoid contamination.
Consider Professional Cleaning for Tough Stains
When faced with tough stains that just won’t budge, I see the benefit of seeking professional cleaning assistance. The experts possess the right tools and knowledge to tackle challenging spots without the risk of damaging my newly resurfaced surfaces, such as using steelwool that could scratch my tile or disturb the varnish on cabinetry. By opting for professional services, I ensure that my kitchen maintains its integrity and continues to shine.
Assess tough stains that need special attention.
Consider professional cleaning for effective treatment.
Avoid using harsh tools like steelwool that may damage surfaces.
Preserve the appearance of tiles and varnished surfaces.
Avoid Products That Are Intended for Wood Care
Understanding the limitations of wood-specific products is vital for maintaining the integrity of your resurfaced kitchen. These products often contain acids or abrasive ingredients that can strip protective coats and damage surfaces not designed for wood care. I prioritize identifying safe alternatives that are compatible with the materials in my kitchen. It’s also important to learn how to read labels effectively; I pay close attention to ingredients that may harm my surfaces, avoiding anything that suggests excessive abrasiveness, like sandpaper, or harsh chemicals that could cause irreversible damage. Adopting these practices ensures my kitchen remains a beautiful and functional space for years to come.
Using wood-specific products in my resurfaced kitchen can lead to significant problems. These products often contain harsh acids or abrasives that may strip protective coatings on surfaces not designed for wood care. I find it more effective to utilize dish soap and a soft towel, ensuring that I maintain my kitchen’s beauty without risking damage.
It’s essential to prioritize compatible cleaning solutions; understanding what not to use helps preserve my surfaces over time. I keep an eye out for common materials and frequently refer to a FAQ section when I’m uncertain about a product’s suitability for my kitchen. Avoiding wood care products is a simple yet crucial step in preserving the integrity of my space:
Harsh ingredients can strip protective coatings.
Wood-specific soaps may cause surface damage.
Soft towels and dish soap are safer alternatives.
Consult FAQs for guidance on proper care.
Identify Safe Alternatives for Your Resurfaced Kitchen Surfaces
When selecting cleaning products for my resurfaced kitchen, I always opt for alternatives specifically designed for the materials I have. I find that gentle dish soap mixed with warm water works wonders for cleaning many surfaces without causing harm. Additionally, I look for pH-balanced cleaners that are safe for non-wood surfaces, ensuring my kitchen retains its beauty without any risk of damage.
Learn to Read Labels to Avoid Harmful Ingredients
Reading labels is fundamental for me to ensure that the cleaning products I choose are suitable for my resurfaced kitchen. I pay particular attention to avoid any harmful ingredients, such as acids or abrasives, that could damage my surfaces. By familiarizing myself with common hazardous components, I can confidently select safe alternatives that protect the integrity of my kitchen.
Product Type
Harmful Ingredients to Avoid
Safe Alternatives
Wood Cleaners
Harsh acids, abrasives
Gentle dish soap, pH-balanced cleaners
All-Purpose Cleaners
Bleach, ammonia
Vinegar solution, natural cleaners
Scouring Pads
Steel wool, coarse materials
Soft cloths, microfiber towels
Preventative Measures: Guarding Against Wear and Tear
To further safeguard the longevity of my newly resurfaced kitchen, I implement several preventative measures that significantly reduce wear and tear. I always use protective mats and trivets under hot items to prevent heat damage to surfaces. Additionally, installing cabinet door buffers helps to mitigate impact damage and keep the cabinetry in optimal condition. It’s equally important to keep sharp objects away from resurfaced countertops, as this minimizes the risk of scratches. Lastly, I carefully select cleaning tools that won’t scratch or scuff surfaces, ensuring that my kitchen remains both functional and visually appealing. Each of these strategies plays a crucial role in preserving the beauty and integrity of my kitchen, allowing me to enjoy it for many years to come.
Use Protective Mats and Trivets Under Hot Items
In my resurfaced kitchen, I prioritize using protective mats and trivets for all hot items. This simple practice prevents potential damage, such as warping or discoloration, to the surfaces below. By keeping these protective barriers in place, I not only maintain the aesthetic appeal of my kitchen but also extend the life of my countertops, ensuring they remain beautiful and functional for years to come.
Install Cabinet Door Buffers to Prevent Impact Damage
Installing cabinet door buffers has been a game changer for protecting my cabinetry from impact damage. These simple yet effective buffers absorb the shock when doors close, reducing the likelihood of dents and scratches that can detract from my kitchen’s appearance. By taking this proactive step, I ensure that my investment remains not only functional but also aesthetically pleasing for years to come.
Keep Sharp Objects Away From Resurfaced Countertops
In my experience, it’s vital to keep sharp objects away from resurfaced countertops. I ensure that knives and other cutting tools are used on designated cutting boards, which helps prevent any unintentional scratches or chips on the surface. By being mindful of how I handle these tools, I maintain the integrity and appearance of my countertops for years to come:
Utilize cutting boards for knife work.
Store sharp tools in a dedicated area.
Educate family members on proper usage.
Choose Cleaning Tools That Won’t Scratch or Scuff Surfaces
When selecting cleaning tools for my resurfaced kitchen, I focus on options that protect surfaces from scratches and scuffs. I prefer microfiber cloths and gentle sponges, which effectively lift dirt without leaving marks. By consciously choosing the right tools, I ensure my kitchen remains not only clean but also visually appealing over time.
Inspect Cabinets Regularly to Stay Ahead of Potential Damage
Regularly inspecting cabinets is an essential practice for maintaining the overall health and appearance of my resurfaced kitchen. I find that creating a checklist for key inspection points helps ensure I don’t overlook anything important. By addressing minor damage promptly, I can prevent issues from escalating and needing extensive repairs later. It’s also wise to know when to call in professionals for repairs; their expertise can save me time and effort. Tracking changes over time allows me to anticipate future maintenance needs, ensuring my kitchen continues to look pristine and functions efficiently.
Create a Checklist for Regular Inspection Points
To ensure my resurfaced kitchen remains in pristine condition, I create a detailed checklist that highlights the key inspection points throughout the cabinets. This checklist includes looking for any signs of warping, checking hinges for proper alignment, and assessing the integrity of the finishing touches. By systematically reviewing these elements, I can quickly address any issues before they escalate and affect the overall functionality and aesthetics of my kitchen.
Address Minor Damage Before It Becomes Extensive
Being proactive about minor damage in my resurfaced kitchen has proven invaluable. I make it a habit to regularly examine areas, like door edges and drawer fronts, for any signs of wear or defects. Addressing these small issues promptly prevents them from escalating into major repairs that could disrupt my kitchen’s functionality and aesthetics.
I focus on specific inspection points, including:
Checking for warping or misalignment in cabinet doors.
Inspecting hinges for signs of wear and tear.
Assessing the finish on surfaces for chipping or peeling.
Know When to Call in Professionals for Repairs
Recognizing when to call in professionals has been crucial for me in maintaining my resurfaced kitchen. I pay attention to signs of damage, like unusual creaks or persistent misalignment in cabinet doors, which indicate that a professional’s expertise is needed. Their knowledge and skills not only save me from potential headaches but also ensure that repairs are done correctly, preserving the beauty and functionality of my kitchen.
Track Changes Over Time to Predict Future Maintenance Needs
As I monitor changes in my kitchen cabinets over time, I can better anticipate future maintenance needs. By documenting observations, I engage in proactive upkeep that helps preserve my kitchen’s appearance and functionality. This practice not only minimizes unexpected repairs but also enhances my understanding of when certain materials may require special attention:
Regularly note any signs of wear and tear.
Keep track of seasonal changes that may affect materials.
Assess which areas of my kitchen require more frequent attention.
Conclusion
Implementing proven maintenance strategies for your newly resurfaced kitchen ensures it remains beautiful and functional for years to come. A consistent light cleaning routine, immediate spot cleaning, and using the right products prevent damage and preserve the integrity of surfaces. Regular inspections help identify and address minor issues before they escalate, while preventative measures protect against wear and tear. These practices not only enhance the kitchen’s appearance but also contribute to a safer and more enjoyable cooking environment.
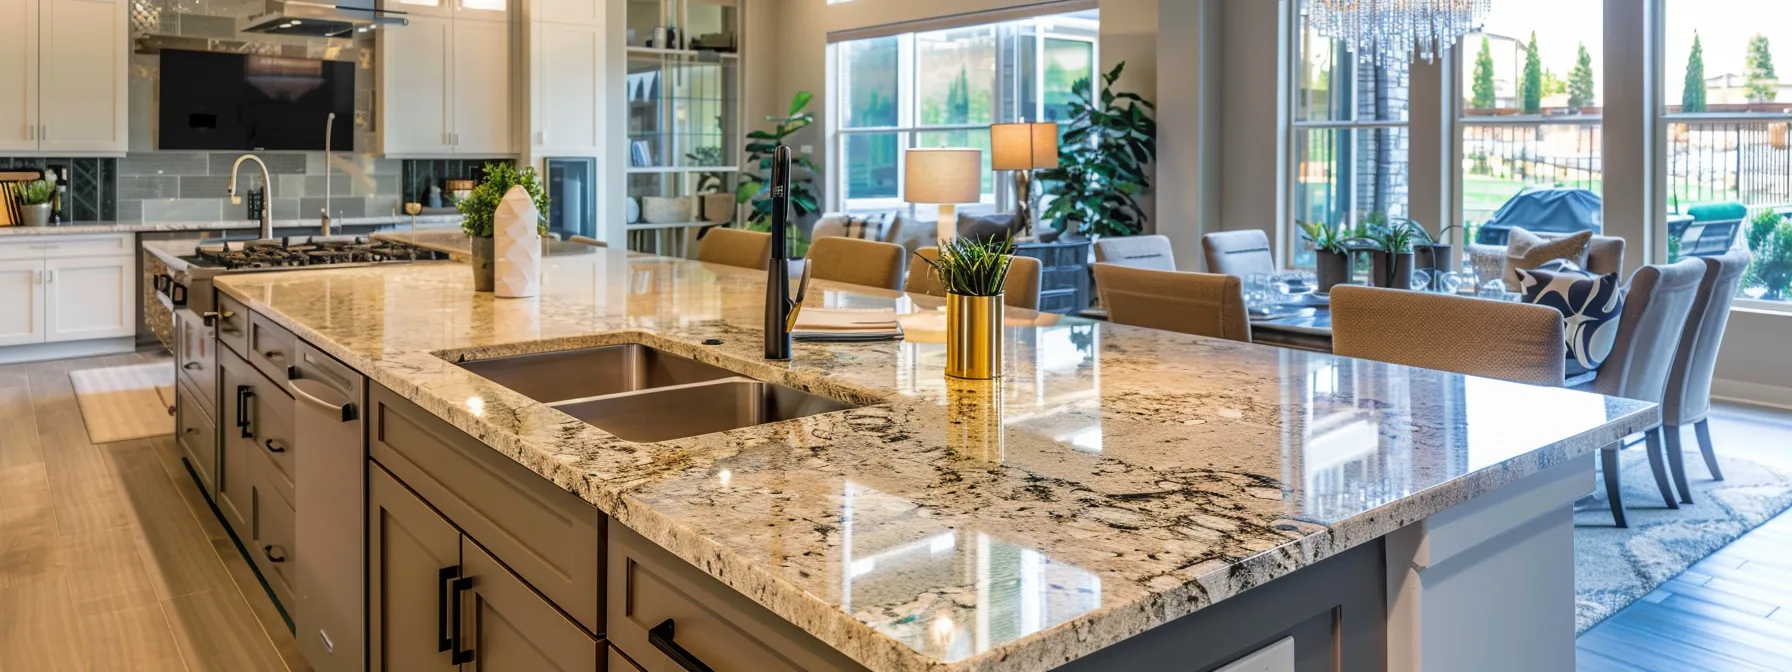
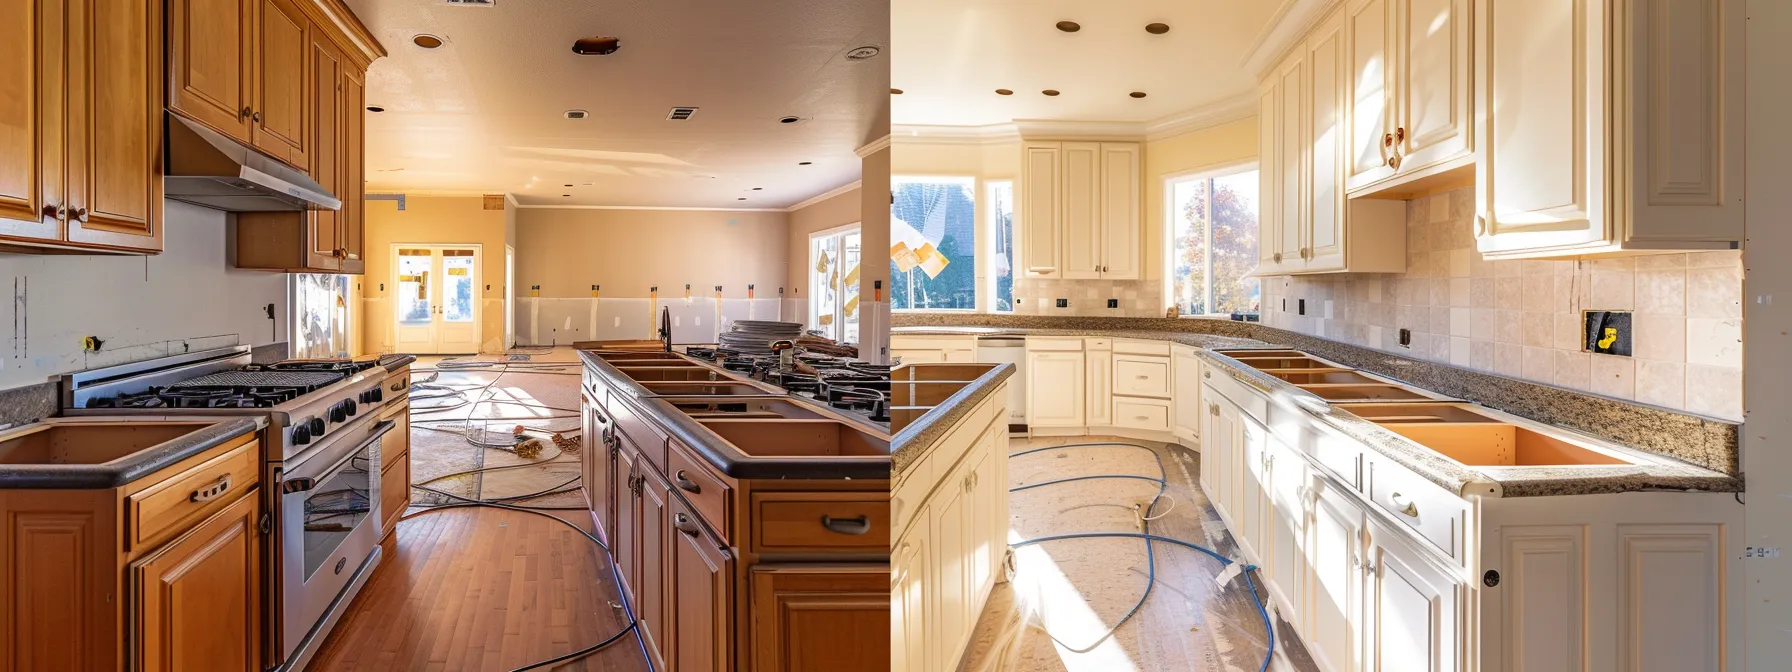
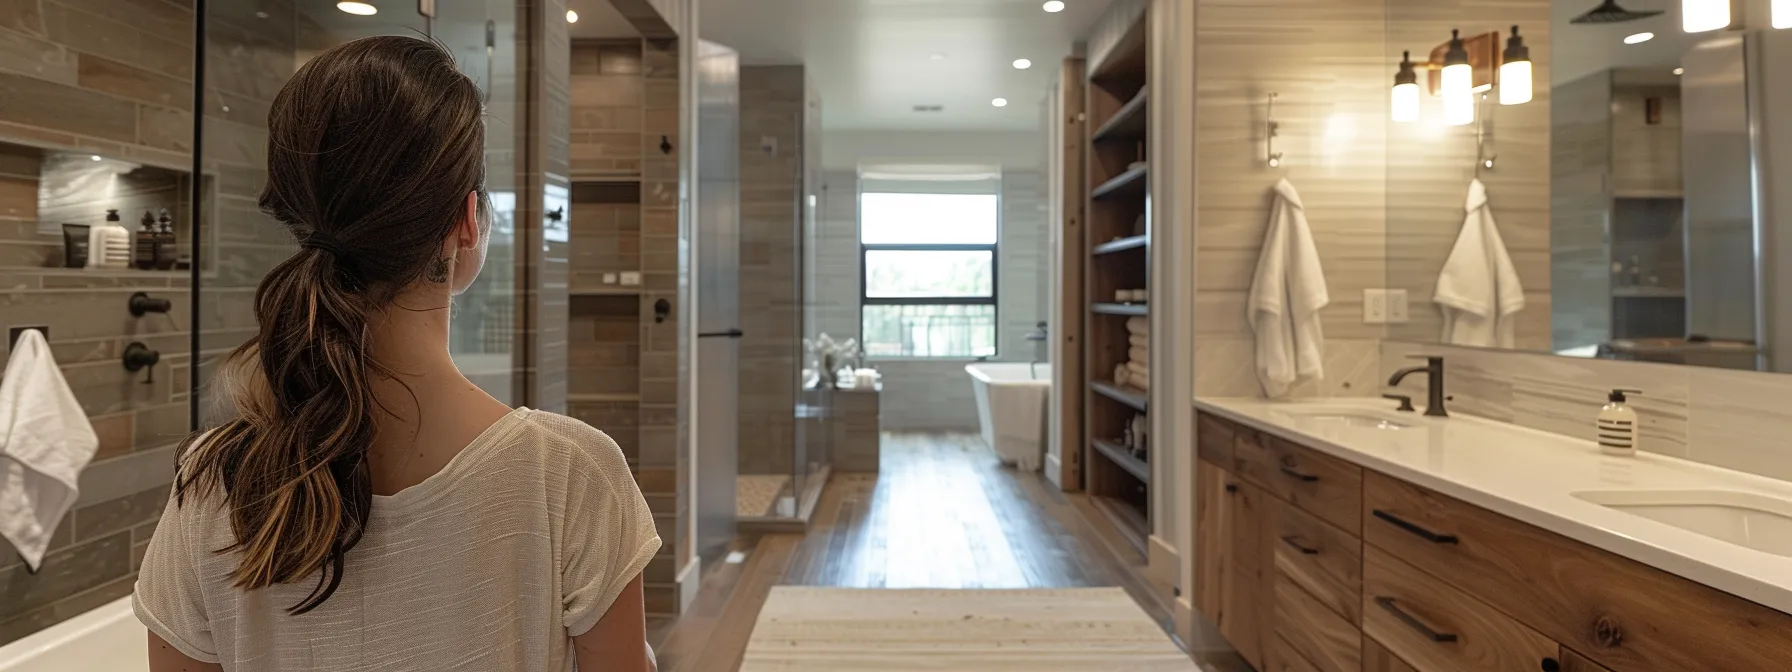
Elevate Your Property‘s Worth Through Strategic Kitchen Resurfacing
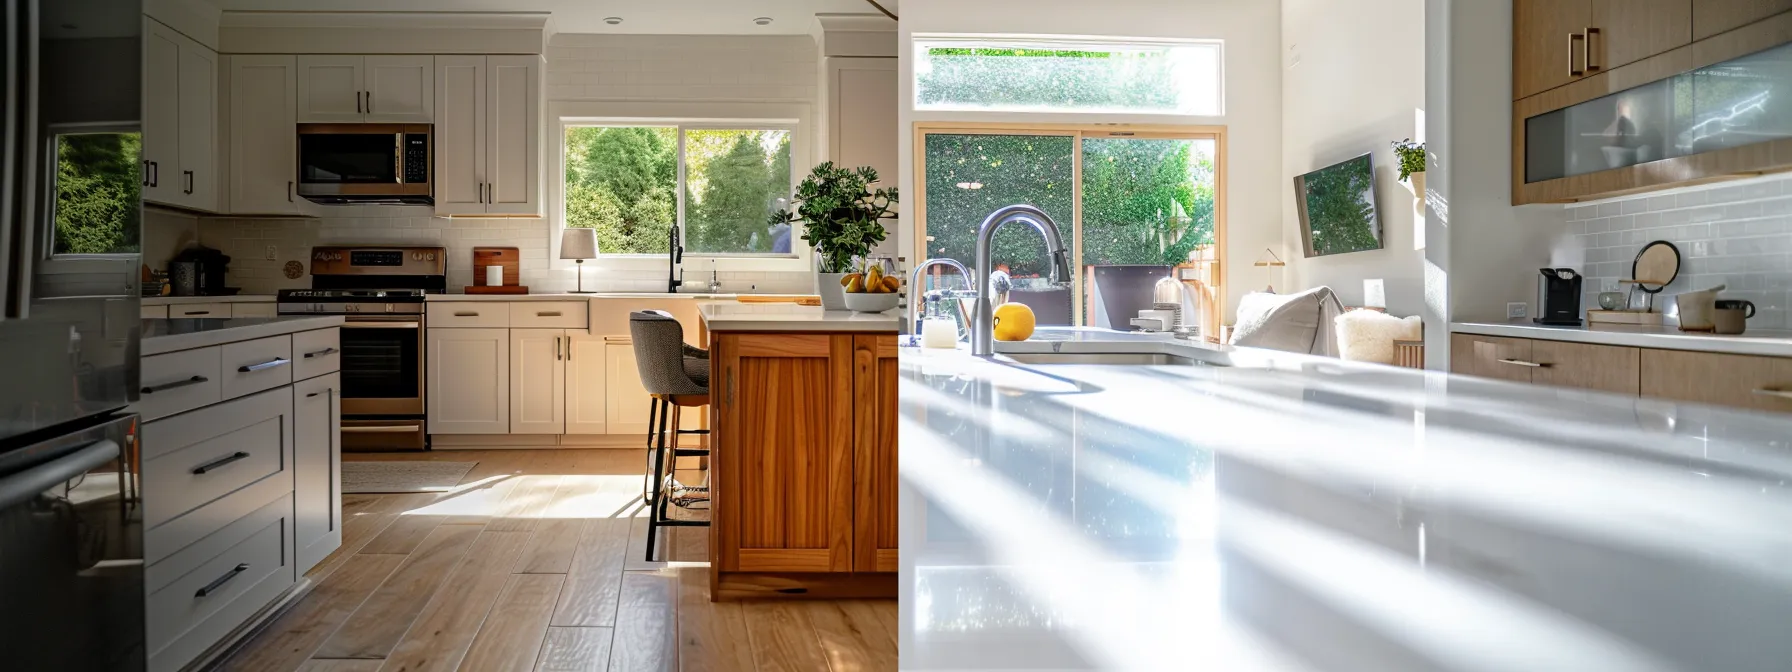
Investing in kitchen renovations can significantly elevate your property‘s market value, making your home more attractive to potential buyers. Granite countertops, modern cabinetry, and sleek finishes are not just trends; they are vital elements that can transform your space during kitchen remodeling. Partnering with seasoned professionals like MBA Victoria ensures you get the most robust advice and execution for your project. Imagine stepping into a kitchen that not only looks stunning but also enhances your home’s overall appeal. Keep reading to discover how strategic kitchen resurfacing can maximize your return on investment and elevate your property‘s worth.
Unveiling the Value: Kitchen Resurfacing’s Impact on Home Price
kitchen renovations and resurfacing presents a remarkable opportunity to enhance your home’s value without the daunting expense of a complete remodel. By updating your cabinetry and finishes, you can create a fresher, more appealing space that resonates with potential buyers. In my experience, I have seen many clients transform their kitchens through strategic resurfacing, leading to impressive returns when appraisers assess property value. I recall one particular project featured on Houzz, where carefully chosen materials and clever designs turned a dated kitchen into a stunning centerpiece of the home. This case serves as a formula for success, illustrating how thoughtful improvements can significantly affect your overall investment.
Overview of Kitchen Resurfacing Benefits for Home Value
When I consider the benefits of kitchen renovations, one standout advantage is its ability to attract interest from potential buyers. A refreshed kitchen not only enhances visual appeal but also aligns with modern energy-efficient trends, which are increasingly sought after in the real estate market. For instance, homes featuring upgraded finishes often prompt a positive response from real estate agents, as they recognize that even small improvements can yield significant returns, much like adding a new garage door or investing in quality steel fixtures.
Real-Life Success Stories of Kitchen Resurfacing Enhancements
One project that stands out to me involved a homeowner who was facing the possibility of foreclosure. They decided to invest in kitchen resurfacing rather than a full kitchen remodel, focusing on cost-effective kitchen renovations updates that made a significant difference. According to the National Association of Realtors, even minor renovations can increase property value and attract buyers, allowing this owner to turn a potential loss into a profitable sale, ultimately enhancing their financial situation and mortgage prospects.
In another instance, a couple wanted to boost their home’s appeal before listing it. They targeted their kitchen renovations for resurfacing, opting to upgrade finishes and cabinetry without exceeding their budget. This strategic enhancement not only raised the property‘s worth but also provided an impressive return on investment that surpassed their income expectations, demonstrating how impactful even modest changes can be in the competitive market.
A Guide to Budget-Friendly Kitchen Surface Materials
As I guide clients in their kitchen renovations resurfacing journeys, I emphasize the importance of selecting the right materials to achieve both aesthetic appeal and value without straining their budgets. Balancing style with functionality is key, especially in spaces where cooking takes center stage. I often help homeowners compare costs of various resurfacing options, focusing on budget-friendly choices that align with current trends in sustainability. For instance, using durable laminate or chic tiles can provide a fresh look while being easy on the wallet. Understanding the construction and application of these materials allows homeowners to make informed decisions that will impress potential buyers and resourceful estate agents alike.
Choosing the Right Materials for Cost-Effective Resurfacing
In my experience, choosing the right materials for cost-effective kitchen renovations and MBA Victoria is essential for maximizing property value while keeping debt under control. For instance, opting for stone veneer can provide a high-end look without the associated credit strain of traditional stone finishes. This material not only meets the current demand for stylish renovations but also contributes significantly to an appealing and functional kitchen space.
Comparing Costs: Resurfacing Materials That Won’t Break the Bank
When considering kitchen resurfacing options, it’s vital to balance quality with affordability. As an expert in home renovations, I often advise clients to explore materials that not only enhance the beauty of their kitchens but also keep expenses in check. For instance, choosing durable laminate or budget-friendly tiles can significantly reduce costs while delivering stunning results, preventing the need for a second mortgage or unexpected tax burdens.
Evaluate budget-friendly resurfacing materials.
Prioritize durability and aesthetics.
Avoid unnecessary debt from costly renovations.
Transform your kitchen to enhance property value.
Ultimately, the right resurfacing decisions can elevate your property‘s worth and seamlessly integrate with your overall financial strategy, offering a stunning kitchen without stretching your budget thin.
Transform Your Kitchen’s Look With Strategic Resurfacing
As I dive into the process of kitchen resurfacing, I find that planning is essential for achieving a stunning transformation that aligns with your goals, especially if you’re considering a home equity loan to finance your renovations. My approach starts with careful consideration of the most impactful areas to focus on, as these can greatly influence the overall price and return on investment. An economist might suggest that targeted renovations can yield a remarkable percentage increase in home value, and I wholeheartedly agree. Armed with the right knowledge, I guide clients through each step, ensuring that their vision comes to life while maximizing their property’s appeal and marketability.
Planning Your Kitchen’s New Look: A Step-by-Step Approach
When I assist clients in planning their kitchen’s new look, I emphasize the importance of a strategic approach to design elements like lighting and layout. Focusing on the function of the room and how it interacts with the rest of the home can greatly enhance the overall quality of life for its occupants. By ensuring that each update serves a purpose, homeowners can achieve a higher return on investment while creating a welcoming atmosphere that resonates with potential buyers.
Step
Action
Considerations
1
Assess Current Layout
Identify areas for improvement that affect quality of life.
2
Determine Style and Budget
Align choices with personal taste and financial goals.
3
Select Materials
Choose durable finishes that offer longevity and appeal.
4
Plan for Lighting
Incorporate natural and artificial light to enhance ambiance.
5
Final Review
Ensure all elements harmoniously elevate the space.
The Most Impactful Areas to Resurface in Your Kitchen
When I assess a kitchen for resurfacing, I prioritize areas that can yield the highest return on investment. For instance, updating countertops and cabinetry can immediately enhance the aesthetic appeal. Statistics show that kitchens with modern wood flooring not only look inviting but also attract serious buyers, allowing homeowners to leverage their improvements against home equity, ensuring every choice elevates the overall value of the property.
Focus on countertops for immediate visual impact.
Refresh cabinetry to modernize the entire space.
Consider upgrading to attractive wood flooring to enhance appeal.
Target key areas that directly influence buyers’ perceptions.
Maximize ROI With Smart Kitchen Resurfacing Choices
To truly elevate your property‘s worth, it’s vital to pinpoint high-ROI resurfacing options that appeal to prospective buyers. I often encourage homeowners to consider elements that leave a lasting impression, such as updating hardwood floors or incorporating a stylish shower feature. However, while strategizing your renovation, it’s equally crucial to avoid common mistakes that can diminish your home’s value; a poorly executed resurfacing project can lead to loss rather than gain. With such factors in mind and considering current trends like energy-efficient heat pumps, I guide clients in making informed decisions that not only enhance their kitchens but also elevate the overall value of their bathrooms and living spaces.
Identifying High-Roi Resurfacing Options
Identifying high-ROI resurfacing options involves thorough research into current market trends and buyer preferences. For instance, upgrading to energy-efficient appliances and installing stylish finishes can significantly enhance your kitchen’s appeal, helping to increase your home equity. Focusing on renovations that not only elevate visual aesthetics but also add functionality is a smart strategy in maximizing your property‘s worth.
Here are key considerations for smart kitchen resurfacing decisions:
Evaluate energy-efficient options, such as heat pumps.
Researchtrends to identify desirable finishes and materials.
Consider upgrades that enhance both style and functionality.
Focus on renovations with the potential for significant equity increases.
Avoiding Resurfacing Mistakes That Lower Home Value
Avoiding resurfacing mistakes is critical for maintaining and enhancing your property‘s worth. When planning a kitchen update, it’s essential to remain aware of integrating materials that not only meet aesthetic goals but also align with durability requirements. For instance, using fiberglass or fiber cement siding may elevate the visual appeal without compromising longevity, ensuring you don’t void any warranty that would otherwise protect your investment in home improvement.
Choose materials that promise durability while enhancing visual appeal.
Avoid decisions that could lead to voided warranties on products.
Opt for updates that align with Fannie Mae guidelines to ensure financing options remain open.
Expert Tricks for a Seamless Kitchen Resurfacing Project
Preparing your kitchen for a resurfacing project can make a world of difference in the overall success of the transformation. I always emphasize the importance of taking the time to evaluate your current space and understanding whether quick fixes or a complete overhaul suits your needs and budget best. For instance, addressing minor issues like outdated countertops, or even enhancing your kitchen’s utility with thoughtful layouts, can be considered quick fixes that might not require full renovation. Alternatively, if the existing space has extensive damage or simply lacks style, a more comprehensive update, including elements like vinyl siding or an attractive basement design, may be necessary. Each choice can also open the door to potential tax deductions associated with home improvement, enhancing the value of your investment for the future.
How to Prepare Your Kitchen for a Smooth Resurfacing Process
Preparing your kitchen for resurfacing involves a systematic evaluation of both utility and aesthetics, which I find crucial for ensuring project success. Start by assessing your sink‘s condition, as this is often a focal point; a well-chosen brand can enhance both functionality and desirability. Additionally, coordinating with a general contractor can help outline your goals and establish a realistic budget, especially if you’re considering utilizing a home equity line to fund the project, allowing for upgraded usability across your kitchen space.
Quick Fixes vs. Complete Overhauls: What’s Best for Your Home?
Deciding between quick fixes and a complete overhaul for your kitchen is a critical choice that can influence both your enjoyment and the property‘s value. In my experience, if you plan to tap into a home equityline of credit, starting with quick updates like replacing kitchen cabinet fronts may suffice, especially if the overall structure is sound. However, if your property might need a rigorous home inspection soon, investing in a full renovation can resolve underlying issues and offer a compelling appeal that justifies your line of credit while potentially offsetting higher interest rates down the road.
Linking Kitchen Resurfacing to Increased Property Value
As I reflect on the integral role kitchen aesthetics play in shaping homebuyer perceptions, I realize how crucial it is to create a space that resonates with potential buyers. A modernized kitchen not only enhances visual appeal but also contributes to the overall value added to a property. When buyers step into a well-designed kitchen, they often envision their lives unfolding within that space, which has a profound psychological impact on their decision-making process. According to industry insights, a refreshed kitchen can lead to an increase in value that significantly exceeds the averagerenovation cost, making it a smart investment for homeowners looking to maximize their property‘s worth.
How Kitchen Aesthetics Influence Homebuyer Perceptions
When potential buyers enter a property, the kitchen often serves as the heart of the home. I have observed that a well-designed, aesthetically pleasing kitchen can create an emotional connection, enhancing the likelihood of a positive purchase decision. The right combination of colors, materials, and finishes not only showcases craftsmanship but also invites buyers to envision their future within the space, significantly impacting their perception of overall value.
The emotional response elicited by an appealing kitchen is not something to take lightly; it can be the difference between a property that sells and one that lingers on the market. This influence is reinforced by the satisfaction buyers feel when they see modern updates and thoughtful designs that cater to their lifestyle needs. Buyers often appreciate a kitchen that not only looks good but also aligns with their culinary and social aspirations.
Aspect
Influence on Homebuyer
Visual Appeal
Engages emotional connection and fosters desire to own the property.
Modern Finishes
Signals quality and reduces perceived renovation costs for buyers.
Functional Design
Shows attention to lifestyle needs, enhancing overall property value.
The Psychological Impact of a Modernized Kitchen on Buyers
The kitchen serves as more than just a cooking space; it embodies the heart of the home for many buyers. I have witnessed how a well-executed modernized kitchen can trigger an emotional response, enticing potential buyers to envision their life unfolding within that space. This emotional connection can often translate into a willingness to pay a higher price, as buyers see a modern kitchen not just as an upgrade but as an integral part of their future lifestyle.
As I reflect on various property viewings, the impact of contemporary design and thoughtful layouts becomes clear. When buyers encounter a kitchen that meshes functionality with aesthetic appeal, it not only elevates their interest but also enhances their perception of the overall property value. The right kitchen can create a lasting impression, leading to quicker sales and potentially higher offers.
Aspect
Influence on Buyers
Emotional Appeal
Encourages buyers to envision living in the space, fostering a personal connection.
Functional Design
Shows how the kitchen can enhance day-to-day living, increasing perceived value.
Contemporary Aesthetics
Signals quality and modernity, making buyers more willing to invest.
Conclusion
Strategic kitchen resurfacing plays a vital role in enhancing your property‘s value. By focusing on key areas such as cabinetry, countertops, and energy-efficient appliances, homeowners can create a space that resonates with potential buyers. Well-executed renovations not only improve aesthetic appeal but also foster an emotional connection that drives higher offers. Ultimately, investing in thoughtful upgrades ensures a significant return on investment and elevates overall property worth.
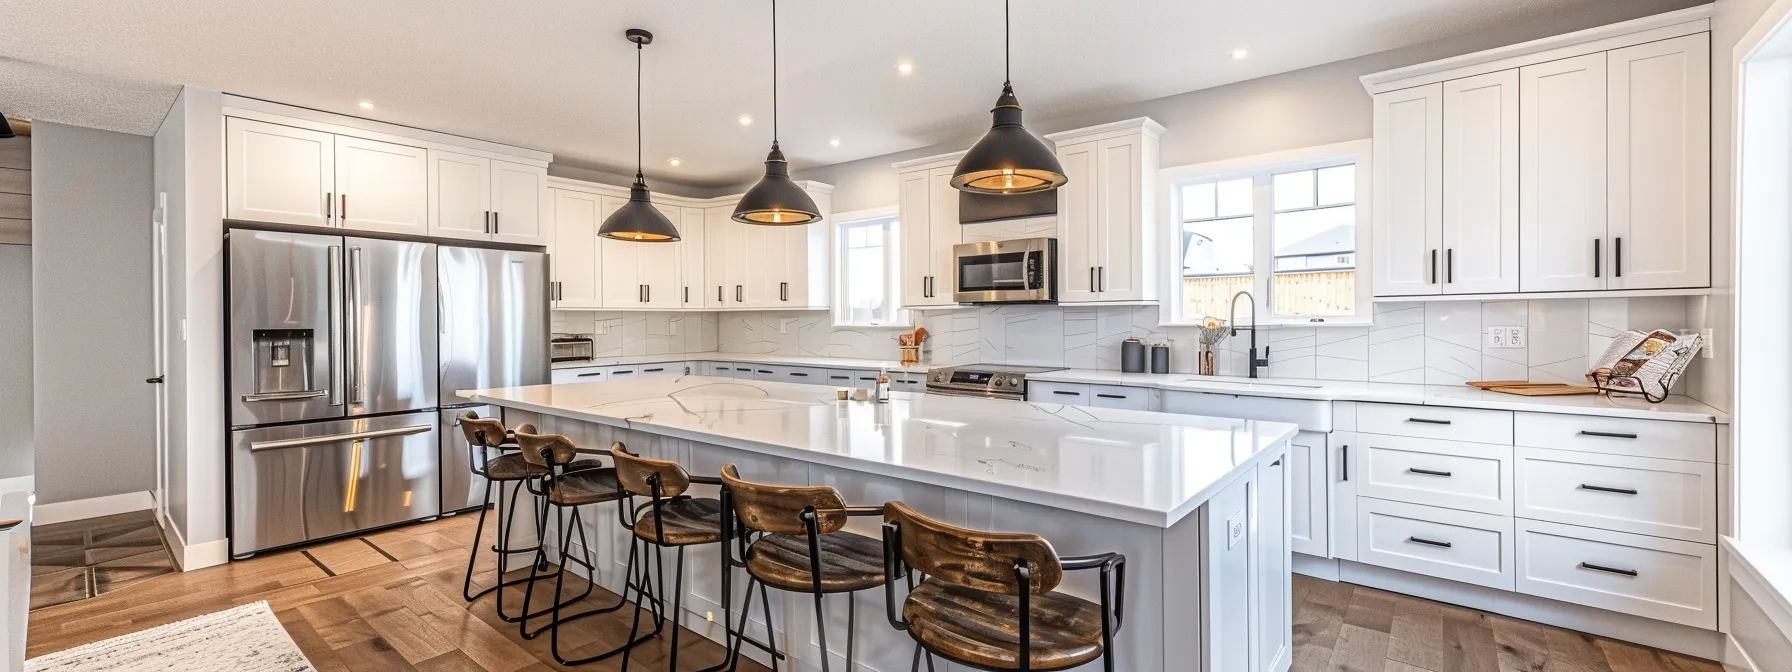
When considering kitchen renovations, one of the smartest moves you can make is refinishing your cabinetry. With methods like spray painting, you can breathe new life into tired cabinets without the hassle and expense of a complete overhaul, all while minimizing waste. According to the Master Builders Association Victoria, opting for this approach can deliver impressive results while aligning with sustainable practices. With a host of advantages to kitchen cabinet refinishing, you’ll discover how it can enhance both your space and budget. Keep reading to uncover the key benefits that make this option a game-changer for any homeowner.
#1: The Most Bang for Your Buck
When considering a renovation, the cost-effectiveness of refinishing kitchen cabinets stands out as a compelling option. In my experience, comparing costs reveals that refinishing is often significantly lower than purchasing new kitchen cabinets. This approach not only saves money but also minimizes material usage, contributing to a more sustainable practice. Additionally, fewer labor and installation costs come into play, as the process of refinishing often requires less time and effort. With a little sandpaper and some creativity, I have transformed cabinets that felt outdated into beautiful, functional pieces that enhance the overall design of the kitchen. These factors work together to ensure that refinishing kitchen cabinets provides the most bang for your buck, making it a savvy alternative for many homeowners.
#1.1: Compare Costs: Refinishing vs. New Cabinets
When I evaluate the costs involved in kitchen remodeling, I consistently find that cabinet painting and refinishing offer exceptional savings. Opting for cabinet refinishing can be a fraction of the price compared to buying new cabinets, which not only preserves my budget but also reduces waste, diminishing the amount of material destined for the landfill. The affordability of painting and refinishing not only makes practical sense but allows me to create a refreshed aesthetic without the substantial financial burden associated with completely new installations.
#1.2: Understand the Value of Minimal Material Usage
Embracing minimal material usage through kitchen cabinet refinishing has not only benefitted my projects but also aligned with my values of sustainability. By opting for high-quality painting services instead of new installations, I can refresh the appearance of cabinets, drawers, and even complement them with a revamped countertop. This approach contributes to a more eco-friendly renovation while allowing me to provide clients with a free quote that reflects significant cost savings without compromising on style or quality. Master Builders Association Victoria
#1.3: Calculate Savings on Labor and Installation
When considering kitchen cabinet refinishing, a significant factor to weigh is the savings on labor and installation. In my experience, refinishing or cabinet refacing requires less time compared to complete replacements, which translates into lower labor costs. This also allows for better customer service since projects can be completed efficiently, giving clients quicker access to their updated kitchens.
Refinishing saves time and money on labor costs.
Installation processes are simplified, reducing disruption.
High-quality results allow for the reuse of existing wood.
Efficient approaches provide clients with better overall service.
Helpful tips can maximize the impact of cabinet refinishing projects.
#2: More Money Left for Other Upgrades
By choosing kitchen cabinet refacing, I’ve discovered a way to allocate more funds towards other essential upgrades in my kitchen. This method allows me to update my cabinets while preserving a budget that can now support enhancing other elements of the space, such as high-quality countertops or modern appliances. The financial benefits of prioritizing refinishing are apparent; I save significantly when I opt for professional cabinet refinishing services rather than full replacements. This approach not only aligns with my commitment to environmentally friendly practices but also enables me to invest in brands that prioritize quality in interior painting and other kitchen features, ensuring a cohesive and modern design throughout the entire space.
#2.1: Budget Allocation for Countertop or Appliance Upgrades
When I prioritize kitchen cabinet refinishing, I find that my budget can stretch significantly further. This allows me to invest in premium countertops or state-of-the-art appliances that elevate the entire kitchen’s aesthetic and functionality. By not pouring my resources into new cabinets, I can focus on features that truly transform the space, resulting in a cohesive and stylish kitchen that meets my needs.
#2.2: The Financial Benefits of Prioritizing Refinishing
Prioritizing kitchen cabinet refinishing significantly impacts my overall renovation budget, allowing me to reallocate resources where they matter most. By avoiding the high costs associated with new cabinet purchases, I find that I can invest more in upgrades like energy-efficient appliances or luxurious countertops, which enhance not just the beauty but also the functionality of the kitchen. This financial flexibility empowers me to create a space that truly reflects my style without breaking the bank.
#3: Less Hassle & Inconvenience
Considering kitchen cabinet refinishing has significantly minimized the hassle that often accompanies renovations. I appreciate that the timeline for refinishing is generally much shorter compared to the lengthy process of a full cabinet replacement. This efficiency means I can complete updates quickly, minimizing disruption to my daily life. Additionally, one of the aspects I find most beneficial is the ability to keep my kitchen functional throughout the refinishing process. Having access to my kitchen while improvements are underway allows me to maintain my routine and enjoy the benefits of both a modern aesthetic and functionality—all without the extensive inconvenience that a complete overhaul would typically require.
#3.1: Timeline Comparison: Refinishing vs. Full Replacement
When I evaluate the timelines for kitchen renovations, the contrast between refinishing and full cabinet replacement is striking. Typically, I find that refinishing can be completed in just a few days, allowing me to enjoy my updated space without a lengthy waiting period. In contrast, a complete replacement often stretches out for weeks or even months, disrupting my daily life and routine far more than I would prefer.
#3.2: The Convenience of Staying Kitchen-Functional During the Process
One of the greatest perks of kitchen cabinet refinishing is the ability to keep my kitchen functional while the work is being done. I find it incredibly convenient to maintain access to my kitchen, allowing me to prepare meals and carry out daily tasks without interruption. This flexibility transforms the renovation process into a more manageable experience, empowering me to enjoy the benefits of an updated space without the chaos associated with a complete remodel.
Aspect
Refinishing
Full Replacement
Timeline
Typically completed in days
Can take weeks or months
Kitchen Functionality
Fully functional during refinishing
Limited access during replacement
Disruption Level
Minimal disruption to daily routine
Significant disruption expected
#4: A Range of Options to Inspire You
One of the most exciting aspects of kitchen cabinet refinishing is the array of choices available to truly personalize your space. I find that exploring various stain and paint options opens up a world of possibilities, allowing me to achieve the precise look I’m aiming for. From rich, deep stains to vibrant paints, each choice can dramatically alter the atmosphere of the kitchen and reflect my unique taste. Beyond color selection, customization plays a vital role in creating a cohesive design. I appreciate the ability to modify cabinet features, hardware, and finishes, ensuring that every element aligns with my vision and enhances the overall aesthetic of my kitchen.
#4.1: Exploring Stain and Paint Options
As I immerse myself in the world of kitchen cabinet refinishing, I find that the variety of stain and paint options available ignites my creativity. Whether I want a sleek modern look or a warm rustic charm, exploring the range of colors and finishes allows me to truly customize my kitchen. Each choice resonates with my personal style, turning an ordinary kitchen into a personalized masterpiece.
In selecting stains or paints, I notice that each finish not only changes the visual appeal but also contributes to the overall atmosphere of the space. This flexibility to choose distinct tones and textures enables me to craft a kitchen that feels uniquely mine:
Finish Type
Description
Style Inspiration
Matte Finish
Soft and understated, perfect for a modern look
Contemporary kitchen design
Semi-Gloss Finish
Reflective surface that enhances color durability
Classic and timeless interiors
Rich Stains
Deep color that highlights the natural grain of wood
Rustic or farmhouse-style spaces
#4.2: Customization Options to Match Your Style
Customizing my kitchen cabinets has been one of the most rewarding aspects of refinishing. I find that the options for hardware, door styles, and finishes let me create a space that truly reflects my aesthetic preferences and functional needs. Whether I prefer a sleek modern look or a rustic charm, the flexibility in customization ensures my kitchen feels uniquely mine.
Here’s a quick overview of some customization options I consider:
Hardware choices: Knobs and pulls in various materials and finishes.
Door styles: From traditional to contemporary designs.
Finish options: Matte, semi-gloss, or rich stains for a personal touch.
#5: A Boost to Home Value
Investing in kitchen cabinet refinishing has tangible benefits when it comes to enhancing the value of my home. I’ve noticed that modern, updated cabinets can significantly impact appraisals, often translating into a higher overall property value. A refreshed kitchen creates an inviting atmosphere that appeals to potential buyers, making it a crucial selling point in today’s competitive market. This means that by refreshing my cabinets, I not only enjoy the immediate benefits of a stylish and functional space but also position my home as a more attractive option for future buyers.
#5.1: The Impact of Modern, Updated Cabinets on Appraisals
When I assess the potential impact of modern, updated cabinets on home appraisals, the difference becomes quite clear. Having freshly refinished cabinets adds a touch of elegance and modernity, which appeals significantly to prospective buyers. I’ve noticed that a kitchen featuring stylish and well-maintained cabinetry often translates into a higher appraisal value, making it a wise investment for anyone looking to boost their home’s market appeal.
#5.2: Appeal to Potential Buyers With a Fresh Kitchen Look
Upgrading my kitchen cabinets with refinishing has proven to be a strategic move that resonates with potential buyers. A freshly updated kitchen not only elevates the space but also creates a warm and inviting atmosphere that draws positive attention. When I invest in the aesthetics and functionality of cabinets, this effort stands out to buyers looking for a home they can envision themselves in.
To highlight the impact of cabinet refinishing on buyer appeal, consider the following aspects:
Aspect
Benefit
Modern Appearance
Updated cabinets reflect current design trends, making the kitchen more attractive.
Functionality
Refinished cabinets offer improved usability, showcasing a well-maintained space.
Emotional Connection
A refreshed kitchen invokes positive feelings, helping buyers imagine their life in the home.
#6: An Eco-Friendly Investment
Choosing kitchen cabinet refinishing stands out as an exemplary choice when it comes to sustainable living. I prioritize reducing waste by opting for refinishing instead of the more common approach of complete cabinet replacement. Each refinishing project not only extends the life of existing materials but also minimizes the amount of discarded cabinetry that ends up in landfills. This commitment to eco-friendly practices resonates with my values and those of my clients. By making thoughtful decisions about home improvement, I contribute to a larger movement towards sustainability that emphasizes responsible consumption and environmental stewardship. Such improvements not only benefit the planet but also enhance the overall living experience by fostering spaces that reflect both style and a conscious commitment to preserving our resources.
#6.1: Reducing Waste Through Refinishing
As I’ve engaged in kitchen cabinet refinishing, I have witnessed first-hand the positive impact it has on reducing waste. Instead of discarding old cabinets and contributing to landfill overflow, I can rejuvenate existing materials, extending their life and functionality. Each refinishing project not only beautifies a space but also embodies my commitment to environmental sustainability, proving that stylish homes can also be eco-conscious.
#6.2: The Importance of Sustainable Home Improvements
Sustainable home improvements are essential in today’s world as they address both environmental and personal priorities. I consistently strive to implement eco-friendly practices in my renovations, understanding the impact these choices can have on our planet’s future. By focusing on refinishing over replacement, I create a home that mirrors my commitment to sustainability while still providing aesthetic and functional benefits.
Conclusion
Choosing kitchen cabinet refinishing offers significant financial and practical advantages for homeowners. This approach not only saves money but also reduces waste, allowing for budget allocation towards other essential upgrades. By maintaining kitchen functionality during the process, refinishing minimizes disruption to daily life while enhancing overall aesthetics. Ultimately, investing in refinishing boosts home value and promotes eco-friendly practices, making it a smart choice for any kitchen renovation.
Understanding the Financial Advantages of Kitchen Resurfacing
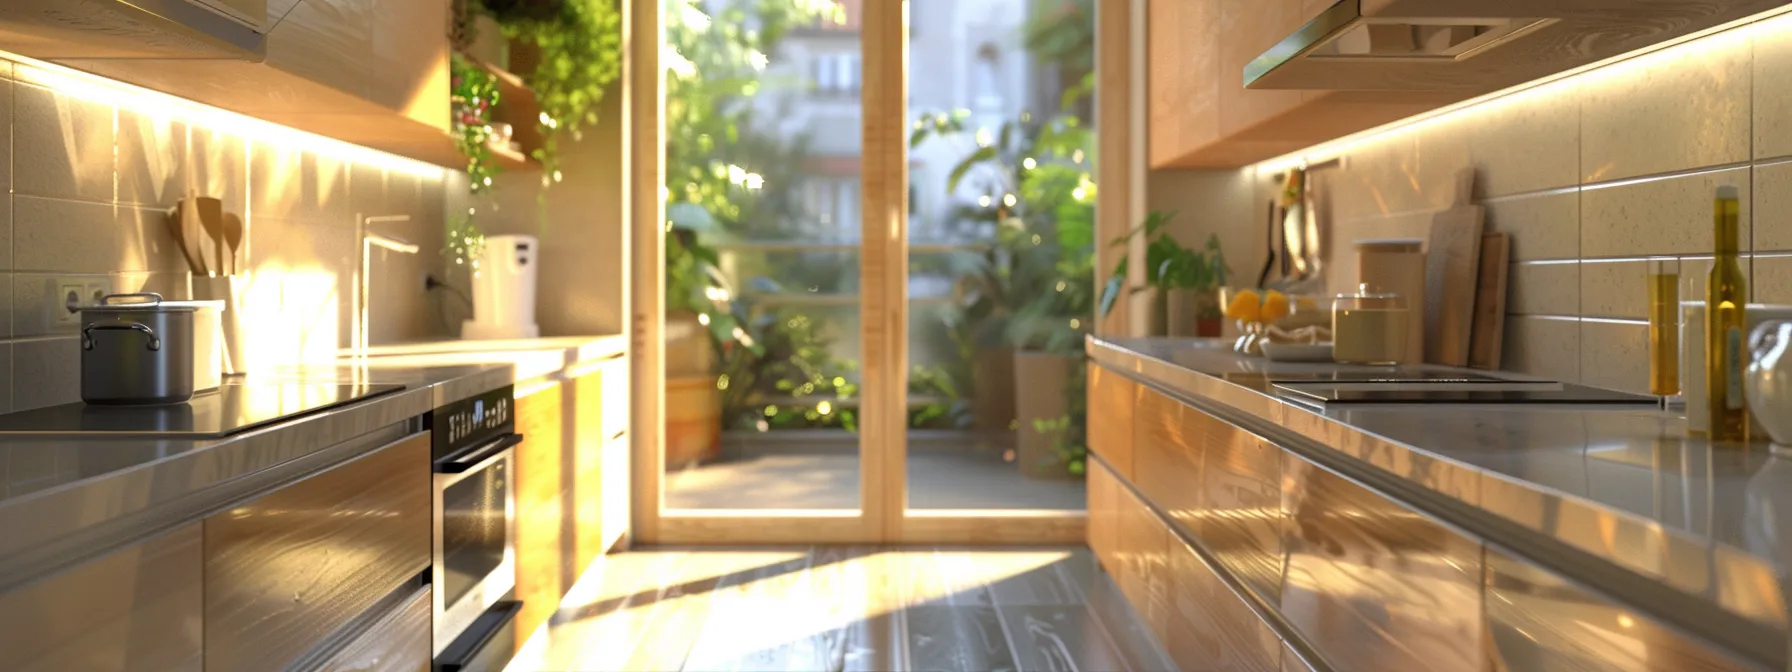
Kitchen renovations can bring new life to your home, but they don’t always need to involve an extensive overhaul. By focusing on aspects like lighting and refaced cabinets, homeowners can enhance both the aesthetics and usability of their kitchens without breaking the bank. The Master Builders Association of Victoria indicates that kitchen resurfacing offers a cost-effective solution that successfully transforms spaces. Many might overlook the financial advantages of such projects, but the savings can be significant when comparing resurfacing with a full remodel. Whether you’re looking to refresh your space or significantly improve its functionality, the benefits stretch beyond initial costs. Keep reading to uncover how kitchen resurfacing could be the smart choice for your budget.
The Economic Impact of Kitchen Resurfacing Explained
When considering a kitchen transformation, it’s vital to compare the costs of kitchen resurfacing with a full remodel. Many homeowners are surprised to learn that resurfacing can provide an attractive taste to their space without the ceiling-high expenses associated with extensive construction work. By breaking down the savings, I’ve found that both materials from Master Builders Association of Victoria and labor significantly contribute to the overall affordability of resurfaced kitchens. Additionally, these updates often lead to longevity, allowing clients to enjoy their revitalized kitchens for years to come while maintaining the excellent condition of walls and surfaces. Understanding these financial advantages empowers us to make informed decisions that align with our aesthetic and practical needs.
Overview of Costs vs. Full Kitchen Remodel
When I compare the costs of kitchen resurfacing with a complete remodel, the difference is quite striking. Resurfacing not only updates kitchen cabinets but can also enhance energy efficiency through smarter material choices, such as new doors or finishes that minimize heat loss. For instance, replacing a worn countertop with granite can instantly improve the aesthetic while being more resistant to stains, making it a practical choice for any busy kitchen.
Breaking Down the Savings: Material and Labor
As I analyze the costs associated with kitchen resurfacing, it becomes clear that the choice of materials plays a crucial role in savings. For instance, opting for wood veneer over more expensive hardwood can dramatically reduce expenses while still delivering a sophisticated look. Additionally, using marble for countertops can elevate the space aesthetically while being mindful of efficiency due to its durability and lower maintenance needs.
This thoughtful selection of materials results in a well-planned budget, as homeowners can enjoy an appealing kitchen that reflects their style without the price tag of full kitchen remodeling. The added benefit is not only the immediate visual impact but also the long-term performance and longevity of these chosen finishes, making them a wise investment. As I continue to explore the financial benefits of surface updates, several factors consistently come to light:
Affordability of materials such as wood veneer and marble
Efficiency through lower maintenance and durability
Immediate transformation with lesser disruption compared to full remodels
The Longevity of Resurfaced Kitchens
In my experience, the longevity of resurfaced kitchens is one of the most compelling reasons to consider this renovation option. When I see a freshly updated room with new drawer fronts and a modern stove, it’s clear that the choices made during resurfacing can greatly influence durability. This approach not only revitalizes the kitchen but also provides lasting enjoyment without the high kitchen remodeling costs associated with a complete overhaul.
Comparing Costs: Kitchen Resurfacing vs. Full Remodel
As I examine the financial aspects of kitchen resurfacing, evaluating the initial expenses in comparison to a full remodel is essential. While the immediate outlay for resurfacing is often significantly lower, the long-term value assessment reveals even greater benefits. By choosing options like refined wood veneers or energy-efficient materials, I not only enhance the aesthetic appeal of the space through a stunning makeover but also contribute positively to the home’s overall energy performance. This thoughtful approach can lead to a notable return on investment, which can be further complemented by potential increases in home value. Considering the financial credits and incentives available for energy-efficient upgrades makes resurfacing even more appealing, showcasing a smart strategy for homeowners looking to enhance both beauty and value.
Initial Expense Comparison
When I compare the initial expenses of kitchen resurfacing with those of a full remodel, the savings can be significant. For instance, choosing kitchen cabinet refacing as an alternative to completely replacing cabinets often results in a fraction of the cost, allowing homeowners to allocate their budget toward high-quality materials, like steel for hardware or new appliances. This means I can help clients achieve a stunning refaced kitchen that not only enhances their aesthetic but also remains cost-effective, so they can focus on enjoying meals in their revitalized space without the financial strain of a complete renovation.
Long-Term Value Assessment
As I evaluate the long-term value of kitchen resurfacing, I recognize how this choice enhances property value while promoting sustainability. For example, opting for a butcher blockcountertop can elevate both the kitchen’s appeal and functionality, reducing waste by extending the life of existing structures. This eco-friendly approach not only preserves resources but also aligns with my commitment to creating spaces that are both beautiful and environmentally responsible.
Impact on Home Value
When assessing the impact on home value, I often recognize that kitchen resurfacing can provide substantial returns compared to traditional remodeling. With the rising kitchen remodel costs, homeowners are increasingly drawn to cost-effective solutions that also demonstrate intelligence in recycling existing structures while enhancing their overall appeal. Not only does a resurfaced kitchen add aesthetic value aligned with current interior design trends, but it also reflects savvy home improvement choices that can elevate property listings in the competitive market.
Aspect
Kitchen Resurfacing
Full Kitchen Remodel
Initial Costs
Lower
Higher
Impact on Home Value
Significant
Potentially Higher
Eco-Friendly Options
Yes
Varies
Time for Completion
Shorter
Longer
How Kitchen Resurfacing Saves You Money
Reducing overall remodeling costs is one of the major financial benefits I’ve encountered with kitchen resurfacing. By selecting carefully, I can minimize the need for new materials, like cabinets or countertops, which tend to be pricier. This approach is not only more budget-friendly but also environmentally friendly, as it encourages the use of existing structures. Lower labor costs and time investment further enhance the appeal; resurfacing typically requires less manual work compared to a full remodel, which means quicker turnarounds. Importantly, I also see clients avoiding hidden renovation expenses that often lurk in larger projects, like unexpected plumbing issues or the costs of removing old appliances, such as a dishwasher. This financial foresight makes resurfacing an efficient choice for any homeowner aiming to upgrade their kitchen without overspending.
Reducing the Need for New Materials
By choosing kitchen resurfacing, I can significantly reduce the need for new materials, which in turn lowers the overall complexity of the renovation process. For example, instead of purchasing an entirely new quartzcountertop, I often help clients revive their existing surfaces with durable refinishing techniques that maintain their functionality while offering a fresh appearance at a fraction of the price. This approach not only minimizes waste but also allows homeowners to invest in other areas, such as quality flooring that complements their cooking space beautifully.
Lower Labor Costs and Time Investment
One of the key benefits I’ve observed with kitchen resurfacing is the significant reduction in labor costs and time investment. Since the process involves updating existing cabinetry instead of a complete replacement, I can efficiently carry out services such as cabinet painting with minimal disruption. This not only helps clients save money but also means I can provide a free quote quickly, allowing for a smoother project timeline without the usual utility interruptions that a full remodel might incur.
Avoiding Hidden Renovation Expenses
In my experience, one of the standout benefits of kitchen resurfacing is the ability to avoid hidden renovation expenses that often inflate kitchen remodel costs. Full remodels can lead to unexpected costs arising from issues like outdated plumbing or electrical systems, which can put a strain on a customer‘s kitchen remodeling budget. By resurfacing, we work with the existing structures, minimizing waste sent to the landfill and keeping the project on track and within budget.
Smart Budgeting for Your Kitchen Resurface Project
When planning a kitchen resurfacing project, estimating your budget effectively becomes a priority. It’s essential to understand how to keep costs down while still aiming for the best outcomes. I find that allocating funds wisely can make a significant difference, especially when considering elements like custom kitchen cabinets or cabinet refacing. Spending thoughtfully on materials like ceramic tiles can enhance aesthetics without escalating labor costs excessively. By focusing on these areas, you set yourself up for a successful home repair that balances quality and affordability, transforming your kitchen into a space that reflects your style and meets your budgetary needs.
Estimating Your Resurfacing Budget
Estimating your resurfacing budget starts with a clear understanding of your priorities and the key elements in your kitchen, such as the sink and pantry layout. I recommend paying close attention to material choices, especially if you’re considering stainless steel for durability and aesthetics. By focusing on your must-haves, you can create a practical budget that aligns with your vision for a refreshed kitchen remodel.
Define your essential features, like the sink and pantry organization.
Research material costs to make informed decisions.
Set a realistic budget that accommodates necessary updates.
Tips for Keeping Costs Down
To effectively keep costs down during your kitchen renovation, I recommend prioritizing well-chosen upgrades that minimize the need for extensive demolition. Collaborating with seasoned remodelers can also provide insights into cost-effective materials and solutions that save money in the long run. Moreover, I often guide clients through an FAQprocess to clarify expectations and identify areas where they can achieve significant savings without sacrificing quality.
Here’s a summary of strategies for budgeting effectively:
Strategy
Description
Prioritize Upgrades
Focus on essential enhancements that don’t require demolition.
Consult Experts
Work with experienced remodelers for valuable advice.
Use an FAQ Process
Clarify doubts and explore cost-saving options during planning.
Where to Allocate Your Budget Wisely
When planning how to allocate your budget wisely while remodeling your kitchen, I focus on key areas that promise the most value. Prioritizing high-traffic features, such as countertops and cabinetry, often yields a significant return on investment. Ensuring that you invest in durable materials will extend the life of your remodel and keep your kitchen looking fresh for years to come:
Countertops – Invest in quality surfaces that enhance functionality and aesthetics.
Cabinetry – Opt for refinishing or refacing options to save costs while still achieving a modern look.
Flooring – Select durable and stylish flooring that can withstand daily use.
Appliances – Consider energy-efficient models that may save on operating costs over time.
Financial Benefits Beyond the Obvious
Kitchen resurfacing brings a range of financial benefits that extend well beyond the immediate upgrade. I’ve observed that energy efficiency improvements are a significant factor, as many resurfacing projects incorporate materials designed to reduce energy consumption. This leads to lower utility bills, which can add up over time. Additionally, decreased maintenance costs are a noteworthy advantage; by opting for durable finishes, clients spend less on repairs and upkeep. Lastly, the enhanced aesthetic appeal of a resurfaced kitchen can also translate into financial perks. A beautiful and inviting space often leads to increased home value, making it a strategic investment that pays dividends in both enjoyment and financial returns.
Energy Efficiency Improvements
In my experience, kitchen resurfacing not only elevates aesthetics but also significantly enhances energy efficiency. By choosing modern materials designed to conserve energy, I see clients benefiting from reduced utility bills over time. This shift often incorporates better insulation and reflective surfaces that help maintain comfortable temperatures in the kitchen year-round.
Energy Efficiency Aspects
Kitchen Resurfacing
Full Kitchen Remodel
Energy-efficient materials
Yes
Often varies
Impact on utility bills
Reduced costs
Uncertain
Insulation improvements
Enhanced
Possible
Reflective surfaces
Included
Not guaranteed
Decreased Maintenance Costs
Through my experience with kitchen resurfacing, I’ve noticed that one significant financial advantage is the reduction in ongoing maintenance costs. By selecting durable materials that resist wear and tear, clients find themselves spending less time and money on repairs and upkeep. This practical approach ultimately enhances both the kitchen’s longevity and the homeowner’s peace of mind, making resurfacing a strategic investment in both beauty and functionality.
Enhanced Aesthetic Appeal and Its Financial Perks
In my journey through kitchen renovations, I’ve witnessed firsthand how enhanced aesthetic appeal can bring measurable financial perks. A beautifully refurbished kitchen acts as a showcase, often capturing the attention of potential buyers and increasing the marketability of a home. This renewed visual charm can translate into higher offers when it’s time to sell, underscoring the value of investing in a well-designed resurfacing project.
Real-Life Case Studies: Kitchen Resurfacing Cost Benefits
To truly appreciate the financial advantages of kitchen resurfacing, I find it compelling to delve into real-life case studies showcasing before and after cost analyses. Examining these transformations offers clear insights into the savings achieved through resurfacing compared to full remodels. Alongside these analyses, homeowner testimonials shed light on their personal experiences, highlighting how the project not only met their aesthetic aspirations but also eased their financial burdens. Finally, expert insights enrich this discussion by focusing on the long-term financial gains associated with resurfacing strategies, illustrating how these enhancements contribute to sustained savings and increased property value over time.
Before and After Cost Analyses
In my experience, conducting before and after cost analyses of kitchen resurfacing projects reveals significant financial advantages. For instance, I worked with a couple who initially considered a full remodel for their kitchen but opted for resurfacing instead. After completing the project, they reported a savings of over 40% compared to their original remodeling budget, allowing them to allocate those funds towards other home improvements.
These transformations not only enhance the kitchen’s appearance but also demonstrate measurable cost savings. Clients often provide feedback that reinforces the value of resurfacing, particularly how the maintenance and operational costs decrease after upgrades are made. This highlights the advantages of choosing resurfacing as a financially savvy choice:
Significant reduction in initial outlay
Long-term savings from increased durability
Improved aesthetic appeal contributing to potential market value
Homeowner Testimonials on Savings
After completing a resurfacing project, many homeowners share their satisfaction with the savings they’ve experienced. One client expressed how opting for resurfacing instead of a full remodel allowed them to save a substantial amount, which they redirected towards enhancing their outdoor living space. Hearing these stories reinforces the sense of accomplishment that comes from making a financially savvy choice while still achieving a beautiful kitchen.
Expert Insights on Long-Term Financial Gains
In my discussions with industry experts, I’ve noticed a strong consensus around the long-term financial benefits of kitchen resurfacing. Many professionals emphasize that these projects not only enhance aesthetic appeal but also significantly increase property value, making them a smart investment for homeowners. By preserving existing structures and opting for high-quality finishes, homeowners often witness a return on investment that surpasses traditional remodeling efforts, reinforcing the value of resurfacing as a forward-thinking choice.
Conclusion
Understanding the financial advantages of kitchen resurfacing is essential for homeowners looking to enhance their spaces without overspending. By choosing resurfacing, they can significantly lower initial costs while still achieving a modern look and improving energy efficiency. This strategy not only minimizes long-term maintenance expenses but also increases property value. By making informed decisions, homeowners can enjoy beautiful kitchens that align with their budget and lifestyle.
Key Skills and Expertise: Choosing Your Bathroom Remodel Contractor
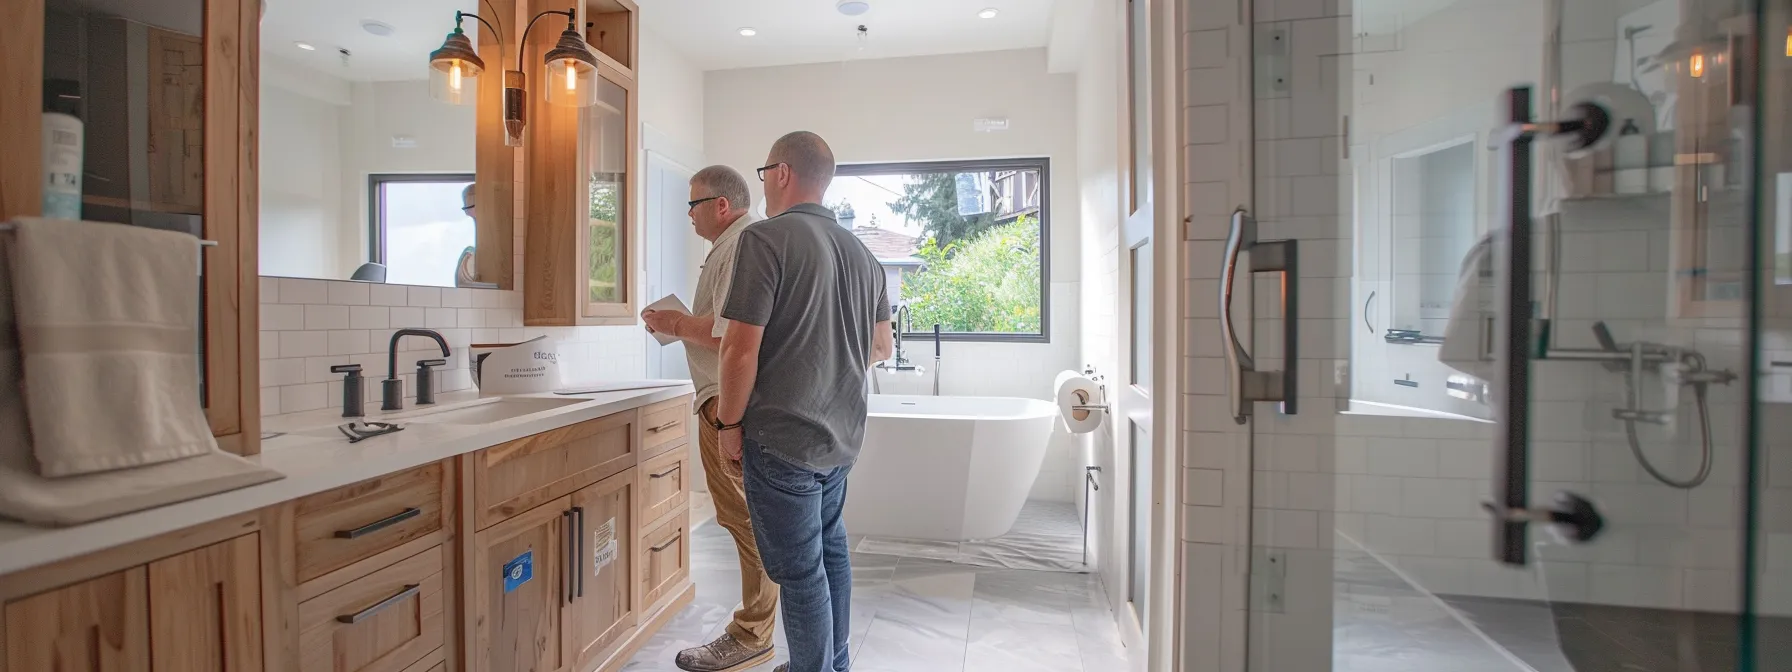
Choosing the right bathroom remodeling contractor is an essential step in ensuring a successful renovation. When planning for projects ranging from bathroom and kitchen resurfacing to full-scale demolition, understanding the qualifications and skills of potential contractors is crucial. Partnering with a licensed contractor, like those recognized by the Master Builders Association Victoria, guarantees compliance with industry standards and safe practices. As homeowners prepare to enhance their spaces, from the ground up to the roof, the selection process becomes a vital part of the journey. Keep reading to explore the key skills and expertise that will guide you in making the best choice for your bathroom remodel.
Key Takeaways
A well-structured plan is vital for a successful bathroom remodel
Assess contractor qualifications to ensure compliance with regulations and standards
Conduct thorough interviews to evaluate contractors’ expertise and past experiences
Obtain detailed written estimates for transparency and informed decision-making
Reference checks reveal contractor reliability and customer satisfaction
1. Start With a Clear Plan
Creating a comprehensive plan at the outset of a bathroom and kitchen resurfacing remodel is essential for both efficiency and effectiveness. This plan should include a detailed floor plan that outlines the desired layout and incorporates all necessary elements such as drywall installations and plumbing modifications. A clear plan not only serves as a roadmap for the project but also facilitates communication between the customer and the contractor Master Builders Association Victoria.
In this planning phase, it is important to consider any relevant law and building regulations that may affect the remodel. Contractors should possess the necessary certification to ensure compliance with these regulations. This knowledge allows for a smoother process and helps prevent potential legal issues, providing peace of mind to the customer.
Thorough planning also assists in setting realistic timelines and budgets for the project. A well-structured approach allows the contractor to allocate resources effectively, which can lead to a more successful remodel. By prioritizing a clear plan, customers can significantly enhance the likelihood of achieving their desired bathroom transformation.
With a solid plan in hand, the next step takes center stage. Finding skilled bathroom remodeling contractors will turn your vision into reality.
Identifying a competent bathroom remodel contractor hinges on assessing their qualifications and reviewing their past work. A contractor’s credentials, including any necessary certifications, should be a primary focus for homeowners. This includes verifying their completion of relevant exams and ongoing education in areas such as building codes and inspection protocols. Additionally, contractors with knowledge in integrating modern features like solar energy can offer innovative solutions, enhancing the functionality and sustainability of the remodeled space. By prioritizing these aspects, clients can ensure they engage a professional who not only understands their vision but also possesses the expertise to execute it flawlessly.
Prioritizing Contractor Qualifications and Past Work
Homeowners should prioritize the qualifications and past work of potential contractors when embarking on a bathroom remodeling project. Those with experience in generalcarpentry and expertise in bathroomventilation can deliver superior results, ensuring both functionality and comfort. Furthermore, reviewing a contractor’s previous projects provides insight into their craftsmanship and adherence to contract specifications.
Criteria
Importance
Qualifications
Ensures compliance with regulations and standards
Past Work
Demonstrates craftsmanship and attention to detail
Specialization in Carpentry
Affects structural integrity and design technique
Experience in Ventilation
Improves air quality and moisture control
Identifying the right bathroom remodeling contractors sets the stage for your dream project. Now, it’s time to bring your vision to life by conducting effective phone interviews to find the perfect fit for your needs.
3. Conducting Effective Phone Interviews
Conducting effective phone interviews with prospective bathroom remodeling contractors serves as a crucial step in the selection process. Homeowners should prepare essential questions to evaluate the contractor’s expertise and ensure they are well-equipped to handle the specific requirements of the project. Inquire about their licenses, adherence to building regulations, and previous experiences with similar renovations. This not only safeguards against potential issues but also aligns expectations. Focusing on aspects such as customer satisfaction and the contractor’s approach to optimizing space, particularly regarding floor design, can significantly influence the overall outcome of the remodeling endeavor.
Essential Questions to Gauge Contractor Expertise
To effectively assess a contractor’s expertise, homeowners should ask pointed questions regarding their knowledge of plumbing systems, specifically how they handle pipe installations and water supply configurations during a bathroom remodel. Additionally, inquiring about their familiarity with local building code regulations can reveal how well-equipped they are to manage compliance throughout the renovation process. Understanding past experiences with potential lien situations is also crucial, as it provides insights into the contractor’s reliability and financial practices.
Consider these essential questions while interviewing contractors:
Question
Purpose
What is your experience with plumbing systems in bathroom remodels?
Evaluates knowledge of pipe installations and water supply management
How familiar are you with local building codes?
Assesses compliance with legal regulations
Have you dealt with lien issues in past projects?
Reveals financial reliability and history
Effective phone interviews set the stage for success in your renovation journey. Now, it’s time to dig deeper and evaluate your top contractor prospects to ensure they can turn your vision into reality.
4. Vetting Your Top Contractor Prospects
Vetting contractor prospects is a vital step in ensuring a successful bathroomrenovation. Homeowners should focus on evaluating the credentials of potential contractors, considering their organizational structure, such as whether they operate as a limited liability company. This designation can offer a layer of protection for the homeowner in case of mishaps during the project. Additionally, thorough reference checks provide insight into past client experiences and help assess the contractor’s reliability and expertise in areas like wallconstruction and the handling of sophisticated systems, such as refrigerant in heating and cooling installations. Understanding the fee structures, including any hidden costs, allows clients to budget effectively and aligns expectations with potential contractors.
Evaluating Contractor Credentials and References
Evaluating contractor credentials and references is essential for a successful bathroomrenovation. Homeowners should assess the contractor’s qualifications, particularly in areas such as shower installations, water heating systems, and electrical work. A reliable contractor, ideally with experience as an electrician, should provide proof of past home improvement projects that demonstrate their expertise and commitment to quality.
Checking references from previous clients serves to highlight the contractor’s reliability and workmanship. A detailed account of past renovations will reveal not only the contractor’s proficiency but also their interaction with clients. Homeowners can gain additional insights into how well the contractor manages project timelines and communicates throughout the renovation process:
Criteria
Importance
Credentials
Validates technical expertise and specialization
References
Provides real-world examples of customer satisfaction
Experience with Shower and Water Heating
Ensures knowledge of crucial installation practices
Electrical Work Knowledge
Critical for integrated home improvement projects
After narrowing down the top contractor prospects, it’s time to take the next crucial step. Conducting thorough site visits will reveal not only their capabilities but also how well they align with your vision for your renovation.
5. Conducting Thorough Site Visits With Contractors
Conducting thorough site visits with prospective bathroom remodel contractors plays a pivotal role in assessing their on-site problem-solving skills and professionalism. During these visits, homeowners can observe how contractors interact with the property and evaluate their ability to navigate challenges unique to the space, such as incorporating design features like an elevator or optimizing layouts for smaller areas. Additionally, discussing the specifics of the remodel within the context of the visit allows homeowners to gauge how well the contractor communicates their vision while also ensuring that the necessary warranty details and contractual obligations are understood. This hands-on assessment not only verifies the contractor’s expertise but also provides crucial insights into their approach and reliability, which are vital in making an informed hiring decision.
Assessing on-Site Problem-Solving Skills and Professionalism
During site visits with potential contractors, it is crucial to assess their problem-solving skills and professionalism in real-time scenarios. Observing how a corporation handles unexpected challenges, such as masonry issues or design constraints, provides insight into their resourcefulness and adaptability. A contractor’s ability to communicate effectively while addressing these challenges reflects their dedication to delivering quality results and ensures a smoother remodeling process.
After conducting thorough site visits, it’s time to take the next crucial step. Securing detailed estimates in writing will ensure clarity and set the foundation for a successful renovation project.
6. Securing Detailed Estimates in Writing
Securing detailed estimates in writing is vital for homeowners embarking on a bathroom remodel. Clear and transparent cost breakdowns provide a comprehensive understanding of where funds will be allocated, ensuring that clients know what to expect financially throughout the project. Itemizing costs not only highlights individual expenses, such as labor, materials, and additional services, but also allows for easier comparisons among contractors. This transparency fosters trust and enables informed decision-making, granting homeowners the confidence needed to proceed with their selected contractor. By prioritizing a structured estimate, clients position themselves to avoid unexpected expenditures and ensure a successful renovation process.
Understanding the Importance of Transparent Cost Breakdowns
Transparent cost breakdowns are fundamental in establishing trust and clarity between homeowners and contractors. By providing a clear outline of expenses, clients can comprehend where their investment is being directed, which ultimately reduces confusion regarding financial commitments. This approach allows for better comparison between different contractor estimates, ensuring that the selected professional aligns with both budgetary constraints and project expectations.
Detailed estimates clarify all financial aspects of the project.
Clear cost breakdowns help to establish trust between clients and contractors.
Itemized expenses make it easier to compare estimates from multiple contractors.
Selecting the Perfect Bathroom RenovationContractor: A Guide
Choosing the right contractor for a bathroom renovation can significantly influence the outcome of the project. When considering options for bathroom and kitchen resurfacing, it is essential to align with professionals recognized by reputable organizations, such as the Master Builders Association of Victoria and the national association of home builders. A qualified general contractor brings expertise and a keen understanding of design, ensuring that each bathroom renovation is tailored to the client’s vision and needs. Navigating the selection process involves several key steps to find a reliable partner for transforming your space. Keep reading to discover how to effectively choose the perfect bathroom renovationcontractor for your project.
Key Takeaways
Start with a clear plan outlining desired changes for bathroom remodeling
Research and prioritize reliable contractors known for quality craftsmanship
Obtain multiple detailed quotes to compare pricing and scope of work
Assess contractor expertise and communication style during initial interviews
Conduct thorough site visits to evaluate previous work and professionalism
1. Start With a Clear Plan
Before embarking on a Bathroom and Kitchen Resurfacing project, it is essential to start with a clear plan. Homeowners should outline their vision, detailing the desired changes, such as installing a new bathtub or updating the shower space. This initial step will serve as a foundation for discussions with potential bathroom remodel contractors Master Builders Association of Victoria.
Understanding the project timeline and budget plays a crucial role in the planning phase. Homeowners should research BBB accreditedcontractors known for their reliability and craftsmanship. Establishing these parameters will ensure that every aspect of the bathroom remodeling aligns with the homeowner’s expectations.
Clear communication of the planned updates will aid contractors in providing accurate quotes and timelines. By conveying specific goals for the renovation, homeowners can foster a collaborative relationship with their chosen bathroom remodel contractors. This partnership will ultimately lead to a beautifully transformed space that meets both functionality and aesthetic preferences.
With a solid plan in hand, the next step is crucial: finding the right professionals to bring that vision to life. Selecting excellent bathroom remodelingcontractors can make all the difference in transforming ideas into reality.
2. Find Excellent Bathroom RemodelingContractors
When searching for skilled bathroom remodelingcontractors, homeowners should prioritize reliability and quality over simply opting for the cheapest contractor. A thorough vetting process ensures that chosen professionals possess the necessary skills to execute critical tasks such as waterproofing and tile installation. Referrals from friends or online reviews can point toward contractors with a solid reputation in home improvement.
It is vital for homeowners to obtain multiple quotes before making a decision. Each proposal should include a detailed contract outlining the scope of work, materials to be used, and timelines for completion. Comparing these contracts allows homeowners to assess which contractors offer the best balance of price and quality.
Establishing open communication with contractors from the outset is beneficial. This dialogue facilitates discussions about specific needs and preferences, ensuring that all aspects—such as design aesthetics and functional requirements—are considered. Homeowners can rest assured knowing their project is in capable hands when they collaborate effectively with their selected contractor.
Prioritize reliability and quality over the cheapest contractor.
Focus on professionals skilled in waterproofing and tile installation.
Obtain multiple quotes, emphasizing the importance of a detailed contract.
Establish open communication for discussions about needs and preferences.
Assess balance of price and quality before finalizing the contractor.
Choosing the right contractor sets the foundation for a successful renovation. Now, it’s time to dive into a crucial step: conducting phone interviews to find the perfect match for your project.
3. Conduct Phone Interviews
Phone interviews provide a vital opportunity for homeowners to assess potential bathroom remodelingcontractors. During these conversations, it is imperative to ask specific questions that will reveal the contractor‘s expertise and approach to customer service. Inquiries about the scope of their past projects, the types of materials they typically recommend, and the warranties they offer can greatly inform a homeowner’s decision-making process. Focusing on these aspects will help establish a clear understanding of each remodelingcontractor‘s capabilities and how well they align with the homeowner’s vision for their bathroom renovation.
Questions You Should Ask a Bathroom RemodelingContractor
When interviewing potential contractors for a bathroom remodel project, homeowners should focus on specific questions that gauge both expertise and compatibility. Inquire about the contractor‘s experience with similar renovations, particularly regarding countertop installations and material selections, as these choices significantly impact the quality of life within the newly remodeled space. It is also essential to discuss their approach to communication and timelines, ensuring that the contractor‘s work style aligns with the homeowner’s expectations for a smooth renovation process.
Engaging with potential contractors has paved the way for the next crucial step. Now, it’s time to vet your top prospects and ensure they align with your vision.
4. Vet Your Top Prospects
Once homeowners have identified their top prospects for bathroom renovationcontractors, the next critical step involves thorough vetting. It’s essential to check the contractor‘s license and ensure they have a clean track record with the Better Business Bureau. Reaching out to references offers insights into the contractor‘s expertise and reliability while conducting a remodel. Engaging in open conversations with previous clients allows homeowners to gauge the contractor’s responsiveness and work ethic, which are pivotal factors in the hiring process. By asking the right questions and evaluating feedback, homeowners can secure a trustworthy professional capable of bringing their bathroom renovation vision to life.
Questions You Should Ask Contractor References
When contacting references for potential bathroom remodelers, homeowners should assess how well the contractor addressed issues related to accessibility during the renovation. It is equally vital to inquire about the overall bathroom remodel cost and whether the final expenses matched the initial estimates provided by the bathroom remodeling company. Additionally, understanding how effective the contractor was in managing details such as grout application can offer insights into the quality of craftsmanship and attention to detail that clients can expect.
After narrowing down the best candidates, the next step is crucial: conducting thorough site visits. This allows for a firsthand assessment of their work quality and attention to detail, ensuring the right fit for your renovation project.
5. Conduct Thorough Site Visits
Conducting thorough site visits is an integral aspect of selecting the right bathroom renovationcontractor. During these visits, homeowners can evaluate the contractor‘s previous workspaces, paying close attention to construction quality, attention to detail, and cleanliness. Observation of how well the flooring, electrical work, and plumbing were executed offers valuable insights into what can be expected for their own bathroom remodeling project.
Homeowners should also take the opportunity to communicate directly with the contractor during site visits. Discussing aspects such as the installation of electrical fixtures and the specific construction methods used helps in assessing the contractor‘s expertise and understanding of their trade. Questions about the price and factors that influence it, such as materials and labor quality, can further clarify the overall cost expectations for the upcoming renovation.
Lastly, site visits enable homeowners to understand a contractor‘s workflow and project management practices. Observing how efficiently a contractor orchestrates the various elements involved, such as electricians, plumbers, and craftsmen on-site, reflects their professionalism and ability to adhere to timelines. This firsthand experience can significantly aid homeowners in making an informed decision when selecting a contractor for their bathroom remodeling project.
Thorough site visits provide valuable insights to bring ideas to life. Once the vision is clear, obtaining written estimates sets the stage for a successful project.
6. Get Estimates in Writing
Acquiring written estimates from potential bathroom contractors is a vital step in the renovation. Homeowners should request detailed proposals that outline the scope of work, materials, and costs associated with the bathroom remodel. This written documentation helps to avoid misunderstandings and sets clear expectations regarding project outcomes.
When reviewing estimates, it is crucial for homeowners to look for consistency in pricing and services offered among different contractors. Comparisons should focus not only on cost but also on the quality of materials suggested, including fixtures and lighting options. A well-detailed estimate provides insight into the value of each contractor‘s work concerning the property‘s overall marketability.
Additionally, homeowners should be mindful of any contingencies or hidden costs addressed in the estimates. It is recommended to ask questions about any factors that could influence pricing, such as unexpected repairs or changes in material selection. Being proactive in understanding these elements helps homeowners make an informed choice when selecting a bathroom contractor for their renovation project:
Key Elements in Bathroom Contractor Estimates
Details
Scope of Work
Clearly defines tasks included in the renovation
Materials
Outlines types and quality of materials, including lighting fixtures
Cost Breakdown
Provides a detailed pricing structure for transparency
Contingencies
Addresses potential additional costs and their reasons