Are you worried about how to maintain your resurfaced countertops? Many people underestimate the care needed to keep them looking great for years. In this post, you’ll find essential long-term care tips focused on creating a daily maintenance routine, protecting your surfaces from water damage, and implementing periodic deep cleaning techniques. By following these guidelines, you can ensure strong adhesion and longevity for your surfaces, whether they are in your kitchen or around your bathtub. Say goodbye to dust and wear, and enjoy your beautifully resurfaced countertops for a long time to come.
Key Takeaways
Resurfacing countertops is cost-effective and reduces downtime compared to full replacement
Select materials like marble, tile, or petroleum-based coatings based on your needs and preferences
Regular maintenance is crucial for extending the lifespan of resurfaced countertops
Use gentle cleaning products to prevent damage to the surfaces
Schedule professional maintenance checks to ensure your countertops remain in excellent condition
Understanding Resurfaced Countertops
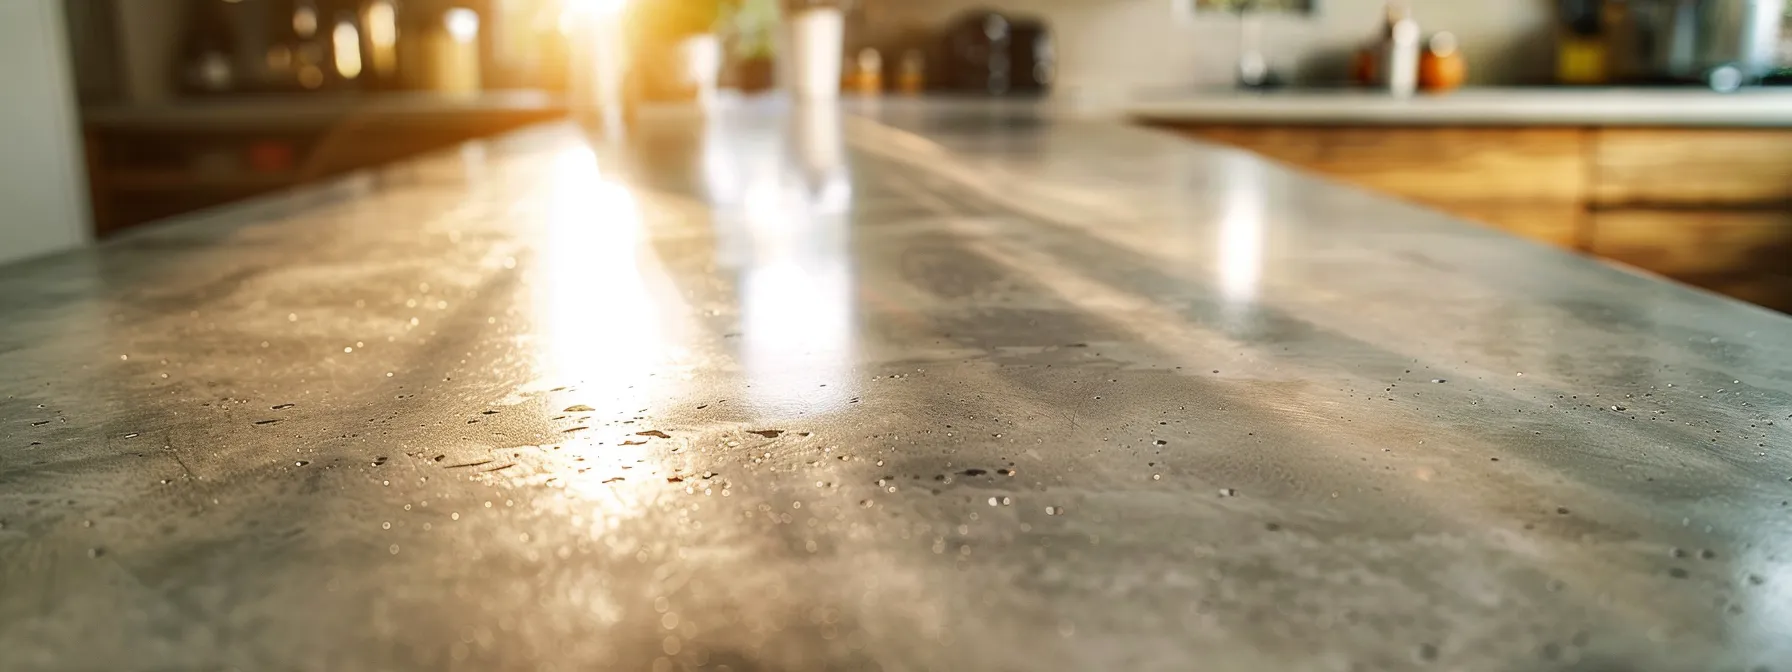
Resurfaced countertops offer various types of materials and finishes, enhancing both aesthetics and usability. You will find that resurfacing provides significant advantages over replacement, such as cost-effectiveness and reduced downtime. Additionally, knowing the expected lifespan of these surfaces helps you plan for maintenance. This section will guide you through different resurfacing options, FI Imagine their benefits, and longevity.
Types of Resurfacing Materials and Finishes
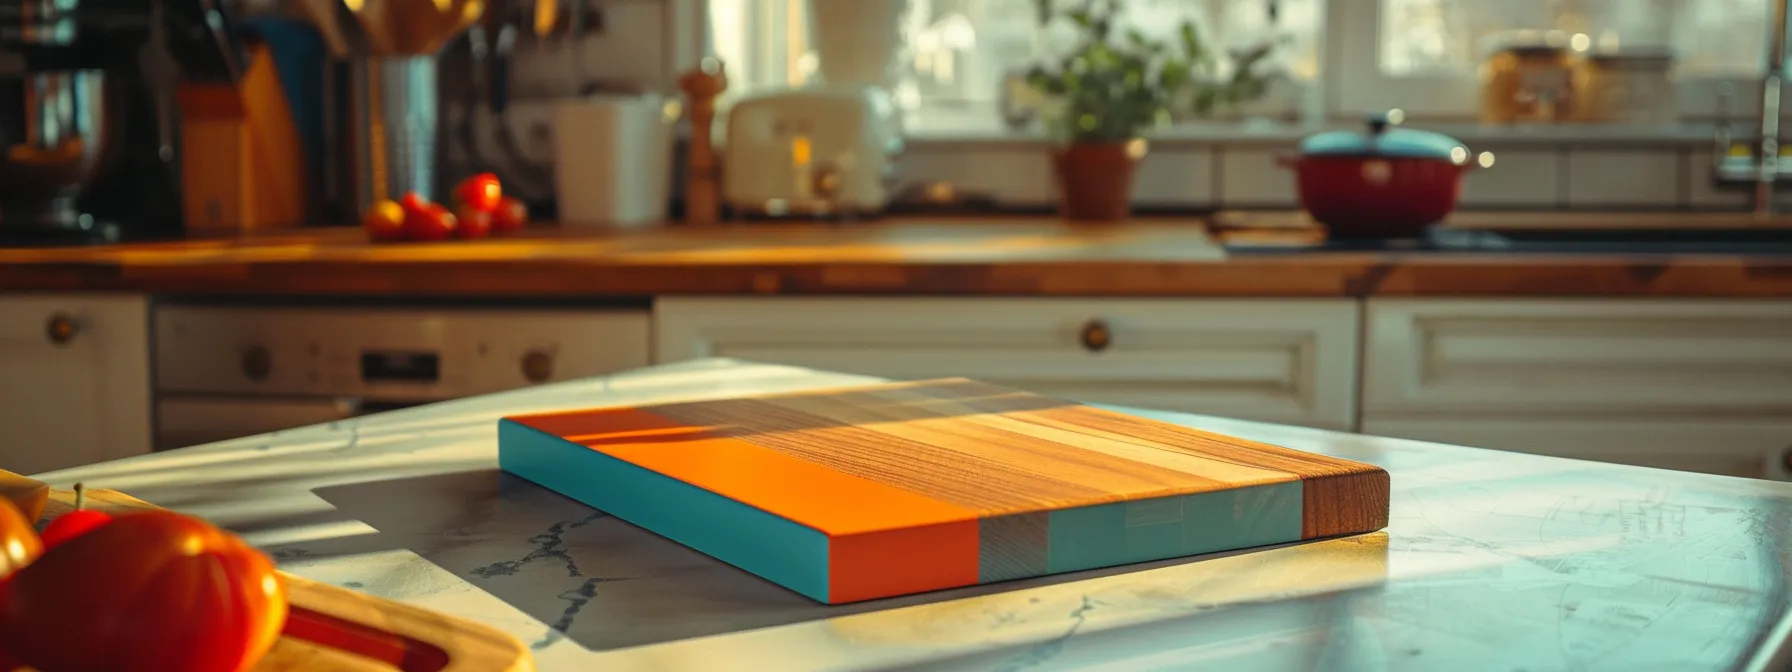
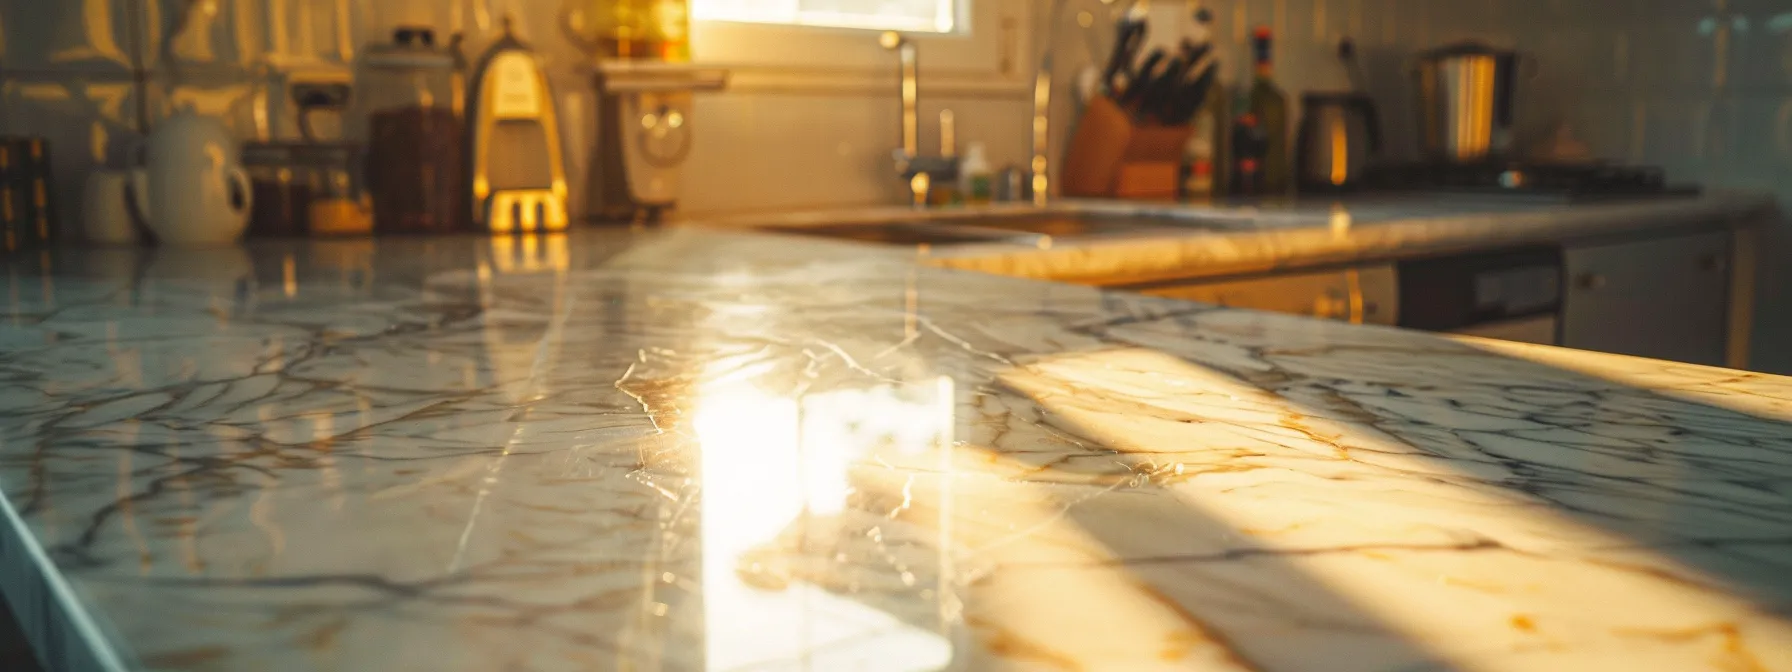
When considering resurfaced countertops, various materials and finishes can meet your needs. Marble is a popular choice due to its elegant appearance and durability. It fits well in both kitchens and bathrooms and can elevate the overall aesthetic of your space.
Another versatile option is tile, which offers endless color and pattern possibilities. This material is not only stylish but also easy to clean and maintain, making it a practical choice for busy households. With the right tile, you can create a beautiful and functional countertop that suits your lifestyle.
Additionally, petroleum-based coatings can provide a robust finish for your resurfaced countertops. These finishes enhance the surface’s resistance to stains, chemicals, and everyday wear, ensuring your countertop retains its beauty for years. Choosing the right surfacing material for your countertop involves assessing both aesthetics and functionality:
Marble for elegance and durability.
Tile for versatility and ease of maintenance.
Petroleum-based coatings for long-lasting protection.
Advantages of Countertop Resurfacing Over Replacement
Countertop resurfacing offers notable cost savings compared to full replacement. Instead of investing a significant amount in new materials, you can opt for a resurfacing solution that delivers a fresh, updated look without the hefty price tag. This method not only preserves your existing structure but also allows for a wide range of finishes, whether you prefer a sleek metal look or the warmth of a butcher block design.
Moreover, the resurfacing process minimizes disruption in your home. Unlike replacement, which often involves extensive remodel work and lengthy downtime, resurfacing typically takes less time and can be completed quickly by an expert. This efficiency means you can return to your normal routine sooner while still achieving the aesthetic improvements you desire.
Another advantage is the ability to achieve a high-quality finish that rivals new materials. Using a quality primer and modern resurfacing techniques, you can attain a flawless surface without the imperfections that might arise from a new installation. By selecting the right materials and expert services, your countertops can maintain their beauty and functionality for years, providing long-term value that replacement option struggles to match.
Expected Lifespan of Resurfaced Countertops
The expected lifespan of resurfaced countertops largely depends on the materials used and how well you maintain them. Generally, countertops resurfaced with high-quality materials can last between 5 to 10 years. Using a good sealant and waterproofing methods can significantly enhance durability by protecting surfaces from water damage and stains, which are common issues in both kitchens and bathrooms.
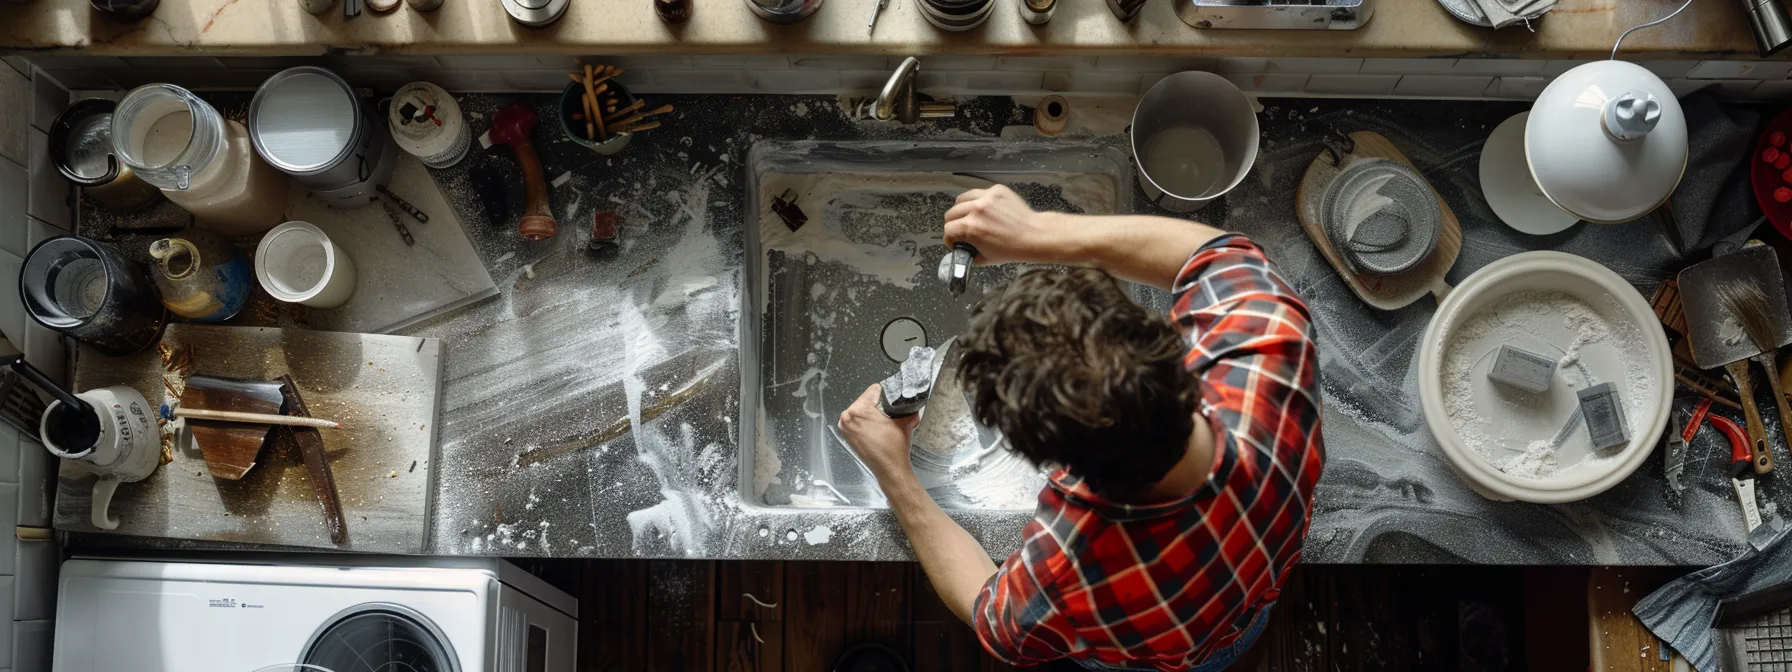
Regular maintenance is essential to extending the lifespan of your resurfaced countertops. Clean them using a gentle sponge and a mild detergent to avoid damaging the surface. You may also consider applying a protective mineral-based sealant every couple of years, as this can help maintain the original appearance while safeguarding against everyday wear and tear.
If you notice any signs of wear, addressing them promptly can prevent more extensive damage. For instance, using a paintbrush to apply touch-up coats of sealant can effectively prolong the life of your countertop finishes. By following these simple care tips, you can keep your resurfaced countertops looking great and functional for years to come.
Now that you understand what resurfaced countertops are, it’s time to keep them looking their best. Establishing a daily maintenance routine will protect your investment and enhance the beauty of your space.
Establishing a Daily Maintenance Routine
Choosing the right cleaning products is essential for maintaining your resurfaced countertops in both the bathroom and kitchen. You will learn gentle cleaning techniques that prevent surface damage while ensuring long-lasting beauty. Additionally, tips on avoiding scratches and stains during daily use will help you keep your surfaces looking pristine. This quick guide will equip you with practical insights for daily care.
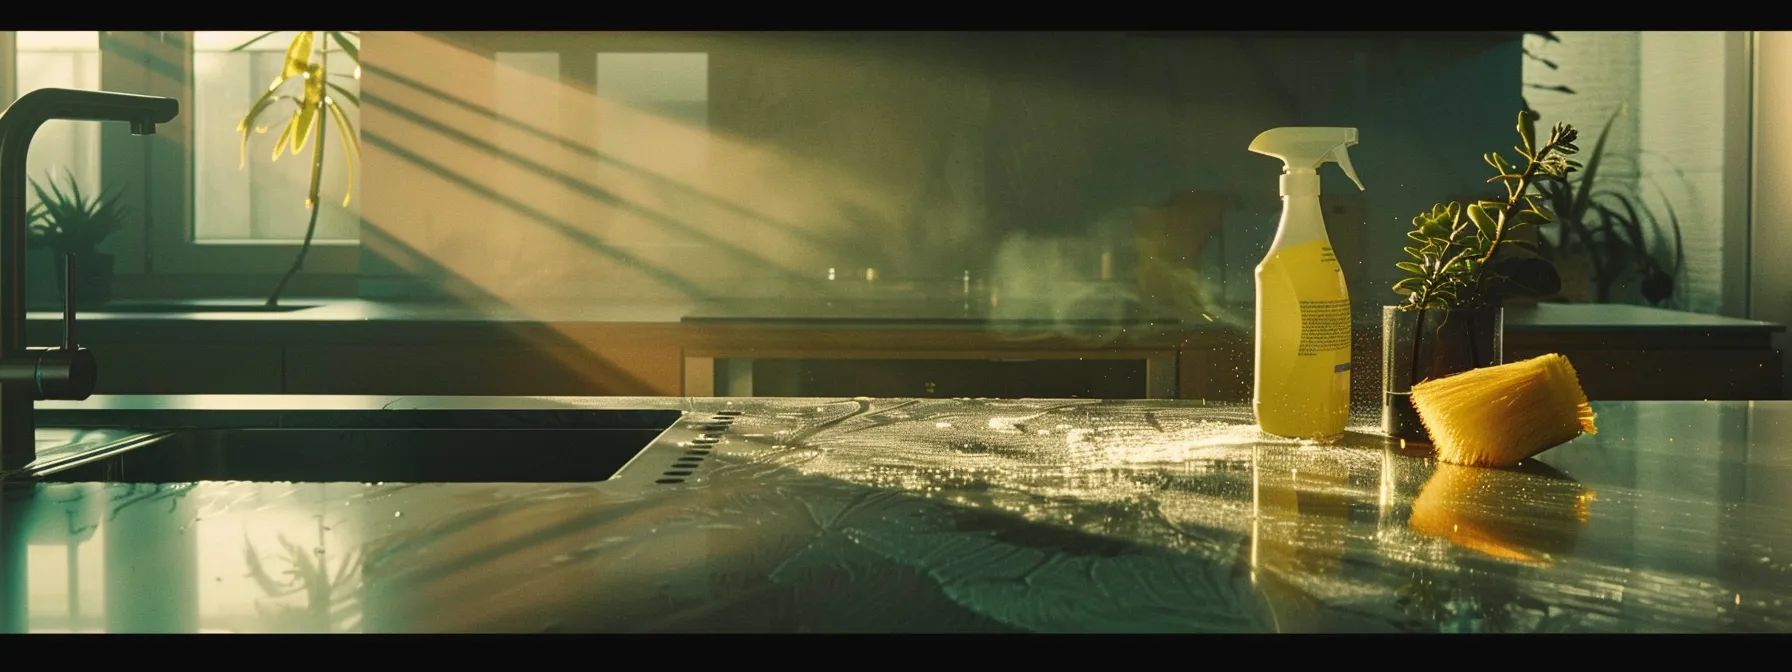
Choosing the Right Cleaning Products
When maintaining your resurfaced countertops, selecting the right cleaning products is crucial. Avoid harsh chemicals that can damage materials like epoxy or formica. Instead, opt for gentle soaps that effectively lift stains without harming the surface. For example, a mild dish soap mixed with water works well for daily cleaning, ensuring you remove residues while preserving the integrity of your countertops.
For specific materials such as soapstone, which is known for its durability, you can use specialized cleaners designed for natural stone. These products help to maintain the beauty and functionality of the surface without causing wear. Additionally, if you encounter stubborn stains on particle board surfaces, using a mixture of baking soda and water can help lift the stain effectively while keeping your countertop safe from damage.
Remember to regularly check the labels of your cleaning products. Avoid any cleaners containing bleach or ammonia, as these can negatively impact the finish of your resurfaced countertops. By prioritizing appropriate cleaning products and routines, you can protect your investment and keep your surfaces looking their best for years to come.
Gentle Cleaning Techniques to Prevent Surface Damage
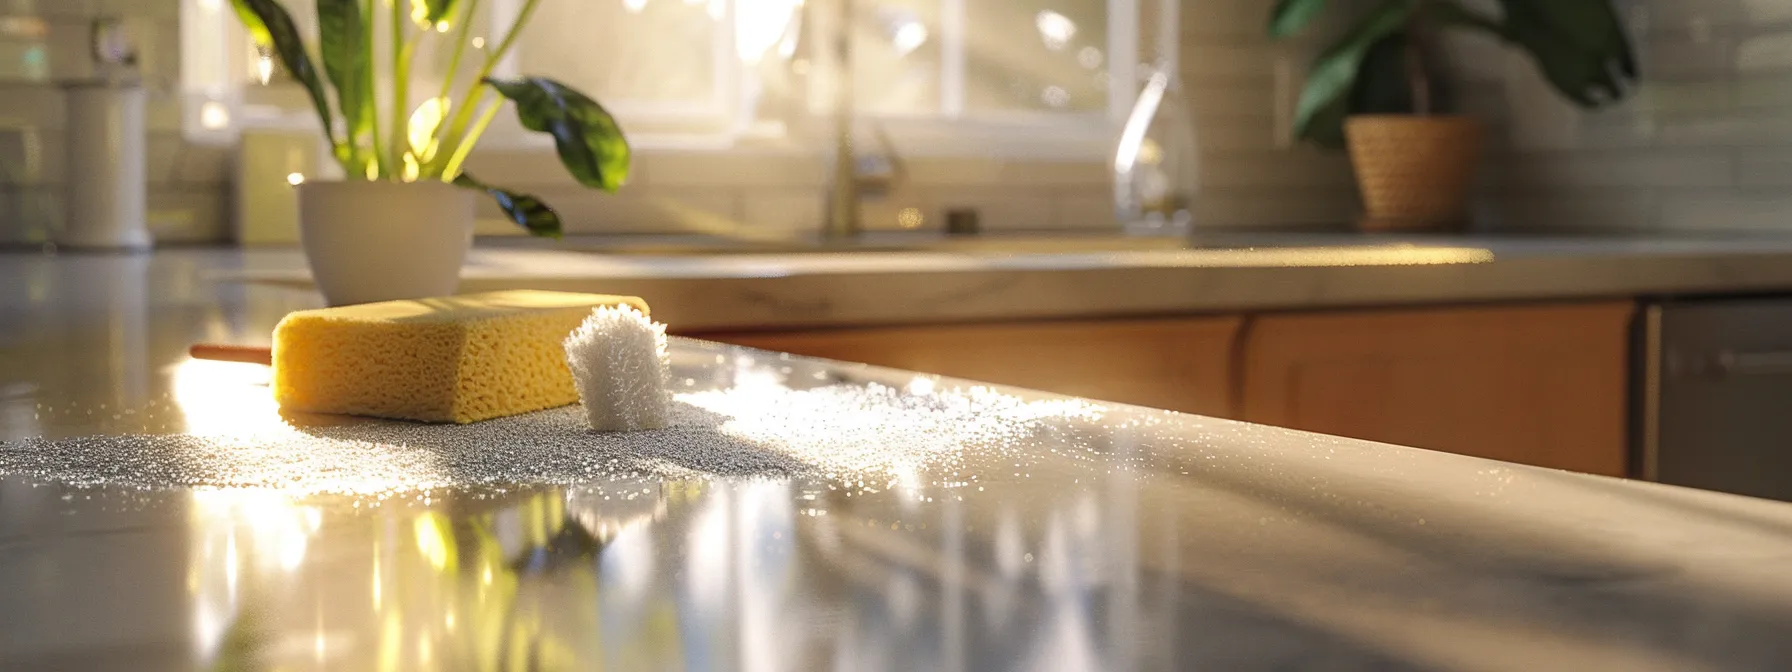
To maintain the beauty of your resurfaced countertops, use gentle cleaning techniques that protect the surface from damage. For everyday cleaning, avoid abrasive tools like sandpaper, which can scratch your countertop. Instead, opt for a soft cloth or sponge combined with a mild soap solution to gently lift dirt and oil, ensuring your surfaces remain pristine without harming the finish.
When it comes to specific areas like the shower, it’s crucial to be cautious. Water and moisture can affect countertops, particularly around sinks or bathtubs, so drying these surfaces after use can prevent soap scum and mineral buildup. Using specialized cleaners designed for your countertop material can further enhance its durability while avoiding any harm from harsh chemicals.
It is beneficial to establish a routine that incorporates regular maintenance checks. Inspect your countertops periodically for any signs of wear, and touch up with appropriate sealers as needed. By combining careful cleaning with timely upkeep, you align your home improvement efforts with practical care, ensuring your resurfaced countertops last for years to come:
Use soft cloths or sponges for cleaning.
Avoid sandpaper and harsh tools.
Dry surfaces regularly, especially in the shower.
Utilize specialized cleaners for your countertop material.
Regularly check for signs of wear and perform touch-ups.
Tips to Avoid Scratches and Stains During Daily Use
To prevent scratches on your resurfaced countertops, avoid using abrasive items, such as certain types of plastic scrubbing pads or tools that might contain sand particles. Instead, choose soft cloths or sponges for cleaning your surfaces. This simple change in cleaning habits can significantly extend the life of your countertops, maintaining both their appearance and functionality.
When working near your sink, be mindful of placing heavy objects directly on the countertop without protection. Use a cutting board or a mat made of polyurethane to shield the surface from scratches and dents. This not only offers you a designated area for food preparation but also prevents damage from accidentally dropping utensils or dishes.
Routine inspections are key to maintaining your countertops. Look for any signs of wear, and address them quickly to avoid larger issues. If you notice any scratches or marks from daily use, use a gentle polishing product specifically designed for your resurfaced material. Regular upkeep in this manner will keep your countertops looking pristine and help you to enjoy their benefits for many years.
Daily care keeps your surfaces looking sharp. But even the best routine needs backup to shield your countertops from wear and tear.
Protecting Your Countertops From Damage
To protect your resurfaced countertops from damage, focus on using cutting boards and protective mats to prevent scratches. Managing heat exposure is crucial to avoid warping, especially in high-traffic areas like Bathrooms and Kitchens. Additionally, be cautious with spills and cleaners to prevent chemical damage, ensuring your cabinetry and surfaces remain in top condition for years to come.
Using Cutting Boards and Protective Mats
Using cutting boards is essential in maintaining the pristine condition of your resurfaced countertops, especially when you are working with materials like quartz and Caesarstone. These surfaces are durable but can still be scratched by sharp utensils if proper precautions aren’t taken. By making it a habit to always use cutting boards, you can significantly prolong the lifespan of your countertops and keep them looking new.
Additionally, incorporating protective mats can provide extra security for your countertops, particularly in high-use areas like your kitchen cabinet spaces. These mats are especially beneficial if you frequently place pots or pans directly on your surfaces, which can cause scratches or heat exposure damage. Choosing mats made from materials like ceramic or porcelain can add an extra layer of protection, ensuring that your countertops remain in excellent condition.
When you choose to use cutting boards and protective mats, you are investing in the long-term care of your resurfaced countertops. This proactive approach not only minimizes the potential for scratches and damage but also enhances your overall kitchen experience. By caring for your surfaces now, you can enjoy their beauty and functionality for the years to come, reflecting the value of attention to detail in your home maintenance routine.
Managing Heat Exposure to Prevent Warping
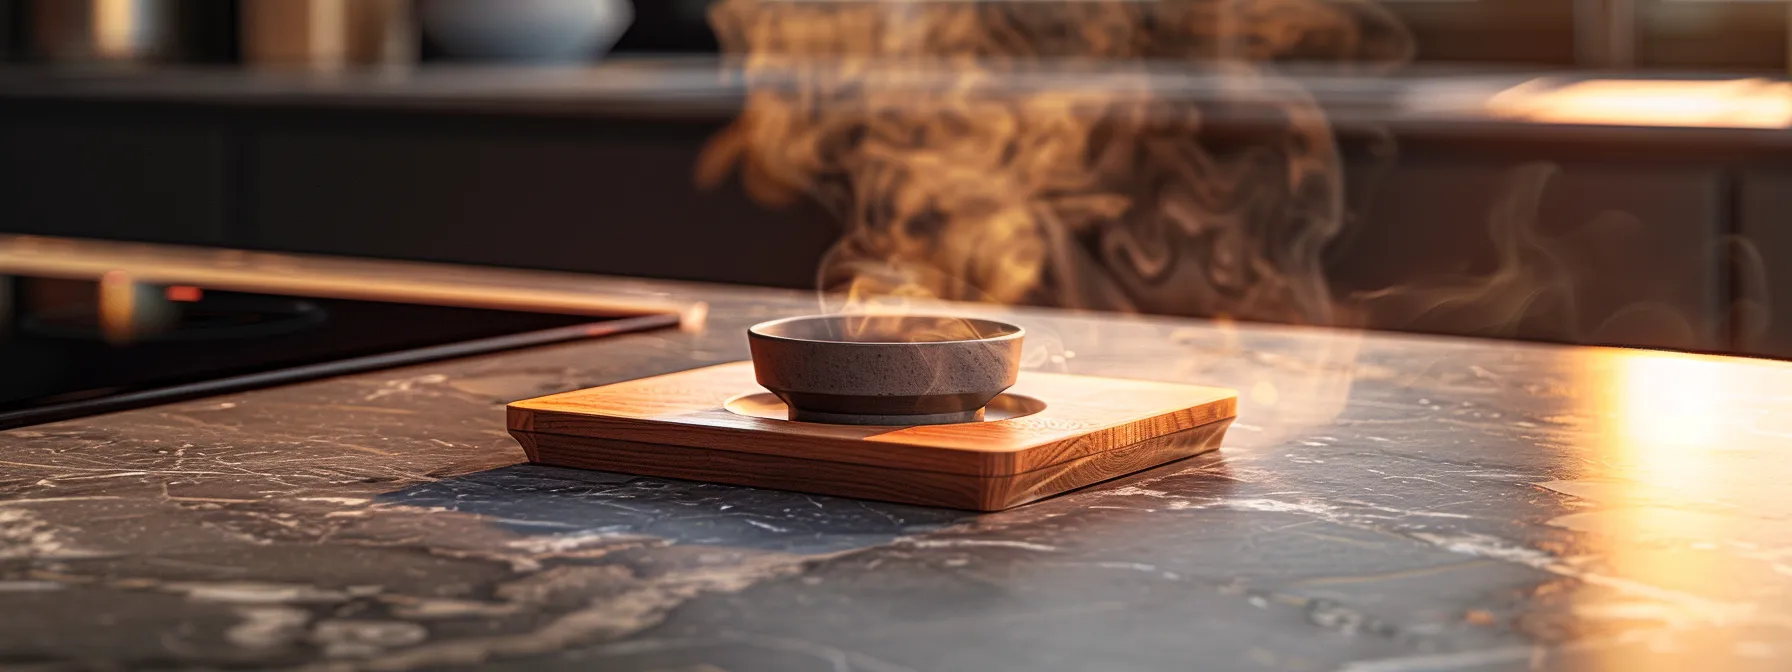
To prevent warping in your resurfaced countertops, particularly those made from solid surface materials, managing heat exposure is essential. Always use trivets or hot pads when placing hot pots or pans on your countertops. This simple act of attention can significantly reduce the risk of heat damage and help maintain the integrity of your surfaces over time.
During a kitchen remodel or routine cooking, be mindful of the temperature of items you set down. Avoid placing very hot or extremely cold items directly on the countertop, as temperature extremes can weaken the material. By taking precautions in daily activities, you can minimize wear and tear that may result from improper heat exposure.
Another effective way to protect your countertops from heat-related warping is to use cutting boards consistently. Avoid using abrasive utensils directly on the surface, as this can exacerbate the risks of heat damage. Maintaining this practice not only safeguards your countertops but also enhances their longevity, allowing you to fully enjoy their functional beauty for years to come.
Preventing Chemical Damage From Spills and Cleaners
To prevent chemical damage to your resurfaced countertops, it’s crucial to be mindful of the products you use, especially during kitchen remodeling projects. For instance, when cleaning surfaces made of materials like Corian or resin, always opt for gentle, non-abrasive cleaners that avoid harmful chemicals. This helps maintain the integrity of the surface without causing discoloration or deterioration.
When spills occur, act quickly to clean them up before they can penetrate the surface. Harsh substances, including those found in some adhesives and cleaners, can lead to long-lasting damage if left unattended. Aiming to use pH-balanced cleaning solutions can further protect your countertops, ensuring they remain in excellent condition while preserving their original finish.
In areas with stainless steel elements, such as sinks or appliances, be especially cautious. The interaction between certain cleaners and stainless steel can cause spotting or damage over time. By keeping your countertops protected from direct exposure to abrasive cleaning agents, you can extend their lifespan and maintain their beauty throughout the years.
Your countertops deserve more than just protection; they need attention. By delving into periodic deep cleaning and care, you can ensure they shine and last for years to come.
Periodic Deep Cleaning and Care
Regular maintenance of your resurfaced countertops is essential for longevity and performance. You will learn effective methods for removing tough stains without damaging the surface, ensuring the beauty of materials like engineered stone remains intact. Additionally, you’ll discover when and how to reapply sealants or finishes to maintain their protective layer, as well as the importance of scheduling professional maintenance checks to address wear and uphold your warranty.
Removing Tough Stains Without Harming the Surface
To effectively remove tough stains from resurfaced countertops, you’ll want to start by using soft, non-abrasive cleaning tools. For instance, a gentle sponge or cloth paired with a mixture of mild dish soap and water can work wonders. Avoiding harsh chemicals is key, as they may damage surfaces made from solid materials, such as quartz or recycled plywood.
If you encounter stubborn stains, consider using a paste made from baking soda and water. Apply this solution directly to the stain, letting it sit for a few minutes before gently rubbing with a cloth. This method can remove deep-set stains without harming the finish of your resurfaced countertop, allowing you to maintain both its beauty and durability.
Additionally, if you’re dealing with oily or greasy stains, using a solution of vinegar and water can be effective. Spray this mixture on the stained area, allow it to penetrate for a short time, and then wipe clean with a soft cloth. Regular attention to these stains not only keeps your countertops looking pristine but also ensures the longevity of the surface materials you’ve chosen for your kitchen or bathroom.
When and How to Reapply Sealants or Finishes
Reapplying sealants or finishes is essential to maintaining the protective layer of your resurfaced countertops. You should consider doing this every few years, depending on the materials used and the wear your surfaces undergo. Regular evaluation of the surface will help you determine the right time for reapplication, allowing you to prevent damage from stains and moisture over time.
To begin the reapplication process, ensure that your countertops are clean and completely dry. Use a gentle cleaning solution to remove any residue, and then allow the surface to air dry thoroughly. Once prepared, apply the chosen sealant uniformly using a soft cloth or applicator, allowing adequate time for it to set as per the manufacturer’s instructions.
Staying proactive about sealing your countertops not only enhances their longevity but also helps you maintain their aesthetic appeal. By consistently monitoring your surfaces and reapplying sealants as needed, you can protect your investment and ensure that your countertops remain beautiful and functional for years to come.
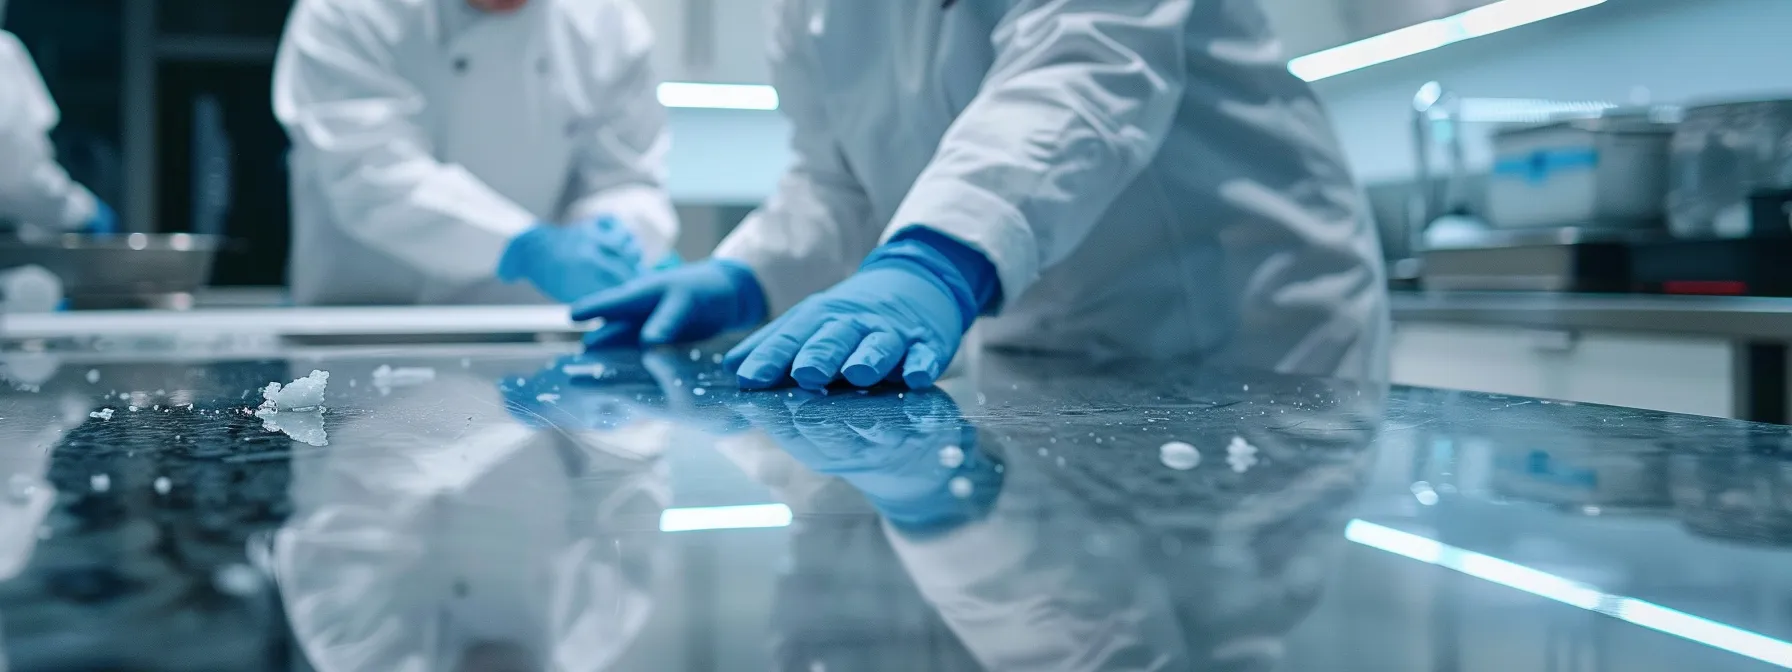
Scheduling Professional Maintenance Checks
Scheduling professional maintenance checks for your resurfaced countertops is a proactive step that significantly contributes to their longevity and performance. By enlisting expert services, you gain access to specialized knowledge and tools that can effectively address any wear or damage that may occur over time. Regular assessments help identify potential issues before they escalate, ensuring that your countertops remain in excellent condition.
During these professional checks, technicians can evaluate the integrity of the surfaces and recommend necessary treatments, such as resealing or refinishing. This process not only enhances the protective layers but also maintains the beauty of your countertops, which is essential for spaces like kitchens and bathrooms. Keeping these areas looking pristine contributes to the overall value of your home, making it an important aspect of home care.
As part of your countertop maintenance routine, consider setting a schedule for these checks based on usage and material. For instance, high-traffic kitchen surfaces may require more frequent visits compared to bathroom countertops. By prioritizing professional maintenance, you ensure your investment is well cared for, thereby extending its life and ensuring consistent functionality.
Even with regular care, every surface may show signs of wear. Addressing these minor damages will restore the beauty and function of your kitchen and bathroom.
Repairing Minor Damages and Wear
Repairing Minor Damages and Wear
Identifying early signs of wear and tear on your resurfaced countertops can prevent more extensive damage. You will learn about effective DIY repair methods for small scratches and chips that can be easily addressed. Additionally, understanding when to consult a professional for repairs ensures your countertops remain in top condition, maximizing their lifespan and beauty.
Identifying Early Signs of Wear and Tear
Identifying early signs of wear and tear on your resurfaced countertops is crucial for maintaining their beauty and functionality. Look for surface scratches or dull spots that can develop over time due to daily use. These imperfections may seem minor initially, but addressing them promptly can prevent more extensive damage down the line.
Another warning sign to watch for is discoloration or stains that may appear on the surface. If you notice areas where the color has faded or where stains have not responded to regular cleaning, it could indicate that the protective finish is wearing off. Timely detection of these issues allows you to take preventive measures before they compromise the integrity of your countertops.
Additionally, be aware of any cracks or chips that may form, particularly around edges or high-traffic areas. Regularly inspect your countertops for these signs and act quickly to repair them using appropriate methods to ensure lasting quality. Maintaining a proactive approach to care can help extend the life of your resurfaced countertops:
Look for surface scratches and dull spots.
Watch for discoloration or stubborn stains.
Inspect for cracks or chips in high-traffic areas.
DIY Repair Methods for Small Scratches and Chips
To repair small scratches on resurfaced countertops, start by cleaning the affected area with a mild soap solution. After drying the surface thoroughly, you can use a touch-up kit specifically designed for your countertop material. Apply the color-matching compound with a clean, soft cloth, ensuring a smooth and even finish that blends seamlessly with the surrounding area.
For minor chips, consider using a specialized filler to restore the surface. Carefully follow the manufacturer’s instructions for mixing and application. Once the filler has dried, gently sand the area with fine-grit sandpaper to achieve a level finish that matches the rest of your countertop.
After completing your repairs, it’s important to seal the area to extend its lifespan. Use a suitable sealant and apply it evenly over the repaired surface, which will help protect it from future damage. Regular inspections will allow you to catch new wear before it escalates, ensuring that your resurfaced countertops remain beautiful and functional for a long time.
Knowing When to Consult a Professional for Repairs
Knowing when to consult a professional for repairs on your resurfaced countertops is essential for maintaining their quality and appearance. If you notice significant scratches, deep chips, or cracks that are beyond DIY repair, seeking expert help can prevent further damage. Professionals have the right tools and materials to efficiently repair these issues, ensuring your countertops remain functional and visually appealing.
Another critical factor is the extent of wear and tear that develops over time. If discoloration or stubborn stains persist despite your best cleaning efforts, it may be time to reach out to a professional. They can assess the underlying cause and recommend effective solutions, such as refinishing or resealing, to restore your countertops to their original condition.
Finally, always consider the material of your countertops when deciding on repairs. Certain surfaces, like engineered stone or resin, may require specialized care that only a professional can provide. By consulting an expert, you not only safeguard your investment but also ensure that any repairs are done correctly, extending the lifespan of your resurfaced countertops.
Even small repairs help a countertop endure. To truly protect your investment, consider the lasting strategies that ensure your surfaces stay beautiful for years to come.
Long-Term Strategies for Countertop Longevity
Regular inspections and care schedules are vital for maintaining the longevity of your resurfaced countertops. Implementing eco-friendly practices ensures sustainable maintenance while preserving the environment. Additionally, attention to detail will help you maintain the aesthetic appeal of your countertops over time. Each of these strategies contributes to the durability and beauty of your surfaces, allowing you to enjoy them for many years.
Regular Inspection and Care Schedules
To maintain the longevity of your resurfaced countertops, establish a regular inspection schedule. You should check for scratches, stains, and signs of wear at least once a month. These inspections will help you catch any potential issues early, allowing for timely maintenance and avoiding costly repairs down the line.
In addition to inspections, create a care schedule that details when to clean, reseal, or apply any protective measures. For instance, you might decide to clean your countertops bi-weekly and reseal them every six months, depending on their usage. This routine ensures you’re proactively caring for your investment, prolonging the surfaces’ beauty and durability.
Documentation can be helpful in tracking your inspections and maintenance efforts. You might consider keeping a log or calendar that highlights each activity, making it easier to stay consistent. A combination of structured inspections and diligent care allows you to enjoy the lasting benefits of your resurfaced countertops:
Schedule monthly inspections for scratches and stains.
Create a care schedule for cleaning and resealing.
Maintain a log of inspections and maintenance activities.
Eco-Friendly Practices for Sustainable Maintenance
Adopting eco-friendly practices for maintaining your resurfaced countertops helps you safeguard the environment while ensuring their longevity. You can start by using natural cleaning solutions made from everyday ingredients, such as vinegar and baking soda. These options effectively clean without introducing harmful chemicals that could damage your countertops or the surrounding ecosystem.
Another sustainable approach involves choosing biodegradable cleaning products specifically designed for countertop surfaces. Many brands offer eco-friendly alternatives that are safe for both your home and the planet. By selecting these products, you minimize the environmental impact while ensuring that your countertops receive the care they deserve.
Additionally, consider implementing a routine check to monitor your resurfaced countertops for wear and tear. By catching small issues early, you can address them with minimal materials and effort, reducing waste and promoting sustainability. With these strategies in place, you will maintain the beauty of your surfaces while being mindful of your environmental footprint:
Use natural cleaning solutions like vinegar and baking soda.
Select biodegradable cleaning products for countertop maintenance.
Implement regular inspections to catch wear and tear early.
Maintaining the Aesthetic Appeal Over Time
To maintain the aesthetic appeal of your resurfaced countertops over time, consistently clean them using appropriate techniques and products. You should focus on gentle cleaning products to prevent surface damage while removing dirt and stains. Regular maintenance not only enhances the beauty of your countertops but also contributes to their longevity, ensuring they continue to look fresh and inviting.
Additionally, consider incorporating seasonal touch-ups into your maintenance routine. Inspect your countertops for minor scratches or dull spots and address them promptly. Applying appropriate sealants as needed will help preserve the original finish and beauty of your surfaces, enabling them to shine brightly throughout the years.
Finally, pay attention to your surroundings to protect the visual appeal of your countertops. Avoid placing heavy appliances directly on the surface and use protective mats where necessary. By being mindful of your countertop‘s environment, you can prevent unsightly marks and damage, allowing your resurfaced surfaces to serve as a stunning focal point in your kitchen or bathroom for years to come.
Conclusion
Maintaining resurfaced countertops is crucial for preserving their beauty and functionality over time. By implementing regular inspection schedules, choosing eco-friendly cleaning practices, and promptly addressing minor damages, you can significantly extend the lifespan of your surfaces. Consistent care not only enhances the aesthetic appeal but also protects your investment against wear and tear. Prioritizing these essential long-term care tips ensures that your countertops remain a stunning focal point in your home for years to come.
Are you looking to revitalize your kitchen or bathroom benchtops but unsure which materials offer the best results? Benchtop refinishing can transform your space, but choosing the right products—like wax, resin, epoxy, or oil—can be overwhelming. This guide will break down various refinishing materials and help you select the best fit for your project. You’ll learn how to evaluate the environmental impact, gather necessary tools, and execute a successful refinishing project. By the end, you’ll feel confident in making decisions that lead to beautiful and durable surfaces, addressing your concerns about quality and longevity.
Key Takeaways
Assess your benchtop’s condition to choose suitable refinishing materials
Selecting durable finishes enhances both aesthetics and functionality for high-use areas
Prioritize low-VOC products for a healthier indoor environment during refinishing
Proper preparation is essential for achieving optimal results in refinishing projects
Regular maintenance protects your refinished surfaces from wear and extends their life
Understanding the Essentials of Benchtop Refinishing Materials
To effectively refinish your benchtop, start by assessing your Fimagine Website current countertop condition. This evaluation will guide you to determine suitable material options, including plastic or stone coat finishes. Next, consider the balance between cost and quality, focusing on critical factors like durability and chemical resistance. This approach will ensure you make informed, creative choices for your project.
Assessing Your Current Benchtop Condition
When assessing your current benchtop condition, start by inspecting for any signs of damage, such as chips, scratches, or water damage. Granite surfaces, while durable, are not immune to deterioration. Be sure to check if the finish is intact or if it has faded, as this can affect the longevity of the refinishing project.
Next, test for any stains or discoloration by applying a small amount of vinegar on different areas of the surface. If you notice an immediate reaction or the vinegar seeps into the stone, it may indicate the need for a primer to prepare the benchtop for refinishing. Understanding how well your benchtop stands up to basic household substances will help you choose the right finishing materials.
Lastly, evaluate the overall aesthetic appeal of your benchtop. Consider how it fits with your kitchen or bathroom design and whether it meets your personal style. Calculating the cost of materials against their durability and appearance ensures that you select the most suitable refinishing options, enhancing not only the look but also the function of your countertop.
Identifying Suitable Material Options
When selecting materials for benchtop refinishing, it’s important to consider how well they withstand wear and tear. Solid surface materials offer durability and are relatively resistant to scratches and stains. On the other hand, ceramic surfaces can provide an elegant look while being hygienic and resistant to bacteria, making them a great option for kitchens and bathrooms.
Butcher block is another popular choice, offering a warm, natural aesthetic. Though it might show signs of wear more quickly than other materials, regular maintenance can keep it looking fresh. Additionally, if you work in a home laboratory or similar spaces, choose finishes that can handle spills and resist chemicals, ensuring that your benchtop remains functional and vibrant over time.
Lastly, evaluate your personal style and the practical uses of the benchtop. If you prioritize aesthetics but need functionality, solid surface options provide a versatile canvas that can be customized to your preferred colors and designs. Always remember to match the material choice with the specific requirements of your space, balancing appearance with performance for the best results.
Balancing Cost and Quality
When it comes to refinishing your benchtop, balancing cost and quality is essential for achieving the best results. While it may be tempting to choose the cheapest materials available, investing in high-quality products will enhance the durability and appearance of your countertop. For example, opting for environmentally friendly finishes may cost a bit more upfront, but they often provide better long-term performance and require fewer chemicals, which benefits both you and the environment.
Consider the type of finish you want to apply. If you’re using a paintbrush for stain application, choose a product specifically designed for your benchtop material, whether it’s metal, wood, or stone. This careful selection will minimize issues like bubbling or peeling, ensuring a smooth and professional appearance that stands the test of time. Finding a balance means being willing to invest in proper tools and materials that suit your project.
It’s also crucial to take into account the maintenance required for different materials. Some finishes may appear stunning at first, but if they require excessive upkeep to maintain their look, the initial savings can quickly diminish. By selecting a durable option that can withstand wear on a daily basis, you ensure your benchtop remains functional and visually appealing in your kitchen or bathroom, making it an investment worth considering for both cost and quality in the long run.
You have grasped the essentials of benchtop refinishing materials. Now, let’s look closer at the different types you can choose from and how each can transform your space.
Exploring Various Material Types for Refinishing
When refinishing your benchtop, consider the advantages of epoxyresin coatings for their durability and glossy finish. Acrylic refinishing kits offer user-friendly solutions with a quick drying time. Utilizing polyurethane finishes can enhance wood surfaces, while considering natural stone overlays provides a sophisticated touch, such as marble, enhancing your interior design. Each option has unique benefits to elevate your space.
Advantages of EpoxyResin Coatings
One significant advantage of epoxyresin coatings is their exceptional durability. When applied correctly, they create a robust surface that can withstand everyday wear and tear in both kitchens and bathrooms. This makes them ideal for busy areas where scratches from sandpaper or daily usage are common, as they maintain their integrity and finish over time, enhancing your cabinetry and overall design.
Additionally, epoxyresin coatings offer a stunning, glossy finish that elevates the aesthetic appeal of your benchtops. The shine of epoxy can mimic the appearance of natural stone, such as quartz, without the hefty price tag. This allows you to achieve a high-end look for your project while still adhering to your budget, ensuring your refinished surfaces look polished and professional.
Application of epoxy is also user-friendly. You can easily apply it with a brush, allowing for a smooth and even coat. For the best results, proper preparation, including sanding the surface to create a suitable base, is essential. By investing time in preparation, you ensure that the epoxy adheres well, providing a long-lasting finish that you can be proud of in your home.
Benefits of Acrylic Refinishing Kits
Acrylic refinishing kits provide a user-friendly option for refreshing your benchtop without the need for replacing it entirely. These kits often come in a variety of colors and finishes, allowing you to match your countertop with your kitchen or bathroom décor while enhancing its aesthetic appeal. Using an acrylic kit can often be a more sustainable choice, as it promotes recycling by extending the life of your existing surfaces rather than discarding them.
Another advantage of acrylic refinishing kits is their superior hygiene standards. Acrylic finishes create a smooth, non-porous surface that is resistant to bacteria and mold growth, making them an ideal choice for busy kitchens and bathrooms. This characteristic provides peace of mind, knowing that your benchtop remains clean and safe for food preparation and other activities.
The liquid form of acrylic makes for easy application, whether you are a beginner or an experienced DIYer. The kits typically include all the necessary tools and detailed instructions, allowing you to achieve a professional-looking result without hiring a contractor. This convenience means you can take on your project confidently, saving both time and money while updating your space with a durable finish that stands the test of time:
Benefits
Description
User-Friendly
Acrylic kits are easy to apply, making them suitable for DIY projects.
Hygiene
They create a non-porous surface that resists bacteria and mold.
Sustainability
Promotes recycling by refurbishing rather than replacing surfaces.
Variety
Available in multiple colors and finishes to match design preferences.
Cost-Effective
Less expensive option compared to complete countertop replacement.
Utilizing Polyurethane Finishes
Utilizing polyurethane finishes can significantly enhance the durability of your benchtop, whether you’re working with engineered stone, concrete, or steel. These finishes create a strong protective layer that shields your surfaces from scratches and stains, making them an ideal choice for high-traffic areas in your kitchen or bathroom. This level of protection ensures your countertop remains pristine after a makeover, minimizing the impact of daily wear and tear.
A major advantage of polyurethane is its versatility, allowing you to apply it to a variety of materials, including wood and engineered stone. This type of finish results in a clear, glossy surface that not only enhances the appearance of your benchtop but also makes cleaning easier. Regular dusting and wiping with a damp cloth will keep your surfaces looking new, ensuring that maintenance does not become a burden.
When applying polyurethane finishes, it’s crucial to prepare your benchtop properly to achieve the best results. This involves sanding the surface well to create a smooth base, enhancing adhesion. Adequate preparation and application will yield a clean and long-lasting finish, ensuring your kitchen or bathroom remains attractive and functional over time:
Material Type
Benefits of Polyurethane Finishes
Engineered Stone
Protects against scratches while enhancing the glossy surface.
Concrete
Provides a durable shield, making cleaning effortless.
Steel
Prevents rust and maintains its attractive finish.
Considering Natural Stone Overlays
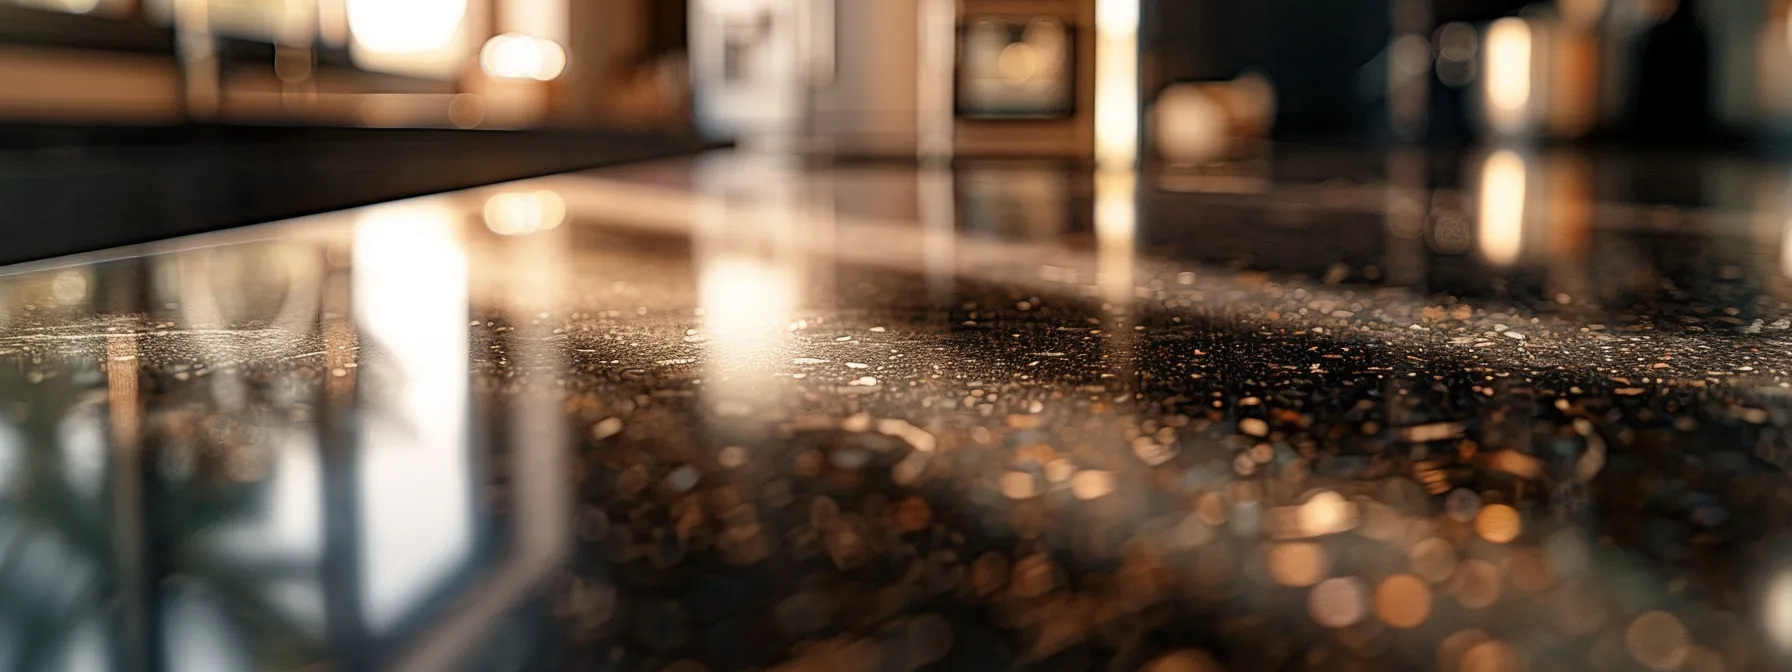
Considering natural stone overlays for your benchtop can significantly enhance both aesthetics and functionality in your kitchen or bathroom. These materials, such as granite or quartz, are known for their durability, resisting cracks and chips that often occur in high-use areas. When properly maintained, these surfaces can also withstand the etching that can be caused by acidic substances, ensuring your benchtop remains both beautiful and resilient over time.
Natural stone offers distinct advantages in terms of hygiene, as it can effectively resist bacteria common in kitchens, especially around sinks and food preparation areas. This characteristic keeps your kitchen cabinet surfaces safe and clean, providing peace of mind while cooking or handling food. Additionally, the non-porous variants of these stones prevent liquids from seeping into the surface, reducing the risk of stains and enhancing overall cleanliness.
Another notable benefit of natural stone overlays is their ability to elevate the appearance of your space. By choosing finishes that complement your kitchen cabinet design, you create a cohesive and stylish look. The natural beauty of stone adds a touch of elegance, making it ideal for those who wish to invest in a high-end appearance without the need for complete countertop replacement.
Now that you’ve seen the different materials used for refinishing, it’s time to focus on what fits your needs best. Choosing the right material is the key to ensuring lasting beauty and functionality in your space.
Selecting the Right Material for Your Specific Needs
Matching materials to your kitchen or bathroom environments is key when selecting for benchtop refinishing. Consider the specific needs of high-use areas, prioritizing durability and easy maintenance. Additionally, opting for surfaces that provide heat and scratch resistance will ensure longevity. This section will explore the benefits of various materials, including mineral, tile, and silicon options that align with a minimalist aesthetic.
Matching Materials to Kitchen or Bathroom Environments
When selecting materials for your benchtop refinishing, consider how they fit into your kitchen or bathroomrenovation. Durability is critical, especially in high-use areas. For instance, choosing soapstone offers excellent heat resistance and is easy to clean with just soap and water, ensuring it remains attractive and functional.
Adhesion is another essential factor. If you plan to use polyurethane finishes, ensure that the underlayment is properly prepared to create a strong bond. This preparation can include sanding the surface adequately to enhance adhesion, which will ultimately extend the longevity of your refinished countertop.
Each material has its strengths. For instance, while a solid surface material may provide a sleek look, soapstone may offer more resilience against scratches and heat. Evaluate your lifestyle and usage patterns to inform your decisions for a benchtop that meets your needs effectively:
Material Type
Benefits
Soapstone
Heat resistant and easy to clean with soap.
Polyurethane Finishes
Strong adhesion and lasting durability.
Solid Surface
Sleek appearance and versatile design options.
Choosing Materials for High-Use Areas
When choosing materials for high-use areas, consider how well they can withstand wear and tear. Hardwood surfaces, while beautiful and warm, may require more maintenance to protect against scratches and moisture. By selecting hardwood finishes that emphasize grain patterns and are treated for added durability, you can ensure a lasting aesthetic appeal without sacrificing functionality.
Sustainability also plays a crucial role in material selection for high-traffic spaces. Opting for eco-friendly options not only contributes to a healthier environment but often results in more resilient surfaces. By understanding the impact of moisture on various materials, you ensure that your benchtop will perform optimally, no matter how frequently it is used.
Ultimately, the right material choice for high-use areas should balance aesthetics with practicality. A durable finish that resists wear will save you time and effort in the long run, allowing you to maintain your kitchens or bathrooms without constant upkeep. Investing in the right materials now can significantly enhance both your space and daily routine:
Material Type
Benefits
Hardwood
Warm aesthetics; requires good maintenance against moisture.
Sustainable Options
Environmentally friendly; generally more resilient.
Durable Finishes
Resistance to wear; easy maintenance; lasting performance.
Opting for Heat and Scratch Resistance
When opting for materials that provide heat and scratch resistance, it’s crucial to consider how well they can handle everyday kitchen tasks. For instance, materials like travertine offer an appealing blend of beauty and durability, making them suitable for busy environments. By applying a high-quality sealant, you can enhance the resistance of your benchtop against both heat and abrasion, ensuring it maintains its visual appeal over time.
Choosing the right finish for your benchtop is essential, especially if you want to avoid unnecessary damage from everyday use. A surface that withstands heat and resists scratches will prevent wear and tear, ultimately extending the lifespan of your kitchen countertop. Remember, synthetic materials often outperform natural stones in terms of scratch resistance, but mixing materials can offer a unique aesthetic while maintaining functionality.
Lastly, making informed choices about materials can also have a positive impact on the environment. By selecting durable surfaces that withstand heat and scratches, you reduce the likelihood of needing replacements, which can lead to less waste in landfills. Investing in resilient materials ensures you enjoy a beautiful benchtop that meets your practical needs while being mindful of your ecological footprint.
Choosing the right materials sets the stage, but the choices don’t end there. Next, consider how these options impact your health and the environment, shaping a better future for your home and family.
Evaluating Environmental and Health Factors
When evaluating materials for benchtop refinishing, focusing on low-emission options is vital for healthier indoor environments in your Bathrooms and Kitchens. Understanding VOCs in refinishing products will help you select safer choices, while opting for sustainable and eco-friendly materials contributes to responsible home improvement. These considerations will guide your decisions and ensure your refinishing project aligns with both safety and environmental goals.
Selecting Low-Emission Materials
When selecting materials for your benchtop refinishing, prioritizing low-emission options is essential for maintaining a healthy indoor environment. Look for products that are labeled as low-VOC (volatile organic compounds), as these materials emit fewer harmful chemicals into the air. This choice can significantly reduce potential health risks, ensuring a safer space for you and your family during and after the refinishing process.
Consider using water-based finishes and adhesives, which typically contain lower levels of VOCs compared to their solvent-based counterparts. These options not only improve air quality but also make cleanup easier, as water is the primary solvent. By opting for these environmentally friendly choices, you enhance the safety and functionality of your kitchen or bathroom without compromising on performance.
Additionally, researching the source of your materials can lead you to sustainable suppliers who emphasize eco-friendly practices. This commitment often translates to responsible manufacturing methods, further ensuring that the products you use are both safe and environmentally conscientious. Choosing low-emission materials reflects your dedication to health and sustainability, ultimately benefiting both your living space and the planet.
Understanding VOCs in Refinishing Products
Volatile Organic Compounds (VOCs) are chemicals found in many refinishing products, including paints, stains, and sealants. These compounds can evaporate into the air, potentially leading to indoor air quality issues, which may affect your health over time. Understanding the VOC levels in the products you choose is essential for creating a safe environment during and after your benchtop refinishing project.
When selecting materials, look for options labeled as low-VOC or no-VOC. These products emit significantly fewer harmful chemicals, reducing the risks associated with inhalation and exposure. You may notice that water-based finishes often have lower VOC levels compared to oil-based alternatives, making them a healthier choice for your kitchen or bathroom.
Not only do low-emission products enhance indoor air quality, but they also contribute to a more eco-friendly approach to refinishing. By choosing sustainable materials and finishes, you’re making a conscious decision that benefits both your home and the environment. This choice reflects your commitment to responsible home improvement practices and improves your space’s overall safety:
Type of Product
VOCs Level
Health Impact
Oil-Based Finishes
High
Increased risk of respiratory issues
Water-Based Finishes
Low
Safer for indoor air quality
Low-VOC Products
Very Low
Minimal health risks
Choosing Sustainable and Eco-Friendly Options
Choosing sustainable and eco-friendly options for your benchtop refinishing project can significantly reduce your environmental impact. When selecting materials, look for those made from recycled content or sustainably sourced woods. These choices not only contribute to responsible home improvement but can also provide unique aesthetic appeal, ensuring your space stands out.
Using low-VOC products is another way to prioritize sustainability and health. Water-based finishes are often available with low volatile organic compound emissions, making them a safer choice for indoor air quality. This approach helps create a healthier environment for you and your family, minimizing exposure to harmful chemicals during and after the refinishing process.
Finally, consider the longevity of the materials you choose. Investing in durable options reduces the frequency of replacements, leading to less waste over time. By focusing on sustainable and eco-friendly solutions, you not only enhance the appearance of your benchtop but also support a cleaner, greener future for yourself and your community:
Material Type
Environmental Impact
Benefits
Recycled Content
Reduces waste
Unique aesthetic with lower environmental cost
Low-VOC Products
Improves air quality
Safer for indoor spaces
Durable Finishes
Less frequent replacements
Saves time and resources
The air was thick with thoughts on health and the environment. Now, it was time to gather the right tools and supplies to bring new life to your space.
Gathering the Necessary Tools and Supplies
Gathering the necessary tools and supplies is crucial for a successful benchtop refinishing project. Begin by identifying essential tools that ensure a smooth application, such as brushes, sanders, and protective gear. Next, learn how to find quality materials at local and online retailers, allowing you to select the best options for your project. Finally, determine whether DIY kits or professional supplies better suit your needs and expertise, ensuring you achieve the desired results effectively.
Essential Tools for a Successful Refinishing Project
To kick off your benchtop refinishing project, ensure you have high-quality tools that simplify the process. A sturdy sander is essential for prepping your countertop by smoothing out imperfections and enhancing adhesion. Selecting either a hand sander or a powered sander will depend on the size and material of your benchtop, giving you control over the finish.
Brushes and rollers are necessities for applying your chosen finish evenly. Choose brushes specifically designed for the type of material you’re using; for instance, synthetic bristles work well with water-based finishes while natural bristles are best for oil-based products. Opting for a high-quality roller can also help in achieving a smooth, streak-free application, which is crucial for a professional look.
Lastly, don’t overlook the importance of protective gear. Safety glasses, gloves, and masks protect you from dust and fumes during the refinishing process. Ensuring your workspace is safe is just as important as selecting the right materials for your benchtop, as it allows you to work confidently and effectively while adhering to safety standards.
Finding Quality Materials at Local and Online Retailers
To find quality materials for your benchtop refinishing project, start by exploring local home improvement stores. These retailers often carry a wide selection of resurfacing products, including paints, coatings, and adhesives. You can consult with knowledgeable staff who can guide you in selecting materials that suit your specific needs and offer practical advice based on your project’s requirements.
Online retailers also present a convenient option for sourcing quality materials. Websites specializing in home improvement supplies often feature detailed product descriptions and user reviews, which can help you assess the value of different options. Before making a purchase, take advantage of the comparison features to ensure you’re getting the best materials for your budget and aesthetic preferences.
Additionally, consider checking out specialty shops that focus on resurfacing and restoration products. These suppliers often carry high-quality materials not typically found in larger retail chains. By diversifying your sourcing strategy, you position yourself to find the ideal products that will enhance the outcome of your benchtop refinishing project. Here’s a quick checklist to aid your search:
Research local home improvement stores
Visit online retailers for convenience
Check specialty shops for unique materials
Consult product reviews before purchasing
Ask staff for recommendations
Comparing DIY Kits vs. Professional Supplies
When comparing DIY kits to professional supplies for your benchtop refinishing project, consider the level of control and customization each option offers. DIY kits often simplify the process, presenting all necessary materials in one package, making them accessible for those new to refinishing. However, while these kits are convenient, they may lack the flexibility and high-quality ingredients found in professional supplies, which can lead to superior results.
Professional supplies, on the other hand, typically allow you to select specific products tailored to your benchtop’s unique material and condition. This choice can lead to better adhesion and longevity for your refinished surfaces. If you have previous experience or are willing to learn, investing in professional materials often provides a more durable finish that enhances the overall look of your kitchen or bathroom.
Ultimately, your decision should align with your project goals and skill level. If you prioritize ease and a straightforward application, a DIY kit is a practical choice. Conversely, if you’re looking for long-lasting quality and are prepared to invest time and effort, using professional supplies will likely yield a more satisfying outcome. Here’s a checklist to guide your selection:
Assess your skill level and experience with refinishing.
Determine if you value convenience or customization.
Research different brands to compare materials and reviews.
Consider the specific needs of your benchtop material.
Weigh the long-term benefits of professional supplies against the ease of DIY kits.
With tools in hand, you’re ready for action. Each step in your refinishing project matters, and a few smart tips can make all the difference.
Tips for a Successful Refinishing Project
To achieve a successful benchtop refinishing project, focus on effectively preparing the surface to ensure proper adhesion. Applying materials correctly will lead to optimal results, while routine maintenance can extend the life of your refinished surfaces. You will also learn how to avoid common refinishing mistakes, enhancing your overall experience and outcome in this process.
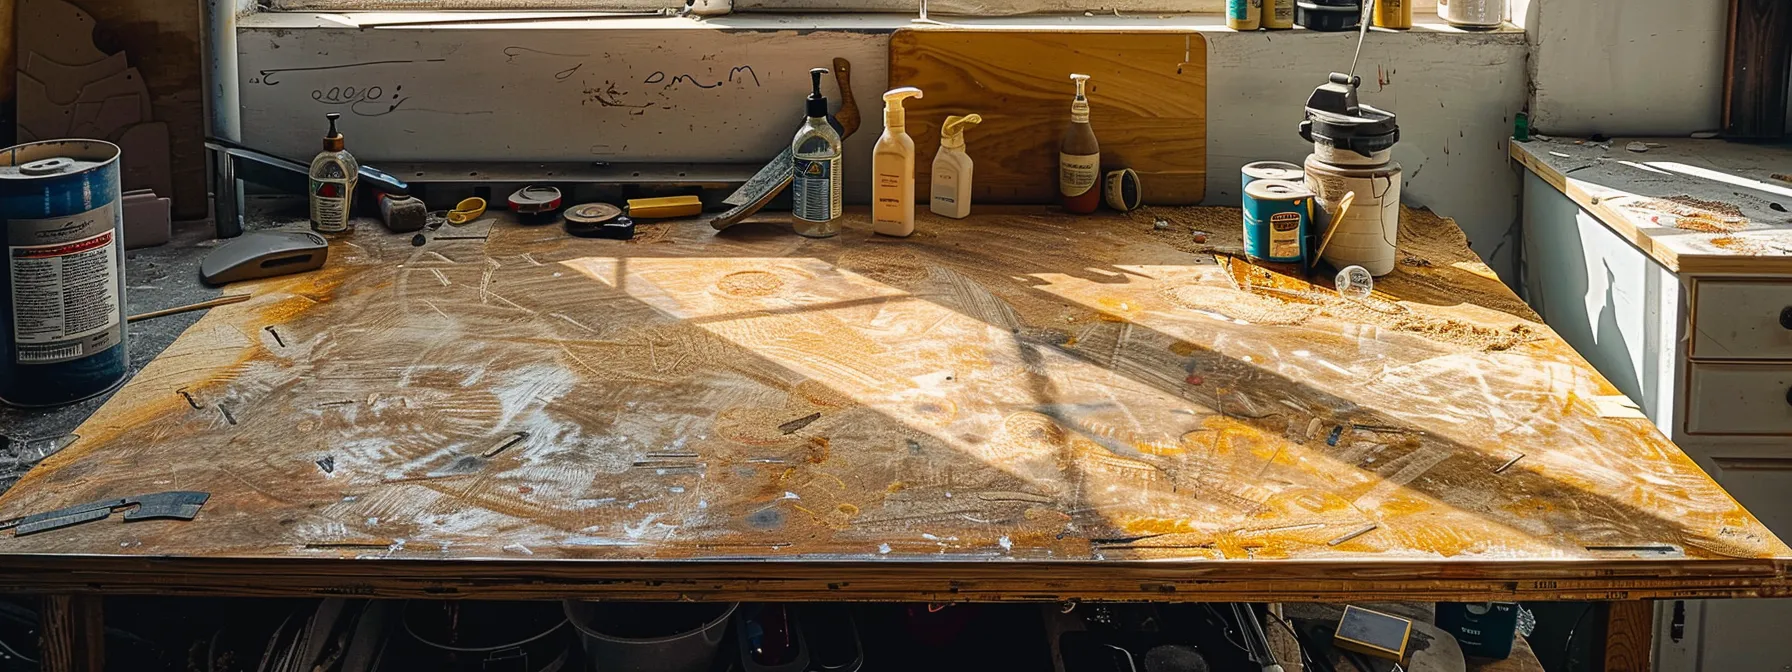
Preparing the Surface Effectively
Preparing the surface is a vital step in the benchtop refinishing process. Start by cleaning the countertop thoroughly to remove any oils, dirt, or residues that could interfere with adhesion. You can use a mixture of warm water and a gentle cleaning solution, followed by a rinse and drying to ensure a clean base for the refinishing materials.
Once cleaned, inspect the surface for imperfections such as scratches, chips, or stains, which may need addressing before applying any refinishing products. Sanding plays a critical role here; using sandpaper or a sander helps smooth uneven areas and creates a rough texture that encourages better adhesion. Ensure you wear protective gear to avoid inhaling dust particles during this process.
After sanding, wipe down the surface with a damp cloth to eliminate any dust particles that could compromise the finish. Following this thorough preparation will significantly enhance the longevity and appearance of your refinished benchtop, making it essential for achieving the best results from your chosen materials.
Applying Materials for Optimal Results
To achieve optimal results in your benchtop refinishing project, start by selecting the right application technique for your chosen material. For example, when using epoxyresin, applying it with a brush allows for an even coating that helps avoid bubbles or uneven surfaces. Ensure you follow the manufacturer’s instructions for mixing and curing times, as this will greatly influence the final look and longevity of your refinished surface.
It’s essential to work in a well-ventilated area when applying refinishing products, especially those with strong odors or chemicals. Proper ventilation not only ensures your safety but also promotes better drying times, resulting in a more durable finish. Take your time during this process; rushing can lead to mistakes that compromise the quality of your work, leaving you dissatisfied with the end result.
Once you’ve applied your chosen materials, be patient as they cure properly. This step is crucial in ensuring the bond between the material and the benchtop is strong, providing the durability you expect from your refinishing project. Regular maintenance after the application, such as gentle cleaning and avoiding harsh chemicals, will help preserve that fresh look, keeping your countertops both beautiful and functional for years to come.
Ensuring Longevity With Proper Maintenance
To ensure the longevity of your refinished benchtop, establish a consistent maintenance routine. Regularly cleaning the surface with a mild detergent and soft cloth prevents buildup of dirt and grime, which can cause scratches and dullness over time. Avoid harsh chemicals, as they may damage the finish and compromise the protective layers of the materials used.
Another important aspect of maintaining your benchtop is to address any spills or stains immediately. Quickly wiping up substances like oils, sauces, and liquids will prevent them from setting into the material, which can lead to discoloration or more significant damage. This proactive approach allows you to keep the surface looking fresh and preserves the aesthetic appeal of the refinishing.
Lastly, consider periodic inspections of the surface for signs of wear, such as scratches or fading. If you notice any issues, take prompt action by applying a touch-up coat or using a rejuvenating product designed for your specific benchtop material. This attention to detail ensures your refinished surface remains functional and visually appealing, enhancing the overall experience in your kitchen or bathroom.
Avoiding Common Refinishing Mistakes
Avoiding common refinishing mistakes is essential to achieving a professional-looking result. One frequent error is neglecting surface preparation. You must clean and sand the benchtop thoroughly before applying any materials to ensure proper adhesion. Skipping this step can lead to peeling or bubbling finishes, undermining the durability of your refinishing project.
Another common mistake is using the wrong application technique for your chosen materials. Each finish, such as epoxy or acrylic, requires specific methods for optimal results. Following the manufacturer’s instructions closely can prevent issues like uneven surfaces or extended drying times. Patience during this stage pays off by ensuring a flawless finish.
Lastly, forgetting to use protective gear can result in health risks and impair your refinishing experience. Always wear safety glasses, gloves, and masks to safeguard yourself from dust and fumes. By taking these precautions and learning from others’ mistakes, you can create a beautiful, long-lasting benchtop that enhances your kitchen or bathroom space:
Ensure thorough surface preparation.
Follow application techniques specific to your chosen materials.
Use protective gear to maintain health and safety.
Conclusion
Choosing the right materials for benchtop refinishing is crucial for achieving a durable and aesthetically pleasing surface. By assessing your current benchtop condition and matching materials to your specific needs, you can enhance both functionality and style in your kitchen or bathroom. Prioritize low-emission and eco-friendly options to promote a healthier indoor environment while enjoying beautiful finishes. Ultimately, informed decisions lead to successful refinishing projects that stand the test of time, making your investment worthwhile.
Are you tired of your worn-out benchtop but worried about the cost of replacement? With easy DIY benchtop resurfacing techniques, you can breathe new life into your surfaces using materials like laminate or formica. In this guide, you’ll learn important basics, essential tools like sandpaper and adhesive, and a step-by-step process that includes preparing your benchtop and applying a new finish. By following these tips, you’ll save money and gain satisfaction from transforming your space while avoiding common mistakes that can hinder your project. Enjoy a beautiful, refreshed benchtop in no time!
Key Takeaways
benchtop resurfacing revitalizes surfaces without full replacement, saving money and reducing waste
proper preparation, including cleaning and priming, is essential for achieving durable finishes
consider using sealants to protect surfaces from moisture, stains, and scratches
using cutting boards prevents scratches, while trivets protect against heat damage
regular maintenance, including cleaning and touch-ups, keeps your resurfaced benchtop looking fresh
Understanding Benchtop Resurfacing Basics
Benchtop resurfacing involves refinishing surfaces to restore or enhance your kitchen or workspace without complete replacement. It offers benefits like cost savings and less waste. You’ll learn to identify suitable materials like butcher block and plywood, understand safety measures for DIY projects, and choose the right resurfacing method using a sprayer. Each aspect plays a crucial role in achieving a refreshed look that aligns with your interior design vision. FImagine Home Page
What Is Benchtop Resurfacing
Benchtop resurfacing is a process that rejuvenates the appearance of your kitchen or workspace surfaces without the need for a full replacement. This technique allows you to apply a new finish over existing materials, such as laminate, metal, or even marble, to bring new life to your countertops. This approach not only saves you money but also minimizes waste, making it an environmentally friendly option.
During resurfacing, you have the opportunity to choose from a variety of finishes, including stains and paint coats, to achieve the desired look. Using a primer is essential for ensuring proper adhesion, especially on smooth or glossy surfaces. By selecting suitable materials and methods, you can create a personalized look that complements your space while extending the life of your surfaces.
DIY benchtop resurfacing empowers you to transform your surfaces effectively. You can easily customize your workspace or kitchen to match your style preferences. Just remember, preparation is key: cleaning surfaces thoroughly, applying the right primer, and following up with quality paint or stain will help you achieve the best results. Consider these steps for a successful project:
Assess the current condition of your benchtop.
Choose appropriate materials such as stains or coatings.
Prepare the surface with cleaning and priming.
Apply the finish using a sprayer for even coverage.
Benefits of Resurfacing Instead of Replacing
Choosing to resurface your benchtops instead of replacing them can lead to significant cost savings. A complete replacement involves not only the expense of new materials like granite or laminate but also the labor costs associated with installation. By using methods like spray painting or applying an epoxy finish, you can achieve a fresh look without breaking the bank, making it a smart financial decision for your kitchen or workspace makeover.
Another important advantage of resurfacing is the minimal waste generated compared to a full replacement. When you refinish your existing surfaces, you contribute less to landfills and help the environment. This eco-friendly approach not only supports sustainable practices but also allows you to transform your space in a way that feels responsible and conscientious.
Lastly, resurfacing opens up a world of customization options. Whether you choose a modern spray painting technique or use a brush for detailed work, you have full control over the final appearance. With various finishes and colors available, you can tailor the look of your benchtops to match your personal style and the overall decor of your home, making each project a unique expression of your vision.
Identifying Suitable Benchtop Materials
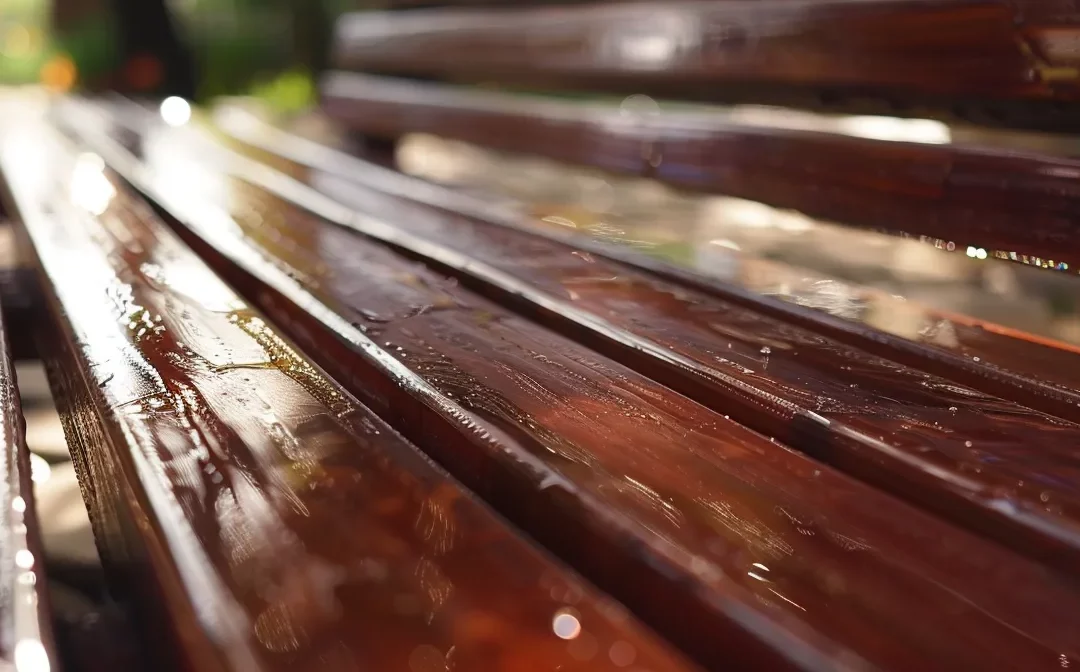
When selecting suitable benchtop materials for resurfacing, consider the existing surface you want to revitalize. Common options include laminate and wood, which can be easily sanded and refinished. If your benchtop is made from sturdier materials like stone, you can enhance its appearance with a high-quality stone coat, providing a fresh look without the need for a complete replacement.
Resin is another excellent choice for benchtop resurfacing, particularly in Bathrooms and Kitchens where moisture resistance is essential. Applying a resin coating can not only protect the surface but also offer a wide range of finishes that suit your personal style. Ensure proper preparation by sanding the surface, which promotes better adhesion for the resin finish.
It’s essential to keep in mind the overall design of your cabinetry and surrounding decor when selecting your resurfacing materials. Your choice should harmonize with your space while providing durability and functionality. By thoughtfully choosing materials, like a chocolate brown resin for a contemporary kitchen or a light hue for a bathroom, you can achieve an attractive and cohesive aesthetic in your home.
Safety Measures for First-Time DIYers
When starting your do it yourself benchtop resurfacing project, safety should be your priority. Make sure to wear protective gear such as gloves, safety goggles, and a mask. These items will guard against potential dust, fumes from sealants, and any chemical exposure involved in working with materials like tile or wood grain finishes.
Before you begin applying finishes or sealants, ensure your workspace is well-ventilated. This helps reduce the buildup of harmful fumes, creating a safer environment for you while you work. Additionally, make sure to clear the floor of any clutter, as a safe and organized area will prevent accidents and make your resurfacing process smoother.
Familiarize yourself with the tools and materials you will use. For instance, if you plan to work with tile, know the best practices for cutting and fitting pieces together. Understanding how to properly use and maintain your tools minimizes the risk of injury and ensures the longevity of your equipment, allowing for a successful DIY resurfacing project.
Choosing the Right Resurfacing Method
Choosing the right resurfacing method depends on the material of your benchtop and your desired outcome. For example, if you are working with a slate surface, using a specialized slate paint can enhance its natural appearance while providing a protective coat. For surfaces made of steel, consider applying a durable epoxy finish to ensure longevity and resistance to scratches.
If your benchtop features a mica laminate, you may benefit from using a primer designed for laminate surfaces before applying a paint or stain. This step is crucial for proper adhesion, ensuring that your new finish lasts longer. When resurfacing plastic counters, look for a spray-on coating that bonds well with plastic, as this method provides a smooth finish while reducing the risk of peeling.
In addition, consider the location of your benchtop. If it’s near a sink or constantly exposed to moisture, you should choose a waterproof finish. A high-quality resin coating is an ideal choice for this scenario, as it not only protects against water damage but also allows for various colors and textures that can match your style preferences. By selecting a method tailored to your material and usage, you can achieve a professional-looking result in your DIY resurfacing project.
Now that you grasp the basics of benchtop resurfacing, it’s time to focus on the tools needed for the job. With the right materials at hand, you can turn your old surfaces into something remarkable.
Essential Tools and Materials Needed
Gathering the necessary equipment is the first step in your DIY benchtop resurfacing journey. You will need quality resurfacing products like paints or coatings suitable for materials such as quartz and wood. Options that fit your budget are important, so explore local hardware stores for reliable supplies. Preparing your workspace effectively will set the stage for a successful project, whether you are refreshing your kitchen cabinet or updating your laundry room.
Gathering the Necessary Equipment
To kickstart your DIY benchtop resurfacing project, gather the essential tools and materials needed for a successful home improvement. Begin with high-quality polyurethane for your finish, as it provides excellent durability and a smooth look. A foam roller or brush will help you apply the polyurethane evenly, ensuring a professional finish without visible lines.
Next, you should consider the types of powders and adhesives that may be needed for specific resurfacing tasks. If you’re working with laminate surfaces, a primer designed specifically for this material can enhance adhesion and prevent peeling in the long run. Additionally, having a good-quality mask on hand will protect you from dust and fumes while you work, ensuring a safe environment.
Finally, prepare your workspace to ensure a smooth project experience. Gather drop cloths or tarps to keep your area clean and free from spills. Organize your tools and materials so they are easily accessible, making the resurfacing process seamless:
High-quality polyurethane finish
Foam roller or brush
Specialized primer for laminate surfaces
Powders and adhesives for specific materials
Protective mask for safety
Drop cloths or tarps for workspace preparation
Selecting Quality Resurfacing Products
When selecting quality resurfacing products, it’s important to consider the type of surface you are working with and the desired outcome for your renovation project. If you’re resurfacing a solid surfacecountertop, choose a high-quality acrylic or polyurethane finish that offers durability and a smooth appearance. For concrete benchtops, look for specialized concrete coatings that provide both protection and an appealing aesthetic, ensuring a long-lasting result.
Pay attention to the pigments used in your selected products, as they can significantly impact the final look of your resurfaced area. A good-quality paint or stain will contain rich pigments that deliver vibrant colors while maintaining their integrity over time. This is crucial for achieving a polished appearance, especially on walls or countertops where durability against wear and tear is necessary.
Additionally, ensure that the resurfacing products you select are easy to apply and compatible with your workspace conditions. For instance, if you are working indoors, opt for low-VOC (volatile organic compounds) options that minimize fumes while still providing effective coverage. This consideration not only enhances your comfort during the renovation process but also contributes to a healthier indoor environment.
Affordable Options for Beginners
When starting your DIY benchtop resurfacing project, you can find affordable options that won’t strain your budget. For instance, consider using basic materials like latex paint specifically designed for countertops or a low-cost polyurethane finish. These choices not only provide a fresh look but also ensure durability for your surfaces in bathrooms and kitchens.
Additionally, look for options that help minimize dust and create a safe workspace. Investing in a quality dustmask and drop cloths can protect both you and your room while you work. The right protective gear allows you to focus on the task, making the resurfacing process smoother and more enjoyable.
Ultimately, you should focus on sourcing materials that fit your project needs without overspending. Explore hardware stores or online resources that offer budget-friendly resurfacing products. Remember, quality doesn’t have to come at a high price:
Latex paint designed for countertops
Low-cost polyurethane finish
Protective masks to reduce dust exposure
Drop cloths for workspace protection
Budget-friendly resurfacing kits
Where to Find Reliable Supplies
Finding reliable supplies for your DIY benchtop resurfacing project is crucial for achieving great results. Local hardware stores are often a good starting point, as they carry a variety of resurfacing products, including paints, primers, and protective finishes. You can ask staff for recommendations based on your specific project needs, ensuring you select the right materials tailored to your benchtop surface.
In addition to local shops, consider checking online retailers for specialized resurfacing supplies. Websites often have a broader selection of products, allowing you to compare brands and prices easily. Make sure to read customer reviews to gain insight into the reliability and effectiveness of the products you’re considering. This approach can help you make informed choices and budget more effectively for your project.
Don’t overlook the value of community resources, such as neighborhood groups or DIY forums. You can often find recommendations for trusted suppliers and tips from fellow DIYers who have successfully completed similar projects. Engaging with others in the community not only helps you source quality supplies but can also provide valuable insights to enhance your benchtop resurfacing experience.
Preparing Your Workspace
Preparing your workspace is a vital step in your DIY benchtop resurfacing project. Start by selecting a location with ample natural light and ventilation to ensure a safe and comfortable environment. Clear the area of any obstructions, such as furniture or appliances, to create a clutter-free workspace that allows you to move freely and focus on the task at hand.
Next, gather all the necessary tools and materials before you begin. Having everything organized and within reach will streamline your workflow and reduce the chances of misplacing items during the resurfacing process. Use drop cloths or tarps to protect the surrounding surfaces from spills and dust, keeping your workspace clean and reducing cleanup time later.
Finally, ensure that your workspace is well-ventilated to promote a safe working environment. Open windows or use fans to create airflow, which will help dissipate any fumes from paints or sealants. By maintaining a clean and organized workspace, you set the stage for a more efficient and enjoyable resurfacing experience:
Key Preparation Steps
Tips for Success
Choose a well-lit location
Ensure sufficient natural light and ventilation
Clear the area of clutter
Create space for movement and focus
Gather all essential tools
Organize materials for easy access
Use protective coverings
Prevent spills and dust accumulation
Ensure proper ventilation
Open windows and use fans if needed
With your tools ready, it’s time to focus on the surface that needs your attention. Preparing your benchtop will set the stage for a smooth and successful resurfacing experience.
Preparing Your Benchtop Surface
To achieve a successful DIY benchtop resurfacing, begin by thoroughly cleaning and removing old finishes. This step ensures a solid foundation for your new surface. Next, repair any damages and imperfections to create an even base. Use effective sanding techniques for a smooth surface, and protect surrounding areas to prevent accidental messes. Lastly, ensure a dust-free environment for optimal results.
Cleaning and Removing Old Finishes
Start by cleaning your benchtop to remove any dirt, grease, or old finishes that may interfere with the new layer. Use a mild detergent mixed with warm water and a soft cloth or sponge. This step not only prepares your surface for better adhesion but also highlights any areas that may need additional attention.
After the initial cleaning, you must address any remaining old finishes, such as paint or varnish. Consider using a chemical stripper specifically designed for resurfacing or a heat gun to soften these layers. Carefully follow the manufacturer’s instructions, as effective removal ensures a smoother, more professional-looking result in your resurfacing project.
Once you have successfully removed the old finishes, sand the surface lightly to create a rough texture that promotes better adhesion for your new coating. Use fine-grit sandpaper to avoid damaging the surface while ensuring it feels smooth to the touch afterward. This process is crucial for achieving a durable finish that enhances your benchtop’s overall appearance, making your DIY project truly effective.
Repairing Damages and Imperfections
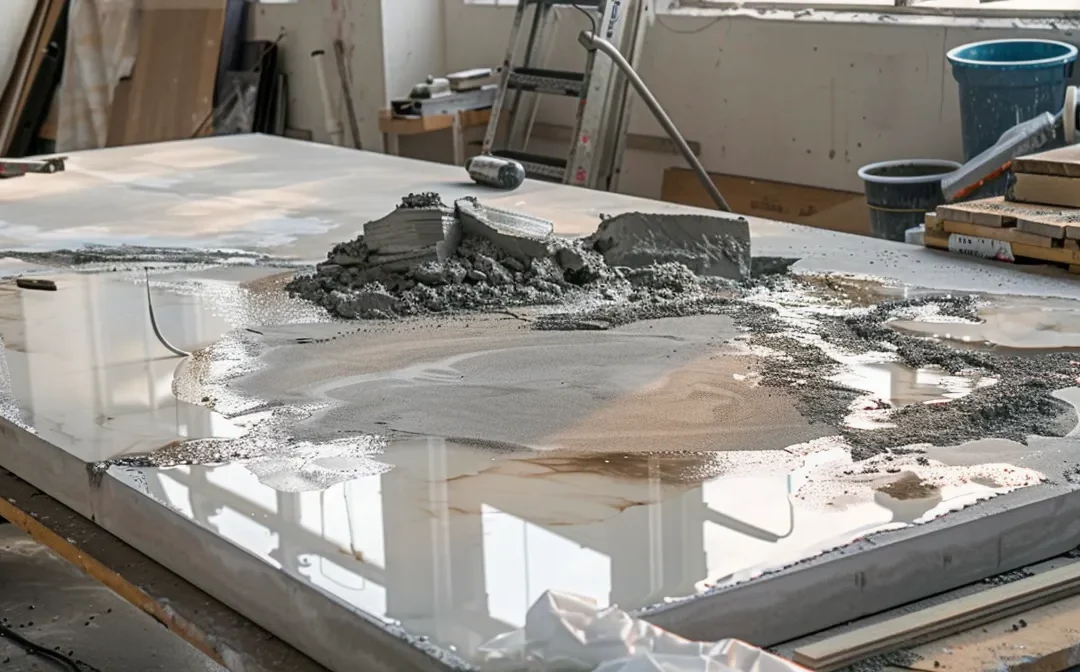
When you notice damages or imperfections on your benchtop, addressing them before resurfacing is vital for achieving a professional finish. Begin by inspecting the surface for any cracks, chips, or scratches that may disrupt the appearance of your new coating. Using wood filler or epoxy can effectively repair these areas, creating a smooth surface ready for the next steps in your resurfacing project.
Next, ensure that you properly fill in any dents or voids. Apply the chosen filler to the troubled areas and let it cure as per the manufacturer’s instructions. Once cured, lightly sand the patches until they are level with the surrounding surface. This step is essential as it prevents any unevenness from showing through the new finish, allowing for a smoother, more refined look.
After patching and sanding, double-check the entire surface for any remaining imperfections. A thorough inspection helps to catch micro-scratches or rough spots that could compromise your final result. Spending this extra time on surface repairs will enhance the durability of your resurfacing, ensuring that your benchtop looks great and stands the test of time.
Sanding Techniques for a Smooth Surface
Sanding your benchtop is a crucial step to ensure a smooth and professional finish during your DIY resurfacing project. Begin with coarse sandpaper, typically around 80-grit, to remove any rough patches and imperfections on the surface. This initial sanding will help create a solid foundation for the new coating, allowing for better adhesion during the resurfacing process.
After addressing the rough spots with coarse sandpaper, switch to a finer grit, such as 220-grit, to refine the surface further. This step smooths out any marks left by the coarser paper and prepares the surface for the application of the finish. Be sure to sand in the direction of the grain if you’re working with wood, as this will enhance the overall appearance and ensure an even look when the coating is applied.
Once you’ve completed sanding, clean the surface thoroughly to remove any dust and debris. A clean workspace is essential for achieving optimal results in your resurfacing project. To summarize the sanding techniques for a smooth surface, follow these steps:
Start with 80-grit sandpaper for initial smoothing.
Progress to 220-grit sandpaper for a finer finish.
Sand in the direction of the grain for wood surfaces.
Thoroughly clean the surface to remove dust before resurfacing.
Protecting Surrounding Areas
Before you begin your benchtop resurfacing project, it’s essential to protect the surrounding areas to prevent any accidental damage. Start by covering nearby surfaces with drop cloths or plastic sheeting. This simple step will shield your cabinets, floors, and appliances from drips, spills, and dust during the resurfacing process, ensuring a cleaner and safer work environment.
Additionally, use painter’s tape to mask off edges and trim where your benchtop meets other surfaces. This technique helps create clean lines and prevents any finish from seeping onto the areas you want to keep untouched. By taking the time to carefully tape off these areas, you can achieve a more professional-looking result without the worry of paint or coatings staining your cabinetry or walls.
Finally, ensure your workspace is free from clutter and distractions. Organizing your tools and materials not only allows for better movement while working but also minimizes the risk of accidents. By creating a clear and protected area, you’ll not only enhance your efficiency but also set the tone for a successful DIY resurfacing project.
Ensuring a Dust-Free Environment
Creating a dust-free environment is essential for successful benchtop resurfacing. A clean workspace prevents dust and debris from settling on your freshly prepared surfaces, which can affect the adhesion of your new finish. Before you start your project, thoroughly clean the area to remove any existing dust and particles that might interfere with your resurfacing work.
While you work, it’s important to maintain a dust-free space. Use drop cloths to cover nearby furniture and floors, ensuring they stay protected from dust and overspray. You can also utilize damp cloths to wipe surfaces periodically, capturing dust in the air while you sand or prepare your benchtop.
To further reduce dust, consider using a vacuum with a HEPA filter to clean the workspace before and during your project. A well-ventilated area helps circulate air, which not only keeps the space comfortable but also minimizes airborne dust particles. By focusing on these simple yet effective strategies, you’ll create an optimal environment for your DIY benchtop resurfacing project.
With your benchtop surface prepared, the real work begins. Follow this step-by-step resurfacing guide to transform your space efficiently and effectively.
Step-by-Step Resurfacing Guide
To successfully complete your DIY benchtop resurfacing, start by applying a primer for better adhesion. You’ll then explore techniques for an even coating application, ensuring a smooth finish. Consider ways to create decorative finishes that reflect your style. Don’t forget about drying times and the importance of patience, followed by sealing for durability to protect your work.
Applying Primer for Better Adhesion
Applying primer is essential for achieving better adhesion when resurfacing your benchtops. A quality primer forms a strong bond between the existing surface and the new finish, ensuring that your hard work lasts longer. You should choose a primer that is compatible with your benchtop material to enhance adhesion and promote durability in the new coating.
Before applying primer, make sure your work area is clean and well-ventilated. This preparation will help avoid dust and debris from compromising the smoothness of your resurfaces. Using a foam roller or brush, apply a thin, even coat of primer across the surface, following the manufacturer’s guidelines for drying times to ensure optimal results.
Once the primer is dry, inspect your work to confirm there are no missed spots. This crucial step allows you to maintain an even surface, leading to a professional-looking finish once you apply your final layer. Follow these steps for successful primer application:
Choose a high-quality primer suitable for your surface.
Clean the benchtop thoroughly before priming.
Apply a thin, even coat and allow it to dry completely.
Techniques for Even Coating Application
To achieve a smooth and even coating application during your benchtop resurfacing project, it’s crucial to use the right tools. A high-quality foam roller or brush will help you apply the resurfacing material uniformly across the surface. Begin by dipping the brush or roller into your chosen coating and removing excess product to prevent drips, ensuring even coverage as you work across the surface.
Next, always apply the coating in thin layers. Thin layers dry faster and allow for better adhesion of subsequent coats. When rolling or brushing, maintain a steady motion and overlap each stroke slightly to avoid streaks or bare spots. This technique will help you achieve that professional look in your DIY project, making it easier to apply multiple coats as needed for a complete finish.
After applying your coating, allow ample drying time as indicated on the product label before adding a second coat. Be sure to check for an even finish under good lighting, as this can reveal any missed areas. If necessary, lightly sand the first layer with fine-grit sandpaper before applying the next coat for enhanced smoothness and adherence:
Step
Technique
Tips
1
Select Quality Tools
Use foam rollers or brushes for even application.
2
Apply Thin Layers
Thin layers dry faster and improve adhesion.
3
Allow Proper Drying Time
Lightly sand between coats for a smooth finish.
Creating Decorative Finishes
Creating decorative finishes on your resurfaced benchtops can significantly enhance their appearance, making the space feel fresh and inviting. You might consider using techniques like stenciling or sponge painting to achieve personalized designs that reflect your style. These methods are accessible for beginners, allowing you to infuse your creativity directly into the project.
Experimenting with different color combinations can also yield impressive results. For instance, utilizing contrasting colors can add depth and dimension to your benchtops, transforming them from ordinary to extraordinary. When applying these decorative finishes, ensure that you work in thin layers to maintain an even texture and prevent unsightly drips.
After applying your decorative finishes, sealing the surface is crucial for durability and protection. A clear topcoat will help safeguard your design against daily wear and tear while enhancing the overall sheen. By following these steps, you can achieve a stunning finish that not only looks professional but also meets your functional needs.
Drying Times and Patience
Understanding drying times is crucial for your DIY benchtop resurfacing project. Each product you use, whether it’s a primer, paint, or sealant, has specific drying times that must be followed to ensure a durable finish. Failing to allow adequate drying can lead to poor adhesion, which may result in damage or peeling in the future.
Patience is key during the resurfacing process. After applying each layer, let it dry completely before moving on to the next step. This may take anywhere from a few hours to a day, depending on the temperature and humidity levels in your workspace. By allowing sufficient time for each coat to cure, you’ll not only improve the overall finish but also extend the lifespan of your resurfaced benchtops.
If you find yourself eager to rush through the project, remind yourself that good preparation and waiting for drying times will pay off in the long run. Quality results come from attention to detail, and a little patience will yield a professional-looking surface that meets your expectations. Take the time to read the product instructions and be mindful of how they fit into your overall project schedule.
Sealing for Durability
Sealing your benchtop is a crucial step in the resurfacing process that ensures durability and longevity. After applying your desired finish, choosing a high-quality sealant protects the surface from moisture, stains, and scratches. This added layer of protection is especially important in kitchens and bathrooms, where surfaces are frequently exposed to spills and humidity.
Ensure you select a sealant compatible with the materials used in your resurfacing project for optimal performance. Apply the sealant in thin, even coats following the manufacturer’s recommendations for drying times. Taking this approach not only enhances the appearance of your new surface but also extends its lifespan, giving you peace of mind that your hard work will endure daily use.
Once the sealant has dried, perform a thorough inspection to ensure complete coverage, paying special attention to edges and corners. Sealing your benchtop effectively prevents water damage and improves overall resilience, making it easier for you to maintain its beauty over time. By prioritizing this final step, you’ll be set for a successful and long-lasting resurfacing result that meets your expectations.
You’ve learned how to resurface like a pro. Next, let’s tackle the common DIY mistakes that can trip you up along the way.
Avoiding Common DIY Mistakes
Avoiding common DIY mistakes is crucial for the success of your benchtop resurfacing project. Start by never skipping preparation steps, as they lay the groundwork for a quality finish. Understanding product instructions helps you use materials effectively while ensuring good ventilation reduces risks. Be ready for unexpected problems, and know when it’s time to seek professional help for optimal results. Each of these points is essential to navigate your project smoothly.
Not Skipping Preparation Steps
When tackling a DIY benchtop resurfacing project, preparation is the cornerstone of success. Skipping essential preparation steps can lead to a host of issues, including poor adhesion and uneven finishes. Taking the time to clean, repair, and properly sand the surface ensures that your new coating will adhere effectively, resulting in a durable and polished appearance.
For example, cleaning the existing surface thoroughly can remove grease, dust, or old finishes that may interfere with the new layer. Neglecting to do this could cause the new finish to peel off or look uneven. A consistent and prepared surface creates a solid foundation for your resurfacing project and is crucial for achieving the professional results you desire.
Additionally, evaluating the condition of your benchtop before starting will help you identify any necessary repairs. Addressing any chips or cracks ensures that these imperfections won’t show through the new finish. By committing to the preparation phase, you greatly improve your chances of achieving a successful and satisfying DIY resurfacing experience.
Preparation Steps
Importance
Clean Existing Surface
Removes debris ensuring better adhesion.
Repair Damages
Prevents imperfections from showing through.
Sand the Surface
Promotes adhesion and a smooth finish.
Understanding Product Instructions
Understanding product instructions is key to a successful DIY benchtop resurfacing project. Each product, whether it’s primer, paint, or sealant, comes with specific guidelines that detail how to properly apply and set it for the best results. By carefully reading and following these instructions, you’ll avoid common pitfalls, such as applying too thick a coat, which can lead to peeling or an uneven finish.
It’s important to recognize that products may have different drying times and preparation requirements. For instance, some primers require a certain drying period before applying the next coat, while others may need specific surface conditions to ensure adhesion. Taking the time to understand these nuances will enhance the durability of your resurfaced benchtop and prevent the frustration of having to redo parts of your project because of oversight.
Additionally, familiarizing yourself with the tools and techniques recommended in the instructions can help you streamline your resurfacing process. For example, knowing the right type of brush or roller to use can make a significant difference in achieving a smooth finish. By integrating these insights into your work, you position yourself for a more efficient and satisfying DIY experience.
Avoiding Poor Ventilation Issues
Maintaining proper ventilation during your benchtop resurfacing project is essential for your safety and the quality of your work. When you apply paints, primers, or sealants, these substances may contain volatile organic compounds (VOCs) that can accumulate in enclosed spaces. To protect yourself from harmful fumes, open windows and doors to create airflow or use fans to circulate fresh air throughout your workspace.
Another area of concern is the drying process of the products you apply. Insufficient ventilation can lead to longer drying times and affect adhesion, resulting in an uneven finish that detracts from your hard work. You should design your workspace to encourage proper air movement, ensuring that your surfaces dry evenly and quickly. This simple adjustment can improve the overall outcome of your resurfacing project.
It’s also helpful to be mindful of the weather when planning your resurfacing tasks. Humid or damp conditions can compound ventilation issues and delay the drying process. Try to resurface your benchtops when the weather is dry and mild, allowing your finishes to cure properly. By considering these factors, you can avoid poor ventilation issues and achieve a successful DIY resurfacing experience.
Dealing With Unexpected Problems
When resurfacing your benchtop, unexpected problems may arise, and it’s essential to stay prepared. For instance, if the primer or finish appears to peel or bubble, this could indicate the surface was not adequately cleaned or dried before application. To address this issue, carefully remove the affected area and reapply a proper primer after ensuring the surface is clean and dry.
Another common issue you might face involves inconsistencies in the coating. If you notice streaks or uneven color distribution, this could result from applying the material too thickly or not using the right tools. In this scenario, take a step back, sand down the area lightly to smooth it out, and reapply the finish using a roller or brush for even coverage.
Lastly, be prepared for unexpected weather changes while working on your resurfacing project. High humidity or sudden rain can affect drying times and adhesion quality. If you’re working indoors, monitor the ventilation and temperature to create an optimal environment. Adjust your project timeline considering these factors, ensuring that you allow sufficient drying time between coats to achieve the best results.
When to Seek Professional Help
Sometimes, despite your best efforts, a DIY benchtop resurfacing project may become overwhelming. If you encounter significant imperfections that could compromise the final outcome, it may be best to seek professional help. Professionals have the experience and tools necessary to address issues like deep scratches, severe stains, or uneven surfaces, ensuring a polished finish that enhances your space.
Additionally, if you find that the surface material is more challenging to work with than anticipated, don’t hesitate to call in the experts. This is particularly true for materials such as natural stone or high-end laminates, which require specific techniques and expertise during resurfacing. Partnering with professionals can provide peace of mind, as they know how to properly handle these materials for the best results.
Finally, if you feel unsure about your ability to achieve the desired look or finish, it’s wise to choose professional services. Investing in quality resurfacing work can save you time and money in the long run, preventing costly mistakes that may necessitate further repairs or complete replacements later on. Evaluating your comfort and skill level can help you decide when it’s time to bring in a professional:
Recognize significant imperfections that need expert attention.
Identify challenging surface materials that require specialized skills.
Evaluate your confidence in achieving the desired finish.
You’ve avoided the common DIY pitfalls. Now, it’s time to care for your new benchtop, ensuring it stays beautiful for years to come.
Caring for Your New Benchtop
Caring for your newly resurfaced benchtop is essential for maintaining its appearance and longevity. You will learn effective routine cleaning tips to keep your surfaces spotless, along with strategies for preventing scratches and heat damage. Additionally, recommended maintenance products will help you protect your investment, while touch-up techniques can address minor flaws. Finally, understanding long-term care measures ensures lasting results for your benchtop.
Routine Cleaning Tips
To maintain the pristine appearance of your newly resurfaced benchtop, start with regular routine cleaning. Use a soft cloth or sponge with warm water and mild dish soap to gently wipe down the surface. Avoid abrasive cleaners or scouring pads, as these can scratch the finish and lead to premature wear.
After cleaning, it’s beneficial to rinse the surface with clean water to remove any soap residue. This simple step helps preserve the fresh look of your benchtop, preventing dullness over time. For added shine, consider using a non-abrasive cleaning product specifically designed for resurfaced surfaces, ensuring it complements the materials used in your resurfacing project.
Lastly, keep the workspace clutter-free to make routine cleaning easier. Regularly dusting the area and promptly wiping up spills will not only maintain the appearance of your benchtop but also extend its lifespan. Following a consistent cleaning schedule can greatly enhance the durability and beauty of your resurfaced benchtop:
Cleaning Task
Frequency
Recommended Products
Wipe down with a soft cloth
Daily
Mild dish soap, warm water
Rinse to remove residue
Daily
Clean water
Deep clean with specific products
Weekly
Non-abrasive surface cleaner
Dust and wipe up spills
As needed
Soft cloth or sponge
Preventing Scratches and Heat Damage
To protect your newly resurfaced benchtop from scratches, consider using cutting boards whenever you slice or chop food. This simple practice helps preserve the integrity of your surface and prevents unwanted damage. By making this small adjustment in your kitchen habits, you can significantly extend the life of your benchtop.
Heat damage is another concern that can affect the appearance of your benchtop. To prevent heat-related issues, always use trivets or hot pads when placing hot cookware on your surfaces. This precaution safeguards your finishes and helps maintain the professional look of your resurfaced area, ensuring that it remains a focal point in your kitchen.
Additionally, maintaining cleanliness is essential for the longevity of your benchtop. Regularly cleaning your surface with non-abrasive cleaners protects it from dirt and grime buildup that can lead to scratches. Here are some effective care tips to keep in mind:
Use cutting boards to prevent scratches from sharp objects.
Utilize trivets or hot pads to guard against heat damage.
Clean with non-abrasive cleaners regularly to maintain surface integrity.
Recommended Maintenance Products
To keep your newly resurfaced benchtop looking fresh and vibrant, you should invest in quality maintenance products. A non-abrasive surface cleaner specifically designed for the type of finish you’ve applied is essential for routine cleaning. These products effectively remove daily grime without scratching or damaging the surface, ensuring your work remains beautiful over time.
Alongside surface cleaners, consider using a protective wax or sealant regularly. Applying a high-quality sealant designed for your material can enhance its durability and resistance to stains. This layer of protection helps preserve the aesthetic of your benchtop and adds longevity to your resurfaced projects, making it an important step in your maintenance routine.
Lastly, having some microfiber cloths on hand can enhance your cleaning efforts. They are perfect for wiping down your surfaces, leaving no lint behind. This simple addition to your maintenance toolkit will help you maintain a spotless appearance without the risk of scratching, ensuring your newly resurfaced benchtop stays in top condition:
Non-abrasive surface cleaner
High-quality sealant
Protective wax
Microfiber cloths for cleaning
Touch-Up Techniques for Minor Flaws
Touching up minor flaws on your resurfaced benchtop is a straightforward task that can maintain the fresh look of your surfaces. For small scratches or chips, you can use a matching paint or sealant to carefully dab over the imperfections. This process not only conceals the flaws but also reinforces the protective layer of your benchtop, enhancing its longevity.
Another effective technique for addressing minor flaws involves sanding and refinishing the affected area. Use fine-grit sandpaper to gently buff out any visible imperfections before applying a new coat of finish. By matching the texture and color, you’ll ensure that the repair seamlessly integrates with your existing surface, preserving the overall aesthetic of your kitchen or workspace.
Regularly inspecting your benchtop for these minor issues is key to keeping it looking pristine. If you notice any imperfections, address them promptly to avoid more significant damage down the line. By implementing these touch-up techniques, you can keep your resurfaced benchtop in great condition and maintain the fresh, new look you’ve achieved through your DIY efforts.
Long-Term Care for Lasting Results
To achieve lasting results with your resurfaced benchtop, it is essential to establish a regular maintenance routine. Cleaning your surface with mild soap and water will keep it looking fresh while preventing grime build-up. Avoid harsh chemicals that could damage the finish and opt for non-abrasive cleaners specifically designed for resurfaced surfaces.
Incorporate protective measures into your daily habits to safeguard your resurfaced benchtop. Using cutting boards when preparing food will prevent scratches, and applying trivets or heat pads under hot pots will protect against heat damage. These simple actions go a long way in maintaining the appearance and integrity of your newly resurfaced kitchen or workspace.
Additionally, periodic touch-ups will help preserve your benchtop’s look over time. Inspect the surface for any minor flaws and address them promptly with matching paint or sealant. By being proactive and attentive to these details, you ensure that your resurfaced benchtop remains a beautiful and functional part of your home for many years to come.
Conclusion
Easy DIY benchtop resurfacing techniques empower beginners to refresh their kitchens and workspaces effectively and affordably. By understanding key steps like proper preparation, selecting suitable materials, and applying finishes correctly, you can achieve professional-looking results. Implementing safety measures and maintaining a dust-free environment further ensures success throughout the process. Embrace these techniques to enhance your space while saving time and money, showcasing your unique style and creativity.
Your newly resurfaced countertops deserve attention to maintain their durability. Did you know that improper care can lead to issues like water damage and poor adhesion? In this article, you will learn essential maintenance tips, including effective daily cleaning habits, how to protect your countertops from heat and physical damage, and the importance of promptly addressing stains and spills. By following these tips, you can ensure your surfaces remain beautiful and functional, saving you time and future repair costs. Let’s dive in to help you keep your resurfaced countertops in top condition.
Key Takeaways
understanding resurfaced materials is crucial for their maintenance and durability
implement regular cleaning practices to prevent grime and bacteria buildup
use gentle, non-abrasive cleaners to protect your countertops from damage
address spills promptly to prevent stains from setting in
consider professional care for significant wear or visible damage on surfaces
Understanding the Unique Needs of Resurfaced Countertops
Understanding the unique needs of resurfaced countertops is crucial for maintaining their durability and longevity. First, recognizing different resurfacing materials, such as concrete or specialized coatings, can significantly affect usability and aesthetics. Then, implementing proper maintenance practices, like regular cleaning with soap and using a cutting board, ensures your surfaces remain in great shape.
Recognizing Different Resurfacing Materials
When choosing resurfacing materials for your countertops, it’s important to recognize the options available, such as marble, tile, and specialized coatings. Marble offers a timeless aesthetic appeal but requires careful maintenance to avoid scratches and stains. On the other hand, tile surfaces can provide a durable solution, allowing for various designs while being easier to clean and maintain.
Another popular material for resurfacing is resin-based coatings, which are petroleum-derived and designed to withstand wear and tear. These coatings provide a glossy finish that enhances the countertop‘s appearance and can be applied over existing surfaces. Understanding the properties of different materials helps you choose the right option that meets your style preferences and durability needs.
When you prioritize the appropriate resurfacing material, you set the stage for long-lasting use. Each material has unique needs in terms of cleaning and maintenance. By familiarizing yourself with these differences, you can implement the best practices for care, ensuring your countertops remain in excellent condition for years to come.
Benefits of Proper Maintenance
Proper maintenance of your newly resurfaced countertops is vital to ensuring their longevity and functionality. When you regularly clean these surfaces, you prevent the buildup of grime and bacteria that can degrade various materials over time. For instance, using moderate pressure when cleaning a butcher block surface helps maintain its integrity, keeping it in excellent condition for food preparation and presentation.
Another benefit of maintenance is the ability to protect your countertops from damage caused by daily use. For example, applying a suitable primer can enhance the bond between the resurfaced surface and any additional coatings you may choose to apply. Additionally, sealing grout lines properly helps guard against water damage and stains, extending the lifespan of tiled surfaces substantially.
Moreover, professional insights provided by experts in countertop maintenance can guide you in selecting the right products and techniques for preserving specific materials, such as metal and resin-based surfaces. Understanding the unique care needs associated with each material allows you to make informed decisions, ensuring you maximize the durability of your countertops while maintaining their aesthetic appeal.
Caring for resurfaced countertops requires more than just admiration; it needs daily attention. Learn how to establish effective cleaning habits that protect your investment and keep your surfaces looking fresh.
Establishing Effective Daily Cleaning Habits
Establishing effective daily cleaning habits is essential for maintaining the durability of your newly resurfaced countertops. Selecting the right cleaning tools, such as a paintbrush and sponge, helps protect the surface. Additionally, using safe cleaning solutions, including mineral-based options, ensures proper care while enhancing waterproofing and sealant effectiveness. These steps will keep your countertops looking great for years.
Selecting the Right Cleaning Tools
Selecting the right cleaning tools is essential for caring for your newly resurfaced countertops. A soft brush or sponge is a safe choice as it helps to avoid scratching the surface while effectively removing dirt. This approach is particularly useful in both kitchen and bathroom settings, ensuring that you maintain a clean and hygienic environment in all rooms of your home.
Using mineraloil can enhance the shine and longevity of your countertops while providing additional protection from stains and wear. Regular application of mineraloil, combined with gentle cleaning tools, ensures that your surfaces retain their aesthetic appeal and functionality. You can apply mineraloil after cleaning to maintain a protective barrier, especially in high-traffic areas like the kitchen and bathroom.
Consider implementing a daily cleaning routine that includes these tools as part of your maintenance strategy. Regularly using the right brush or sponge will help remove spills and debris before they have a chance to damage your countertops. This proactive approach not only keeps your surfaces looking new but also extends the lifespan of your newly resurfaced countertops, making your home a more inviting space.
Safe Cleaning Solutions for Resurfaced Surfaces
When it comes to cleaning resurfaced surfaces, using safe cleaning solutions is vital to maintaining their looks and longevity. For surfaces like particle board and Formica, a gentle mixture of mild soap and water can effectively remove stains without causing damage. This straightforward approach helps you avoid harsh chemicals that could compromise the integrity of your countertops.
If you have epoxy or soapstone surfaces, consider using a specialized cleaner designed for these materials. These cleaners often contain ingredients that safely lift stains while enhancing the protective qualities of the surface. Regularly applying these cleaners not only keeps your countertops spotless but also reinforces their durability over time.
It’s important to avoid abrasive cleaning tools that can scratch resurfaced surfaces, leading to potential vulnerabilities. Instead, opt for soft sponges or microfiber cloths to gently wipe away any debris. By incorporating these safe cleaning solutions into your daily routine, you can effectively protect your newly resurfaced countertops and keep them looking impeccable for years to come.
Cleaning keeps your surfaces shining, but you must also protect them. Understanding how to shield your countertops from heat and damage ensures they stay beautiful for years to come.
Protecting Countertops From Heat and Physical Damage
To maximize the durability of your newly resurfaced countertops, it is essential to implement heat protection measures and prevent scratches and dents. Using items like trivets or cutting boards can shield surfaces from hot pots, while careful handling can reduce physical damage. Understanding these practical tips will safeguard your renovation investment and enhance your home improvement efforts.
Implementing Heat Protection Measures
Implementing heat protection measures for your newly resurfaced countertops is essential for preserving their appearance and durability. Items like trivets or heat mats are vital when placing hot pots or pans on the surface. Utilizing these tools can effectively prevent heat damage and maintain the integrity of your countertop material, particularly when dealing with sensitive surfaces.
Another key aspect to consider is the placement of heat-resistant pads, especially near areas like the sink or stove where hot items are frequently handled. These pads are designed to withstand high temperatures and can safeguard the polyurethane finish of your countertops from scorching. When you invest in these protective accessories, you’re reinforcing your countertop‘s longevity and reducing the risk of costly repairs.
In addition, always avoid placing hot items directly on plastic or laminate surfaces. Instead, you should establish a habit of using cutting boards and trivets as a buffer. This practice will not only prevent damage but also preserve the finish of your resurfaced countertops, allowing you to enjoy their beauty for years to come.
Use trivets and heat mats for hot pots or pans.
Place heat-resistant pads near sinks and stoves.
Avoid placing hot items directly on plastic or laminate surfaces.
Use cutting boards and trivets as buffers.
Preventing Scratches and Dents
To prevent scratches and dents on your newly resurfaced countertops, it’s essential to practice careful handling when using items like cookware and kitchen utensils. For example, utilizing cutting boards and trivets can significantly reduce the risk of damaging surfaces, particularly in high-usage areas like Bathrooms and Kitchens. This proactive approach not only protects the aesthetic appeal of materials such as granite but also extends their longevity.
When moving items across your countertops, take extra care by lifting rather than sliding. Sliding can cause unnecessary friction that may result in scratches, especially on softer surfaces. Incorporating a gentle touch when interacting with your cabinetry and countertops will help preserve their finish and maintain the beauty of your investment for years to come.
Lastly, consider implementing a regular maintenance routine that includes inspections for any potential signs of wear. By addressing minor scratches or dents quickly, you can prevent further damage and keep your countertops in pristine condition. Make sure to visit the Fimagine Home Page for resources on maintaining accessibility and durability for your countertops to ensure sustained beauty in your home.
Damage can come from many angles, but how you clean your surfaces plays a big role in their longevity. Let’s look at the right products and methods that will keep your countertops shining for years to come.
Choosing Suitable Cleaning Products and Methods
Choosing suitable cleaning products and methods is crucial for maintaining the beauty and durability of your newly resurfaced countertops. You’ll learn which cleaning agents are best for materials like quartz, ceramic, and porcelain, as well as which ones to avoid to protect your kitchen cabinet surfaces. Additionally, exploring eco-friendly cleaning options can help you care for your Caesarstone countertops without compromising the environment.
Cleaning Agents to Use and Avoid
When selecting cleaning agents for your newly resurfaced countertops, avoid any products that are overly abrasive. Solid surface materials, while durable, can be susceptible to scratches and damage from harsh chemicals. Instead, prioritize gentle cleaners specifically designed for countertop surfaces, ensuring your kitchen remodel retains its fresh look despite everyday wear and tear.
Attention to detail is important when cleaning your countertops. Using pH-balanced, non-abrasive cleaners maintains the surface without causing harm. Natural cleaners, such as a mild soap solution, are ideal for daily use and can effectively remove dirt and stains while prolonging the life of your surfaces. Be sure to read labels carefully to select the right cleaning products.
It’s also wise to steer clear of acidic or chlorine-based cleaners, as these can degrade certain materials over time. Regular use of improper cleaners can lead to dull surfaces and shorten the lifespan of your investment. Implementing the right cleaning practices not only enhances the durability of your resurfaced countertops but ensures they remain an attractive feature in your kitchen for years to come:
Use gentle, non-abrasive cleaners.
Avoid acidic or chlorine-based products.
Opt for pH-balanced solutions for daily cleaning.
Read product labels to ensure compatibility.
Eco-Friendly Cleaning Options
When looking to maintain the beauty and durability of your newly resurfaced countertops, consider eco-friendly cleaning options. For materials such as Corian and resin, using natural, non-toxic cleaners can effectively remove stains without compromising the integrity of the surface. These environmentally safe solutions help you achieve a spotless kitchen while minimizing your impact on the environment.
For stainless steel surfaces, a simple mixture of vinegar and water can work wonders. This combination not only cleans but also provides a streak-free shine. By opting for this eco-friendly method, you ensure your stainless steel countertops remain durable and attractive without exposing them to harsh chemicals.
Incorporating eco-friendly cleaning options into your routine helps you protect your investment in kitchen remodeling. Consider using gentle, pH-balanced cleaners designed for specific surfaces, such as Corian and resin. Keeping these points in mind can maintain the longevity and cleanliness of your countertops and ultimately prolong their lifespan:
Use natural, non-toxic cleaners on Corian and resin.
Mix vinegar and water for effective stainless steel cleaning.
Choose pH-balanced options for daily maintenance.
Once you’ve selected the right cleaning products, it’s time to think about the long-term care of your surfaces. Scheduling regular inspections and maintenance will ensure your resurfaced areas stay in great shape for years to come.
Scheduling Regular Inspections and Maintenance
Regular inspections and maintenance of your newly resurfaced countertops are vital for extending their lifespan. Identifying early signs of wear can help you address minor issues before they escalate, ensuring your warranty remains intact. Knowing when to seek professional care, especially for engineered stone or steel surfaces, is equally important for maintaining your interior design aesthetic and functionality.
Identifying Early Signs of Wear and Tear
Identifying early signs of wear and tear on your resurfaced countertops can save you from costly repairs down the line. Look for changes in the surface’s texture, such as rough patches or dull spots, which may indicate that it requires immediate attention. Regular inspections will help you detect these issues before they escalate, ensuring the longevity of materials like plywood or solid surfaces.
You should also be mindful of any visible cracks or chips that can develop over time. These imperfections not only compromise the integrity of the countertop but can also lead to further damage if left unaddressed. Keeping an eye out for these signs during your routine cleaning or maintenance sessions will help you maintain the beauty and functionality of your countertops.
Another factor to consider is the presence of stains or discoloration that may occur with heavy use. If you notice persistent stains that don’t respond to cleaning, it may be time to reassess your cleaning methods or materials. By staying proactive about these issues, you ensure your countertops remain safe, functional, and aesthetically pleasing:
Sign of Wear
Recommended Action
Rough patches or dull spots
Inspect and re-seal as needed
Visible cracks or chips
Consider professional repairs
Stains or discoloration
Reevaluate cleaning methods
When to Seek Professional Care
Recognizing when to seek professional care for your resurfaced countertops is essential for preserving their longevity. If you notice persistent stains that do not respond to your cleaning efforts or if the surface begins to feel rough, it may indicate deeper issues that require professional attention. Proactive steps like this not only maintain aesthetic appeal but also help safeguard your investment.
Another situation where seeking expert help becomes necessary is when you observe any visible cracks or chips. These imperfections can lead to further damage if left unaddressed, compromising the durability of the materials. Consulting a professional will ensure that these issues are resolved properly, preventing any additional repairs down the line.
Lastly, if routine inspections reveal significant wear, such as dullness or discoloration, don’t hesitate to reach out to a professional. These signs may indicate that your countertops need special treatments or refinishing to restore their original beauty. Understanding when to seek professional care is a vital part of maintaining your countertops, ensuring they remain functional and visually appealing for years to come.
Regular inspections catch small problems before they grow. When spills happen, quick action keeps your surfaces looking fresh and new.
Addressing Stains and Spills Promptly
Addressing stains and spills promptly is key to maintaining the durability of your newly resurfaced countertops. You will learn effective quick response techniques for common spills, ensuring that you can tackle messes before they set in. Additionally, exploring preventive strategies will help you minimize staining, keeping your surfaces pristine and enhancing their longevity.
Quick Response Techniques for Common Spills
When a spill occurs on your newly resurfaced countertops, acting quickly is essential. For spills like coffee or wine, blotting the area with a soft cloth should be your immediate response. Avoid rubbing, as this can push the stain deeper into the surface, increasing the difficulty of removal.
If the spill involves sticky substances, don’t hesitate to use warm, soapy water to gently clean the area. A mix of mild dish soap with warm water is effective at breaking down tough residues without harming the countertop finish. Wipe the surface with a damp cloth and follow up with a dry towel to prevent moisture damage.
Certain spills, like oil or grease, require a slightly different approach. After blotting up excess liquid, sprinkle a small amount of baking soda on the affected area to absorb residual grease. This method not only cleans the surface but also helps prevent stains from setting in, ensuring your countertops maintain their pristine look and functionality.
Preventive Strategies to Minimize Staining
To minimize staining on your newly resurfaced countertops, consider using coasters and mats under beverages and food items. This simple step acts as a barrier, preventing spills from coming into direct contact with the surface. By incorporating these protective measures, you help safeguard against potential stains from items that could cause discoloration.
Another effective preventive strategy is sealing porous surfaces or applying protective coatings. By applying a high-quality sealer, you create a barrier that makes it more difficult for stains to penetrate the countertop. Regularly check for wear on the sealant and reapply as needed to maintain optimal protection.
Finally, establishing a routine for cleaning up spills immediately can drastically reduce the chance of permanent stains. Wiping up liquids as soon as they occur not only keeps your countertops looking pristine but also reinforces the habit of caring for your surfaces properly. This proactive approach will ultimately ensure your countertops retain their beauty and functionality for years to come.
Conclusion
Maximizing the durability of your newly resurfaced countertops is essential for preserving their beauty and functionality. By understanding the unique needs of different materials and establishing effective cleaning habits, you can significantly extend their lifespan. Implementing practical protective measures against heat and physical damage further safeguards your investment. Regular maintenance and prompt attention to spills will keep your surfaces looking pristine and functional for years to come.
Are you struggling to keep your resurfaced benchtops looking pristine? You’re not alone. Proper care is essential for maintaining the beauty and durability of your phenolic resin countertops. In this guide, you’ll learn daily maintenance tips, effective deep cleaning techniques, and the do’s and don’ts of resurfaced benchtop care. By following these strategies, you’ll prevent issues like mold build-up and stubborn stains, ensuring your surfaces remain attractive and functional. Let’s dive in and discover how to effectively clean and maintain your resurfaced benchtops today.
Key Takeaways
understanding your benchtop material helps determine proper cleaning and maintenance methods
use gentle cleaning solutions to avoid damaging the resurfaced finish
promptly address spills to prevent stains and maintain appearance
schedule regular professional inspections for early detection of potential damage
reapply sealants as needed to protect against stains and wear over time
Understanding Your Resurfaced Benchtop Material
Understanding the material of your resurfaced benchtop is essential for effective cleaning and maintenance. You will explore common types of resurfaced finishes, including plastic, marble, resin, and porcelain. Each material has unique characteristics that influence care methods. Knowing your benchtop’s specifics will ensure you choose the right cleaning techniques and products for optimal results.
Common Types of Resurfaced Benchtop Finishes
When managing a resurfaced benchtop, it’s vital to recognize the variety of finishes available. Plastic finishes are often chosen for their affordability and durability. They can resist staining but may require regular application of wax for shine and protection against minor scratches for FImagine Home Page.
Marble resurfaced finishes provide a classic look and are well-known for their aesthetic appeal. While they can be susceptible to etching from acidic substances, you can maintain their beauty by using gentle cleansers and avoiding harsh solvents. Regular sealing can also prolong their life and enhance their resistance to stains.
Resin and porcelain are popular choices for contemporary kitchens. Resin surfaces are robust and easy to clean with Bathroom and Kitchen Services, but you should avoid using iron pans directly on them to prevent damage. Porcelain offers great durability; however, be careful not to flood the surface during cleaning as it can cause water to seep into seams and potentially weaken the bond.
Understand the type of resurfaced finish.
Use wax for plastic finishes to maintain shine.
Avoid harsh solvents on marble to prevent etching.
Seal marble surfaces for better stain resistance.
Keep iron pans away from resin surfaces.
Be careful about flooding porcelain finishes during cleaning.
Characteristics of Different Resurfacing Materials
When it comes to resurfaced benchtops, understanding the characteristics of the materials can greatly affect how you maintain them. For instance, cast iron surfaces, while durable, can rust if not cared for properly. Using a mixture of rubbing alcohol and mild soap on cast iron will help maintain its finish without risking damage.
Marble benchtops are known for their stunning appearance, but they require special attention. You should avoid using vinegar or acidic cleaners, as these can lead to etching. Regular cleaning with a gentle powder or pH-balanced cleaner will keep the surface looking pristine without causing harm.
Resin and porcelain surfaces are both modern choices that offer excellent durability. While resin is easy to clean, it’s crucial not to expose it to high heat from cast iron cookware, which could lead to degradation. For porcelain, be cautious with acetone; this solvent can weaken the adhesive that holds the tiles together. Always use compatibility-tested cleaners to preserve the integrity of your benchtops.
Importance of Knowing Your Benchtop’s Specifics
Knowing the specifics of your resurfaced benchtop material directly affects its cleanliness and appearance over time. For example, understanding whether your surface is plastic, resin, or marble will guide you in selecting the right cleaning products and techniques. Using an inappropriate cleaner can lead to increased wear and tear, making it essential to match the material to the recommended care methods.
In a bathroom or kitchen setting, the cleanliness of surfaces is paramount. For instance, marble surfaces require gentler cleaning solutions to maintain their finish, while resin can handle more robust cleaning agents. Failing to recognize these differences can result in damage, such as etching or degradation, which diminishes the beauty and functionality of your benchtop.
Moreover, being aware of your benchtop’s specifics allows you to implement focused maintenance practices. This includes knowing how frequently to apply a protective spray or sealant, which varies by material. By taking these steps, you prolong the life of your surfaces and uphold their aesthetic appeal, ensuring your spaces remain inviting and well-maintained.
Caring for your resurfaced benchtop keeps it looking fresh and new. Follow these daily maintenance tips to ensure it lasts for years to come.
Daily Maintenance Tips for Resurfaced Benchtops
Adopting gentle cleaning practices is essential for maintaining the finish of your resurfaced benchtop, whether it mimics concrete or comes from a resurfaced bathtub. This section will highlight safe cleaning agents for everyday use that won’t damage the surface. Additionally, you’ll learn how to prevent surface damage during daily use, ensuring your benchtop remains durable and visually appealing.
Gentle Cleaning Practices to Adopt
To keep your resurfaced benchtops in top shape, implementing gentle cleaning practices is essential. Start by regularly utilizing a microfiber cloth to wipe away dust and debris. This helps avoid scratching the surface while ensuring you maintain a clean area that does not harbor germs.
When it’s time to disinfect your benchtops, opt for a disinfectant that is safe for your specific resurfaced material. You can create a simple cleaning solution by mixing warm water with a mild dish soap in a spraybottle. This mixture effectively removes dirt and grime without causing damage, giving you peace of mind as you care for your surfaces.
If you want to elevate your cleaning routine, consider using ultrasonic cleaning for stubborn stains. This method uses high-frequency waves to gently lift particles without scratching the surface, making it ideal for maintaining a pristine appearance. Always ensure your cleaning area is well-ventilated to enhance the effectiveness of your cleaning products and to promote a safe environment while you work.
Safe Cleaning Agents for Everyday Use
When maintaining resurfaced benchtops, you should choose safe cleaning agents that effectively clean without causing damage. Using a mild dish soap mixed with warm water creates a gentle solution that’s safe for surfaces around the sink or shower, ensuring you avoid harsh chemicals that can weaken the finish. This simple mixture removes grime while preserving the integrity of your benchtop material.
Foam cleaners specifically designed for kitchen and bathroom surfaces can be highly effective. Look for products that are safe for your material, whether it’s plastic, resin, or porcelain. Foams tend to cling to surfaces, allowing them to work on stubborn stains without excessive scrubbing, which can help reduce wear from moisture over time.
For quick touch-ups in your bathroom or kitchen, consider using a stainless steel cleaner for appliances and fixtures. These products can also help maintain the overall aesthetic of your resurfaced benchtops, ensuring they remain visually appealing. Just make sure to check compatibility to avoid any adverse reactions that could lead to damage or a dull surface.
Preventing Surface Damage During Daily Use
To prevent surface damage during daily use on your resurfaced benchtops, it is important that you are mindful of the tools you utilize. Using a soft-bristled brush and mild soap for cleaning can help maintain the integrity of the surface. Avoid abrasive materials, as they can wear down the finish and create scratches that diminish the aesthetic appeal of your benchtop.
Additionally, always wear personal protective equipment, such as gloves or an apron, when cleaning to protect yourself from any harsh cleaning agents that might be unsafe for your skin. This also helps ensure you manage the cleaning process effectively without introducing unwanted contaminants to your benchtops. A simple coat of care will keep your surfaces looking fresh and can extend their lifespan.
Lastly, be cautious with heavy items on your benchtops. Whenever possible, lift objects instead of dragging them across the surface. This can significantly reduce the risk of scratches or scuffs that may occur over time. By paying attention to these practices, you can maintain a well-preserved and visually appealing benchtop in your kitchen or bathroom.
Even with daily care, stains can linger stubbornly on your resurfaced benchtops. To tackle these challenges, let’s explore effective deep cleaning techniques that will restore their shine.
Deep Cleaning Techniques for Stubborn Stains
Deep Cleaning Techniques for Stubborn Stains
Identifying stains on your resurfaced benchtops is the first step towards effective cleaning. This section will guide you through appropriate treatments for different stain types, followed by a step-by-step guide for deep cleaning your surfaces. You’ll also discover homemade cleaning solutions that incorporate mineral oil and other useful ingredients to tackle tough stains without damaging your surfaces. These practical insights ensure your resurfaced areas remain attractive and functional.
Identifying Stains and Appropriate Treatments
Identifying the type of stain on your resurfaced benchtops is crucial for appropriate treatment. For example, stains caused by acid, like those from citrus beverages, require a different approach than those originating from grout or other solid substances. Recognizing these differences allows you to choose the most effective cleaning agents, such as lemon juice for neutralizing minor acid stains while being careful not to leave it on for too long.
When dealing with stubborn epoxy stains, it’s important to assess the extent of the damage. You can often treat these with specific solvents designed for epoxy removal. However, you should always test a small, inconspicuous area first to ensure that your chosen treatment doesn’t harm the finish of your resurfaced benchtop.
If you encounter anything more complex, like stains that seem to linger despite regular cleaning, consider consulting a professional cleaning service or a laboratory specializing in surface restoration. They can provide tailored solutions that may include deep cleaning techniques or specialized products designed for your benchtop material, ensuring you maintain its integrity and appearance.
Step-by-Step Guide to Deep Cleaning
To begin deep cleaning your resurfaced benchtops, make sure you gather the right materials. You’ll want to have isopropyl alcohol on hand, as it effectively removes stubborn stains without damaging the surface. Start by dampening a cloth with the isopropyl alcohol and gently blotting the stain, allowing it to penetrate for a few minutes.
Next, if the stain persists, consider utilizing a cleaning solution that contains oil to break down tougher residues. Applying a small amount of this solution to the affected area and letting it sit for a while will help lift the stain more effectively. Afterward, use a soft cloth to wipe the area clean, ensuring you remove any remaining oil that could attract dirt and grime.
For areas with caulk or built-up grime, you may need a more intensive approach. Use a specialized cleaner or a gentle solution of soap and water to carefully scrub the surface. If you notice any scratches or imperfections after cleaning, touch them up with polyurethane or consider reglazing to restore the finish. This way, you can keep your resurfaced benchtops looking immaculate and fully functional.
Homemade Cleaning Solutions That Work
One reliable homemade cleaning solution for your resurfaced benchtops is a mixture of baking soda and water. This gentle paste acts as a non-abrasive scrub, effectively removing grease and stains without scratching the surface. You can apply it directly to stubborn spots and let it sit for a few minutes before wiping with a damp cloth to maintain the integrity of your benchtop while ensuring you protect its warranty.
Another effective approach is using a blend of vinegar and liquid dish soap. This combination excels at cutting through grime and leaves your surfaces looking fresh. However, always remember to thoroughly rinse the area after cleaning, as vinegar can potentially lead to corrosion over time, especially on surfaces that are not well-sealed.
For those tough, set-in stains, consider using a solution of hydrogen peroxide and baking soda. This mixture not only helps to brighten stained areas but also doesn’t introduce abrasive chemicals that could damage your resurfaced benchtops. As you use these homemade cleaning solutions, ensure that you follow up with a protective sealant to prolong the lifespan of your benchtops and maintain their aesthetic appeal.
Cleaning is just the start. To keep your resurfaced benchtop looking its best, know the do’s and don’ts that make all the difference.
Do’s and Don’ts of Resurfaced Benchtop Care
To maintain the integrity of your resurfaced benchtops, it’s essential to recognize actions to avoid to prevent damage. This section will cover best practices for prolonging surface life, addressing common mistakes related to bacteria and contamination. By understanding these guidelines, you can effectively prevent aerosol issues and ensure your benchtops remain safe and visually appealing.
Actions to Avoid to Prevent Damage
Avoid using abrasive cleaners and scouring pads on your resurfaced benchtops, as they can cause scratches and damage the finish. Instead, opt for gentle cleaning solutions that protect the material. Keep in mind that maintaining the waterproofing of your surfaces is crucial for preventing stains and damage over time.
Another action to steer clear of is exposing your benchtops to extreme heat or heavy items without protection. Using trivets or cutting boards can help prevent marks and maintain the integrity of your resurfaced surfaces. Preventing flux from heat will also ensure your benchtops remain visually appealing and fully functional.
Finally, never ignore spills, as letting liquids sit can lead to stains and irreversible damage. Wipe up any spills immediately using a soft cloth to preserve the condition of your benchtops. Implementing these preventive measures will enhance the longevity of your resurfaced areas and keep them looking pristine:
Use gentle cleaning products.
Avoid abrasive tools and harsh chemicals.
Prevent heat exposure by using insulating materials.
Wipe up spills promptly to avoid stains.
Best Practices for Prolonging Surface Life
To prolong the life of your resurfaced benchtops, always use cutting boards and trivets. This simple practice helps protect the surface from scratches, heat, and stains caused by hot cookware or sharp utensils. By making this small adjustment, you maintain the appearance and integrity of your surfaces, ensuring they remain functional and stylish for years to come.
Regular maintenance is key to preserving the beauty of your resurfaced benchtops. Cleaning spills immediately prevents staining and damage, while utilizing gentle cleaning products can avoid wear on the surface. Incorporate a routine that includes gentle dusting and cleaning to keep your benchtops looking their best while minimizing the risk of long-term issues.
Consider applying a protective sealant periodically to enhance your benchtop’s durability. This layer not only helps resist stains and scratches but also retains the original finish. Different materials require specific sealants, so be sure to research or consult professionals to select the right option for your resurfaced surface:
Use cutting boards and trivets to protect surfaces.
Clean spills immediately to prevent staining.
Apply a protective sealant regularly for added durability.
Common Mistakes and How to Prevent Them
One common mistake you may encounter is using harsh cleaners or abrasive pads on your resurfaced benchtops. These products can scratch and damage the finish, leading to long-term deterioration. Instead, stick to gentle cleaning solutions and soft cloths that will protect the surface while keeping it clean.
Another frequent error is neglecting immediate clean-up of spills. Allowing liquids to sit on your benchtops can result in stubborn stains and potential damage. Make it a habit to wipe up spills promptly, which will help maintain the integrity and appearance of your surfaces over time.
Finally, you should be cautious about using high-heat cookware directly on your resurfaced benchtops. This can lead to heat damage that compromises both aesthetics and functionality. Always use trivets or cutting boards to safeguard your surfaces from heat exposure:
Use gentle cleaning solutions to avoid surface damage.
Wipe up spills immediately to prevent staining.
Utilize trivets and cutting boards to protect from heat.
Even with careful attention, spills can happen. Knowing how to handle them swiftly makes all the difference in keeping your benchtop looking its best.
Handling Spills and Accidents Effectively
When spills occur on your resurfaced benchtops, knowing the immediate steps to take is crucial for preventing damage. In this section, you’ll learn how to handle various types of spills effectively, from food and liquids to abrasive substances. You will also discover strategies for protecting the surface from long-term effects, ensuring that your benchtops maintain their integrity and appearance.
Immediate Steps to Take After a Spill
When a spill occurs on your resurfaced benchtop, the first step is to act quickly. Immediately grab a soft cloth or paper towel to blot up the liquid, rather than wiping, to minimize spreading the stain. This approach helps prevent liquids from seeping into seams or any porous materials, preserving the integrity of your benchtop.
Next, once you’ve absorbed as much of the spill as possible, gently clean the affected area with a mild cleaning solution. A mix of warm water and a few drops of dish soap works effectively for most surfaces. Always use a cloth that is non-abrasive to avoid scratching the finish, ensuring your benchtop remains in optimal condition.
Finally, after cleaning, it’s wise to inspect the area for any remaining stains. If necessary, apply a suitable stain remover specifically designed for your resurfaced material, taking care to follow the manufacturer’s instructions. By staying proactive in addressing spills, you can maintain both the beauty and functionality of your benchtops over time.
Cleaning Up Different Types of Spills
When dealing with spills on your resurfaced benchtops, the first step is to assess the type of liquid involved. For water or juice spills, act promptly by blotting the area with a soft cloth. This will help prevent any liquid from seeping into the seams, which is crucial for maintaining the integrity of your benchtop.
If you encounter oil-based substances like cooking oil or grease, you will need to follow a specific approach. Blot the excess oil with a dry cloth, then use a solution of warm water and mild dish soap to gently clean the area. This will effectively lift the grease while being safe for the resurfaced material.
In the case of sticky spills, like those from syrups or sauces, it’s essential to remove the residue without damaging the surface. Start by scraping off any solid particles with a plastic spatula, then apply a gentle cleaning solution that suits your benchtop’s material. This method ensures you tackle the stickiness effectively while preserving the finish of your resurfaced benchtop.
Protecting the Surface From Long-Term Damage
To protect the surface of your resurfaced benchtops from long-term damage, regularly inspect your cleaning materials and techniques. Choosing the right products tailored for your benchtop material is crucial. For instance, using pH-balanced cleaners can prevent unintended wear and maintain the finish, ensuring your surfaces remain looking new for years.
Additionally, develop a habit of immediately addressing spills with appropriate actions. Promptly blotting spills and cleaning with safe solutions can prevent staining and damage over time. This proactive approach not only preserves the integrity of your resurfaced benchtops but also reduces the likelihood of costly repairs in the future.
Finally, applying a protective sealant at recommended intervals can significantly enhance the durability of your resurfaced surfaces. This preventive measure helps shield against damage from moisture, stains, and scratches. By periodically reapplying the sealant, you ensure your benchtops maintain their aesthetic appeal and functional qualities, making your cleaning efforts more effective and worthwhile.
Despite your best efforts, surfaces may still need a little extra attention. Discovering long-term care and maintenance strategies will ensure your kitchen and bathroom retain their shine for years to come.
Long-Term Care and Maintenance Strategies
To ensure your resurfaced benchtops remain in excellent condition, consider scheduling regular professional inspections to catch potential issues early. You’ll also learn when to reapply sealants for optimal protection. Along with these strategies, you’ll find effective tips to keep your benchtop looking new and vibrant for years, enhancing both its aesthetic appeal and functionality.
Scheduling Regular Professional Inspections
Scheduling regular professional inspections for your resurfaced benchtops is vital for maintaining their integrity and appearance over time. These inspections allow experts to assess the condition of your surfaces, identifying any potential issues before they escalate into costly repairs. By prioritizing these appointments, you take proactive steps to ensure your surfaces remain in excellent condition, setting the foundation for long-term durability.
During these inspections, professionals can provide insights tailored to your specific resurfaced materials, helping you understand when to apply protective coatings or sealants. They can also recommend cleaning products that will preserve the beauty and functionality of your benchtops. By leveraging their expertise, you can make informed decisions that enhance the lifespan of your resurfaced surfaces and keep them looking new.
Implementing a routine for professional inspections not only safeguards your investment but also gives you peace of mind. Scheduling these evaluations at regular intervals—every six to twelve months—can keep your resurfaced benchtops in top shape. Here are some benefits of regular professional inspections:
Early detection of potential damage.
Customized recommendations for cleaning and maintenance.
Enhanced longevity of your resurfaced surfaces.
When to Consider Reapplying Sealants
Reapplying sealants on your resurfaced benchtops is crucial for maintaining their protective layer against stains and damage. You should consider reapplying sealants when you notice a change in the surface’s appearance or feel; for instance, if liquids seem to be absorbing more quickly or you see discoloration. This indicates that the previous sealant may be wearing thin, compromising its effectiveness.
Another key factor to determine when to reapply sealants is the frequency of use in your kitchen or bathroom. If your resurfaced benchtops receive heavy daily use, such as from cooking or constant cleaning, you may need to refresh the sealant every six months to a year. Regular inspections can help you stay on top of maintenance and ensure your surfaces remain in optimal condition.
In addition, consider seasonal changes that may affect your benchtops, such as increased humidity or temperature fluctuations. These conditions can impact the performance of the existing sealants over time. By remaining vigilant about these factors, you can effectively maintain your resurfaced benchtops and protect your investment:
Look for signs of wear and discoloration.
Assess usage frequency for timely reapplication.
Monitor seasonal changes that may affect sealant integrity.
Tips for Keeping Your Benchtop Looking New
To keep your resurfaced benchtops looking new, incorporate a routine cleaning schedule. Regularly dusting the surfaces with a soft microfiber cloth prevents the accumulation of dirt and debris, which can lead to scratches over time. Maintain this habit to promote a fresh appearance and avoid long-term damage to your beautiful benchtops.
Choosing the right cleaning products is essential for sustaining the look of your resurfaced benchtops. Stick with gentle cleaners that are specifically formulated for the material of your benchtop, avoiding harsh chemicals that can wear down the finish. Using these appropriate products will help preserve the vibrant appearance and integrity of your surfaces for years to come.
You should also proactively address any spills or stains as soon as they occur, which will significantly reduce the risk of permanent damage. For instance, blot any liquid immediately rather than wiping, and use a mild soap solution for cleaning. This prompt action helps maintain the pristine look of your resurfaced benchtops and keeps your kitchen or bathroom inviting.
Conclusion
Maintaining the integrity and appearance of your resurfaced benchtops is vital for long-term durability and aesthetics. By understanding the specific materials and employing effective cleaning techniques, you can prevent damage and preserve their functionality. Regular inspections, safe cleaning agents, and prompt spill management are key strategies to uphold your surfaces’ pristine condition. Prioritize these actionable insights to ensure your benchtops remain visually appealing and functionally sound for years to come.