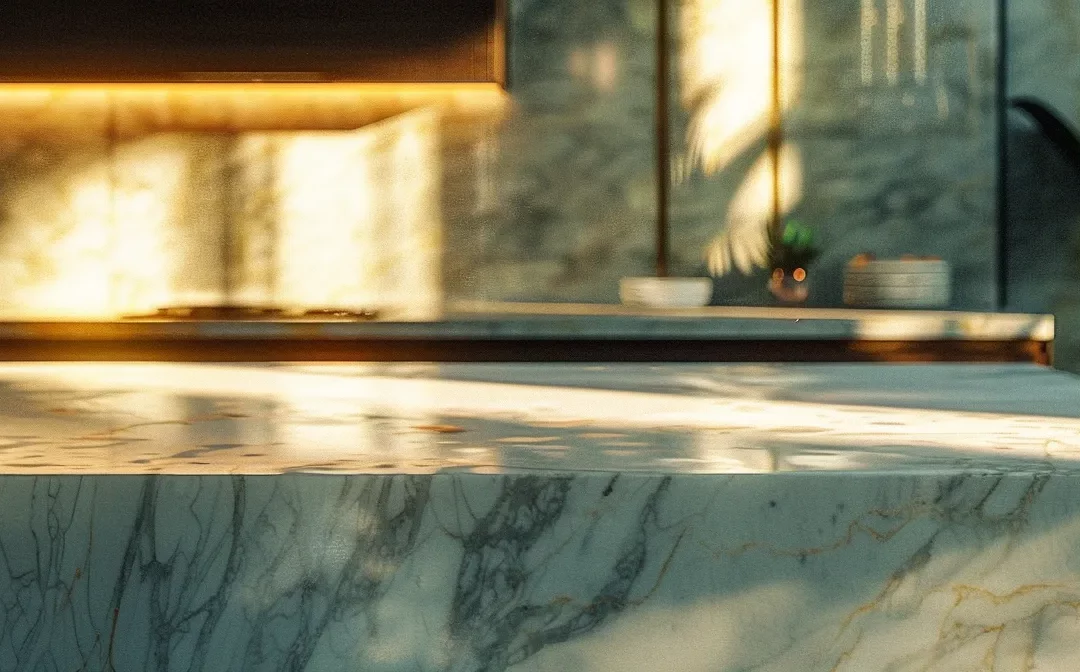
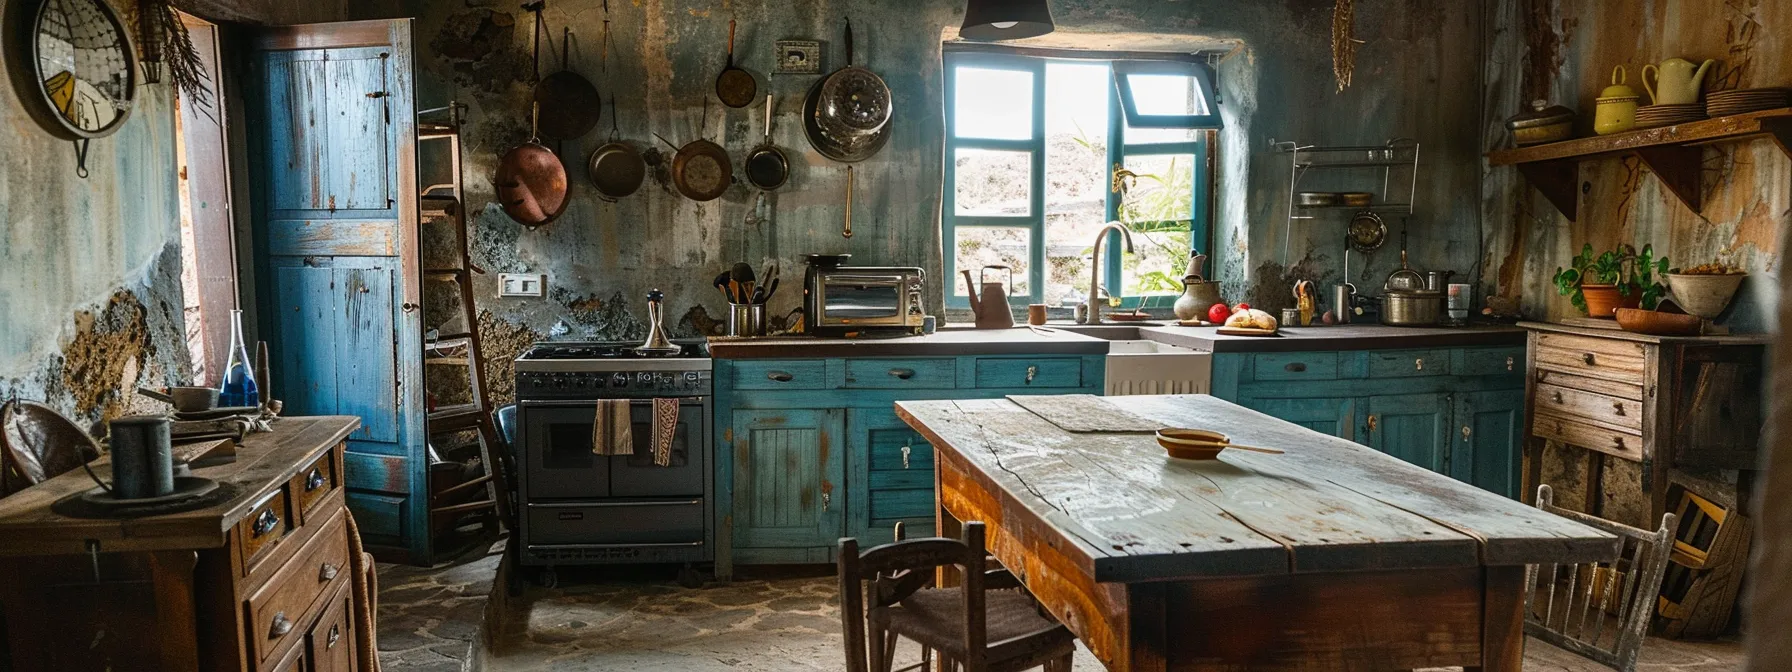
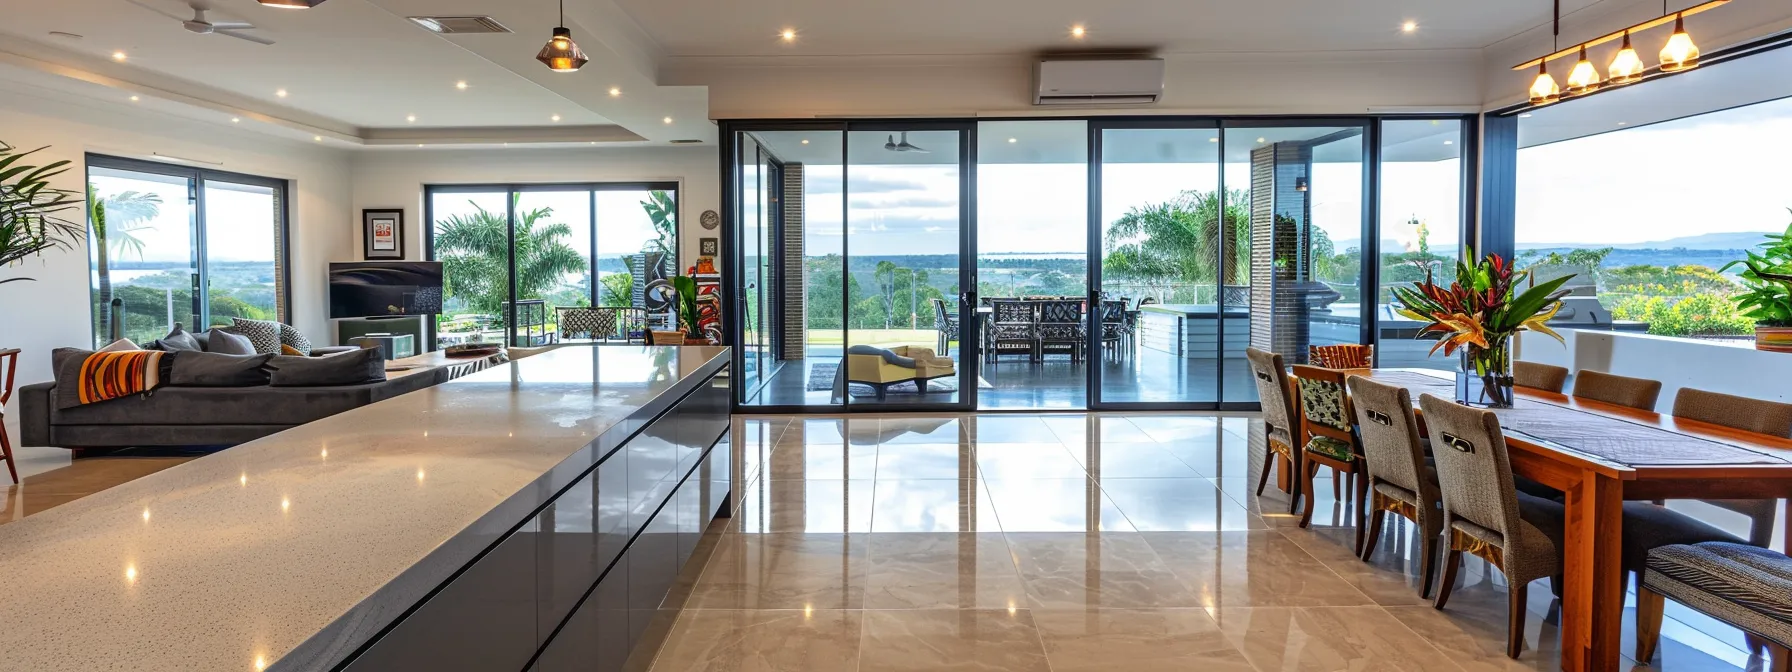
Are you tired of your kitchen benchtop looking worn and outdated? Many homeowners overlook the benefits of benchtop resurfacing, which can not only enhance the appearance but also prevent water damage. In this guide, you’ll discover the essential materials needed, like a putty knife, and the step-by-step process for lamination. By following these steps, you’ll gain a beautiful, durable surface that reduces wear and keeps your kitchen looking new. Let’s dive in and transform your kitchen together!
Key Takeaways
benchtop resurfacing is a cost-effective alternative to complete replacement
it reduces waste and promotes environmental sustainability
proper surface preparation ensures a successful resurfacing project
regular maintenance keeps your resurfaced benchtop looking new and functional
customization options allow you to reflect your personal style in your kitchen
Why Benchtop Resurfacing Is the Ideal Kitchen Upgrade
Benchtop resurfacing offers multiple advantages over complete replacement, providing you with a budget-friendly transformation that enhances your kitchen. This method addresses concerns like moisture and humidity, ensuring a durable finish. Additionally, resurfacing reduces waste, making it an environmentally sustainable choice. Discover how to elevate your kitchen with effective and practical solutions.
Advantages Over Complete Benchtop Replacement
Benchtop resurfacing is a smart choice when compared to complete replacement. It minimizes stress and disruption during your kitchen upgrade process. You can avoid the mess and extensive time that a full remodel brings, ensuring a smoother transition into your newly transformed space.
This method effectively addresses issues such as corrosion and leaks in your current benchtop. Instead of tearing everything out, resurfacing focuses on improving what you already have, reinforcing the surface against inevitable wear and moisture exposure without the hassles of a major renovation.
Moreover, resurfacing is a more environmentally friendly option. By opting to resurface rather than replace, you significantly reduce waste that would otherwise end up in a landfill. You can enjoy a refreshed look for your kitchen while being conscious of the impact your choices have on the environment, making it both practical and sustainable:
Aspect
Benchtop Resurfacing
Complete Replacement
Cost
More budget-friendly
Higher expense
Time
Quicker process
Lengthy renovation
Environmental Impact
Less waste produced
Generates more waste
Concern Addressed
Corrosion & leaks
Requires full removal & replacement
Budget-Friendly Transformation Options
Benchtop resurfacing is a cost-effective solution that significantly enhances the look of your kitchen without breaking the bank. You can refresh your surfaces by addressing issues like dirt and minor scratches, making them look brand new. This process not only saves you money but also avoids the need for additional costs associated with full-scale renovations.
When you consider your kitchen’s ventilation and overall layout, resurfacing allows you to keep existing fixtures such as valves and connections intact. If your benchtop has minor damages that affect its functionality, a skilled professional can take care of these with a simple adjustment, using tools like a screwdriver to tighten fittings. This way, you maintain the integrity of your kitchen’s design while enhancing its appearance.
The transformation options with benchtop resurfacing are practical and straightforward. You can choose from a range of colors and finishes to suit your style, allowing for an upgrade that complements your existing décor. By opting for resurfacing over full replacement, you access multiple benefits while minimizing disruption during the process:
Cost-effective upgrade
Preservation of existing features
Quick installation with minimal mess
Wide array of design choices
Environmental Benefits of Resurfacing
Choosing benchtop resurfacing is an environmentally responsible decision that reduces waste. Unlike a complete benchtop replacement, which often sends old materials to landfills, resurfacing allows you to retain much of the existing structure. You contribute to a lower environmental impact by polishing up existing surfaces instead of tearing everything out and starting over.
Another benefit of resurfacing pertains to energy efficiency. By keeping the original benchtop, you minimize the energy used in producing new materials. This method also helps maintain room temperature stability, as the existing materials typically have better insulation than new alternatives. Hence, resurfacing not only refreshes your kitchen but also keeps energy costs in check.
Furthermore, resurfacing materials are often designed for longevity and durability, meaning they last longer than some new options available in the market. You may find that resurfacing can effectively mask minor damages, such as chips in the surface that could expose moisture to tile structures underneath. By keeping the integrity of your kitchen intact, you avoid future waste and promote sustainability in your home renovation efforts:
Aspect
Benchtop Resurfacing
Complete Replacement
Waste Production
Less waste generated
More waste produced
Energy Efficiency
Improves insulation
Requires more energy
Longevity
Durable surface with polishing
New materials may deteriorate
Upgrading your kitchen with benchtop resurfacing is just the start. Next, you’ll want to know the essential materials and tools you need to achieve a flawless finish.
Essential Materials and Tools for Resurfacing
To successfully resurface your kitchen benchtop, you need to focus on choosing the right resurfacing products that suit your materials, like granite. Essential tools, including a washer for cleaning surfaces and brushes for applying the coat, will ensure a smooth process. Additionally, don’t forget about safety gear to protect yourself from dust and stains during the project.
Choosing the Right Resurfacing Products
When choosing resurfacing products for your kitchen benchtop, it’s crucial to select high-quality materials that match the existing surface. For instance, if your benchtop is made of granite, a resin specifically designed for stone surfaces will provide the best adhesion and longevity. Investing in the right products saves you time and effort in the long run, as well as ensuring a finish that withstands everyday wear and tear.
Consider the length of the project when selecting materials. A reliable resurfacing product should offer quick curing times without sacrificing quality. For instance, if you expect minimal downtime, look for products that can set and be used within a short period. This approach allows you to continue using your kitchen with minimal disruption while ensuring that the resurfacing process goes smoothly.
Don’t overlook the importance of thorough cleaning, which is where the right soap and water supply come into play. Properly washing the surface before application ensures that dirt and grease don’t interfere with the adhesion of the resurfacing product. Using a suitable cleaning agent can enhance the product’s effectiveness, leading to a longer-lasting, beautifully finished benchtop that enhances your kitchen’s overall look.
Must-Have Tools for a Smooth Process
To achieve a smooth resurfacing process, having the right tools on hand is essential. Invest in high-quality brushes that can apply your chosen cleaning agent evenly across the benchtop surface. This ensures that the new finish adheres properly and that every crevice of your kitchen, regardless of material—be it wood or stone—receives the attention it needs during your renovation.
In addition to brushes, consider using a durable washer for thoroughly cleaning your surfaces before applying any resurfacing products. This tool helps eliminate grease and dirt that can affect adhesion, leading to a more successful outcome. Whether you are working around a sink or various fixtures, a washer can enhance the efficiency of your preparation process, making the entire renovation task less labor-intensive.
Lastly, don’t forget to use protective gear such as gloves and goggles to safeguard yourself from dust and potential stains during the resurfacing project. Proper precautions not only ensure your safety but also help maintain a clean working area. By using these must-have tools, you set the stage for a successful kitchen transformation that enhances both aesthetics and functionality.
Safety Gear to Protect Yourself
When you embark on a benchtop resurfacing project, prioritizing safety should be your first step. Using gloves will provide protection against abrasive materials and chemicals while working with various resurfacing products. These materials can be harsh and may cause skin irritation, so ensuring your hands are well-protected helps maintain your comfort and health throughout the process.
Additionally, wearing safety goggles is crucial to shield your eyes from dust and potential splashes of resurfacing substances. This is especially important when using tools that generate pressure, as airborne particles can result in discomfort or injury. By taking this simple precaution, you can focus on the task at hand without worrying about the risks to your vision.
Lastly, consider using a dust mask to guard against mold spores or fine particles while resurfacing. Some products may release fumes or small particles that can be harmful when inhaled. Ensuring that you’re equipped with proper ventilation and a quality mask can significantly enhance your safety, enabling a smoother and safer kitchen transformation.
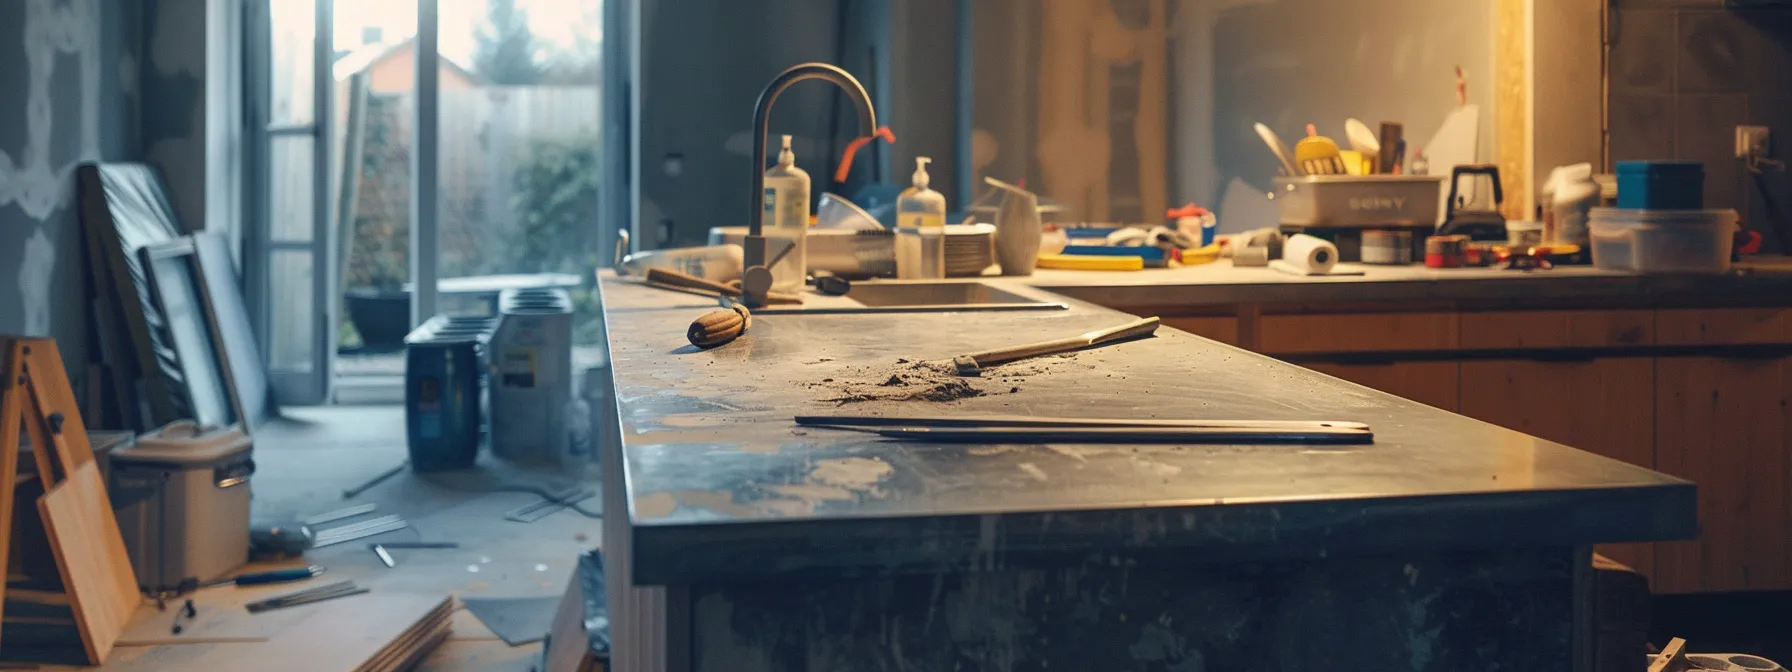
You’ve gathered the right tools and materials; now it’s time to focus on what comes next. Preparing your kitchen for benchtop resurfacing sets the stage for a transformation that you won’t want to miss.
Preparing Your Kitchen for Benchtop Resurfacing
Preparing Your Kitchen for Benchtop Resurfacing
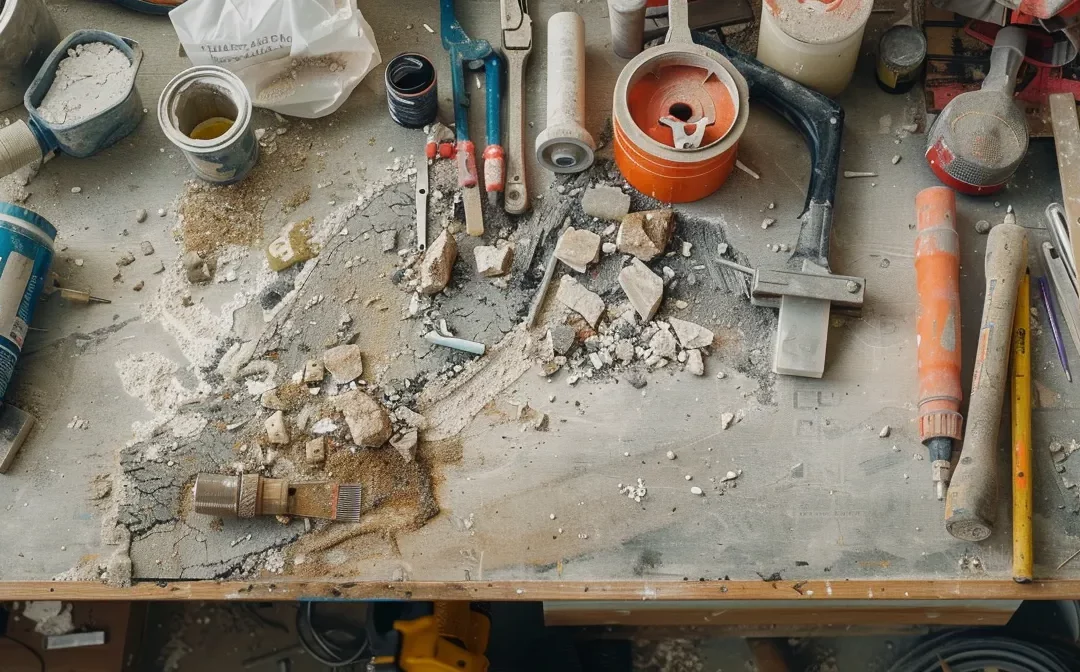
To ensure a successful benchtop resurfacing project, start by clearing and protecting surrounding areas, including the floor. Address any cracks and imperfections in the solid surface to create a smooth foundation for your new finish. Clean the surface thoroughly with an appropriate cleaner, and take plumbing tips into account to prevent issues during the process. Prepare for effective surface sanding to achieve optimal results.
Clearing and Protecting Surrounding Areas
To begin your benchtop resurfacing project, it’s essential to clear and protect the surrounding areas of your kitchen. Start by removing all items from your countertops, including appliances, utensils, and any decor. This not only gives you ample space to work but also prevents any scratches or damage to your belongings during the remodel.
Next, protect your flooring and nearby surfaces. Use drop cloths or plastic sheets to cover the floor and any furniture that can’t be moved. This step is crucial because resurfacing materials, such as epoxy, can create spills or drips. Taking this precaution will save you from potential cleanup efforts and ensure that your kitchen remains in good condition throughout the process.
Finally, evaluate the condition of the initial surface. Look for any cracks that may require a quick fix with an ironscrew or mineral filler before you start the resurfacing. Addressing these imperfections ahead of time will pave the way for a smoother finish and a successful transformation of your kitchen:
Remove all items from countertops
Cover the flooring and nearby surfaces
Check for cracks and repair them
Repairing Cracks and Imperfections
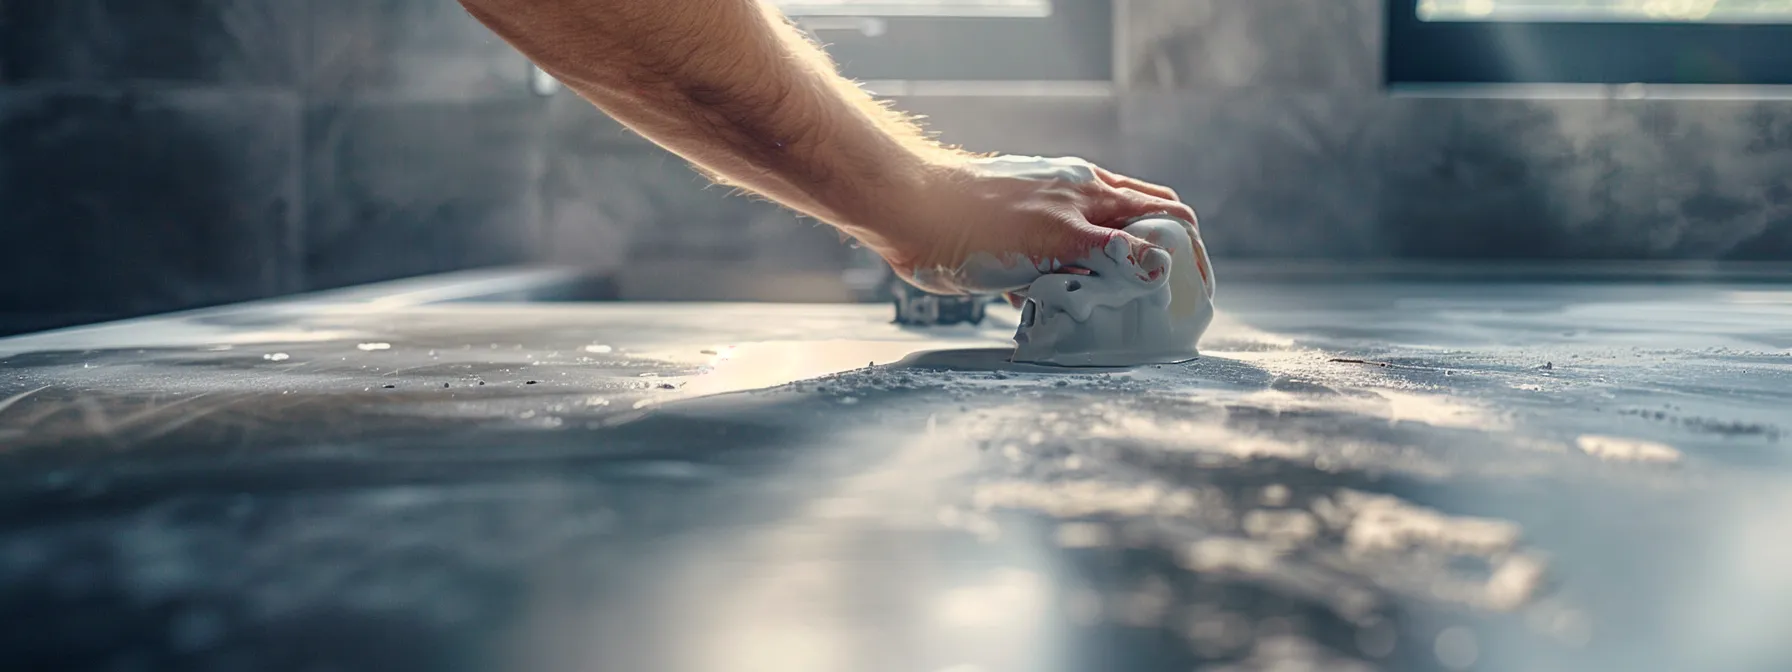
Before you start benchtop resurfacing, it’s vital to repair any cracks and imperfections that could affect the final outcome. Use a plastic filler specifically designed for the material of your benchtop to ensure strong adhesion. Apply the filler carefully, ensuring it occupies the entire crack, and level it off with a putty knife for a smooth finish.
After filling in the cracks, allow the material to cure fully. Once it’s set, use a razor blade to carefully remove any excess filler that may extend beyond the surface of the benchtop. This will create a seamless transition between the filled area and the surrounding material, contributing to a polished look during resurfacing.
Don’t forget to remove any debris from the surface before applying the resurfacing coating. Thoroughly cleaning the area not only enhances adhesion but also ensures that wear and tear do not compromise the new finish. After these preparations, you are well on your way to achieving an impressive kitchen transformation:
Step
Action
1
Repair cracks with plastic filler for strong adhesion.
2
Use a razor to remove excess filler for a seamless finish.
3
Clean the surface thoroughly to eliminate debris.
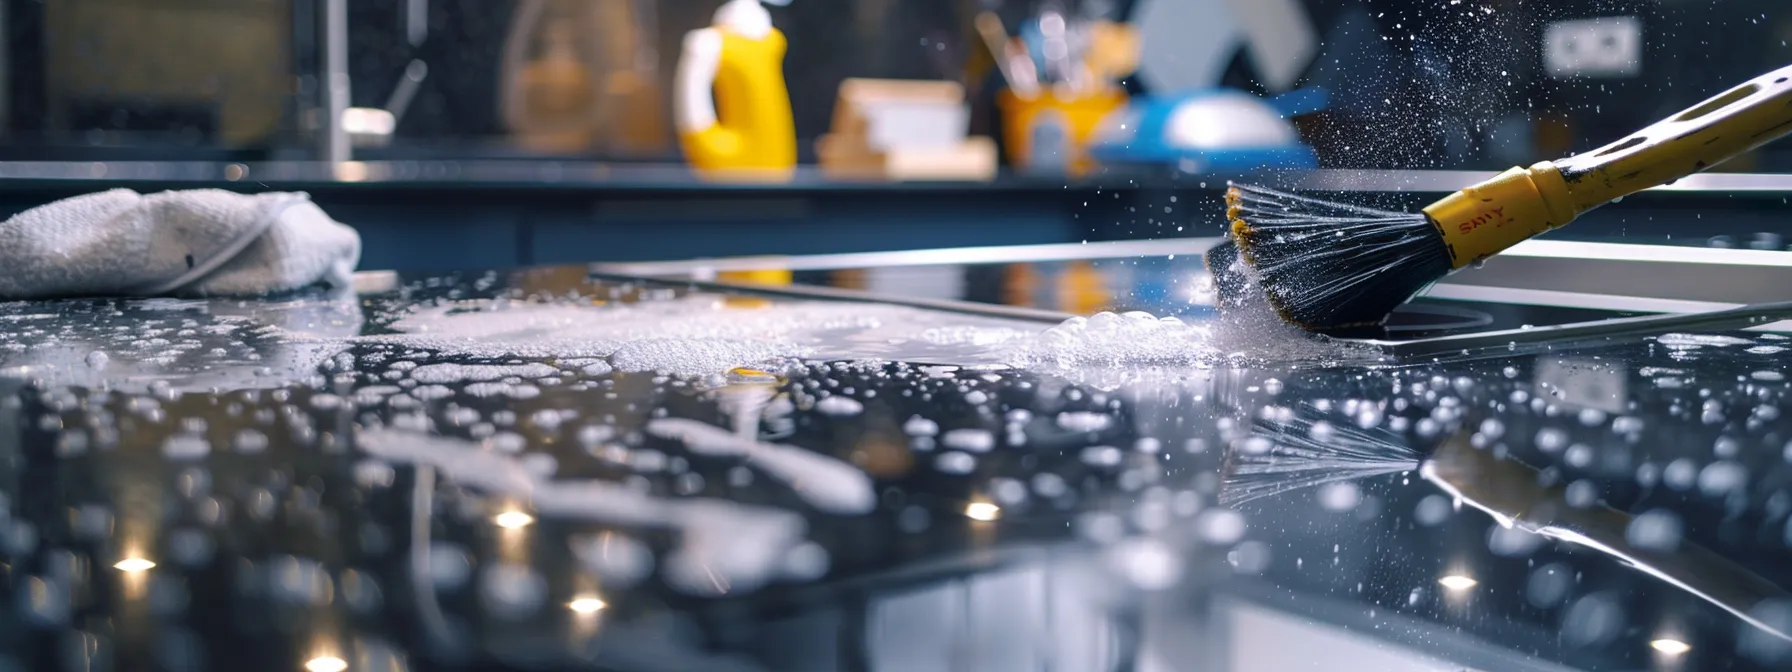
Cleaning the Surface for Optimal Results
Cleaning the surface of your countertop is a critical step in achieving a flawless benchtop resurfacing. Start by removing any dust, dirt, and grease accumulated on the surface; this ensures that the resurfacing products adhere properly. Use a degreaser or a mild soap solution, making sure to scrub thoroughly while paying particular attention to the edges and seams where residue often builds up.
Once you’ve removed dirt and grease, your next step is to prepare the surface for optimum results by sanding it down. Use high-grit sandpaper to gently roughen the surface of the quartz or plywood, promoting better adhesion for the new finish. Sanding ensures that any imperfections, such as scratches or dents, are smoothed out, making your resurfaced countertop look seamless and professional.
After sanding, you must clean the surface once more to eliminate sanding dust. A damp cloth can be effective for this purpose; ensure the countertop is completely dry before applying any resurfacing materials. Proper preparation, including cleaning, sanding, and drying, contributes significantly to the longevity and durability of your benchtop, ensuring that your kitchen transformation is successful:
Step
Action
1
Remove dust, dirt, and grease from the countertop.
2
Sand the surface with high-grit sandpaper.
3
Wipe down the surface to remove sanding dust.
Tips for Effective Surface Sanding
When preparing for surface sanding during your benchtop resurfacing project, start by selecting the right type of sandpaper, such as high-grit options. If your benchtop has minor imperfections, even small leaks can become larger issues if not properly addressed. By choosing the appropriate grit, you ensure that your surface is roughened adequately, promoting better adhesion for the new resurfacing material.
As you sand, focus on applying consistent pressure but avoid over-sanding one area to prevent uneven surfaces. If your benchtop is made from materials that may chip, like silicon, make sure to be gentle along the edges. This careful approach prevents damage and helps maintain the integrity of your kitchen design, ensuring the final result looks polished and professional.
After completing the sanding process, thoroughly clean the surface to remove any dust or debris before applying the resurfacing product. Failing to do so can lead to an uneven finish and reduce the lifespan of your newly resurfaced area. Effective sanding and meticulous cleaning serve as essential steps, not just for aesthetic purposes but also for the durability of your kitchen transformation in the realm of Bathrooms and Kitchens, reinforcing the importance of quality in your Creative Design Services.
You’ve prepared your kitchen, and now it’s time to get to work. Follow this step-by-step guide, and you’ll see how simple resurfacing can bring new life to your benchtop.
Step by Step Benchtop Resurfacing Guide
This step-by-step guide walks you through the essential processes for successfully resurfacing your kitchen benchtop. You’ll learn how to apply the primer coat, utilize effective techniques for spreading the resurfacing compound, and create a smooth, even surface. Additionally, we’ll cover drying times, what to expect during the curing process, and finishing your project with a durable protective sealant.
Applying the Primer Coat
Applying the primer coat is a crucial step in benchtop resurfacing that helps ensure a strong bond between the existing surface and the resurfacing material. Begin by selecting a high-quality primer compatible with your benchtop material, such as granite or laminate. Use a clean brush or roller to apply the primer evenly, covering all areas of the benchtop to promote consistent adhesion for the resurfacing compound.
While applying the primer, focus on even coverage to avoid any areas where the resurfacing material may not adhere properly. This attention to detail helps prevent peeling or bubbling once the surface is fully finished. Allow the primer to dry according to manufacturer recommendations before proceeding to the next step. Patience during this phase can save you from future headaches caused by improper adhesion.
Once the primer coat is dry, it acts as a protective barrier, ensuring the longevity of your resurfacing job. Take the time to assess the surface before moving on; look for any imperfections that need addressing. This step also reinforces the importance of preparation in your kitchen transformation, setting you up for a successful resurfacing experience that meets both aesthetic and functional needs.
Techniques for Spreading the Resurfacing Compound
When you are ready to spread the resurfacing compound, ensure you have a clean and well-prepared surface. Start by using a quality trowel or spreader to apply the compound evenly across the benchtop. Begin at one end and work your way to the other, taking care to cover all areas thoroughly to achieve a consistent finish.
As you apply the resurfacing compound, maintain a steady hand to avoid creating air pockets or uneven spots. It’s important to use smooth, sweeping strokes, allowing the compound to fill in any cracks or imperfections in the surface. This attention to detail will help ensure that you achieve a professional-looking result that enhances the overall aesthetic of your kitchen.
After applying the compound, check for any areas that may require additional coverage. If you notice any low spots or thin patches, simply add more compound and smooth it out. Taking this additional step will contribute to a durable and aesthetically pleasing surface that complements your kitchen’s design, ensuring that your resurfacing project meets your expectations for both function and style.
Creating a Smooth and Even Surface
Creating a smooth and even surface is essential for achieving a professional result during your benchtop resurfacing project. As you apply the resurfacing compound, focus on using consistent pressure and technique to eliminate any imperfections. This careful attention ensures that the compound fills in all cracks and voids, contributing to a flawless appearance for your kitchen upgrade.
After applying the resurfacing material, take the time to inspect the surface for any low areas or uneven spots. If you notice these imperfections, you can easily add more compound to those sections and smooth it out. This practice is important because it helps to ensure that the final finish not only looks great but also stands up to daily use.
Finally, patience plays a role in this process. Allow the resurfacing compound to cure according to the manufacturer’s instructions before applying any additional layers or finishes. Following these guidelines will result in a durable surface that enhances the overall aesthetics of your kitchen, giving you the refreshed and modern look you desire.
Drying Times and What to Expect
Understanding drying times is vital for your benchtop resurfacing project. After applying the resurfacing compound, it typically requires a curing time of around 24 hours. This allows the material to set properly, ensuring a durable finish that can withstand daily use in your kitchen.
During the drying process, it’s important to maintain proper ventilation in the area. This helps dissipate any fumes and speeds up the curing time. You should also avoid placing any objects on the benchtop until the surface is fully cured to prevent any potential damage or indentations.
After the initial drying period, you can expect that the resurfaced benchtop will feel firm and ready for light use. However, complete curing may take up to a week, depending on the specific product used. Patience is key during this phase to achieve the best results:
Action
Timeframe
Initial drying time
24 hours
Complete curing time
Up to 7 days
Ventilation recommendation
Ensure proper airflow
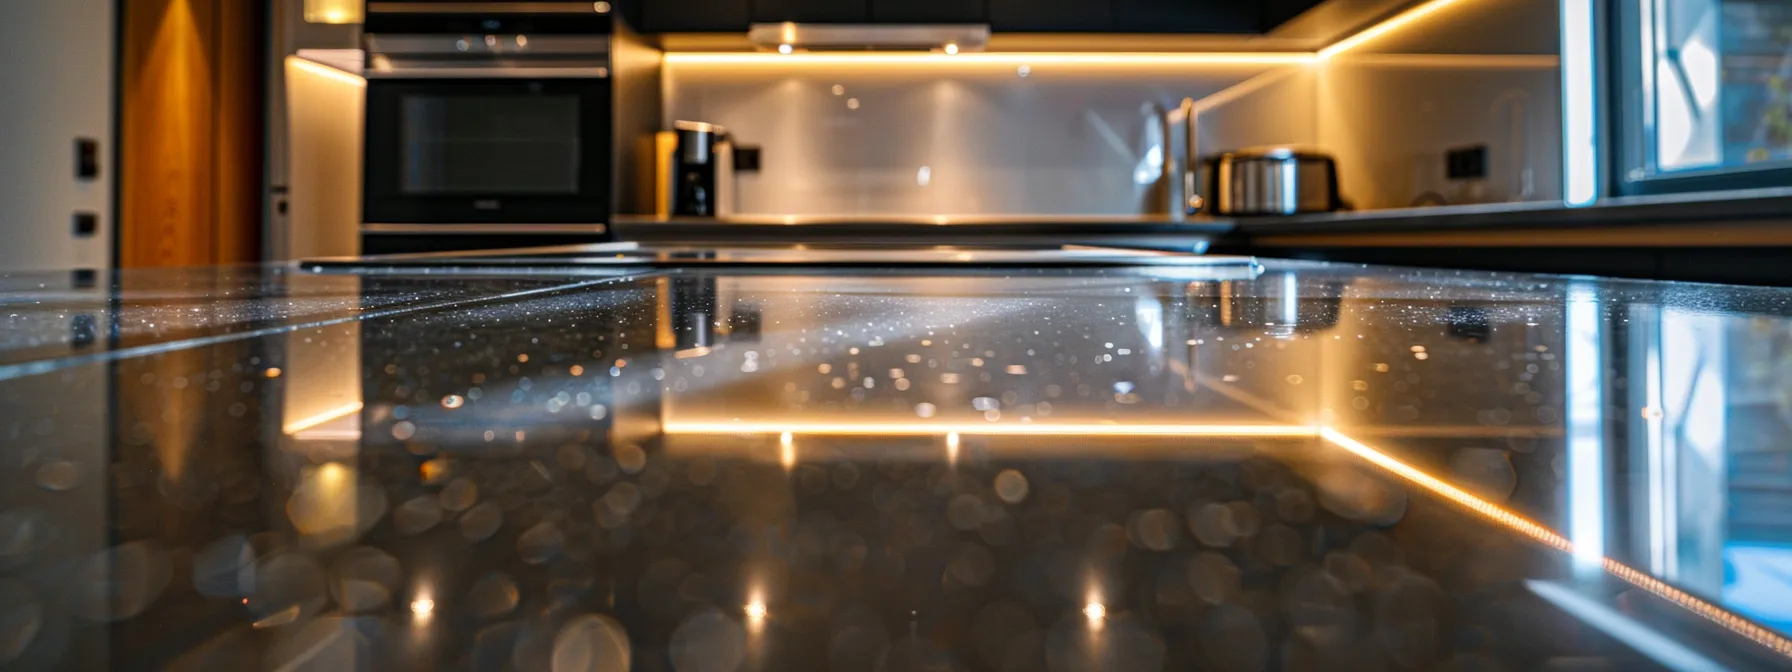
Finishing With a Protective Sealant
Finishing your benchtop resurfacing project with a protective sealant is a crucial step that enhances durability and longevity. A high-quality sealant creates a barrier against stains, moisture, and heat, protecting the surface of your newly resurfaced kitchen benchtop. This final touch not only preserves the beauty of your work but also ensures it withstands everyday use, so you can enjoy your transformed kitchen for years to come.
When applying the protective sealant, ensure the resurfaced surface is completely cured and clean. Use a clean brush or roller to apply the sealant evenly across the entire benchtop. Taking your time during this step will lead to a smooth finish that complements all the hard work you have put into resurfacing your kitchen, ensuring it looks polished and professional.
After sealing, allow the surface to dry fully before using the benchtop. Follow the manufacturer’s guidelines for curing time, as this will vary based on the type of sealant used. By taking care to finish the project correctly, you will create a stunning, durable surface that’s not only functional but also elevates your kitchen’s overall aesthetic appeal:
Apply a high-quality protective sealant
Ensure the benchtop is clean and completely cured
Use a brush or roller for even coverage
Allow the sealant to dry completely before use
You’ve resurfaced your benchtop with care. Now, let’s explore how to add your personal touch to make it truly yours.
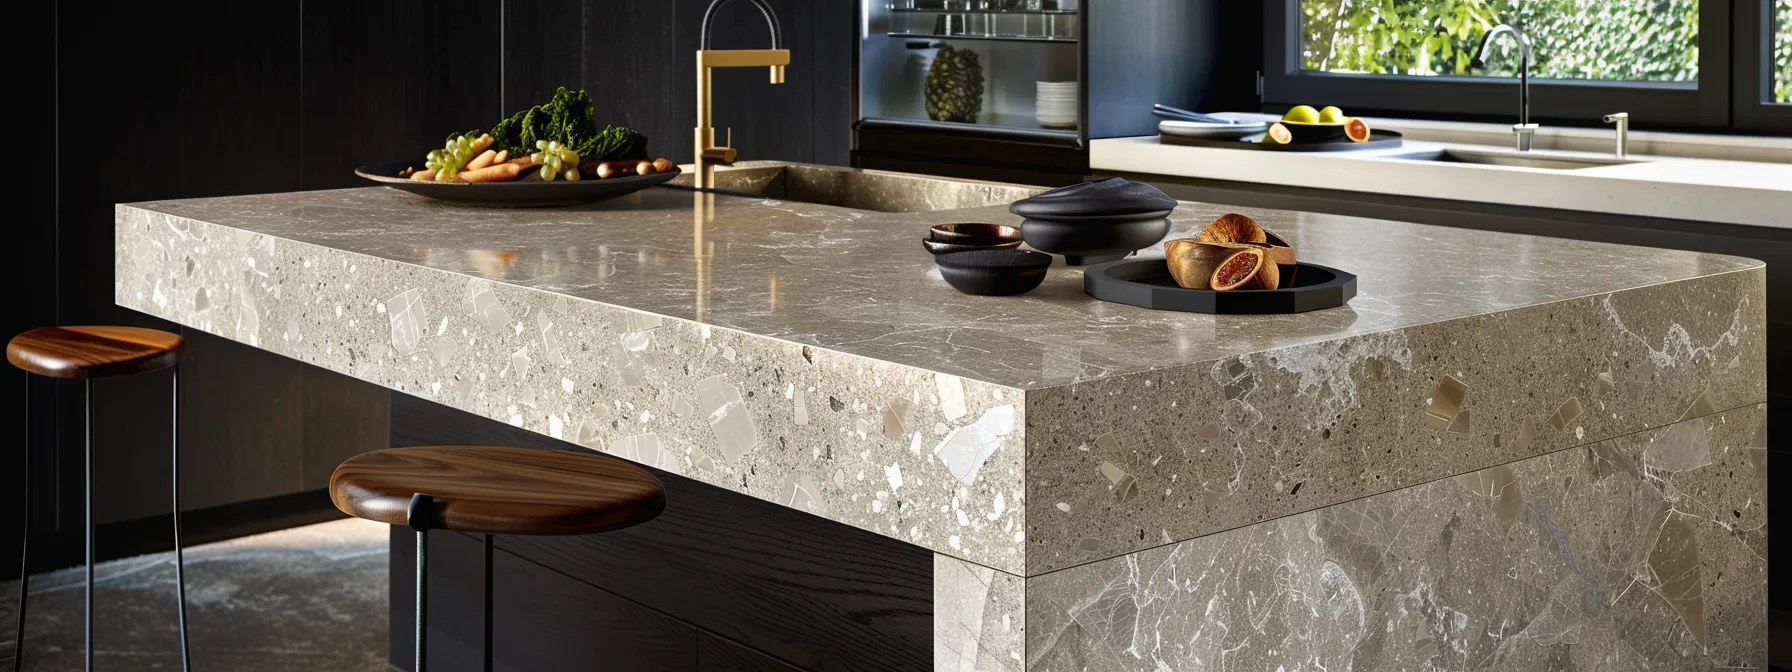
Customizing Your Resurfaced Benchtop
Customizing Your Resurfaced Benchtop
Customizing your resurfaced benchtop allows you to create a space that reflects your personal style. Start by selecting colors and finishes that match your kitchen decor. You can also explore adding decorative elements or textures to enhance its aesthetic appeal. Additionally, consider incorporating functional enhancements to improve usability, making your kitchen both beautiful and efficient.
Selecting Colours and Finishes
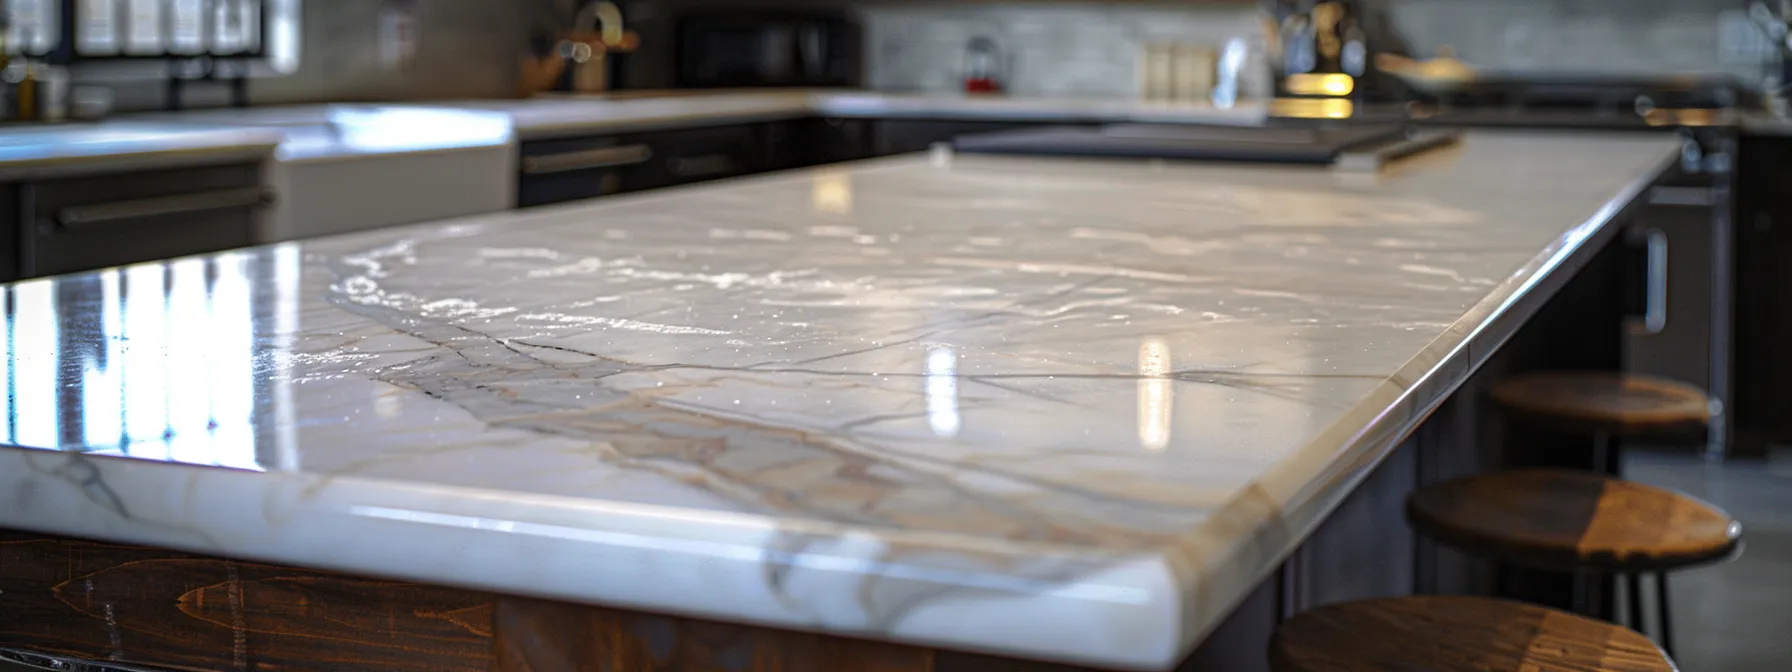
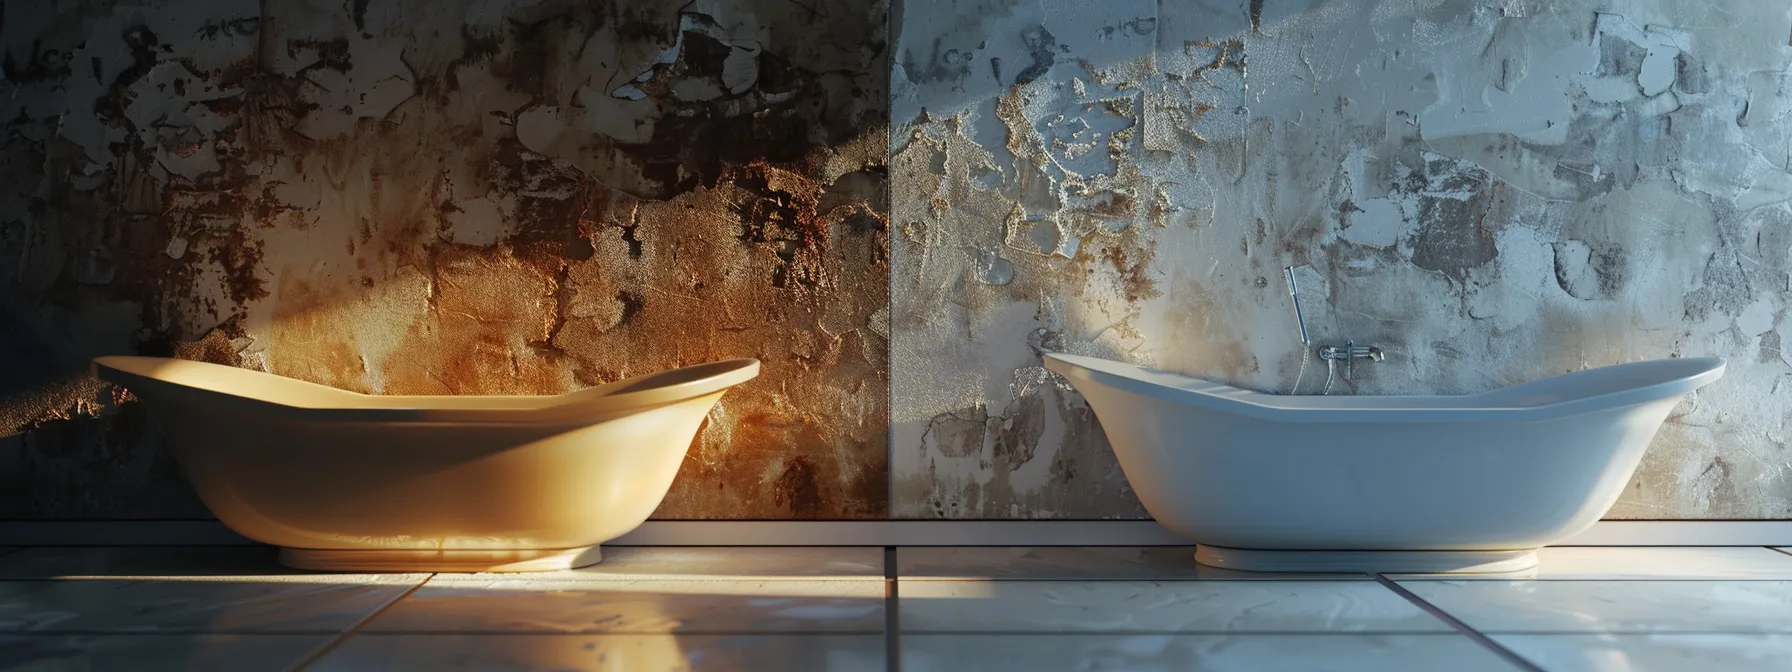
When selecting colors and finishes for your resurfaced benchtop, consider how these choices will harmonize with your existing kitchen decor. Think about the overall theme of your kitchen; a sleek, modern space may benefit from a glossy finish in neutral tones, while a rustic kitchen might be enhanced by warmer shades and textured finishes. By contemplating these aspects, you ensure that your new benchtop complements the entire room and adds to its aesthetic appeal.
It’s also important to take into account practical factors such as durability and ease of maintenance. For example, darker colors can help disguise minor stains or scratches, making them a practical choice for busy kitchens. On the other hand, lighter finishes can create an airy feel but may require more upkeep. Balancing aesthetics with functionality will help you choose the best options for your resurfacing project.
Finally, involve your family in the decision-making process if you’re sharing your kitchen with others. Explore various color swatches and finishes together to find a design that everyone loves. This collaboration not only helps create a kitchen that reflects your style but also fosters a sense of ownership among household members, enhancing their connection to the newly transformed space:
Consideration
Options
Benefits
Color Harmony
Neutral tones, warm shades
Enhances space aesthetic
Durability
Darker colors, gloss finishes
Resists stains and scratches
Family Involvement
Color swatches, collaborative choices
Creates shared ownership
Adding Decorative Elements or Textures
When customizing your resurfaced benchtop, adding decorative elements or textures can significantly enhance its visual appeal. Consider incorporating contrasting color accents to create a striking focal point or implement subtle textures that add depth to the design. These enhancements allow you to express your personal style while maintaining a cohesive look with your kitchen decor.
Using decorative elements, such as edge profiles or unique finishes, can elevate the functionality and aesthetics of your benchtop. For instance, selecting a textured finish can help hide fingerprints or minor scratches, making it both practical and beautiful. You can also opt for a glossy or matte finish depending on your kitchen’s overall theme; glossy surfaces may lend a modern touch, while matte finishes can provide a softer, more elegant feel.
Don’t hesitate to experiment with various materials or overlays during the resurfacing process. Adding materials like metal accents or patterned overlays can create an eye-catching, personalized look. These choices not only enhance the kitchen’s design but also reflect your individuality, ensuring your benchtop stands out as a central feature of your kitchen transformation.
Incorporating Functional Enhancements
Incorporating functional enhancements during your benchtop resurfacing can significantly improve the usability of your kitchen. Consider adding built-in cutting boards or integrated drainage racks that cater to your cooking habits. These enhancements not only optimize your workspace but also streamline meal preparation, making your kitchen more efficient and user-friendly.
Another practical option is to create additional storage solutions within your benchtop design. By integrating pull-out drawers or concealed compartments, you can maximize your kitchen’s functionality while keeping it visually appealing. Having easy access to kitchen tools and utensils will help reduce clutter on your counters, enhancing the overall organization.
Finally, consider installing power outlets on your benchtop surface to support small appliances. This practical addition keeps cords organized and accessible, allowing you to use your kitchen gadgets more conveniently. Being strategic about these enhancements will transform your resurfaced benchtop into a highly functional space that meets your everyday needs:
Enhancement Type
Description
Benefits
Built-in Cutting Boards
Integrated boards for meal prep
Optimizes workspace
Storage Solutions
Pull-out drawers and compartments
Reduces clutter and enhances organization
Integrated Power Outlets
Accessible outlets on the benchtop
Convenient access for kitchen appliances
Customizing your resurfaced benchtop brings new life to your kitchen. Now, learn how to keep that freshness alive with proper maintenance.
Maintaining Your Newly Resurfaced Benchtop
To keep your newly resurfaced benchtop looking its best, focus on daily care practices that maintain its shine and durability. Learn about the ideal products to use and which to avoid to ensure a long-lasting finish. Additionally, you’ll discover how to handle minor repairs and touch-ups effectively, preserving the beauty and functionality of your kitchen transformation.
Daily Care Practices
To maintain your newly resurfaced benchtop, start with daily cleaning using a mild soap and water solution. This simple practice removes dirt and spills without damaging the surface, ensuring it remains in excellent condition. Avoid harsh chemicals or abrasive sponges that can scratch or weaken the new finish.
It’s also crucial to immediately wipe up any spills, especially liquids that could stain or seep into seams. By taking quick action, you protect the integrity of the resurfaced surface and keep it looking fresh. Regularly inspecting for any minor damages or scratches helps you address issues early on, maintaining the overall appearance of your kitchen benchtop.
Finally, consider applying a specialized polish suitable for resurfaced surfaces periodically. This practice can boost the shine and enhance the protective layer, ensuring longevity for your kitchen upgrade. By incorporating these daily care practices, you’ll keep your benchtop looking vibrant and functional for years to come.
Products to Use and Avoid
To maintain your newly resurfaced benchtop, it’s important to use mild soap and warm water for regular cleaning. These gentle cleaning solutions effectively remove spills and dirt without risking damage to the surface. Avoid using harsh chemicals, as they can weaken the bond of the resurfacing material and reduce its lifespan.
For added shine and protection, consider using a specialized polish designed for resurfaced surfaces. Such products often contain ingredients that restore luster while reinforcing the protective layer. It’s critical to verify the product is appropriate for your specific benchtop material to ensure optimal results and avoid any potential issues.
On the other hand, stay clear of abrasive sponges or scrubbers as they can scratch the finish, leading to irreversible damage. Opt for soft cloths or sponges to preserve the appearance of your benchtop. By selecting the right products, you can safeguard your kitchen investment and enjoy a beautiful, functional space for years to come.
Handling Minor Repairs and Touch-Ups
Handling minor repairs and touch-ups on your resurfaced benchtop is essential for maintaining its appearance and functionality. For small scratches or chips, you can use a repair kit that matches your benchtop material. These kits typically include a filler that closely resembles the original surface, allowing you to restore the area effectively without the need for extensive work.
When addressing any blemishes or stains, you should act promptly to prevent lasting damage. A simple cleaning solution or gentle abrasive can help you minimize the appearance of minor imperfections. Remember to test any product on a small, inconspicuous area first to ensure it won’t interfere with the resurfaced finish.
Regularly performing touch-ups also helps you address wear over time, keeping your kitchen looking fresh. You can enhance the durability of your benchtop by applying a specialized sealant after repairs, which provides an added layer of protection. By staying proactive with minor repairs, you ensure that your resurfaced kitchen benchtop maintains its beauty and longevity, making it a valuable focal point in your home.
Conclusion
Benchtop resurfacing is a practical and budget-friendly way to transform your kitchen without the hassle of a complete remodel. You can enhance your kitchen’s aesthetic while addressing issues like moisture and wear, all while minimizing waste and environmental impact. By following the right steps and utilizing quality materials, you achieve a durable and visually appealing surface that meets your needs. Embrace benchtop resurfacing to rejuvenate your kitchen and enjoy its renewed beauty for years to come.
When considering benchtop resurfacing, you may wonder what affects the final price. Factors such as the size and layout of your benchtop, the choice of environmentally friendly resurfacing materials, and the surface condition can significantly influence costs. This article will explain how different aspects like professional expertise and additional features impact the overall price. By understanding these elements, you can make well-informed decisions, ensuring your resurfacing project meets your needs without exceeding your budget.
Key Takeaways
Accurate measurements are essential for determining the cost of benchtop resurfacing
Complex layouts and unique designs significantly influence resurfacing project prices
The choice of materials impacts both cost and durability for your benchtop
Professional expertise is crucial for quality resurfacing outcomes and avoiding additional costs
Custom features like sink cutouts can increase both functionality and overall resurfacing costs
The Size and Layout of Your Benchtop Affects Cost
Measuring your benchtop area accurately is vital for determining the cost of resurfacing. The overall size and any complex layouts can significantly impact the final price. Additionally, factors such as the choice of materials—like marble—and the need for cabinet painting can also play a role. Understanding these elements ensures you get the best value Bathrooms and Kitchens service, including a solid warranty from your handyman.
Measuring Your Benchtop Area Accurately
To get an accurate price estimate for your benchtop resurfacing, you must measure your benchtop area carefully. Start by measuring the length and width of your countertop Fimagine Home Page. If you have a layout that includes a dishwasher or other appliances, consider how these elements may affect your overall surface area Bathrooms and Kitchens. This attention to detail ensures that you account for every section, helping to avoid unexpected costs.
Consider the materials involved when measuring your benchtop. If you plan to use steel or resin for resurfacing, the size can impact not only the material costs but also the complexity of the job. For instance, if your benchtop features sleek lamination or intricate shapes, you’ll need to factor in these specifications when seeking an accurate quote.
Your interior design preferences will also play a role in determining the final resurfacing cost. Each design choice, from color to texture, can influence the price based on the materials used and the area involved. By measuring your benchtop accurately, you can provide detailed information to your resurfacing professional, ensuring that the project aligns with your vision and budget.
Impact of Complex Layouts on Resurfacing Price
A complex layout can significantly influence the resurfacing price of your benchtop. When your benchtop features unique shapes or cut-outs, such as for sinks or appliances, this adds to the difficulty of the job. More intricate designs often require additional time and labor, which can raise the overall cost of the resurfacing project.
The materials you choose matter too. For example, if you opt for quartz rather than a simpler laminate, the cost will reflect both the material’s price and the skill needed to install it properly. Additionally, complexities like grout lines in a textured design can further affect the pricing, as thorough attention is needed to ensure a flawless finish while reducing the chance of future wear and tear.
If you’re considering a do it yourself approach for your resurfacing project, be aware that complex layouts may challenge even the most skilled amateurs. Assessing your layout carefully will help you understand the knowledge and tools you need to achieve quality results. Without this preparation, you might incur extra costs due to mistakes, which could offset any savings gained from handling the project yourself:
Layout Type
Complexity Level
Price Influence
Straight Edge
Low
Standard Pricing
Curved Surface
Medium
Increased Labor Costs
Cut-outs for Sinks
High
Significantly Higher Costs
The size and layout of your benchtop set the stage for cost. Now, consider how the choice of resurfacing materials can shape that price even further.
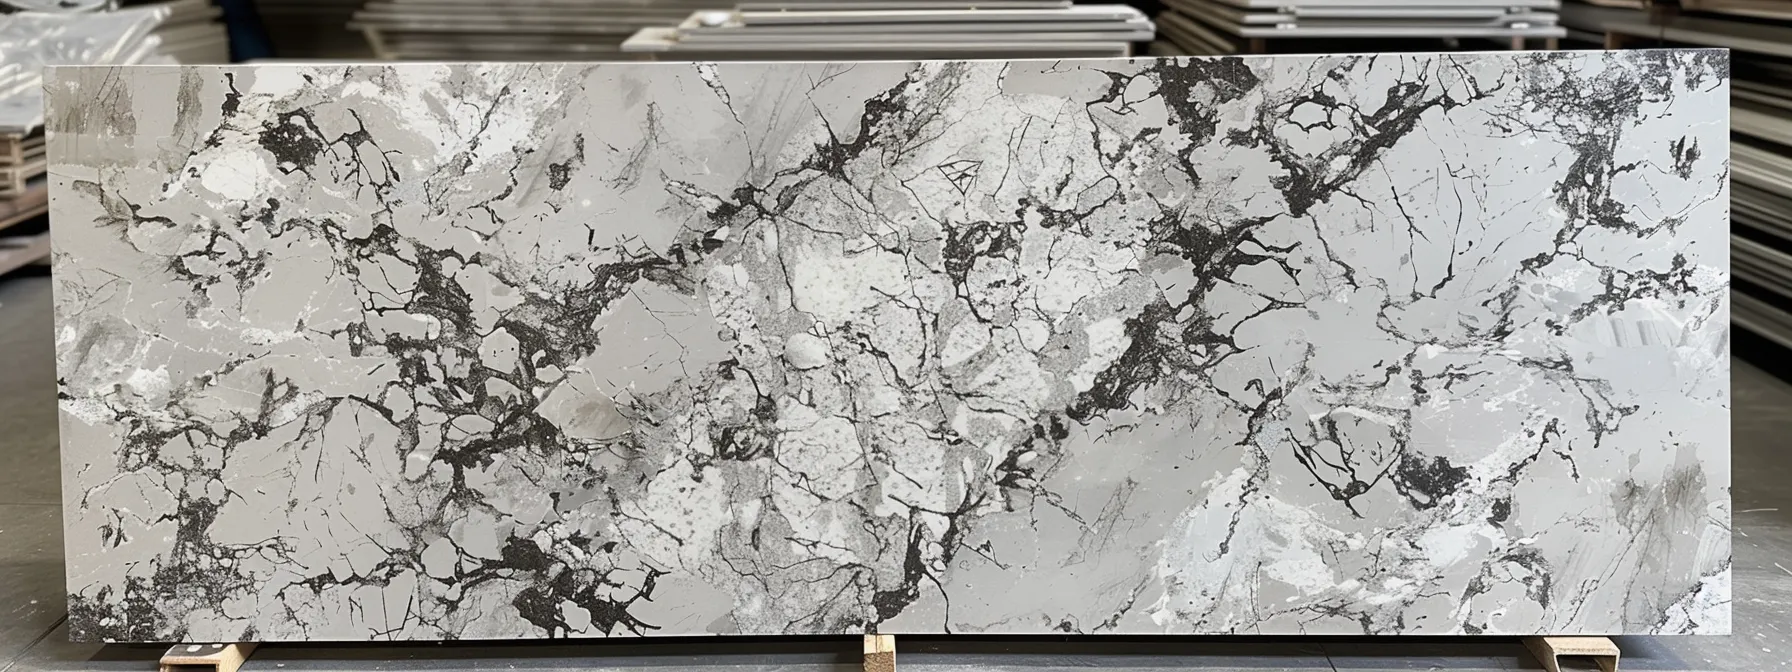
Choice of Resurfacing Materials Influences Price
Your choice of resurfacing materials greatly affects the overall cost of your benchtop project. Comparing different options such as wood veneer, butcher block, solid surface, and tile will help you understand how each material meets your style and budget needs. It’s essential to consider durability versus cost when selecting the right material, ensuring you make an informed decision that aligns with your vision.
This section will cover practical insights on various resurfacing materials and their impact on costs, guiding you toward a choice that balances aesthetics and functionality.
Comparing Different Resurfacing Materials
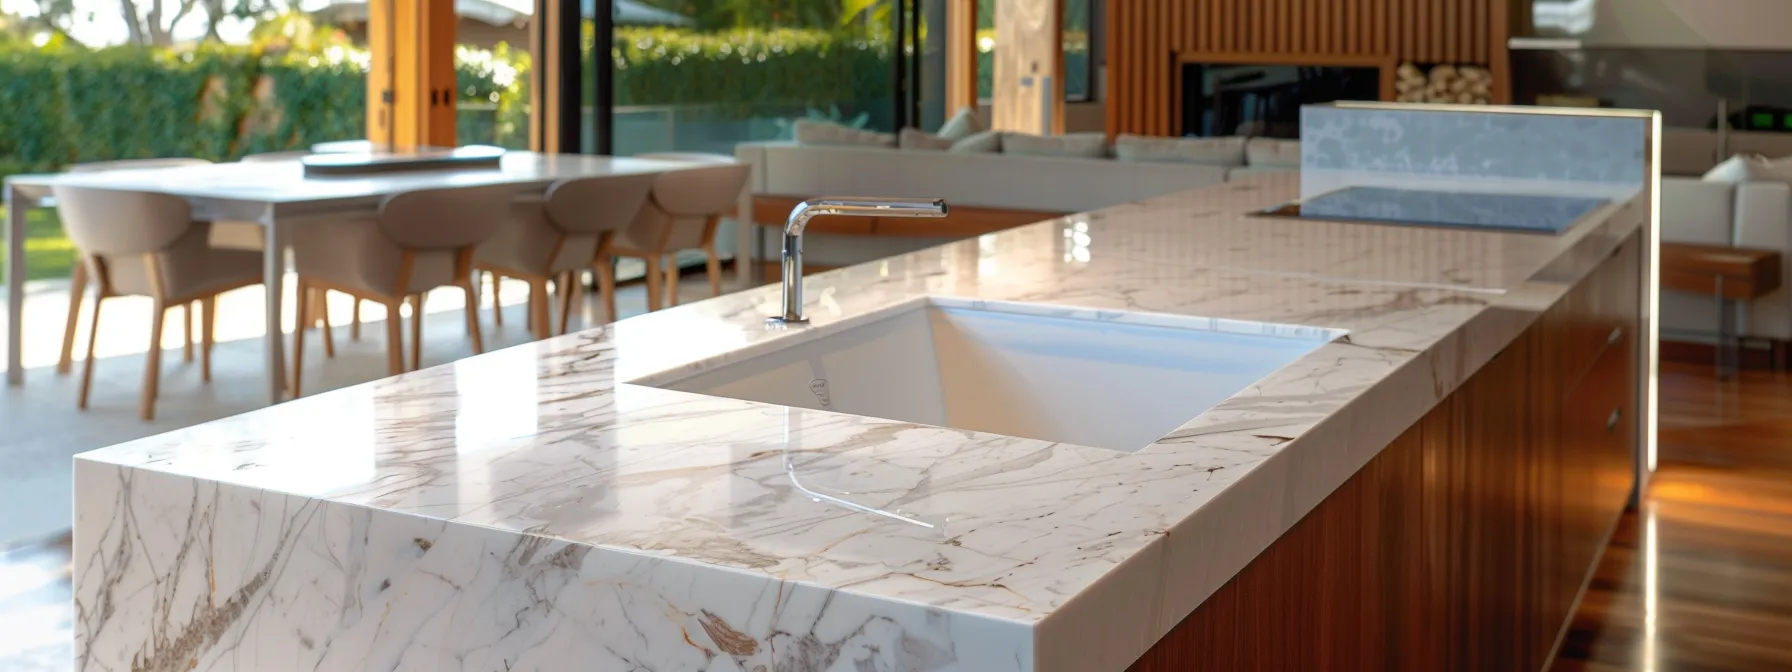
Your choice of resurfacing materials plays a significant role in determining the cost of your benchtop project. Options such as porcelain and granite each come with distinct advantages and price points. For example, granite is valued for its durability and natural beauty, making it a popular choice that can enhance your home’s aesthetic appeal and provide a strong return on investment.
Another versatile option is epoxy, which can offer a modern look at a relatively lower cost compared to natural stones. It can be customized in various colors and patterns, allowing you to achieve a unique finish that resonates with your style while also addressing any budget constraints. Consider polymer materials as well, which offer excellent durability and resistance to everyday wear, making them ideal for high-traffic areas.
When comparing these materials, it is helpful to assess their overall performance and maintenance needs. Different materials offer varying levels of upkeep; for instance, granite may require sealing over time, while epoxy provides a more low-maintenance solution. By weighing the pros and cons of each option, you can make an informed decision that balances aesthetics, functionality, and cost:
Material
Cost Range
Return on Investment
Maintenance Level
Granite
$50 – $100/sq ft
High
Moderate
Porcelain
$40 – $90/sq ft
Medium
Low
Epoxy
$30 – $70/sq ft
Medium to High
Very Low
Polymer
$25 – $60/sq ft
Medium
Low
Durability vs. Cost: Selecting the Right Material
When choosing the right material for your benchtop resurfacing, striking a balance between durability and cost is essential. For instance, stainless steel offers exceptional resilience and a modern aesthetic that can withstand high temperatures and spills. However, its price point may be higher compared to other materials, which is something to consider if you’re working within a specific budget.
Understanding the role of maintenance also plays a crucial part in your decision-making. Materials like granite require regular sealing to maintain their appearance, while coatings using sandpaper techniques can help preserve the quality of laminate surfaces. Evaluating the upkeep involved with each material will help you decide which one fits your lifestyle and cabinetry needs best.
Finally, think about how your chosen material will work with the overall design of your space, including lighting considerations. A durable countertop can enhance the visual appeal of your kitchen or bathroom, especially when combined with appropriate cabinetry. Make sure to select a material that complements not just your style but also the practical demands of your daily use.
Choosing the right resurfacing materials shapes the overall cost of your project. But remember, the condition of your surfaces and how they need to be prepared will still play a key role in achieving a lasting finish.
Surface Condition and Preparation Requirements Matter
Assessing the current state of your benchtop is essential for determining resurfacing costs. Look for any damage or wear that may require repairs before starting the project. These necessary repairs can influence the final price and impact how well your new surface adheres, ensuring a lasting finish that enhances your kitchen or pantry design.
Understanding the condition of your benchtop lets you prepare effectively, aligning your expectations with your budget while facilitating a smooth resurfacing process. By considering these factors, you equip yourself with the knowledge needed to make informed decisions, potentially leading to a better outcome for your home improvement project.
Assessing the Current State of Your Benchtop
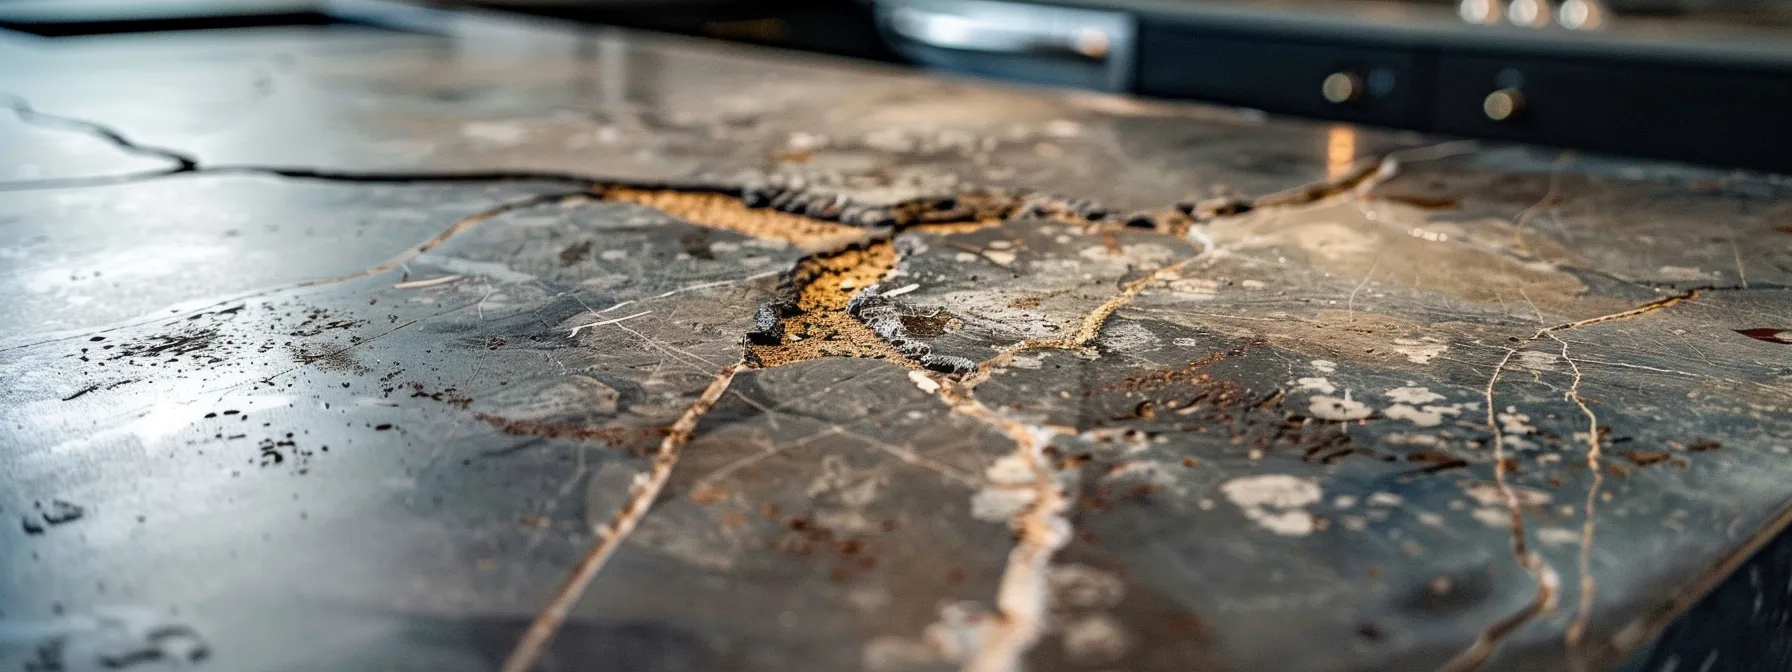
Assessing the current state of your benchtop is a critical step in your renovation process. Begin by inspecting for any visible signs of damage such as scratches, chips, or signs of wear. These imperfections can affect the longevity of the resurfacing project and influence the adhesive‘s ability to bond effectively with the new surface.
If your benchtop is made from materials like wood or particle board, check for moisture damage or warping. These issues may require significant repairs or even replacement of parts to ensure a solid foundation for resurfacing. Ignoring these factors could lead to poor results and additional costs down the line.
Understanding the condition of your benchtop allows you to plan effectively for your resurfacing project. A thorough assessment helps identify the necessary prep work, ensuring that your renovation aligns with your expectations and remains within budget. By addressing these aspects early, you set the stage for a successful transformation that enhances both the aesthetics and functionality of your space.
Necessary Repairs Before Resurfacing
Before you start resurfacing your benchtop, it’s essential to assess and address any necessary repairs. Look for signs of wear such as cracks or chips, especially near complex areas such as around the cooktop or drawers. These damages can compromise the bond between the resurfacing material and the existing surface, potentially leading to peeling or other issues down the line.
If your benchtop is constructed from plywood or another material prone to damage, ensure you check for moisture damage or warping. Repairing these issues not only enhances the integrity of your benchtop but also minimizes future maintenance complexities. Sanding down rough patches may be necessary to create a smooth base for the new surface.
Taking the time to perform these repairs beforehand can save you money in the long run. Each layer of prep work reduces the chances of needing additional resurfacing due to underlying problems. By proactively addressing these concerns, you can ensure a successful resurfacing project that meets your aesthetic and functional needs:
Repair Type
Attention Level
Impact on Resurfacing Cost
Crisp Edges and Chips
Medium
Increased Complexity
Moisture Damage
High
Significantly Higher Costs
Sanding Rough Spots
Low
Standard Pricing
Understanding how surfaces need to be prepared is crucial for a successful project. Now, let’s examine how the skills of professionals can influence your total labor costs.
How Professional Expertise Affects Labor Costs
Hiring skilled professionals for your benchtop resurfacing project is crucial, as their expertise directly impacts labor costs. Homeowners must consider how labor rates can vary based on the complexity of the job and the experience of the general contractor. This section will discuss the importance of professional skills in handling issues like wear and water damage, ensuring a quality finish that enhances your solid wood surfaces.
Importance of Hiring Skilled Professionals
Hiring skilled professionals for your benchtop resurfacing project is vital, as they bring knowledge that directly impacts the quality and durability of the finished product. Their expertise ensures that lifting and molding, especially around elements like a lazy Susan, are executed with precision, providing a seamless look that enhances the overall aesthetic of your kitchen or bathroom. Moreover, experienced professionals can assess the condition of your surface and recommend the appropriate sealant to protect against future wear and tear.
Professionals not only understand the necessary techniques for resurfacing but are also familiar with various materials, including oak, which can significantly influence the project’s outcome. Their ability to navigate different requirements and preferences ensures that your design vision is fully realized while adhering to budgetary constraints. By employing a knowledgeable team, you gain access to high-quality materials and finishes, thereby increasing your home improvement project’s overall value and longevity.
Ultimately, investing in professional expertise safeguards your investment while aligning the resurfacing process with your needs. Their careful handling of repairs and precise application techniques can lead to outstanding results, making sure your benchtop looks impeccable and functions well for years to come. The cost of hiring professionals may seem higher, but it’s a strategic choice that pays off in reliability and appearance:
Skill Level
Impact on Quality
Long-term Benefits
Basic
Lower
Potential issues may arise
Intermediate
Moderate
Improved aesthetics and durability
Expert
High
Enhanced value and longevity
How Labor Rates Affect Overall Cost
The labor rates for your benchtop resurfacing project can have a significant impact on the overall cost. Skilled professionals command higher rates due to their expertise in working with materials such as slate and thermofoil, ensuring a flawless application that enhances your kitchen or bathroommakeover. Understanding how these rates align with the quality of work helps you make informed decisions about your renovations.
When you consider hiring a contractor, keep in mind that brand reputation also influences labor costs. Established brands often provide trained professionals who use the latest techniques and tools, meaning you pay a premium for their services. This investment can lead to enhanced aesthetic appeal, such as precisely applied crown molding, which can elevate the look of your space considerably.
Ultimately, the complexity of your project will dictate how labor rates fit into your budget. For example, if your benchtop requires intricate designs or repairs, the labor costs can rise due to the increased skill and time necessary. By understanding the relationship between labor rates and project specifics, you can budget more effectively for your resurfacing needs:
Labor Type
Rate per Hour
Impact on Overall Cost
Basic Labor
$25 – $45
Lower Total Cost
Specialized Labor
$50 – $80
Moderate Total Cost
Expert Labor
$80 – $150
Higher Total Cost
Expertise shapes costs in ways you might not expect. From here, you’ll see how where you live can change the price of resurfacing, making location just as important.
How Location and Accessibility Influence Resurfacing Cost
Your geographic location plays a significant role in determining the cost of your benchtop resurfacing. Prices can vary based on local market rates and availability of materials. Additionally, accessibility challenges at your home, especially in kitchens and bathrooms, can affect labor time and expenses. Understanding these factors will help you better estimate costs for your kitchen remodel.
This section will explore how geographic factors influence pricing and the potential difficulties that arise from accessing your benchtop area, including any unique challenges that may require specialized tools or techniques, such as concrete resurfacing.
Effect of Geographic Location on Pricing
Your geographic location plays a significant role in shaping the cost of your benchtop resurfacing project. Areas with higher demand for kitchen remodeling services often see increased prices due to the competition among contractors. If you live in a metropolitan region, the availability of materials like ceramic or porcelaintile may also be impacted, leading to variations in cost compared to rural settings where resources might be more limited.
Accessibility to your home and the specific layout of your kitchen can further influence the overall resurfacing price. If your benchtop is situated in a tight space, contractors may need specialized tools to navigate the area effectively, increasing labor time and costs. Additionally, if your existing surface shows signs of mold or requires extensive cleaning, this might lead to added expenses on top of the standard resurfacing services.
Keep in mind that regional material pricing can differ widely. While plastic substrates might be available at a lower cost in some areas, premium choices like natural stone or high-quality tiles can drive up your budget significantly. Understanding these geographic factors helps you plan more effectively for your kitchen remodeling project, ensuring you choose the right materials and services that fit your financial expectations.
Challenges With Benchtop Accessibility
When tackling a benchtop resurfacing project in a busy place like New York City, accessibility can present unique challenges. Limited space and tight corners can make it difficult for contractors to maneuver their equipment, affecting the time and effort needed to achieve proper adhesion. If your benchtop is situated near a stove or enclosed by cabinetry, ensuring that professionals can work efficiently becomes even more essential for a successful resurfacing job.
Dust control is crucial during the resurfacing process, especially in compact kitchen spaces. As the old surface is prepared for a new layer, fine dust can spread throughout your home, even into adjacent rooms. Being proactive about dust management strategies can minimize this issue, protecting your new Caesarstone or other chosen materials from potential damage caused by dust settling during application.
Further complicating matters is the potential need for specialized tools or techniques, especially in areas with high humidity or moisture levels. If your existing benchtop shows signs of water damage, repairs must be addressed prior to resurfacing to ensure a flawless outcome. Engaging professionals who understand these nuances not only enhances the durability of your new surface but also helps avoid costly mistakes that can arise from inadequate preparation or oversight.
Costs can shift based on where you are and how easy it is to get to the job. But there’s more at play—additional features and customizations can significantly enhance your space and impact the final price.
Additional Features and Customizations Add to Cost
Incorporating unique design elements into your benchtop resurfacing can significantly affect the overall price. Customizations such as sink cutouts or specialized edge profiles add to labor and material costs. Understanding these factors ensures that your vision aligns with your budget while enhancing the functionality and aesthetics of your kitchen or bathroom space.
Incorporating Unique Design Elements
Incorporating unique design elements into your benchtop resurfacing can enhance both its appearance and functionality. Features such as sink cutouts or integrated drainage systems not only serve practical purposes but also elevate the overall aesthetic of your kitchen or bathroom. As you consider these additions, keep in mind that they will influence your final resurfacing price significantly.
Custom edge profiles can also add a distinctive touch to your benchtop. Options vary from sleek modern lines to more traditional, ornate styles. The selection you make can affect both the complexity of the work and the material costs involved, as some designs require specialized tools and techniques for precise execution.
When planning for your resurfacing project, think about how these unique elements will align with your overall vision. Balancing functionality and style ensures that you are not only investing in aesthetics but also in a practical solution that fits your everyday needs:
Sink Cutouts
Integrated Drainage Systems
Custom Edge Profiles
Personalized Surface Textures
Unique Color Combinations
Costs for Extras Like Sink Cutouts or Edge Profiles
When planning your benchtop resurfacing project, it’s essential to consider the additional costs associated with customizations like sink cutouts and edge profiles. These features add both functionality and style but also contribute to the overall price of the job. For instance, creating a clean and precise sink cutout requires specialized tools and skilled craftsmanship, which can increase labor costs significantly.
Edge profiles offer another opportunity for customization, allowing you to choose a style that complements your kitchen or bathroom‘s design. Whether you prefer a sleek contemporary look or a more traditional style, each edge profile may entail different levels of labor and complexity, influencing your resurfacing price. The more intricate the design, the more time and expertise are needed for installation, which can lead to higher expenses.
Understanding these costs can help you budget effectively for your resurfacing project, ensuring you achieve the desired aesthetic without unexpected expenses. Consider the following extras that can influence your resurfacing budget:
Sink Cutouts
Integrated Drainage Systems
Custom Edge Profiles
Personalized Surface Textures
Unique Color Combinations
Conclusion
Understanding what determines your benchtop resurfacing price is essential for effective budgeting and planning. Accurate measurements, material choices, and layout complexities directly impact costs, making it crucial to assess every detail before starting your project. Hiring skilled professionals ensures not just a flawless finish but also safeguards your investment for the long term. By being well-informed about these factors, you position yourself for a successful resurfacing experience that enhances the beauty and functionality of your kitchen or bathroom.
Is your kitchen feeling outdated and uninspired? You’re not alone. Many homeowners struggle with tired-looking benchtops that detract from their beautiful kitchen cabinets. In this post, we’ll explore how benchtop resurfacing can give your kitchen a fresh new look without the hassle of replacement. You’ll learn the benefits of resurfacing compared to replacing, the best materials to choose, and tips for maintaining your resurfaced benchtop. By addressing common concerns like dust and adhesive issues, you’ll discover practical solutions to elevate your kitchen’s style and functionality.
Key Takeaways
benchtop resurfacing revitalizes kitchens without the need for a complete remodel
proper surface preparation is critical for successful resurfacing results
environmental impact is minimized by resurfacing instead of replacing countertops
regular maintenance prolongs the lifespan of resurfaced benchtops
choosing the right materials enhances both durability and aesthetic appeal in your kitchen
Discover How Benchtop Resurfacing Revamps Your Kitchen
Benchtop resurfacing is a smart solution for revitalizing your kitchen without a complete remodel. You’ll learn what this process entails, including the use of foam and epoxy materials. Additionally, you’ll discover how to identify signs that your benchtop needs resurfacing, such as mold growth or significant wear.
This information will provide you practical insights, enabling you to determine if resurfacing can transform your kitchen from tired to inspired.
Understand What Benchtop Resurfacing Involves
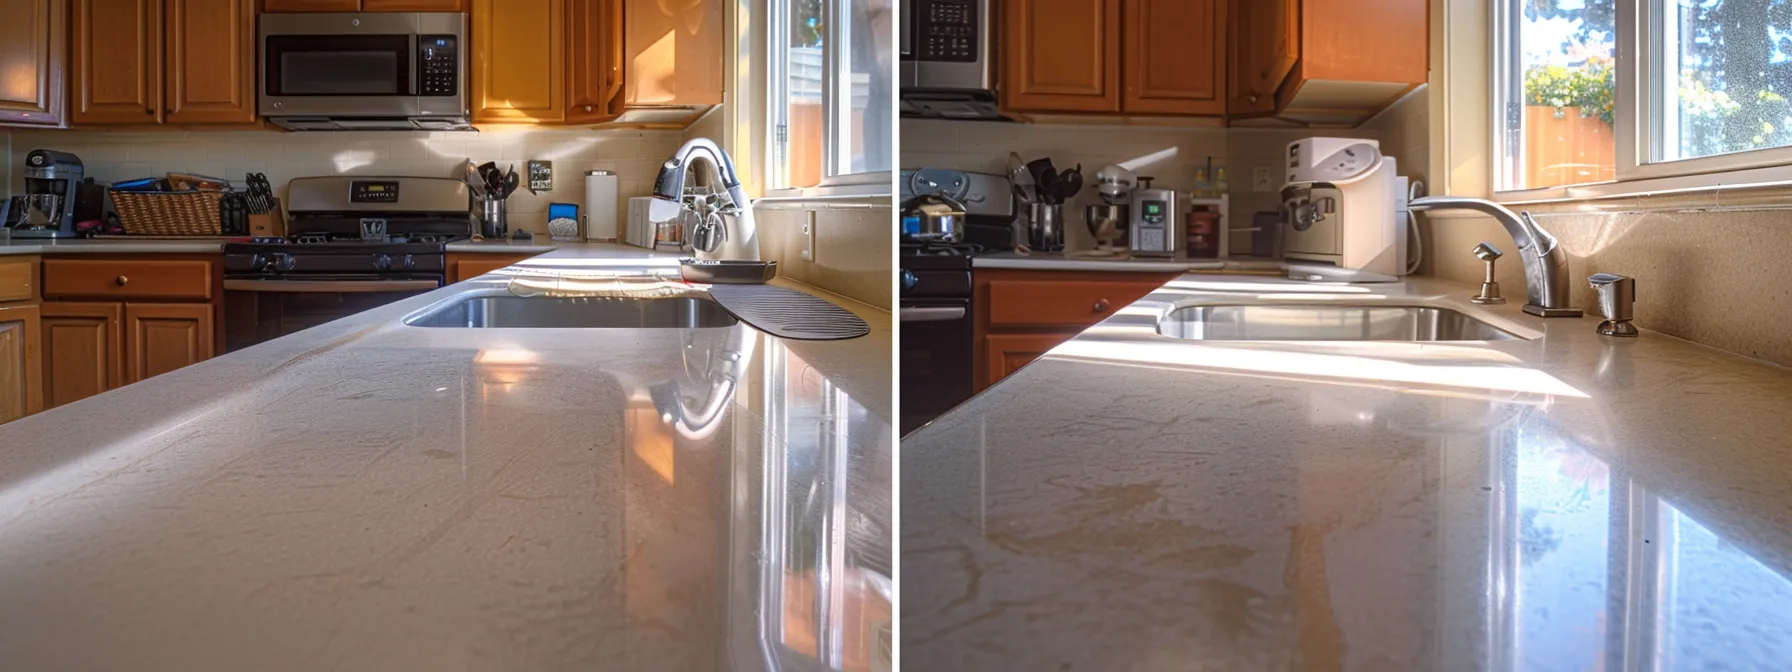
Benchtop resurfacing is an effective method to rejuvenate your kitchen’s surfaces, especially when working with F Imagine materials like granite or formica. This process involves applying a specially formulated coating, typically polyurethane, over existing countertops to restore their appearance. Instead of replacing your cabinetry, resurfacing breathes new life into tired spaces, making it an economical choice for homeowners seeking a kitchen makeover.
The application of this technique requires skill and precision. Professionals meticulously prepare the surface by cleaning, sanding, and priming the area to ensure optimal adhesion of the new finish. By using high-quality epoxy and polyurethane materials, you can achieve a polished look that rivals new installations, all while reducing waste and avoiding the disruption of a full renovation.
To effectively evaluate your benchtop for resurfacing, you should look for signs of wear such as scratches, stains, or even mold. If your countertops exhibit these issues, resurfacing can provide a seamless solution that not only improves aesthetics but also extends the lifespan of your surfaces. Understanding this process empowers you to make informed decisions about transforming your kitchen into a stunning space:
Step
Description
1. Inspection
Check for signs of wear or damage on your benchtop.
2. Preparation
Clean, sand, and prime the surface for resurfacing.
3. Application
Apply a new polyurethane or epoxy coat for a fresh look.
4. Curing
Allow time for the new surface to cure and set properly.
5. Enjoy
Utilize your revitalized kitchen with a modern benchtop.
Identify Signs Your Benchtop Needs Resurfacing
When assessing your kitchen benchtop, look for noticeable wear and tear, such as scratches or stains. These imperfections can compromise the appearance of solid surface materials, making your kitchen feel outdated. If you notice excessive wear around areas like your sink, it may indicate that resurfacing is a necessary solution to restore both function and aesthetics.
Another sign that your benchtop may need resurfacing is the presence of mold or mildew, particularly in grout lines or other crevices that can trap moisture. This not only poses a hygiene issue but can also lead to further damage if left untreated. Addressing these problems promptly through resurfacing can provide a cleaner, more inviting kitchen environment.
Finally, if you find yourself using sandpaper or other tools to manage surface imperfections constantly, it’s time to consider resurfacing options. A properly resurfaced benchtop can alleviate the need for frequent maintenance while enhancing the overall beauty of your kitchen. By taking action now, you can transform a tired space into one that feels fresh and modern.
Benchtop resurfacing can give your kitchen a fresh start. Next, see why resurfacing is often smarter than replacing.
Explore the Benefits of Resurfacing Over Replacing
Resurfacing your benchtop offers significant benefits compared to a complete replacement. First, you can compare the costs of resurfacing and replacing quartz or other materials, which often reveals substantial savings. Additionally, you should assess the environmental impact of resurfacing, as this process reduces waste associated with full remodels. Next, you’ll learn about practical techniques for maintaining your surfaces, whether it’s simply applying a fresh coat or addressing water damage effectively.
Compare Costs of Resurfacing and Replacing Benchtops
When deciding between resurfacing and replacing your benchtop, cost is a significant factor. Resurfacing is generally less expensive, often costing only a fraction of what full renovation requires. For example, if you’re looking at replacing a tile benchtop entirely, you may be faced with higher expenses due to the materials and labor involved in a complete remodel.
In addition to the financial savings, resurfacing minimizes the amount of waste generated during a renovation. By simply applying a new coat over your existing counter, you avoid the mess and disposal costs associated with a complete removal and replacement. This approach not only preserves your budget but also reduces the environmental impact of your remodeling project.
Lastly, maintaining a resurfaced benchtop is straightforward compared to managing the wear and tear of a new installation. If stains or minor damage occur, a simple touch-up can make your kitchen look fresh again. This ease of upkeep means less time and money spent on ongoing maintenance, allowing you to fully enjoy your revitalized kitchen space:
Project Aspect
Resurfacing
Replacing
Cost
Lower overall expenses
Higher initial investment
Waste
Minimal waste generated
Significant waste from old materials
Maintenance
Easy touch-ups for stains
Potentially higher upkeep costs
Assess the Environmental Impact of Resurfacing
Resurfacing your benchtop can significantly reduce the environmental impact of your kitchen renovation. By keeping your existing countertop intact, you minimize waste generated from removing old materials, such as oak or laminate. This approach is less disruptive to the room and helps conserve resources that would otherwise be used in creating new countertops.
The process of resurfacing utilizes durable materials like epoxy that can prolong the life of your surfaces, making it a sustainable option. Unlike a full replacement, which may require new cabinetry or features such as a dishwasher, resurfacing allows you to maintain the integrity of your current setup. This not only conserves energy but also reduces the overall carbon footprint associated with manufacturing and transporting new materials.
Choosing to resurface rather than replace also encourages better long-term practices for maintaining your kitchen. You can easily address any scratches or imperfections without discarding your entire countertop, keeping your space functional and visually appealing. This sustainable choice not only enhances the look of your kitchen but also aligns with environmentally responsible living, ensuring your home remains a healthy space for years to come.
Resurfacing breathes new life into tired spaces, but the right materials make all the difference. Discover how to select the perfect options for your benchtop resurfacing and elevate your kitchen’s appeal.
Choose the Perfect Materials for Benchtop Resurfacing
Choose the Perfect Materials for Benchtop Resurfacing
Selecting the right materials is key to achieving a successful kitchen makeover. You can choose from a variety of resurfacing materials that not only enhance durability but also match your kitchen’s aesthetic. Whether opting for wood finishes or sleek epoxy, a well-chosen material will elevate your home improvement project and create a cohesive look throughout your space.
In the following sections, you’ll explore how different materials can transform your kitchen’s appearance and functionality, as well as tips for using finishes that complement your overall design.
Select From a Variety of Resurfacing Materials
When selecting materials for benchtop resurfacing, consider options like metal and particle board. Metal surfaces can add a modern touch and are known for their durability and resistance to wear. Particle board, on the other hand, offers versatility and a cost-effective solution for those looking to refresh their kitchen without extensive renovations.
Using the right tools is essential in the resurfacing process. A sander will help prepare the surface effectively, ensuring a smooth and clean area for applying your chosen materials. The right sanding technique will enhance the adhesion of the new finish, making your resurfacing project more successful and providing a long-lasting result.
Pay attention to how different materials suit your kitchen’s overall design. Mixing finishes can create a unique look, while ensuring that the functionality meets your everyday needs. By choosing complementary surfaces, you can transform your kitchen into a space that feels both refreshed and harmonized:
Assess the desired style – modern or classic.
Evaluate the durability of metal vs. particle board.
Ensure proper preparation with sanding tools.
Consider maintenance requirements for each material.
Mix surfaces for a personalized touch.
Match Finishes to Your Kitchen’s Aesthetic
When choosing finishes for your benchtop resurfacing project, consider how they will complement your kitchen’s existing design elements, such as woodflooring or ceiling styles. For instance, if your kitchen features dark woodflooring, a lighter marblefinish may provide a striking contrast, creating an inviting atmosphere. This thoughtful approach will not only enhance visual appeal but also create a cohesive look throughout your space.
Using materials like butcher block can introduce warmth and texture to your kitchen, especially if you have a contemporary style. When combined with other finishes, such as sleek epoxy, you can achieve a modern yet inviting kitchen that feels both functional and stylish. Pay attention to how each brand offers unique aesthetic options, allowing you to personalize the look of your benchtops to suit your taste.
Additionally, remember to reflect on your kitchen’s overall color scheme and features to ensure that the chosen finishes harmonize with each other. For example, a mix of elegant marble and rustic wood not only enhances the character of your kitchen but also adds a layer of depth to its design. By carefully matching finishes, you will transform a once tired kitchen into one that truly inspires and captivates those who enter it.
Now that you’ve selected the ideal materials for your benchtop, it’s time to take the next step. Follow this clear guide to resurface your benchtop and make it shine.
Follow a Step-by-Step Guide to Resurface Your Benchtop
Prepare your benchtop thoroughly before starting the resurfacing process. Cleaning and sanding will ensure a proper finish, vital for lasting results. Next, you’ll apply resurfacing products correctly, whether using spray painting techniques or more traditional methods. These steps will not only revitalize your kitchen but can also enhance surfaces in other areas like your laundry room or dining room.
Prepare Your Benchtop for the Resurfacing Process
To prepare your benchtop for resurfacing, begin by thoroughly cleaning the surface to remove any grease, dirt, or residue. Use a sponge and a mild cleaner to wipe down the area, ensuring that everything is spotless. A clean surface is crucial for proper adhesion of the new coating, which will ultimately enhance the aesthetics of your kitchen as part of your interior design.
Next, focus on sanding the existing surface. This step is vital to create a rough texture that helps the resurfacing materials bond effectively. Depending on the type of material, you may need different grit sandpaper. For instance, if you are working with a laminate surface, using a medium-grit sandpaper will prepare it well for the next steps of your Bathroom and Kitchen Services project.
Finally, inspect your benchtop for any damage or imperfections that may require filling. If you come across any deep scratches or chips, consider applying an acrylic paint or a filler product designed for countertop repairs. Addressing these issues before resurfacing will ensure that you achieve a smooth, even finish, providing a stunning result when your kitchen transformation is complete.
Apply Resurfacing Products Correctly
Applying resurfacing products correctly ensures a lasting and appealing finish for your benchtop. Start by selecting a high-quality primer, as this base layer plays a crucial role in achieving optimal adhesion. If you’re working with materials like concrete or stainless steel, choosing the right adhesion methods will prevent future peeling or bubbling, enhancing the durability of your new surface.
Next, when you apply the resurfacing material, be sure to use even strokes. For smooth finishes, consider using a roller or a brush designed specifically for the type of product you choose, whether it’s polyvinyl chloride or an epoxy formulation. This attention to detail will make a significant difference in the overall appearance, allowing you to avoid uneven textures that can detract from your kitchen’s aesthetic.
After you’ve applied the resurfacing products, allowing sufficient curing time is essential for lasting results. Depending on the material you used, this might vary, so read the manufacturer’s instructions closely. Following these steps carefully will ensure that your kitchen benchtop goes from tired to inspired, providing you with a revitalized space you’ll enjoy for years to come:
Choose a high-quality primer.
Use even strokes for application.
Allow proper curing time after application.
You’ve learned how to resurface your benchtop. Now, discover how to keep it looking fresh for years to come.
Learn Tips to Maintain Your Resurfaced Benchtop
To maintain your resurfaced benchtop, it’s essential to implement proper cleaning techniques for materials like soapstone, steel, slate, and terrazzo. Additionally, protecting your benchtop from damage will prolong its lifespan and keep it looking inspired. By following these practical tips, you can ensure your kitchen surfaces remain beautiful and functional for years to come.
Implement Proper Cleaning Techniques
To maintain your resurfaced benchtop, start by implementing proper cleaning techniques tailored to the specific materials used in your kitchen. For surfaces such as epoxy, use a mild soap solution with warm water and a soft cloth or sponge. This method effectively removes dirt and grime while avoiding harsh chemicals that can damage the newly applied finish.
It’s important to avoid abrasive cleaning tools on your resurfaced benchtop, as they can scratch and degrade the surface over time. Instead, opt for non-abrasive cleaning pads or microfiber cloths that will protect the integrity of the finish. Regularly wiping down your benchtop after use can prevent residue buildup and keep it looking vibrant.
In addition to cleaning, consider using cutting boards and trivets to protect your benchtop from scratches and heat damage. These small adjustments in your kitchen habits can significantly prolong the life of your resurfaced surfaces. By taking these practical steps, you ensure that your revitalized kitchen remains both functional and aesthetically pleasing for years to come.
Protect Your Benchtop From Damage
To protect your resurfaced benchtop from damage, make it a habit to use cutting boards whenever you prepare food. This simple practice minimizes scratches and maintains the sleek appearance of your surface. Even minor cuts can lead to larger problems over time, so safeguarding your benchtop is essential for its longevity and functionality.
Consider placing trivets under hot pots and pans to prevent heat damage. The resurfacing materials are durable but can still be affected by extreme temperatures. By incorporating these easy precautions into your cooking routine, you’ll help ensure your kitchen remains inviting and your benchtop stays in excellent condition.
Additionally, regular cleaning is vital for protecting your resurfaced benchtop. Use mild detergents and avoid abrasive scrubbing pads that can scratch the surface. A gentle approach to maintenance keeps your kitchen looking fresh while extending the life of your benchtop, allowing you to enjoy your inspired kitchen for years to come.
Maintaining your resurfaced benchtop is key to its longevity. Next, you’ll want to learn how to steer clear of common mistakes that can undermine your efforts.
Avoid Common Mistakes in Benchtop Resurfacing
To achieve the best results in your benchtop resurfacing project, it’s essential to avoid common mistakes. First, select a qualified resurfacing professional to ensure high-quality workmanship. Next, ensure adequate ventilation during the process to promote safety and effective curing. These considerations will help you transform your kitchen into an inspired space with a polished and durable finish.
Select a Qualified Resurfacing Professional
When selecting a qualified resurfacing professional, it’s essential to evaluate their experience in the field of benchtop resurfacing. Look for service providers who specialize in resurfacing rather than general contractors, as they possess specific skills and knowledge needed for this process. This specialization ensures that they understand the intricacies of materials like epoxy and polyurethane, giving you confidence that they can handle your project effectively.
Seeking out customer reviews and testimonials can also provide valuable insights into a professional’s reliability and quality of work. Engaging with past clients can help you gauge their satisfaction levels and the durability of the resurfacing projects completed. When you hear positive feedback from others, it reinforces the professional’s capabilities and assures you that you are making an informed decision.
Lastly, don’t hesitate to ask about the warranty on the resurfacing work. A reputable professional will offer a comprehensive warranty that covers not only the materials used but also the workmanship. This warranty not only protects your investment but also demonstrates the professional’s confidence in their skills. By taking these steps, you can be sure your kitchen benchtop transformation will be handled with expertise and care, guiding you from a tired space to an inspired environment.
Ensure Adequate Ventilation During the Process
Ensuring adequate ventilation during the benchtop resurfacing process is crucial for both safety and the quality of your project. When using materials like epoxy and polyurethane, strong fumes can be released. Adequate airflow helps dissipate these fumes, reducing any health risks associated with inhalation and creating a more comfortable environment for you and any professionals working in your kitchen.
To enhance ventilation, you may choose to open windows and utilize fans to create cross-breezes around your workspace. This simple step can help maintain a fresh air supply, ensuring that the air remains breathable even while materials cure. In instances where natural ventilation isn’t possible, consider using an air purifier designed to filter out volatile organic compounds.
Good ventilation not only benefits health but also promotes faster curing times for the resurfacing materials. When air circulates effectively, the chemical reactions necessary for the finish to set can occur more smoothly, resulting in a durable and polished appearance for your revitalized kitchen. Remember these tips for a successful resurfacing process:
Open windows to allow fresh air in.
Use fans to improve airflow in the kitchen.
Consider an air purifier to filter out harmful fumes.
Monitor curing times for optimal results.
Conclusion
Benchtop resurfacing serves as an economical and sustainable solution to refresh your kitchen without the need for a complete remodel. By recognizing signs of wear and choosing high-quality materials, you can achieve a stunning transformation that enhances both functionality and aesthetics. This process not only reduces waste but also simplifies maintenance, making your revitalized kitchen a space you can truly enjoy. Embrace resurfacing today to elevate your kitchen from tired to inspired, and create an inviting environment that reflects your personal style.
Are you considering benchtop resurfacing but worried about the costs? Many homeowners believe that replacing kitchen surfaces, like those made of plastic or particle board, is the only option. In this post, you will learn the basics of resurfacing costs, how it compares to full replacement expenses, and tips for budgeting effectively. By understanding these elements, you can make informed decisions that save you money while enhancing your cabinetry and overall kitchen design. Let’s tackle the common pain points and help you navigate the average costs of your resurfacing project.
Key Takeaways
materials significantly influence the overall cost of benchtop resurfacing projects
resurfacing is generally more affordable than complete replacements for kitchens and bathrooms
plan for a contingency fund to cover unexpected costs during the resurfacing process
choose durable materials to enhance longevity and reduce maintenance needs over time
scheduling projects during off-peak seasons can lead to lower costs and better contractor availability
Understanding the Basics of Benchtop Resurfacing Costs
Several factors affect the pricing of benchtop resurfacing, such as the size and type of surface, whether it’s a bathroom or kitchen remodel, and specific materials used. You will explore various resurfacing materials including options for cooktops and butcher block surfaces. Understanding these elements can help you make informed decisions for your project.
Identify Factors That Affect Pricing
When considering benchtop resurfacing, one of the primary factors that can affect pricing is the type of material you choose. For instance, solid wood surfaces offer a warm and classic appearance, but they may come at a higher cost than more common options FIMAGINE Home Page. On the other hand, surfaces such as granite or soapstone present both durability and aesthetic appeal, which can significantly influence your budget as well.
The size and layout of your surfacing area also play an essential role in determining costs. Larger benchtops require more material and labor, which can increase the overall price. Additionally, if you have complex features such as a sink or integrated cooktop, this can further elevate costs due to the additional workmanship involved in achieving a seamless finish.
Finally, your choice of a resurfacing method can impact the overall cost. Some options prioritize environmental friendliness and may use eco-friendly materials, which can be a consideration if sustainability is important to you. However, these choices often come with varying price points, so weighing the environmental benefits against your budget is crucial for making an informed decision.
Explore Different Resurfacing Materials
When considering resurfacing your benchtops, you have a range of materials to choose from, each with its own characteristics and benefits. Solid surface materials are a popular choice because they offer a seamless and sleek appearance. They also come in various colors and brands, allowing you to select a pigment that complements your kitchen or pantry design perfectly.
Another option is tile, which provides versatility and aesthetics. Tiles come in countless designs and sizes, enabling you to create unique patterns that enhance your space. Although tile surfaces can require more maintenance than solid surfaces, their ability to withstand heat and moisture makes them a practical choice for kitchens and bathrooms alike.
For those seeking a warmer, more natural look, wood resurfacing is an excellent solution. Solid wood adds a classic and inviting touch to any area, particularly in a pantry setting. However, it’s essential to consider the brand and quality of wood, as these can significantly influence not just durability but also costs associated with resurfacing.
Resurfacing costs can seem steep, but they often pale in comparison to full replacement expenses. Let’s look closely at how resurfacing stacks up against the more costly option of replacement.
Comparing Resurfacing to Replacement Expenses
When evaluating the costs of benchtop resurfacing versus replacement, it’s important to analyze cost differences between options. Resurfacing can be significantly cheaper than tearing out and replacing materials like a bathtub or porcelain surfaces. Additionally, consider longevity and maintenance costs—using materials like resin may reduce long-term expenses compared to traditional replacements, making resurfacing an attractive option.
Analyze Cost Differences Between Options
When you weigh resurfacing against replacement, the financial implications can be significant. Resurfacing is generally more affordable than a full renovation, making it a sensible choice for those on a tighter budget. Instead of investing in new materials, you can opt for resurfacing solutions like wood veneer, which can dramatically enhance your kitchen or bathroom’s appearance without incurring the high costs associated with complete replacements.
Consider the installation process as well. Replacing surfaces often involves removing existing materials and can disrupt plumbing fixtures, leading to additional labor costs and potential accessibility challenges. In contrast, resurfacing allows for minimal disruption to your space while providing a fresh and updated look. This makes it an efficient option, especially for busy households.
Finally, think about the long-term benefits. Using durable materials such as plywood in resurfacing can extend the lifespan of your surfaces while reducing maintenance expenses. You can enjoy a refreshed aesthetic without worrying about daily wear and tear, making resurfacing a smart investment. When evaluating your options, prioritize both initial costs and future savings:
Affordability of resurfacing materials like wood veneer
Minimized disruption during installation
Long-term durability with materials like plywood
Consider Longevity and Maintenance Costs
When considering the costs of benchtop resurfacing, you must think about longevity. High-quality resurfacing materials, such as thermofoil or solid surface options, can withstand daily wear and tear, making them a durable choice for kitchens and bathrooms. This longevity reduces the frequency of repairs and replacements, ultimately saving you money over time.
Maintenance costs also play an essential role in your decision-making process. Resurfaced surfaces often require less upkeep than traditional materials, allowing for easier cleaning and improved usability. For example, if you choose a resurfaced shower area, you might find that it stays looking new longer than older, porous materials that trap stains and grime.
Additionally, the type of material you select will impact both longevity and maintenance needs. Surfaces designed for high traffic areas, like kitchens and bathrooms, are crucial. Investing in resurfacing solutions means you’re choosing materials that balance aesthetic appeal with practical usage, ensuring your space remains functional and beautiful for years to come.
Understanding the difference in costs makes the decision clearer. Now, let’s break down how to calculate the total expense of your resurfacing project.
Calculating the Total Cost of Your Resurfacing Project
To accurately calculate the total cost of your resurfacing project, start by estimating labor and material expenses, which includes factors like epoxy finishes and the choice of materials such as stainless steel. Additionally, be aware of potential extra fees and taxes that may arise, ensuring you account for all costs before making a decision. Understanding these elements will help you make informed choices for your kitchen or bathroom resurfacing needs.
Estimate Labor and Material Expenses
Estimating labor and material expenses for your benchtop resurfacing project is essential for budgeting effectively. First, measure the length of the surface area you wish to resurface, as this will directly impact material costs. If you plan to use high-quality materials like Caesarstone, it’s important to factor in the premium prices of these options, as they can provide both beauty and durability for your space.
Labor costs can also vary based on the complexity of your project. If your resurfacing involves intricate features like crown molding or additional details, such as creating a smooth transition around sinks or edges, you may incur higher labor expenses. Always communicate clearly with your contractor to get an accurate quote that encompasses all elements, ensuring no surprise charges arise later in the process.
To break down your costs effectively, consider creating a checklist of expenses you might encounter during the resurfacing process:
Material costs (e.g., Caesarstone)
Labor rates based on complexity
Extra fees for specialized techniques (like crown molding)
Estimated waste or excess materials (allow for extra due to potential stains or imperfections)
Include Additional Fees and Taxes
When budgeting for your benchtop resurfacing project, it’s important to account for additional fees and taxes that may arise. Various home improvement projects, including resurfacing, can incur unexpected costs beyond just materials and labor. For instance, permits may be required depending on your local regulations, particularly if you are using materials such as marble that have specific installation guidelines. Be sure to ask your contractor about potential fees that could impact your overall budget.
Another aspect to consider is the cost of living in your area, as it often affects labor rates and material prices. HomeAdvisor provides a useful resource for estimating these costs, allowing homeowners to plan effectively. If you’re in a region with a higher cost of living, be prepared for increased labor expenses and possibly other added fees that may go beyond the initial estimates you receive.
Lastly, it’s wise to include a contingency fund in your budget. This fund can cover any unexpected fees that may arise during the project, providing peace of mind that all aspects are financially controlled. A good rule of thumb is to set aside around 10-15% of your total budget for such instances, ensuring you can navigate any surprises without financial strain.
Cost Elements
Estimated Amount
Material Costs (e.g., Marble)
$X
Labor Costs
$Y
Permits and Fees
$Z
Contingency Fund (10-15%)
$A
You’ve seen the numbers. Now it’s time to save a few. Here are some simple tips to help you lower your benchtop resurfacing costs without sacrificing quality.
Tips to Reduce Benchtop Resurfacing Costs
To reduce costs for your kitchen remodel while ensuring quality, start by selecting cost-effective materials that withstand wear and tear, such as durable steel options. Additionally, finding reliable contractors who offer competitive rates can help you achieve a successful makeover without overspending. These strategies will allow you to navigate the price of resurfacing effectively while maintaining the aesthetics of your space.
Choose Cost-Effective Materials Without Sacrificing Quality
When selecting materials for your benchtop resurfacing project, consider focusing on budget-friendly options that still offer quality and durability. For example, laminate countertops provide a sleek appearance and are more affordable than granite or marble but can effectively enhance your kitchen remodeling efforts. By discussing your preferences with a general contractor, you can ensure you choose materials that meet both your aesthetic and financial needs.
Another effective approach is to look for alternative materials that mimic the look of high-end finishes. Solid surface materials, for instance, can replicate the appearance of stone while being less expensive and easier to maintain. This allows you to achieve the desired look for your countertops without compromising quality or breaking the bank, providing a smart solution for your remodeling project.
Don’t overlook the importance of details such as molding and door finishes when planning your resurfacing project. These elements can significantly enhance the overall look of your kitchen, and opting for cost-effective materials in these areas can keep your project within budget. Your general contractor can guide you in selecting materials that complement your new countertops, ensuring a cohesive and appealing design throughout your space.
Finding reliable contractors is crucial for your benchtop resurfacing project. Look for professionals who are well-versed in local building code requirements, ensuring that all work adheres to safety and regulatory standards. Experienced contractors will understand the complexity involved in resurfacing and can provide insights on the best practices for materials and craftsmanship, reducing the likelihood of future issues.
In your search for contractors, consider their experience in woodworking and manufacturing techniques specific to resurfacing. A contractor with a solid background will not only offer quality workmanship but can also help assess whether you need to replace any underlying components of your benchtop for optimal results. This expertise ensures that your project runs smoothly and that your budget remains intact.
Don’t hesitate to compare quotes from multiple contractors. This will help you gauge competitive rates in your area while also giving you a chance to ask for recommendations or examine past projects. Understand that the lowest price may not always mean the best value, so weigh their experience and customer feedback alongside the costs to make an informed decision.
You’ve learned how to cut costs on resurfacing. Now, it’s time to plan wisely and set your budget for the project ahead.
Planning and Budgeting for Resurfacing Projects
Set a realistic budget based on your needs, particularly when planning for kitchen cabinet resurfacing. Consider the expense of materials like quartz and finishes to achieve the desired look. It’s also essential to allocate funds for unexpected expenses that can arise during construction, ensuring you remain financially prepared throughout your project.
By addressing these factors, you can confidently navigate your resurfacing costs and make informed decisions about coatings and aesthetics, ultimately leading to a successful kitchen transformation.
Set a Realistic Budget Based on Your Needs
When setting a realistic budget for your resurfacing project, it’s essential to evaluate your specific needs and preferences. Consider the materials you want to use, such as wood or Corian, as these will significantly impact your overall costs. Ensure you account for the wear associated with different surfaces, as materials with lower durability may require more frequent maintenance or replacements, adding to your expenses over time.
Think about the existing elements in your space that you plan to retain during the resurfacing process. If you’re considering bathtub refinishing alongside your benchtop project, it’s beneficial to bundle these services with the same contractor. This can often lead to savings as contractors appreciate the opportunity to complete multiple tasks at once, providing a more comprehensive pricing structure for your project.
Your budget should also include the potential cost of additional items, like a cutting board, that complement your resurfaced surfaces. Prioritizing quality in these added components will enhance the longevity and functionality of your space. By planning for these factors, you empower yourself to make informed decisions that align with both your aesthetic goals and your financial capabilities.
Allocate Funds for Unexpected Expenses
When budgeting for your benchtop resurfacing project, it’s vital to allocate funds for unexpected expenses that may arise. Projects can encounter issues such as hidden damage beneath your existing surfaces or complications related to the porosity of the materials you select, like ceramic or engineered stone. Setting aside a contingency fund—typically around 10-15% of your total budget—ensures you remain prepared for these surprises, allowing you to maintain control over your project regardless of challenges that might emerge.
Consider how unexpected requirements can impact both timelines and costs. For example, if your resurfacing reveals underlying wear that needs addressing before refinishing, it can substantially influence your overall return on investment. By planning for such scenarios, you not only safeguard your project but also enhance the longevity and durability of the resurfaced areas, ultimately benefiting both your Bathrooms and Kitchens.
In addition to structural surprises, account for potential changes in material costs during your project. As you may choose specific finishes or colors that you hadn’t planned on initially, this flexibility can lead to increased expenses. Factoring in these fluctuations will help ensure that your resurfacing remains within budget without sacrificing quality or aesthetic appeal, fostering a successful transformation that meets your expectations.
You’ve laid the groundwork for your project and set your budget. Now, let’s focus on making every dollar count while ensuring the quality you deserve.
Ensuring Quality While Staying Within Budget
Prioritizing essential features over extras can help you focus on what truly matters in your benchtop resurfacing project. By scheduling your project during off-peak seasons, you may also benefit from lower rates and increased availability of contractors. These strategies ensure that you maintain quality while staying within your budget, enabling a successful renovation that enhances your space.
Prioritize Essential Features Over Extras
When planning your benchtop resurfacing project, it’s important to focus on the core features that will enhance functionality and aesthetics. Prioritizing essential elements, like choosing durable materials, ensures that you invest your budget wisely. High-quality resurfacing can elevate your kitchen or bathroom without the need for costly extras.
Consider your daily needs and how your benchtop will be used. Features such as heat resistance and easy maintenance should take precedence over design embellishments that may add minimal value. This approach allows you to create a practical and attractive space while staying within your financial limits.
Moreover, eliminating non-essential extras doesn’t mean sacrificing style. You can achieve a refined look using less expensive materials without compromising quality. By focusing on the essentials, you can optimize your resurfacing project, leading to a successful transformation of your space:
Identify essential features that enhance usability.
Choose durable materials with long-term benefits.
Eliminate unnecessary embellishments to save costs.
Schedule the Project During Off-Peak Seasons
Scheduling your benchtop resurfacing project during off-peak seasons can lead to significant cost savings. Most contractors experience a lull in demand during certain times of the year, resulting in lower labor rates and increased availability. By planning your project during these periods, you can not only secure better pricing but also ensure that your needs receive the attention they deserve without rush or delays.
In addition to financial benefits, taking on your resurfacing project at a less busy time allows for flexibility in the scheduling process. You can work closely with your contractor to establish a timeline that fits your overall project goals. This collaboration can lead to enhanced workmanship, as contractors often have more time to focus on each individual job when they are not managing multiple projects simultaneously.
Lastly, choosing to resurface your benchtops during off-peak times can help you avoid the common pitfalls that can arise from time constraints. High demand can lead to rushed decisions or compromises on quality due to tight schedules. By giving yourself ample time and choosing a season that works for both you and your contractor, you can ensure a high-quality finish that meets your expectations and enhances the overall look of your kitchen or bathroom space.
Conclusion
Navigating the costs of benchtop resurfacing is essential for making informed decisions that balance quality and budget. Understanding factors like material choices, labor expenses, and potential extra fees allows you to plan effectively and prevent unexpected financial strain. By prioritizing durable materials and essential features, you can achieve a refreshed aesthetic without overspending. Your approach to resurfacing can transform your kitchen or bathroom, ensuring long-lasting beauty and functionality.
Revitalize Your Space: Swift Kitchen Redesign via Resurfacing
Revitalizing your space with kitchen renovations can seem overwhelming, but it doesn’t have to be. Thanks to the expertise of professionals like the Master Builders Association of Victoria, homeowners now have incredible options such as kitchen cabinet resurfacing. Using materials like foam for cabinetry can dramatically change the look and feel of your kitchen without the hefty price tag of a full remodel. Ready to breathe new life into your kitchen? Keep reading to explore how resurfacing can transform every aspect of your kitchen, from cabinets to countertops, while optimizing your budget effectively.
Discover the Basics of Kitchen Resurfacing
In my journey of kitchen renovations, I’ve often encountered the term “kitchen resurfacing,” and it’s essential to understand exactly what it entails. Essentially, resurfacing is the process of updating surfaces like cabinets and countertops without the expense or time commitment of a full remodel. This method allows homeowners to reface kitchen cabinets with a fresh coat or finish, transforming the space significantly. I appreciate how resurfacing not only enhances aesthetics but also increases durability, especially when materials like metal or laminate are utilized for countertops. For anyone considering a kitchen upgrade in New Jersey, exploring these options introduces both beauty and practicality to your culinary space. If you are in Victoria, you may consider looking into the Master Builders Association of Victoria for guidance and resources.
What Is Kitchen Resurfacing?
Kitchen resurfacing is an efficient way to achieve a fresh look without the hassle and expense of a complete renovation. It involves cabinet refinishing and updating surfaces, allowing me to refinish kitchen cabinets with new finishes that match my design vision. This method is particularly effective for plywood cabinets, offering a durable and stylish upgrade, which is invaluable for homeowners in Delaware looking to enhance their cooking spaces.
Understanding the concept of kitchen resurfacing.
Exploring the benefits of cabinet refinishing.
Learning about surface options for a renewed aesthetic.
Considering the practical advantages in durability and cost.
Connecting with experts for guidance and support.
Benefits of Choosing Resurfacing for Your Kitchen
One of the standout benefits of opting for resurfacing in my kitchen renovation projects is the remarkable transformation it offers in a fraction of the time. With just a brush and a few high-quality materials, I can refurbish surfaces, such as cabinets and countertops, achieving a fresh appearance that harmonizes with my interior design vision. This approach not only refreshes the aesthetic but also represents a smart home improvement choice, as resurfaced areas are often more durable than their original finishes, allowing me to enjoy my updated kitchen for years to come.
Materials Commonly Used in Kitchen Resurfacing
In my experience with kitchen resurfacing, I’ve found that a variety of materials can be utilized to achieve an impressive transformation. For cabinet refacing, options such as high-pressure laminates and wood veneers work exceptionally well, bringing a fresh look to both drawer fronts and cabinets. Additionally, solid surfaces like quartz or granite are popular choices for countertops, ensuring that not only the kitchen but also adjacent spaces like the bathroom and sink area integrate seamlessly in style and functionality.
Step-by-Step Guide to Resurfacing Your Kitchen Cabinets
To embark on the journey of resurfacing kitchen cabinets, a clear plan is essential. I begin by preparing my cabinets meticulously, ensuring they are clean and free of any existing finishes that could interfere with the new surface. Choosing the right materials comes next; the options vary from rich wood grains to high-quality laminates, each offering a distinct look and feel that suits my design preference. The process culminates in applying the new surfaces, where I pay particular attention to details, such as crown molding, to achieve a polished finish. If you’re in an area where home renovations are key, don’t hesitate to reach out for a free estimate tailored to your zip code – it’s a straightforward way to kickstart your kitchen transformation.
Preparing Your Cabinets for Resurfacing
Before diving into my kitchen cabinet refacing project, I focus on preparation to set the stage for a successful makeover. I remove all contents from the cabinets, ensuring a clean slate free of any dust or mold, allowing the new finishes to adhere properly. This step is crucial for anyone aiming to create their dream kitchen, as a well-prepared surface significantly enhances the overall kitchen transformation.
Selecting the Right Materials for Cabinet Resurfacing
Selecting the right materials for cabinet resurfacing is crucial for achieving a stunning kitchen transformation. I often start by choosing a high-quality wood veneer or laminate that perfectly complements the overall design of my space. Additionally, once I’ve decided on the materials, I take care in sourcing sandpaper and stain that will ensure an appealing finish, elevating the look of my cabinets while updating my kitchen effectively.
Step
Description
1
Choose high-quality materials that suit your design vision.
2
Source sandpaper to smooth surfaces before refinishing.
3
Select an appropriate stain to enhance the natural beauty of the wood.
4
Apply the chosen materials to achieve a fresh and modern look.
Applying New Surfaces to Your Cabinets
When I apply new surfaces to my kitchen cabinets, precision and care play a crucial role in achieving a flawless finish. I start by meticulously laying the new material over the prepared surfaces, ensuring it aligns perfectly with the cabinet structure. A steady hand during this process ensures that every edge is crisp, resulting in a professional-grade appearance that elevates my kitchen’s overall look.
Step
Description
1
Lay out the new material carefully on each cabinet surface.
2
Ensure proper alignment with the cabinet structure.
3
Apply adhesive evenly for a secure bond.
4
Smooth out any bubbles or imperfections to maintain uniformity.
Transform Your Kitchen Countertops on a Budget
When enhancing my kitchen, updating the countertops often proves to be one of the most impactful decisions I can make. The variety of resurfacing materials available truly excites me, from stylish laminates to durable quartz options, each presenting a chance to elevate the entire space without overstretching my budget. Preparing the countertops properly is key to ensuring the new surfaces adhere well and look pristine. I follow a systematic approach, thoroughly cleaning and smoothing the existing surfaces before applying the new materials. This careful preparation lays the groundwork for a flawless finish that not only meets my aesthetic expectations but also enhances the functionality of my kitchen. The process of applying the new surface material is equally rewarding, allowing me to see the transformation unfold right before my eyes, resulting in a vibrant and modern kitchen that reflects my personal style.
Types of Countertop Resurfacing Materials
When considering countertop resurfacing, I have found a range of materials that help in achieving the perfect look while being budget-friendly. Laminate is a popular choice for its affordability and variety of styles, making it easy to mimic high-end materials without the cost. Meanwhile, quartz surfaces offer a blend of durability and elegance, providing a luxurious finish that stands up well to daily wear and tear.
Laminate surfaces: Affordable and available in numerous styles.
Quartz materials: Durable and elegant with a high-end feel.
Vinyl wraps: A cost-effective option that’s easy to install.
Wood overlays: Adding warmth and character to the kitchen.
How to Prepare Your Countertops for Resurfacing
Preparing my countertops for resurfacing begins with a thorough cleaning to eliminate any dirt or grease. I make sure to use a suitable cleaner that cuts through grime without damaging the existing surface. Once clean, I focus on smoothing out any imperfections by sanding the area gently, ensuring that the new material adheres properly and the finish looks impeccable.
After cleaning and sanding, I check for any loose or damaged parts of the countertop, making necessary repairs before applying the new surface. This step is crucial as it guarantees a solid foundation for the resurfacing process. Finally, I ensure the surfaces are completely dry and free from dust or debris, creating the perfect canvas for the transformation ahead:
Clean the countertops thoroughly to remove dirt and grease.
Sand the surfaces to smooth out imperfections.
Repair any loose or damaged areas before resurfacing.
Ensure surfaces are dry and free of dust for optimal adhesion.
Applying the New Surface Material
Applying the new surface material is an exciting phase in my kitchen resurfacing project. With careful attention, I lay down the chosen material over the countertops, ensuring even distribution of the adhesive for a secure bond. The satisfaction of seeing the transformation unfold as I smooth out bubbles and imperfections gives me a sense of accomplishment and assurance that my kitchen is well on its way to reflecting my style.
The steps I follow are clear and purposeful:
Gather all necessary tools and materials for the application.
Carefully apply adhesive to the countertop surface.
Align the new material and lay it down evenly.
Smooth the surface to eliminate air pockets or bubbles.
Allow the adhesive to set as per the manufacturer’s guidelines.
Quick and Effective Kitchen Backsplash Transformations
The kitchen backsplash often serves as a focal point, and when it’s time to refresh this element, I find that resurfacing offers a fantastic opportunity to elevate the entire space. Choosing the right resurfacing material is crucial; whether I opt for classic tiles, modern glass, or stylish laminate, each option can dramatically change the design and functionality. Once I’ve selected the ideal material, prepping the existing backsplash is my next step. This involves cleaning and smoothing the surface to ensure a seamless bond with the new layer. Finally, I move on to the installation process, applying the new surface with precision to create a stylish and cohesive look that enhances my kitchen’s aesthetic. Each step contributes to a transformative result, making the backsplash a true highlight of my culinary space.
Choosing a Resurfacing Material for Your Backsplash
When I choose a resurfacing material for my kitchen backsplash, I consider both functionality and aesthetics. A vibrant tile can add character, while glass allows for easy maintenance and reflects light beautifully. I always weigh my design goals against the practical aspects, ensuring that the material I select complements my overall kitchen theme while also standing up to daily wear and moisture.
Material
Features
Best For
Tile
Durable, wide range of colors, and patterns
Add character and style
Glass
Easy to clean, reflective surface
Sleek and modern aesthetics
Laminate
Cost-effective and versatile
Quick, stylish updates
Prepping Your Backsplash for Resurfacing
When prepping my backsplash for resurfacing, I prioritize a clean and smooth surface to ensure the best adhesion for the new material. I start by removing any old adhesive or tiles, followed by a thorough cleaning to eliminate residue and grime. Ensuring that the wall is dry and smooth afterward sets the stage for a flawless resurfacing process, allowing the new material to bond effectively and enhance the overall aesthetic of my kitchen.
Installing Your New Backsplash Surface
When it comes to installing my new backsplash surface, I make sure to approach the task with attention to detail. I apply adhesive evenly across the prepared area, ensuring a solid bond with the wall. With precise alignment, I lay down each piece carefully, taking the time to press firmly and check for any gaps, which ultimately results in a seamless and polished look that enhances the overall design of my kitchen.
Flooring Solutions: Resurface for a Brand-New Look
When considering a kitchen makeover, flooring often becomes a focal point that can greatly influence the overall ambiance of the space. I find that evaluating my kitchen flooring for resurfacing is a critical step, as it helps identify any damage or wear that needs addressing. Once I’ve assessed the condition, exploring suitable materials for resurfacing becomes essential. There are numerous options available that not only enhance the look but also provide durability for daily use. Finally, completing the resurfacing of my kitchen floor transforms the entire room, bringing a refreshed and inviting atmosphere that I can enjoy for years to come.
Evaluating Your Kitchen Flooring for Resurfacing
As I assess my kitchen flooring, I begin by checking for signs of damage, such as scratches, dents, or warping. Identifying these issues is crucial, as they not only affect the appearance of the floor but also its performance over time. I also consider the flooring material; some surfaces, like hardwood, may benefit from refinishing, while others might require replacement or resurfacing to achieve a fresh look:
Inspect for visible damage, such as scratches or warping.
Consider the material type and its suitability for resurfacing.
Determine the need for repairs before proceeding with resurfacing.
Materials Suitable for Kitchen Floor Resurfacing
In my experience with kitchen floor resurfacing, I’ve discovered a variety of materials that cater to both aesthetic appeal and functionality. For instance, vinyl flooring offers an affordable and versatile option, allowing me to select designs that mimic wood or stone without breaking the bank. Additionally, I find that polished concrete not only provides a modern industrial look but also enhances durability, making it an ideal choice for high-traffic kitchen areas.
Completing the Resurfacing of Your Kitchen Floor
Completing the resurfacing of my kitchen floor marks a significant achievement in my renovation journey. As I lay down the final materials, I take extra care to ensure everything lines up seamlessly, creating a uniform look that ties the space together. The satisfaction I feel when I see the finished surface shine underfoot reinforces my confidence in the decision to rejuvenate my kitchen with this effective method.
Maintaining Your Resurfaced Kitchen for Longevity
To keep my resurfaced kitchen looking its best, I prioritize a consistent maintenance routine. Daily and weekly cleaning habits, such as using gentle cleaners and avoiding abrasive materials, play a significant role in preserving the quality of the surfaces. I also remain vigilant about addressing any wear and tear that might arise over time, as prompt attention can prevent minor issues from escalating into major problems. Additionally, I assess the overall condition of my kitchen periodically, allowing me to determine when it might be necessary to consider a resurfacing refresh. By staying proactive in my maintenance efforts, I ensure that my kitchen remains both beautiful and functional for years to come.
Daily and Weekly Maintenance Tips
To maintain the appeal of my resurfaced kitchen, I focus on a few essential cleaning practices. I make it a habit to wipe down surfaces daily with a gentle cleaner, which helps prevent the buildup of grime and keeps everything looking fresh. On a weekly basis, I dedicate time to deeper cleaning, ensuring I tackle any stubborn spots and keep my kitchen vibrant and inviting.
I also remember to check the cabinets and countertops regularly for any signs of wear or damage. By addressing minor issues promptly, I can preserve the integrity of my resurfaced surfaces, ensuring they remain as stunning and functional as the day they were completed. This routine not only prolongs the life of my kitchen but also enhances my enjoyment of the space.
Addressing Wear and Tear on Resurfaced Surfaces
To tackle wear and tear on resurfaced surfaces, I take the time to inspect each area regularly. Any scratches or signs of wear I find are addressed quickly to prevent them from worsening. By applying touch-up paints or finishes, I maintain the beauty of my revitalized kitchen and ensure it remains inviting.
Staying on top of routine maintenance is crucial for prolonging the life of resurfacing. I focus on effective cleaning techniques and protective coatings to guard against everyday wear:
Perform regular inspections for scratches or damage.
Use touch-up finishes to restore minor imperfections.
Implement proactive cleaning routines to preserve surfaces.
When to Consider a Resurfacing Refresh
I encourage myself to consider a resurfacing refresh when I notice signs of wear that detract from my kitchen’s overall appeal, such as fading colors or noticeable scratches on surfaces. Regular assessments have taught me that addressing these issues promptly not only rejuvenates the look but also prevents more significant problems down the line. By remaining attentive to my kitchen’s condition, I can ensure it continues to reflect my style and function effectively for years.
Conclusion
Revitalizing your kitchen through resurfacing offers a practical and cost-effective solution for transforming your space. This approach not only enhances aesthetics but also improves the durability of surfaces like cabinets and countertops. By selecting the right materials and following meticulous preparation and application steps, you can achieve a modern look that reflects your personal style. Regular maintenance ensures that your resurfaced kitchen remains beautiful and functional for years to come.