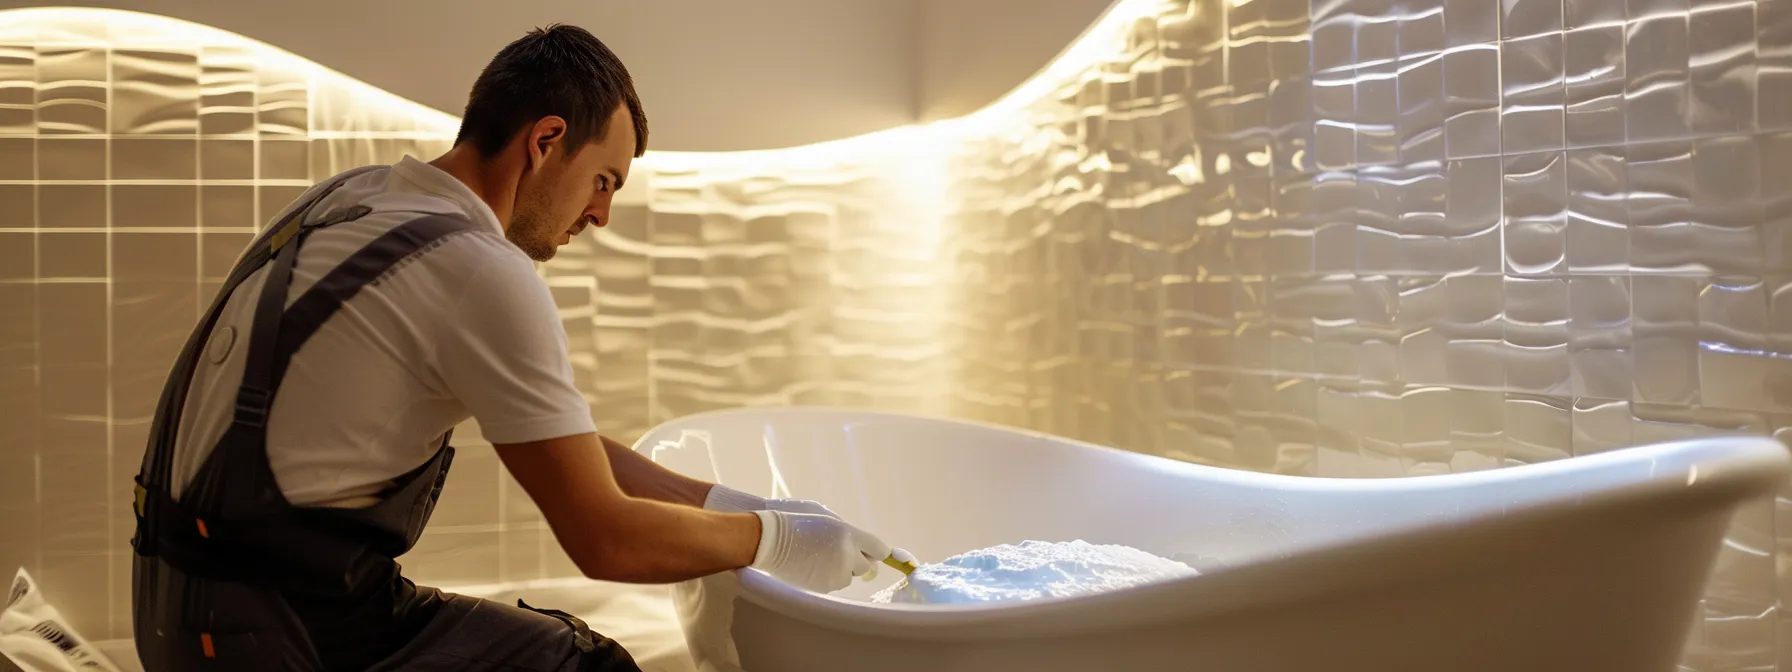
Choosing the Right Expert for Your Bathroom Resurfacing Needs
When considering bathroom and kitchen resurfacing, selecting the right expert is paramount. Aligning with standards set by organizations like the Master Builders Association Victoria ensures you’re on the right path. A reputable expert not only provides a warranty on their work but also offers quality solutions for bathroom additions and flooring, enhancing both functionality and aesthetics. Finding a skilled resurfacing professional will save you time and frustration while delivering stunning results. Keep reading to uncover key factors to consider and how to streamline your resurfacing project.
Key Takeaways
Choose a bathroom resurfacing expert with relevant experience and proven reliability
Ensure the contractor has proper licensing and insurance to protect your investment
Examine past projects and customer reviews to assess craftsmanship and trustworthiness
Understand the warranty offered to secure coverage for potential defects after the renovation
Prioritize quality materials for a durable, aesthetically pleasing, and long-lasting bathroom
Key Factors to Consider Before Hiring a Bathroom Resurfacing Expert
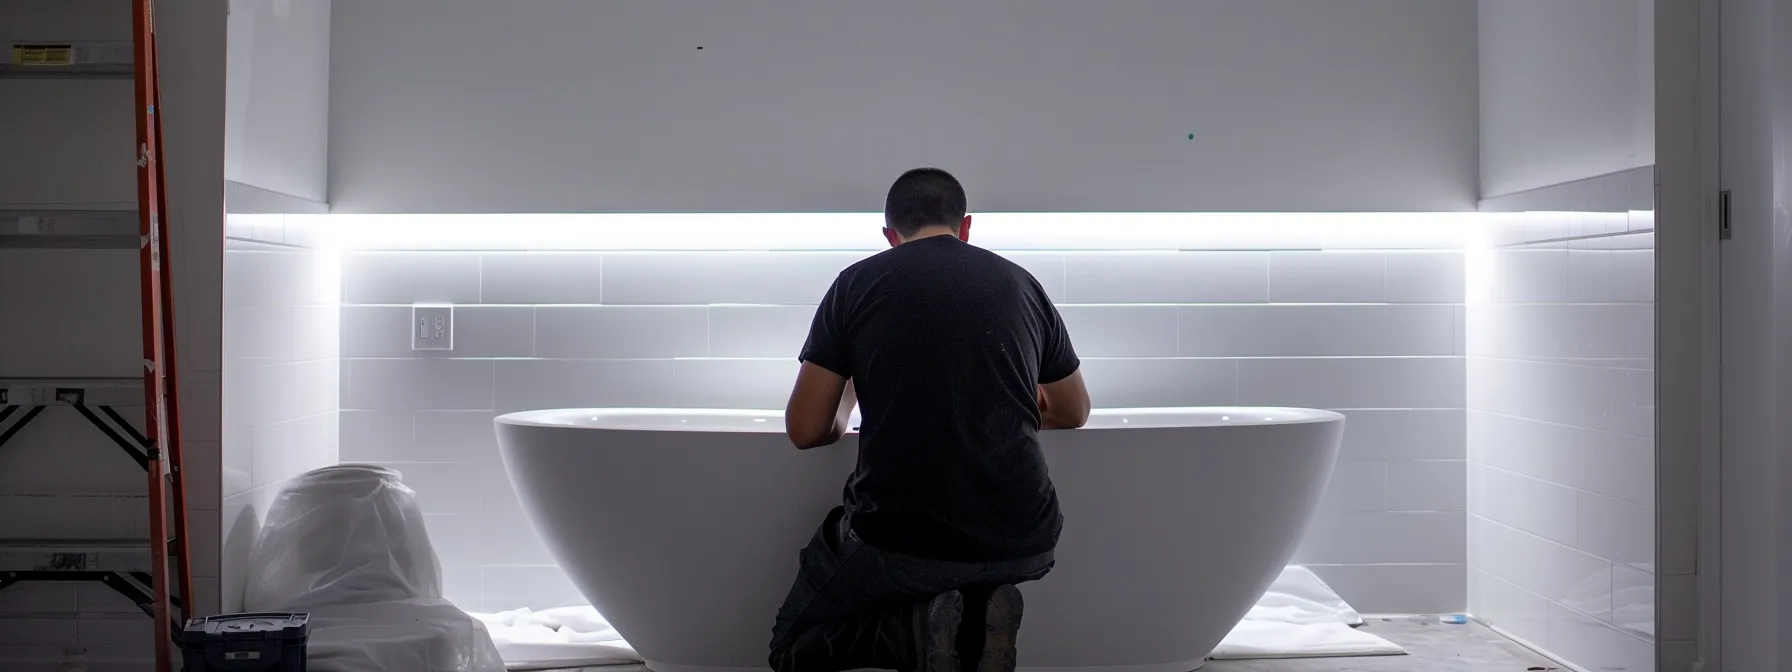
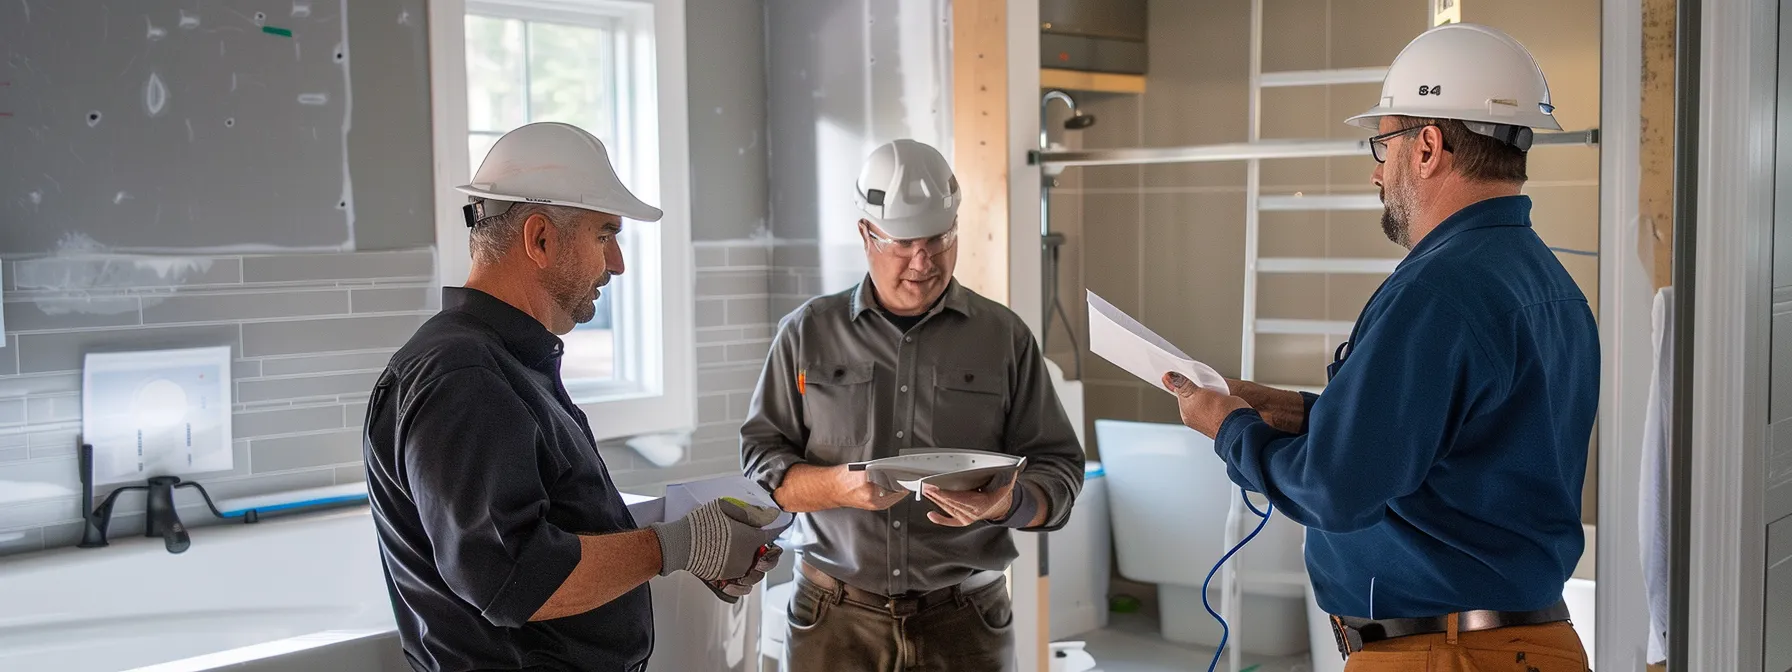
Choosing a bathroom and kitchen resurfacing expert from Master Builders Association Victoria requires careful thought. You need to consider several factors to ensure you select a professional who not only meets your aesthetic desires but also respects the structural integrity of your property. Start by evaluating the expert’s experience and specialization, as these aspects can make a significant difference in the outcome of your project. Assessing the quality of past projects and reading customer reviews will help you gauge their level of craftsmanship and reliability. Ensure that the professional holds proper licensing and insurance, as this protects you and your investment. Understanding the warranty or guarantee offered is crucial, as it reflects the confidence the expert has in their work. Lastly, comparing quotes thoughtfully can lead you to the best overall value, allowing you to achieve that dream bathroom without sacrificing quality for price. Whether your goal is to transform surfaces with luxurious marble or to ensure a functional drain system, making informed decisions will help you create an accessible space tailored to your needs.
Evaluate the Expert‘s Experience and Specialization
When assessing a bathroom resurfacing expert, pay close attention to their experience and specialization. An expert with a strong background in bathroom renovations may have also acquired skills beneficial for related projects, such as kitchen remodeling. Their familiarity with different materials and techniques ensures that they can address issues like mold in basements or provide innovative solutions tailored to your space needs.
Factor
Importance
Example
Experience
Indicates reliability and expertise
Years of successful bathroom resurfacing projects
Specialization
Ensures relevant skills for your project
Expert in both bathroom and kitchen remodeling
Ability to Handle Issues
Protects your home from potential damage
Knowledge of mold remediation in basements
Price
Influences the overall budget
Providing various options that fit your financial plan
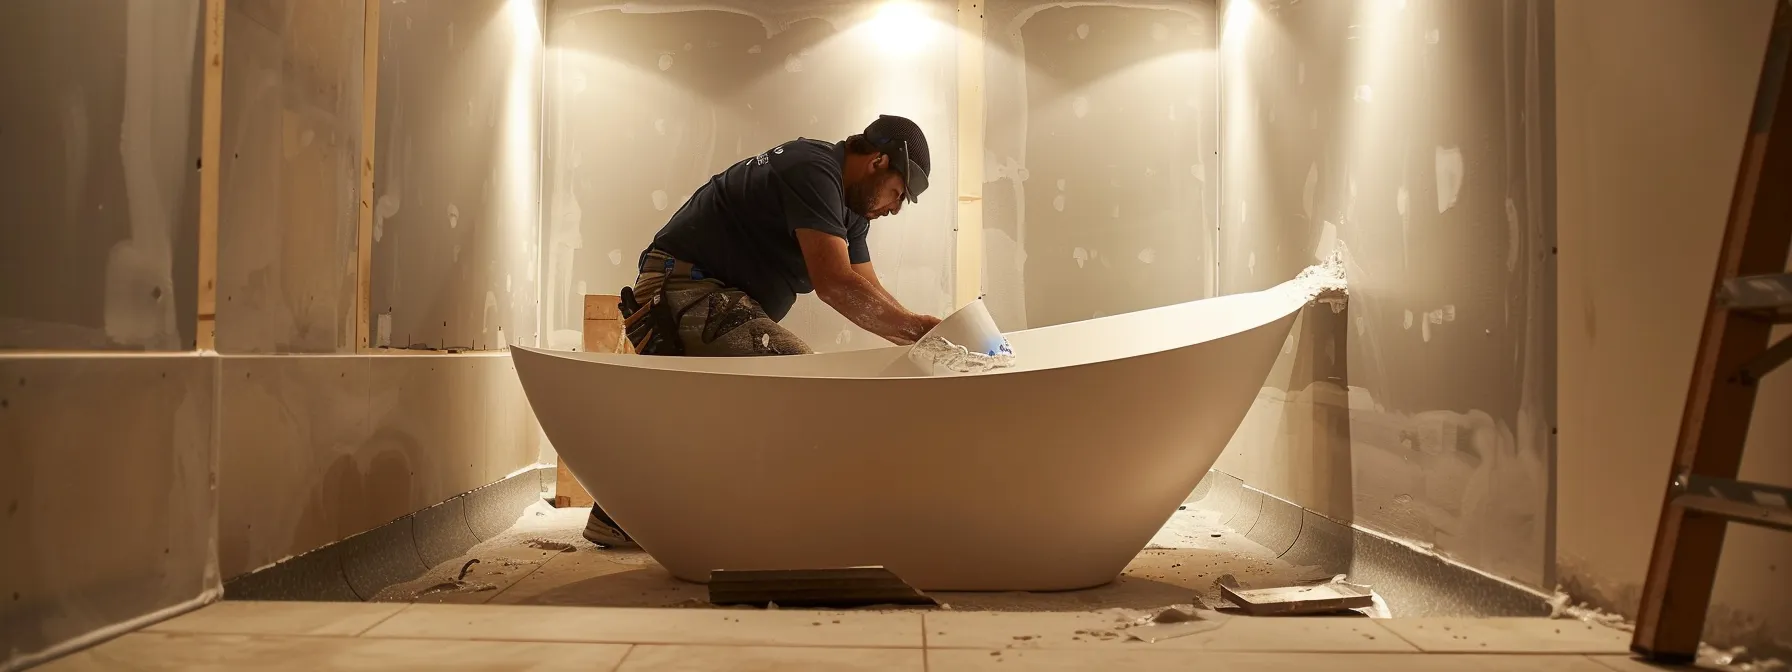
Assess the Quality of Past Projects and Reviews
Examining the quality of past projects and customer reviews is essential in your selection process for a bathroom resurfacing expert. Look for a portfolio that showcases a variety of bathroom remodeling projects, highlighting completed jobs that align with your vision, especially if you desire specific features like a redesigned bathtub. Engaging a general contractor known for transparency will provide you with insights into the expert‘s reputation and work ethic, ultimately enabling you to make a confident decision.
Factor
Considerations
Benefits
Past Projects
Variety in style and scope
Assures expertise in diverse projects
Customer Reviews
Feedback from previous clients
Provides trust and reliability
Transparency
Open communication about the process
Enhances your confidence in workmanship
Check for Proper Licensing and Insurance
Ensuring that your bathroom resurfacing expert possesses the proper licensing and insurance is vital for safeguarding your investment. Certification from relevant authorities confirms their knowledge of industry standards, while insurance protects you from unexpected issues that may arise, such as damage to a countertop or plumbing fixture during the project. Additionally, checking their standing with organizations like the Better Business Bureau helps verify their credibility and commitment to providing a reliable bathroom remodeling service.
Understand the Offered Warranty or Guarantee
When hiring a bathroom resurfacing expert, it is essential to understand the warranty or guarantee they offer to ensure your cabinetry, shower, and ventilation are covered against potential defects. A robust warranty reflects their commitment to customer satisfaction and signifies confidence in their workmanship. By prioritizing experts who offer clear terms of customer service regarding warranties, you can protect your investment and enjoy peace of mind after the renovation is complete.
Compare Quotes for Best Value, Not Just Price
When evaluating quotes for bathroom resurfacing, focus on the overall value rather than merely the price. Look for professionals who demonstrate innovation in their approach, ensuring they can handle all aspects of construction and demolition seamlessly. This becomes especially crucial if you’re considering aging in place modifications, as quality bathroom remodeling services will accommodate your long-term needs without compromising on aesthetics or functionality.
As you weigh your options for a bathroom resurfacing expert, consider the impact that professional knowledge can have on your project. Understanding the depth of their experience not only protects your investment but also transforms your vision into reality.
Decoding the Importance of Professional Expertise in Bathroom Resurfacing
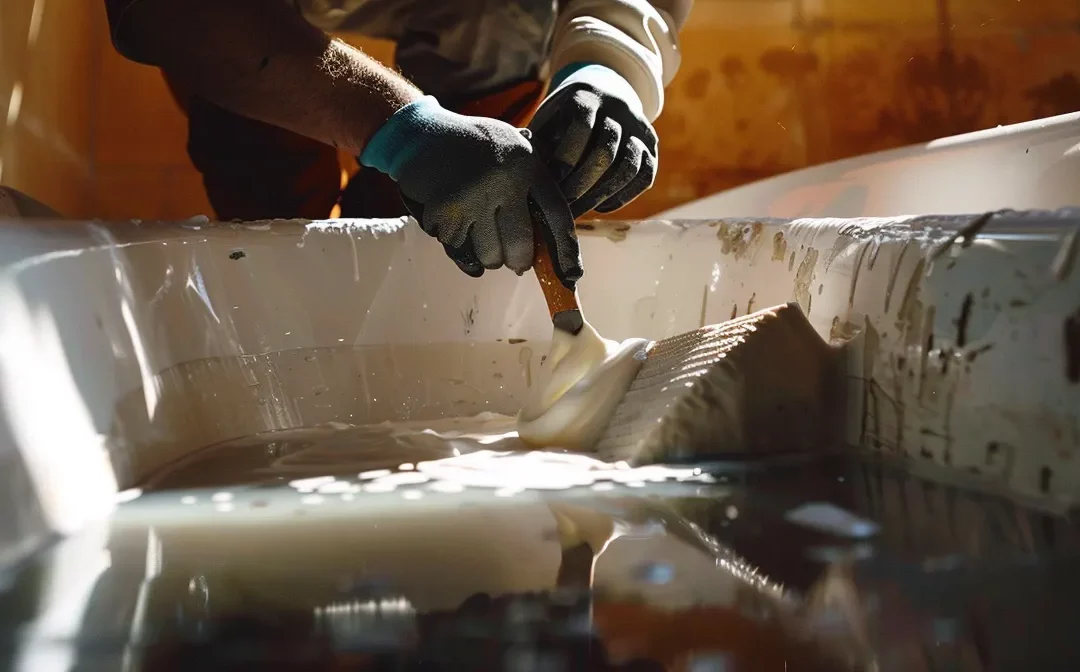
The expertise of professionals in bathroom resurfacing plays a critical role in achieving desired results and ensuring the project is executed smoothly. Their technical skills directly influence the resurfacing outcomes, allowing for precision and a polished final look that meets your expectations. Additionally, the use of professional-grade equipment enhances efficiency, minimizing disruptions during your renovation. These experts also prioritize sustainability by selecting high-quality materials that promote longevity. Whether you’re updating a sink or completely transforming your bath remodel, their knowledge ensures that your investment not only looks great but also adheres to safety standards and withstands the test of time.
The Role of Technical Skills in Resurfacing Outcomes
The technical skills of an expert in bathroom resurfacing significantly impact the final results of your project. Their expertise not only enhances the beauty and accessibility of your bathroom but also integrates water conservation methods into the design. With a professional bathroom remodeling approach, they ensure that each detail, from surface preparation to finish application, meets high standards of durability and aesthetic appeal.
Skill
Importance
Benefit
Surface Preparation
Key to a lasting finish
Prevents future issues with peeling or chipping
Material Selection
Ensures durability
Aids in maintenance and water conservation
Aesthetic Design
Enhances visual appeal
Creates a beautiful, welcoming space
Installation Techniques
Directly affects functionality
Ensures optimal accessibility for all users
The Impact of Professional Equipment on Efficiency
Utilizing professional equipment can greatly enhance the efficiency of your bathroom resurfacing project. A skilled bathroom remodeling contractor will use advanced tools and techniques, ensuring precise work that minimizes disruptions to your daily routine. This commitment to quality not only improves the overall aesthetic of your space but also positively impacts your quality of life, especially in creating an inviting atmosphere that takes advantage of optimal lighting.
When you engage a reputable contractor, you often benefit from a free estimate that clearly outlines the scope of work, helping you understand the timeline and costs involved. This transparency allows you to make informed decisions as you transform your bathroom into a space that reflects your style while maximizing its functionality.
How Experts Ensure Longevity Through Quality Materials
When embarking on a bathroom resurfacing project, experts prioritize the selection of high-quality materials to ensure long-lasting results. Choosing durable tile and robust carpentry elements not only enhances the aesthetic appeal of your space but also adds structural integrity, setting a solid foundation for your home improvement efforts. This skillful approach can lead to a bathroom that withstands wear and tear, allowing you to enjoy your investment for years to come.
Recognizing the value of professional expertise sets the stage for discerning quality in your project. Now, let’s explore the key indicators that reveal exceptional workmanship and premium materials in bathroom resurfacing.
How to Identify Quality Workmanship and Materials
Identifying quality workmanship and materials is crucial when working with bathroom remodel contractors. You’ll want to look for hallmarks of high-quality resurfacing work that demonstrate a contractor’s commitment to excellence. Consider asking specific questions about the materials and techniques they utilize in the process, as these choices can significantly impact the longevity and appearance of your bathroom remodel. Furthermore, understanding the long-term benefits of quality products not only enhances your satisfaction but also instills pride in your investment. Engaging with reliable bathroom remodeling contractors can help answer common questions in your FAQ, guiding you towards a successful renovation that meets your expectations.
Identifying Hallmarks of High-Quality Resurfacing Work
To identify hallmarks of high-quality resurfacing work, examine the overall finish and attention to detail. Look for smooth surfaces without imperfections, consistent color, and well-finished edges that demonstrate craftsmanship. Don’t hesitate to reach out to contractors via their email address to inquire about the materials and processes they employ; this communication can provide insight into their commitment to quality.
Questions to Ask About Materials and Techniques Used
When discussing your project with potential contractors, ask specific questions regarding the materials they intend to use for your bathroom resurfacing. Inquire about the sources of these materials, their durability, and how they hold up against moisture and wear over time. Additionally, you should probe into the techniques they employ during the resurfacing process to ensure that their methods align with best practices for achieving a seamless and long-lasting finish.
Understanding the Long-Term Benefits of Quality Products
Investing in high-quality products for your bathroom resurfacing project ensures durability and longevity. These products not only stand up to daily wear and tear but also enhance the overall aesthetic, providing a space that remains appealing over the years. By prioritizing quality, you set the stage for fewer repairs and lower maintenance costs in the future:
Benefit
Reason
Impact
Durability
Quality materials withstand everyday use
Minimizes the need for frequent repairs
Aesthetic Appeal
Superior finishes enhance overall look
Maintains a modern and inviting atmosphere
Cost-Effectiveness
Long-lasting products reduce replacements
Improves overall value of your investment
Understanding the quality of workmanship and materials is just the beginning. Next, let’s break down the cost-benefit analysis of hiring resurfacing professionals and see how it impacts your project’s success.
The Cost-Benefit Analysis of Hiring Resurfacing Professionals
Understanding the cost-benefit analysis of hiring resurfacing professionals is essential for making informed decisions about your bathroom project. Weighing the expenses of a DIY approach against the advantages of professional resurfacing reveals important insights. While the initial cost may seem lower for a do-it-yourself solution, the potential for long-term savings through expert workmanship becomes clear. Professionals not only ensure a higher quality finish but also minimize the risk of costly mistakes and project delays, allowing you to enjoy your newly renovated space with peace of mind. Engaging with seasoned contractors can lead to a smooth process and a final result that meets your expectations, making the value of their services worthy of consideration.
Breaking Down the Costs: DIY vs. Professional Resurfacing
When considering bathroom resurfacing, evaluate the costs associated with both DIY methods and hiring professionals. While handling the project yourself might seem more economical upfront, the potential for unforeseen complications can escalate expenses significantly. By choosing a professional, you invest in quality craftsmanship that not only delivers a polished result but also ensures compliance with industry standards, ultimately saving you time and money in the long run.
Long-Term Savings Through Professional Workmanship
Opting for professional workmanship in your bathroom resurfacing project ultimately leads to significant long-term savings. Skilled professionals bring expertise that minimizes mistakes, ensuring a high-quality finish that stands the test of time. As a result, you avoid frequent repairs and replacements, allowing your investment to retain its value longer and enhance your overall satisfaction with the space.
How Professionals Can Avoid Costly Mistakes and Delays
Experienced professionals bring a wealth of knowledge that helps them foresee potential challenges in your bathroom resurfacing project, allowing them to implement effective solutions proactively. Their familiarity with industry standards and best practices significantly reduces the chance of errors that could lead to costly complications. By utilizing their expertise, you can stay on schedule and ensure that the project navigates smoothly from start to finish:
Benefit
Description
Anticipate Challenges
Identify potential issues before they become problems.
Implement Solutions
Use tried-and-true methods that save time and resources.
Maintain Timelines
Keep your project on track, avoiding unnecessary delays.
Hiring resurfacing professionals not only enhances your bathroom‘s aesthetic but also saves you time and effort. To ensure a seamless experience, let’s explore how effective project management can significantly reduce stress throughout the resurfacing journey.
Minimizing Stress With Effective Bathroom Resurfacing Project Management
Effective project management is essential for ensuring a smooth bathroom resurfacing experience. Professionals excel at managing timelines and minimizing disruptions, helping you maintain your daily routine while work is underway. Clear communication and regular updates keep you informed about the progress and any adjustments that may arise, fostering a sense of trust and transparency. Should unexpected issues come up, experienced experts can navigate these challenges with ease, utilizing their knowledge and problem-solving skills to devise solutions that prevent delays and keep your project on track. With their oversight, you can focus on the excitement of your renovation, confident that every detail is being handled proficiently.
How Professionals Manage Timeline and Disruptions
Managing the timeline and disruptions during your bathroom resurfacing project is a key responsibility of professionals. They employ strategic planning and experience to schedule tasks efficiently, ensuring that each phase of the project progresses smoothly. By coordinating tradespeople and materials effectively, they minimize downtime, allowing you to continue your daily routines with minimal interruption.
In addition to adhering to a well-structured schedule, these experts maintain open lines of communication with you throughout the process. They provide regular updates on progress, address any potential obstacles proactively, and adapt to changes as needed. This approach fosters a sense of collaboration, giving you peace of mind as your vision for the bathroom comes to life.
The Importance of Clear Communication and Updates
Clear communication is essential throughout your bathroom resurfacing project. It fosters a collaborative environment where you and your contractor can address concerns and share ideas, ensuring that expectations are aligned at every stage. By receiving consistent updates, you stay informed about the progress and any necessary adjustments, which alleviates any potential stress.
This ongoing dialogue builds trust and reinforces the working relationship, allowing for a seamless renovation experience. It empowers you to participate actively in the decision-making process, enhancing your confidence in the outcome. Here’s what effective communication and updates can achieve:
Strengthen collaboration between you and the contractor.
Provide clarity on project timelines and expectations.
Address any unforeseen issues promptly and efficiently.
Enhance the overall satisfaction with the renovation results.
Dealing With Unexpected Issues: The Professional Advantage
Unexpected issues can arise during a bathroom resurfacing project, but relying on professionals gives you a significant advantage in addressing these challenges. Their extensive experience equips them with the ability to swiftly identify problems and implement effective solutions, reducing potential delays and stress for you. This proactive approach not only minimizes disruption but also ensures that the project stays aligned with your goals.
Issue
Professional Response
Outcome
Surprise plumbing leaks
Rapid assessment and repair
Project timeline maintained
Material availability shortage
Alternative options sourced
Continued progress without delays
Unexpected structural concerns
Immediate evaluation and solution
Ensured safety and integrity
With a skilled contractor managing your project, the chances of error decrease significantly, focusing their expertise on delivering quality results while you remain informed and confident in the process. Their familiarity with common issues allows them to mitigate risks effectively, ensuring that any challenge is seen as an opportunity for improvement rather than a setback. You can trust that their professional insight will transform any unexpected circumstance into a seamless part of your renovation journey.
Navigating the world of bathroom resurfacing can lead to remarkable transformations. Before you settle on an expert, ask the right questions to ensure your project runs smoothly and meets your vision.
Questions to Ask Before Finalizing Your Bathroom Resurfacing Expert
Before you make your final decision on a bathroom resurfacing expert, it’s paramount to seek clarity on several key aspects of their service. First, inquire about their process from start to finish; understanding their approach will give you confidence in their ability to deliver results. Next, discuss how they address unexpected challenges, as this will reveal their problem-solving skills and adaptability. Finally, confirm the details on post-project cleanup and care to ensure your space is left immaculate and that you know how to maintain the features they have installed. These conversations will equip you with the insights needed to choose the right professional for your renovation project.
Inquire About Their Process From Start to Finish
Inquiring about the resurfacing expert’s process from start to finish is essential to ensure a successful project. Ask them to detail each phase, from initial consultation to the final walkthrough, so you can grasp how they plan to manage your renovation. Understanding their procedures will also help you determine how they communicate progress and address any concerns that may arise along the way.
Discuss How They Handle Unexpected Challenges
When discussing the handling of unexpected challenges, it’s vital to understand the proactive measures a resurfacing expert employs. Ask them to share specific examples of how they’ve successfully navigated past complications and what strategies they implement to minimize disruptions during a project. This insight can reveal their adaptability and problem-solving capabilities, which are crucial in ensuring your renovation proceeds smoothly.
Challenge
Expert Strategy
Outcome
Unexpected damage during removal
Immediate assessment and quick repair
Project timeline remains intact
Material shipment delays
Source alternative materials quickly
No halt in work progress
Hidden plumbing issues
Assess and implement solutions on-site
Safe and secure plumbing system
Confirm Details on Post-Project Cleanup and Care
Before finalizing your choice of a bathroom resurfacing expert, clarify their approach to post-project cleanup and care. Ensuring that they have a defined plan for tidying up the workspace and removing debris is vital, as a well-maintained environment post-renovation contributes to your satisfaction with the project. Additionally, inquire about the maintenance procedures for the new surfaces, ensuring that you know how to keep them in optimal condition after the work is completed:
Discuss their strategy for debris cleanup and waste removal.
Request details on how they protect your existing fixtures during the resurfacing process.
Inquire about recommended care and maintenance for the finished surfaces.
Cut Bathroom Resurfacing Expenses With Smart Approaches
When it comes to bathroom and kitchen resurfacing, making smart choices can significantly reduce expenses without compromising quality. With guidance from organizations like the Master Builders Association Victoria, you can learn to optimize your resurfacing projects, whether it involves the shower, floor, or bathtub refinishing. Selecting the right materials and employing effective techniques sets the stage for impressive yet budget-friendly transformations. Explore clever strategies that will get you informed about do-it-yourself tricks, strategic timing, and hiring skilled professionals. Engaging in minimalist design not only enhances aesthetics but also leads to long-term savings. Keep reading to discover how to achieve your dream bathroom without breaking the bank!
Key Takeaways
Choose mid-range materials for durability and long-term savings in your bathroom resurfacing
Timing your project during off-peak seasons can significantly reduce costs
Regular cleaning and maintenance extend the lifespan of your bathroom surfaces and fixtures
Gather multiple quotes from contractors to ensure competitive pricing and quality service
Focus on timeless design to limit frequent renovations and maintain aesthetic appeal
Choose Materials Wisely for Cost-Effective Resurfacing
Choosing the right materials for your bathroom and kitchen resurfacing project is essential for managing costs while ensuring quality. Comparing pricing between various materials will help you identify budget-friendly options without sacrificing aesthetics or functionality. Weighing longevity against cost is also vital; investing in materials that endure can lead to significant savings over time. Rather than opting for the cheapest choice, consider mid-range quality selections that promise durability and performance, particularly in large areas like cabinetry and countertops. This strategic approach will not only streamline your renovation but also prepare you for a successful transformation. Don’t hesitate to reach out for a free quote from Master Builders Association Victoria to discuss how you can optimize your resurfacing journey.
Compare Pricing Between Materials
When it comes to selecting materials for your bathroom resurfacing, understanding the cost differences is crucial. For example, while marble may provide an elegant finish, its price point often reflects the extensive mining processes involved. In contrast, materials like epoxy and ceramic glaze offer durability and a range of aesthetic options at a lower cost, especially for surfaces like bathtubs that are subject to daily wear and tear.
Understand the Longevity Versus Cost
When planning your bathroom resurfacing, consider not just the initial costs but also how long the materials will last. For instance, porcelain tiles provide excellent durability and are low-maintenance, making them a wise investment over time. However, if waterproofing is your primary concern, opting for high-quality grout installation can enhance the lifespan of your surfaces, ensuring that your remodel withstands daily use.
Material
Cost
Longevity
Maintenance
Porcelain Tile
Moderate
20+ years
Low
Epoxy Coating
Lower
5-10 years
Moderate
Ceramic Glaze
Moderate
10-15 years
Low
Grout
Low
5-10 years
High
Opt for Mid-Range Quality That Promises Durability
Opting for mid-range quality materials in your bathroomrenovation minimizes the risk of facing costly repairs down the line. Choosing durable options like ceramic tiles can enhance your bathing experience without leading to the headache of frequent replacements. Investing wisely in these materials strikes a balance between aesthetics and long-term functionality, ensuring your space remains both beautiful and practical.
Now that you’ve mastered the art of selecting materials for a budget-friendly resurfacing project, it’s time to explore some practical DIY tricks. Get ready to roll up your sleeves and discover how you can achieve stunning results on your own!
Do-It-Yourself Bathroom Resurfacing Tricks
Embarking on a do-it-yourself bathroom resurfacing project can be a rewarding aspect of home improvement, allowing you to integrate your style into the space while managing expenses. Begin by assessing the scope of your project to understand what can be tackled on your own, and where professional help might be necessary. Gather the required tools and materials ahead of time to ensure a smooth process, minimizing pressure during the renovation. Pay attention to following detailed tutorials to guide your efforts, and prioritize safety precautions to protect yourself while working on the interior design of your bathroom. With careful planning and execution, you can transform your bathroom into a stunning space without breaking the bank.
Assess the Scope of DIY Projects
Before diving into your DIY bathroom resurfacing project, take a moment to assess what tasks you can handle effectively. Consider whether you have the necessary skills to tackle refinishing a sink or if tasks like painting the ceiling are better left to a professional. Gathering your tools and planning your approach at this stage will save you time and help manage costs, allowing you to make environmentally friendly choices while maximizing the potential of your space.
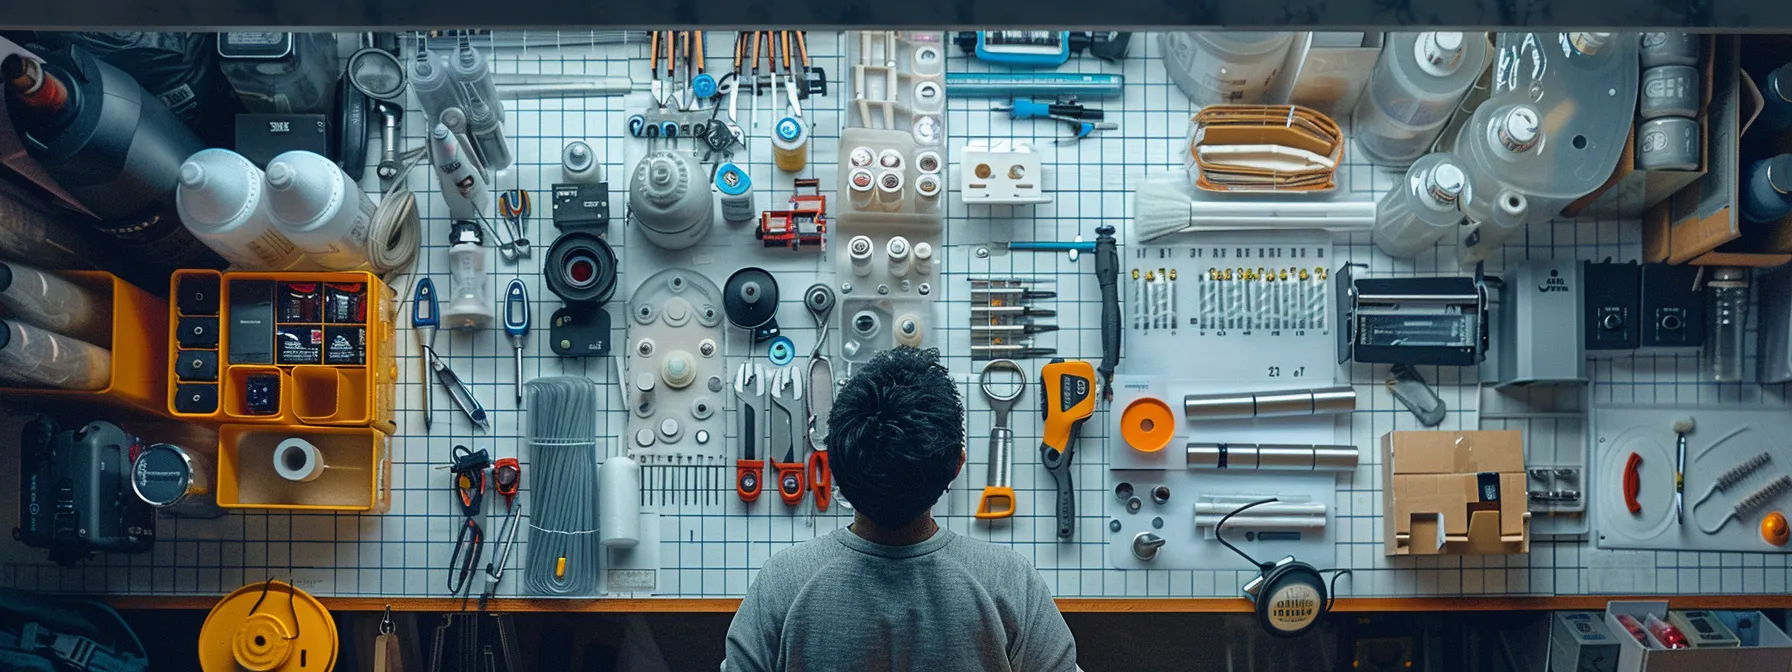
Gather Necessary Tools and Materials
Gathering the right tools and materials is vital for a successful DIY bathroom resurfacing project. For instance, if you plan to work with fiberglass or cast iron surfaces, ensure you have the appropriate safety equipment and high-quality resurfacing products designed for these materials. Additionally, don’t hesitate to request a free estimate to understand the costs involved, especially since many reputable services offer a warranty that covers their work, giving you peace of mind as you embark on your bath remodeling journey.
Follow Detailed Tutorials and Safety Precautions
Embracing a DIY approach in your bathroom remodels can yield satisfaction and significant savings, but it’s paramount to prioritize safety. Before you begin, seek out detailed tutorials that are tailored to the specific tasks at hand; this ensures that you fully understand every step involved in the construction process. Always equip yourself with the necessary safety gear, particularly when working on features like the wall, where precision and protection are essential.
Having a plan in place provides a sense of direction, but safety should never be an afterthought. As you gather information, don’t hesitate to consult an FAQ database for quick answers to common questions that may arise during your project. This proactive approach not only enhances your competence but also allows you to take pride in the successful completion of your bathroom resurfacing efforts.
Step
Importance
Safety Precautions
Gather Tools
Essential for functionality
Use proper equipment
Watch Tutorials
Enhances understanding
Follow along safely
Work on Walls
Improves aesthetics
Use reliable safety gear
Consult FAQs
Clarifies doubts
Quick reference for safety
With your newfound DIY skills, you’re ready to transform your bathroom like a pro. Let’s dive into the critical aspect of timing—discover how to plan your resurfacing project for maximum impact.
Timing Your Bathroom Resurfacing Project
Maximizing your budget for bathroom resurfacing begins with strategic timing and smart choices that can significantly cut costs. Planning your project during off-peak seasons can help you take advantage of lower prices as demand typically decreases. Keep an eye out for special offers or discounts from suppliers, which can make a noticeable difference, especially when working with materials like granite or iron. Additionally, considering partial resurfacing can yield substantial savings while still revitalizing your space. Not only will these approaches help you achieve your bathroom remodeling goals, but they will also help you stay within your budget without compromising quality.
Plan for Off-Peak Seasons
Timing your bathroom resurfacing project during off-peak seasons can greatly benefit your budget. You will likely find lower prices as demand decreases, making it an opportune moment to source materials and hire contractors. Pay attention to seasonal promotions and discounts, which can further enhance your savings while still achieving the desired results for your space.
Seek Out Special Offers or Discounts
To reduce your bathroom resurfacing expenses, actively search for special offers or discounts from suppliers and contractors. Many businesses run promotions, especially during holiday seasons or at the end of product lines, which can significantly decrease your overall costs. By taking the time to research and compare these deals, you can secure quality materials and services at a fraction of the usual price, making your renovation more affordable.
Consider Partial Resurfacing for Savings
Choosing partial resurfacing allows you to refresh your bathroom without the cost of a complete overhaul. Focus on key areas that need attention, such as countertops or tile sections, to achieve a noticeable upgrade while keeping expenditures in check. This targeted approach not only rejuvenates your space but also minimizes the time and effort required for the renovation.
Evaluate areas for partial resurfacing.
Focus on high-impact features like countertops and tiles.
Achieve a fresh look while controlling costs.
As you plan your bathroom resurfacing project, the next crucial step involves finding the right professionals to bring your vision to life. Hiring skilled experts is essential for achieving a stunning and lasting transformation in your space.
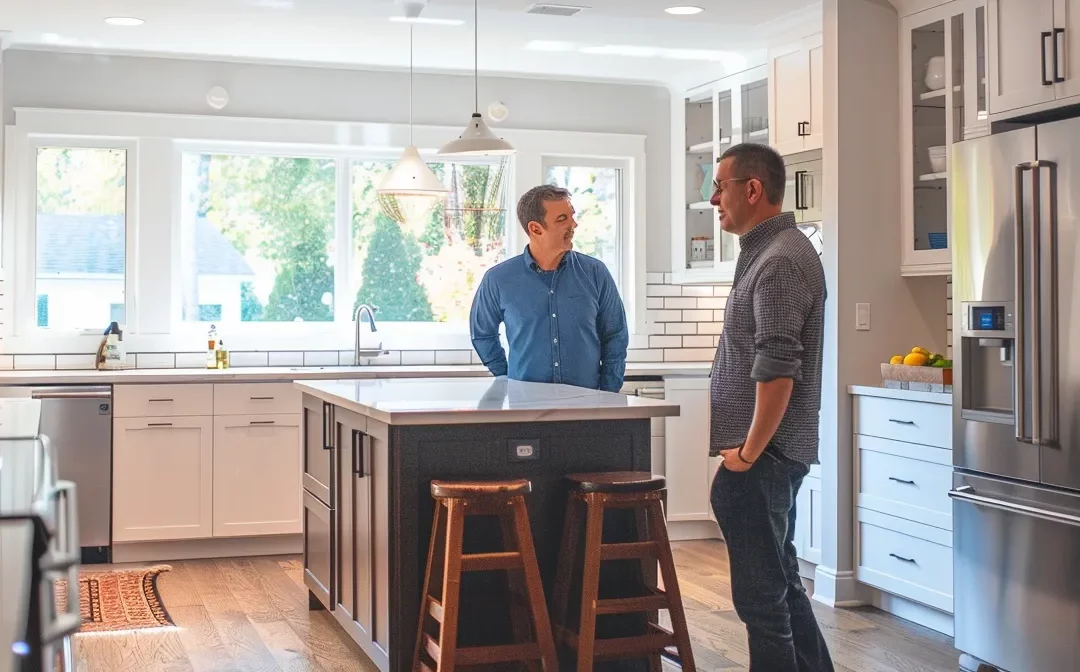
Hiring the Right Professionals for the Job
Finding the right professionals for your bathroom resurfacing project can significantly influence both the quality of the work and your overall expenses. Start by gathering multiple quotes to compare pricing, as this will help you identify competitive rates and valuable service offerings. It’s essential to read reviews and check references to ensure that the contractors you consider have a track record of satisfaction among previous clients. Don’t hesitate to negotiate pricing and the scope of work; a collaborative approach can lead to a solution that fits your budget and needs. This careful selection process is vital in ensuring you make informed decisions that will keep your renovation on track and within financial limits.
Get Multiple Quotes for Comparison
When considering professionals for your bathroom resurfacing project, gathering multiple quotes is essential to ensure you find the best value for your investment. This allows you to compare both pricing and services offered, giving you a clearer picture of what to expect from each contractor. Take your time to evaluate these quotes carefully, looking beyond the price to assess the quality and scope of their work.
As you evaluate your options, consider these key factors to inform your decision:
Contractor
Quote Amount
Services Included
Estimated Timeline
Contractor A
$3,000
Full resurfacing, includes warranty
2 weeks
Contractor B
$2,500
Partial resurfacing, excludes warranty
1 week
Contractor C
$3,200
Full resurfacing, materials included
3 weeks
Read Reviews and Check References
Before selecting a contractor for your bathroom resurfacing, take the time to read reviews and check references. Feedback from previous clients provides insight into a contractor’s reliability and quality of work, helping you to make an informed decision. Positive testimonials can enhance your confidence in a professional, while negative ones may raise red flags.
Read client reviews on multiple platforms.
Check references provided by the contractor.
Assess the overall satisfaction of past clients.
Negotiate Pricing and Scope of Work
Engaging in discussions about pricing and the scope of work can lead to savings and tailored services in your bathroom resurfacing project. Be clear about your budget and the specific areas you want addressed during the renovation. Most contractors appreciate transparency and may be willing to adjust their offerings to better align with your financial expectations.
Open a dialogue about your budget constraints.
Identify critical areas for resurfacing.
Request adjustments to services based on your needs.
Finding the right professionals sets a strong foundation for your renovation journey. Let’s explore how embracing minimalist design can enhance your space and save you money over time.
Embrace Minimalist Design for Long-Term Savings
Adopting a minimalist design approach in your bathroom can lead to significant long-term savings while maintaining a stylish appeal. Selecting a timeless design allows you to avoid costly renovations in the future, as this aesthetic transcends fleeting trends. Additionally, investing in quality fixtures minimizes the need for repairs and replacements, ensuring that your bathroom remains functional and pristine with minimal upkeep. Simplifying your layout can further reduce both labor and material costs, making your resurfacing project more efficient and budget-friendly. These strategic choices not only enhance the overall look of your space but also contribute to maintaining financial stability in your renovation journey.
Choose a Timeless Design to Avoid Frequent Updates
Selecting a timeless design for your bathroom resurfacing project not only enhances its visual appeal but also reduces the frequency of updates you may need to undertake. Focus on classic elements, such as neutral color palettes and simple lines, which remain stylish and adaptable over the years. This strategic choice contributes to long-term savings by minimizing the need for costly renovations driven by changing trends.
Invest in Quality Fixtures That Require Less Maintenance
Investing in quality fixtures is a strategic move that pays off in upkeep and longevity. Durable materials not only withstand daily use but also maintain their aesthetic appeal over time, minimizing the frequency of replacements. By focusing on high-quality options for faucets, showerheads, and sinks, you can significantly reduce maintenance needs, allowing you to enjoy a more functional and stylish space without the worry of constant repairs.
Simplify the Layout to Reduce Labor and Material Costs
Simplifying the layout of your bathroom can significantly lower both labor and material costs during resurfacing. By reducing the complexity of the space, you streamline installation processes and minimize the number of materials required. A more straightforward design not only curtails expenses but also enhances the overall functionality and flow of your bathroom, creating an inviting environment on a budget.
Minimalist design not only enhances visual appeal but also sets the stage for future savings. To protect your investment and keep your space looking fresh, regular maintenance is key.
Regular Maintenance to Prevent Costly Overhauls
Maintaining your bathroom through regular upkeep is a proactive strategy that can save you from expensive repairs down the line. Implementing a routine cleaning regimen helps prevent grime buildup, which can lead to more significant issues if left unchecked. Addressing minor problems as they arise prevents them from escalating into costly repairs. Additionally, scheduling annual inspections allows you to identify potential issues before they become major concerns. By taking these smarter approaches, you can ensure your bathroom stays in top condition, ultimately reducing the need for extensive resurfacing efforts.
Perform Regular Cleaning to Avoid Grime Buildup
Incorporating a regular cleaning routine is essential for maintaining the freshness and longevity of your bathroom surfaces. Frequent cleaning helps eliminate dirt and grime buildup that can lead to discoloration or damage over time. By dedicating just a few minutes each week to cleaning, you can keep your bathroom looking new and avoid the costs associated with extensive repairs or resurfacing.
Develop a weekly cleaning schedule to keep surfaces spotless.
Use appropriate cleaning products that are safe for your materials.
Inspect for any signs of wear or damage during each cleaning session.
Address Minor Issues Promptly
Pay close attention to any minor issues that arise in your bathroom, such as small leaks or cracks. Addressing these problems quickly can prevent them from escalating into larger, more costly repairs. Taking immediate action not only saves you money but also extends the life of your surfaces, ensuring your bathroom remains in excellent condition for years to come.
Schedule Annual Inspections to Catch Potential Problems Early
Scheduling annual inspections is a proactive measure that can save you from unexpected expenses during bathroom resurfacing. By routinely assessing your bathroom‘s condition, you can identify subtle issues early on, such as leaks or damaged fixtures, before they escalate into significant problems. This practice not only allows for timely repairs but also extends the lifespan of your surfaces and fixtures, ensuring that your bathroom remains in good shape for years to come.
Understanding the Timeline for Bathroom Resurfacing Projects
When considering bathroom and kitchen resurfacing, understanding the timeline and process is crucial. Factors like the Master Builders Association guidelines and the types of materials, such as porcelain tile, play significant roles in determining the duration of your project. You also need to consider the involvement of professionals like electricians to ensure everything is functional and up to code. Time management can greatly affect your return on investment, making it imperative to have a clear picture of what to expect. Keep reading to learn about the essential steps before you start, the typical timeline for resurfacing projects, and how to prepare for any unexpected delays.
Key Takeaways
Assess your bathroom‘s condition and address any issues before resurfacing begins
Choose high-quality resurfacing materials for durability and long-lasting aesthetics
Consider your bathroom‘s design and functionality to ensure a successful remodel
Understand the timeline and potential delays to set realistic expectations for your project
Communicate consistently with your renovation team to stay informed throughout the process
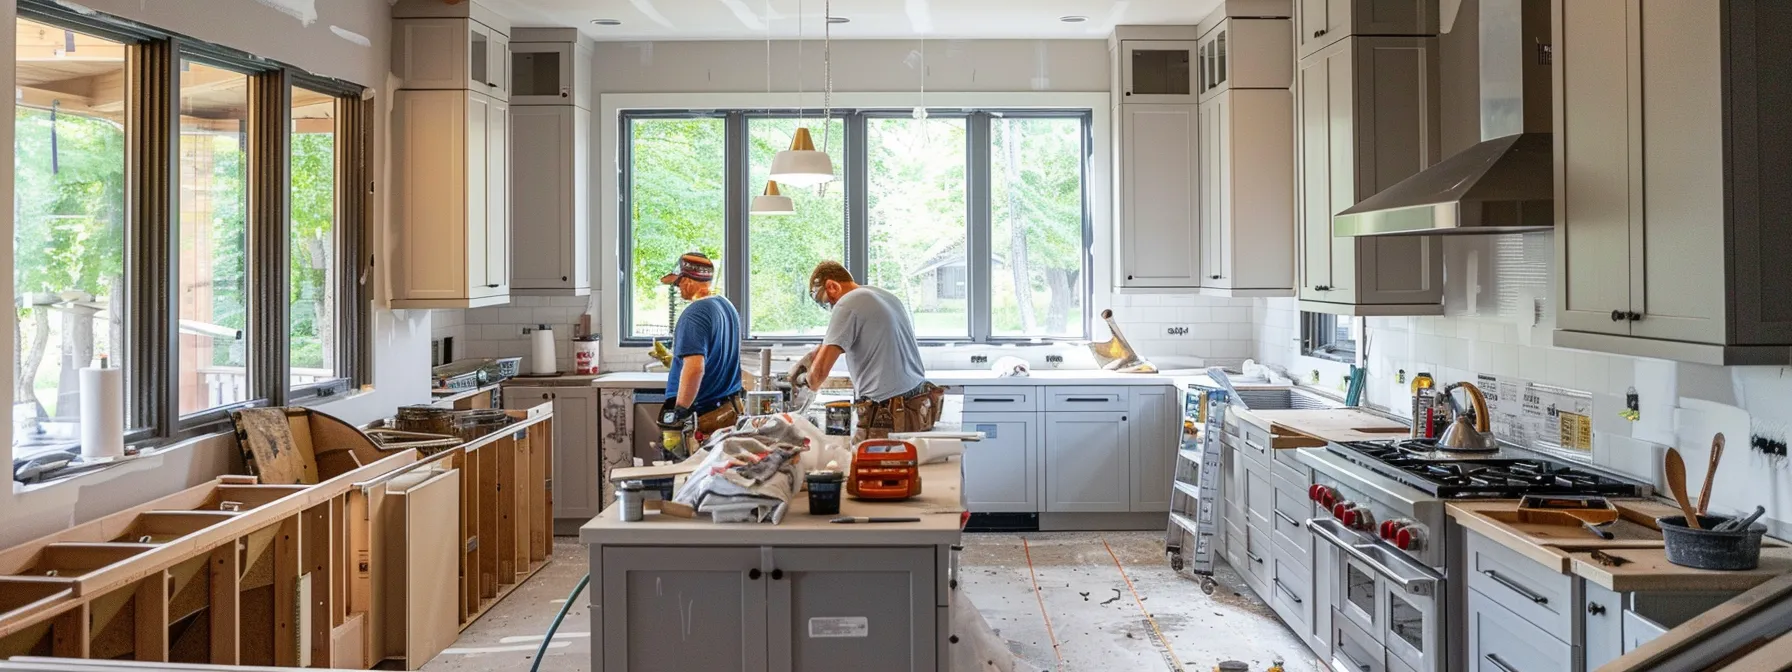
Key Steps Before Starting Your Bathroom Resurfacing
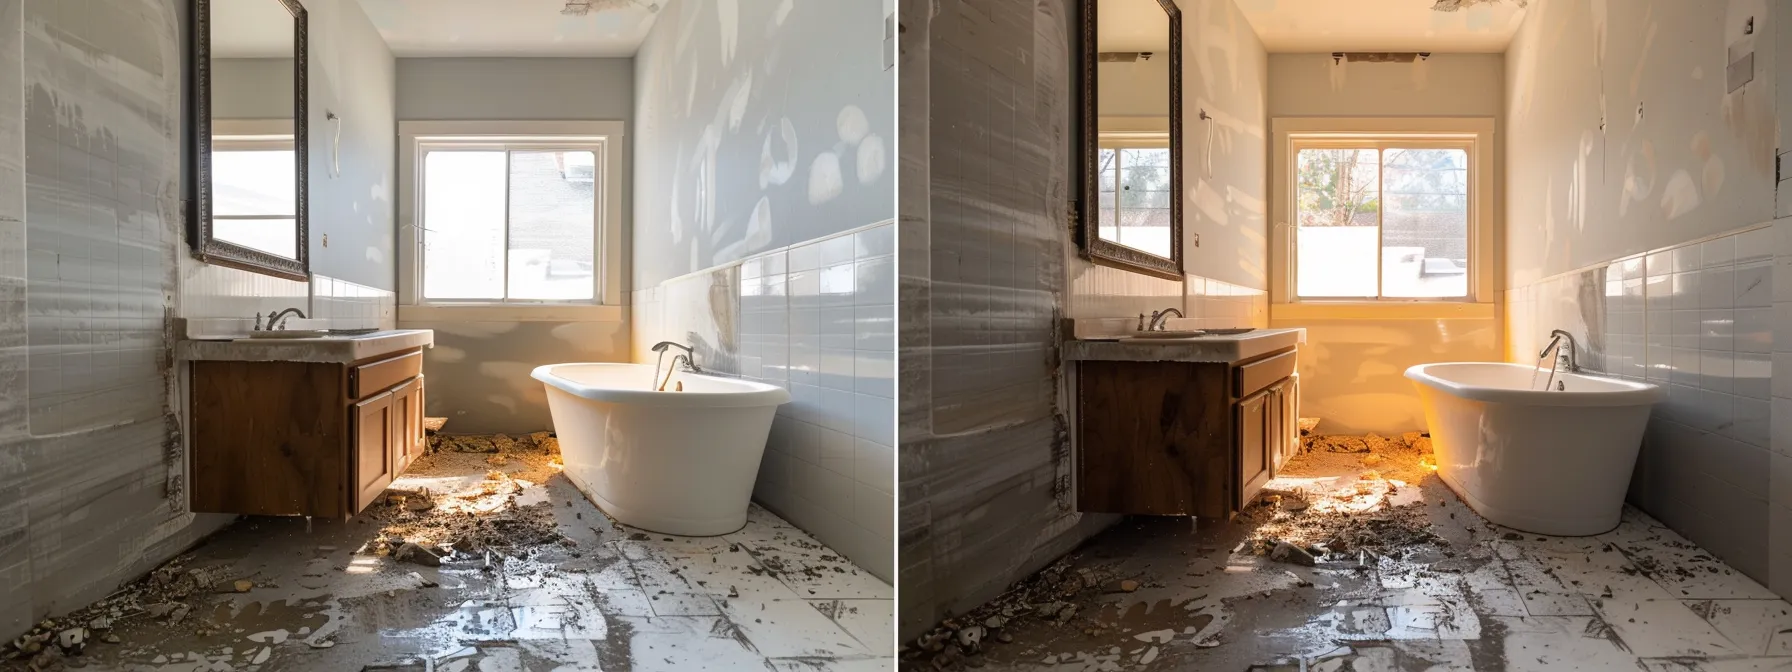
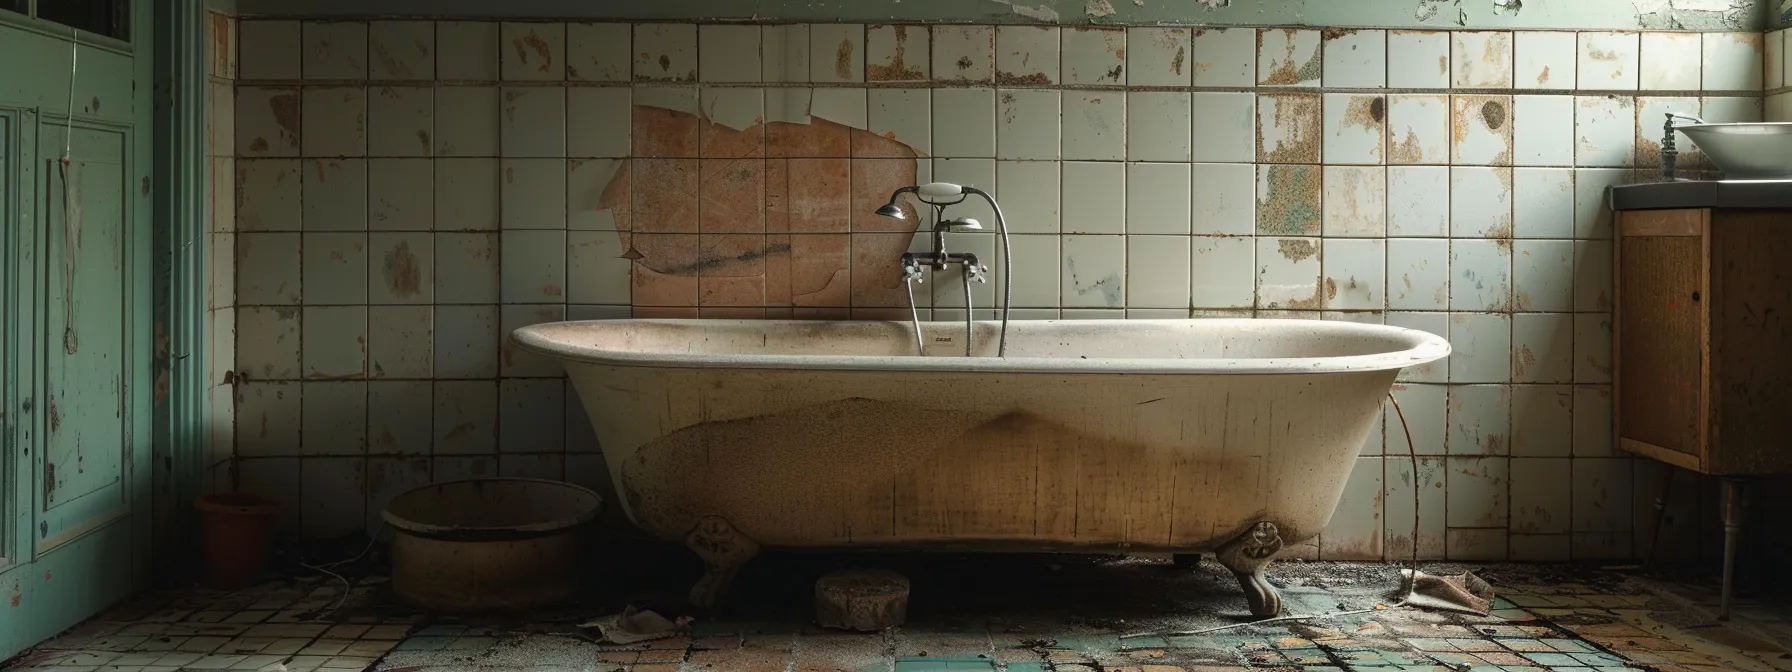
Before diving into your bathroom and kitchen resurfacing project, it’s crucial to take some key steps that can significantly influence the overall outcome. Start by evaluating the current state of your bathroom, checking for issues like mold that could complicate the resurfacing process. Understanding whether you have a cast iron or a wood structure will guide your material decisions, helping you avoid unnecessary expenses. Next, selecting the right resurfacing materials is essential; consider how they will hold up against dust and moisture over time. Finally, focus on finalizing your resurfacing design, as a well-thought-out plan ensures the transformation aligns with your vision and functional needs.
1. Evaluating the Bathroom‘s Current State
Before beginning your bathroom and kitchen resurfacing project, take time to thoroughly evaluate the bathroom’s current state. Check for any signs of damage, such as cracked grout or faulty plumbing fixtures, as unresolved issues can lead to complications during the remodeling process. If you have a hot tub, ensure its condition aligns with your resurfacing goals, and be prepared to address any necessary repairs in your contract with the renovation team. It’s always good to hire professionals affiliated with the Master Builders Association for quality assurance.
2. Choosing the Right Resurfacing Materials
Choosing the right resurfacing materials is a vital step that can significantly impact your bathroom‘s durability and appearance. Opting for quartz, known for its resistance to water damage, can sweeten your investment by providing a long-lasting and beautiful surface. In New Jersey, where home improvement projects thrive, selecting quality materials ensures you not only enhance the aesthetics but also protect your space from future wear and tear.
3. Finalizing Your Resurfacing Design
As you finalize your resurfacing design, consider how the layout and materials will align with your property’s overall aesthetic and practical needs. Engaging in thoughtful planning will enable you to effectively manage the shower remodel cost, ensuring you achieve your desired look without overspending. If you are a landlord, prioritizing both functionality and appeal can significantly enhance tenant satisfaction, making your bathroom remodel a worthwhile investment.
Once you’ve outlined the key steps for your bathroom resurfacing project, it’s time to focus on the timeline. Understanding how long the resurfacing process takes is crucial for planning and anticipation of your stunning transformation.
Understanding How Long Bathroom Resurfacing Takes
Understanding the timeframe for bathroom resurfacing projects is essential to set realistic expectations for your renovation. On average, most resurfacing tasks, including work on your bathtub, can take anywhere from a few days to a week, depending on the scope of the project. Several factors influence this timeline, such as the condition of existing surfaces, potential encounters with mildew, and any necessary upgrades to electrical wiring or plumbing. If your project evolves into a full bathroom renovation, the duration may extend significantly. Being aware of these elements will help you plan accordingly and ensure a smoother renovation experience.
Average Timeframe for Bathroom Resurfacing
The average timeframe for a bathroom resurfacing project often hinges on various factors, including the condition of existing cabinetry and the complexity of the shower area. If your project involves several elements of construction, such as upgrading fixtures or integrating new interior design concepts, this can extend the overall timeline. Therefore, being clear about your goals and communicating with your renovation team will help ensure that your bathroom remodeling project proceeds smoothly and stays on track.
Factors That Can Affect the Resurfacing Timeline
Several factors can influence the timeline of your bathroom resurfacing project. The condition of existing materials, such as tile or fiberglass, often plays a crucial role; damaged surfaces may require additional prep work before refinishing can begin. Additionally, if you’re working with a real estate agent to enhance your property‘s value, their insights on effective updates can help you focus on necessary renovations that stay within your project’s timeframe.
Factor
Impact on Timeline
Condition of Existing Surfaces
Additional repair work may be needed.
Choice of Materials
Some materials require longer drying times.
Design Complexity
Intricate designs or custom features may slow progress.
Permit Requirements
Obtaining permits can introduce delays.
Each room‘s unique characteristics will also affect the resurfacing timeline; for example, if the bathtub refinishing involves complex plumbing adjustments, this may extend the duration of your project. Planning ahead and anticipating these challenges can help you manage expectations and keep your renovation on track.
Now that you have a clear idea of the timeframe involved, it’s time to dive into the resurfacing process itself. Get ready to learn what you can expect as your bathroom transforms before your eyes.
What to Expect During the Resurfacing Process
As you prepare for a bathroom resurfacing project, it’s beneficial to understand what the process entails day by day. Knowing the steps involved in a full bathroom remodel will help you set realistic expectations and stay organized throughout the complete bathroom renovation. Each phase will require your attention, from assessment and preparation to the finishing touches. Keep a towel handy, as surfaces may be damp during certain stages. This understanding will empower you to manage your time effectively and ensure a smoother transition back to your refreshed space.
Day-by-Day Breakdown of Bathroom Resurfacing
During the resurfacing process, each day will lead you through critical stages that require your attention. Initially, you might see your bathroom stripped down, revealing underlying structures, which can ignite interest in how the new marble surfaces will transform the space. As work progresses, it’s essential to maintain communication with your renovation team, especially if your bathroom is located in a basement where moisture levels may affect the resurfacing process.
You’ve witnessed the transformation during the resurfacing process, and the results are just the beginning. Get ready to explore what happens next and how to maintain your stunning new spaces!
Post-Resurfacing: What Comes After?
After completing your bathroom resurfacing project, it’s vital to understand the next steps to ensure a seamless transition back to using your space. Curing time plays a crucial role in this phase, impacting not only the durability of the finishes but also when you can comfortably return to your bathroom. As you await the final touches—like adding a grab bar or painting the ceiling—you should remain informed about the timeline and the complexity of the tasks ahead. Planning ahead allows you to coordinate with your bedroom layout or any adjacent areas, ensuring everything flows smoothly once you are ready to enjoy your refreshed bathroom.
Curing Time and Final Touches
After completing your bathroom resurfacing project, pay close attention to the curing time required for materials like porcelain to reach their optimal durability. It’s essential to avoid any interactions with installed features, such as light fixtures or pipes, until this process is fully complete to prevent issues like lead poisoning from subpar finishes. Once the surfaces are adequately cured, you can focus on adding the final touches that will enhance your space, ensuring that everything is functional and stylish, as highlighted on platforms like HomeAdvisor.
When You Can Use Your Bathroom Again
Once your bathroom resurfacing project wraps up, you’ll want to know when you can comfortably return to using your space. Typically, the average waiting period before using the sink and other fixtures is about 24 to 48 hours, allowing materials ample time to cure. Make sure to establish communication with your contractor or subcontractor to confirm this timeframe, so your restoration meets safety standards, especially regarding any run of duct work related to ventilation.
You’re on the brink of enjoying your newly resurfaced space, but the journey isn’t over yet. Preparing for potential delays can safeguard your project and ensure everything runs smoothly.
Planning for Unexpected Delays in Resurfacing Projects
In any bathroom resurfacing project, being prepared for potential delays can save you significant time and frustration. Common causes of delays include issues with materials, such as granite or plaster, which may not be readily available or require additional preparation. Problems with lighting fixtures or plumbing components can also slow progress. Working closely with a bathroom remodeling contractor can help you identify these challenges early on, allowing for proactive solutions. By anticipating these obstacles, you can streamline your project timeline and ensure a smoother renovation experience.
Common Causes of Delays and How to Mitigate Them
Common delays in bathroom resurfacing projects can arise from supply chain issues that lead to the unavailability of essential materials. If bathroom remodelers encounter difficulties sourcing items like tiles or fixtures, it can stall progress, pushing your project timeline back. To mitigate these risks, establish a reliable communication channel with your team to regularly check on material statuses and adapt your plans accordingly.
Additionally, when working on surfaces such as walls and floors, the chance of encountering unexpected repairs might arise, which can delay completion. Make sure to ask about the warranty options for the materials and work performed to safeguard your investment. Understanding the entire scope of the project from the outset helps in planning for these possibilities:
Identify potential supply chain delays early in the project.
Communicate consistently with your bathroom remodelers regarding material availability.
Prepare for possible repairs on walls and floors before starting work.
Unexpected delays can pose challenges, but with the right strategies in place, you can navigate them effectively. Let’s explore some tips to streamline your bathroom resurfacing timeline and ensure a more efficient process.
Tips for a Smoother Bathroom Resurfacing Timeline
Effective scheduling of contractors is essential to streamline the resurfacing process and avoid unnecessary delays. Begin with thorough research to find a reputable general contractor who understands your project needs, particularly regarding complex countertop installations. Preparing your home is equally important; ensure proper ventilation to manage any unpleasant odors, such as those that might arise from materials containing dichloromethane. Taking these proactive steps will help pave the way for an efficient and successful bathroom resurfacing project.
How to Efficiently Schedule Contractors
To efficiently schedule contractors for your primary bathroom remodel, start by prioritizing clear communication about your project’s needs and timelines. Ensure your contractors understand the specific materials you plan to use, like ceramic tiles, as well as any considerations regarding isocyanate-based products that may require additional precautions during installation. Furthermore, maintain a well-ventilated work environment to help manage any fumes generated during resurfacing, keeping both the team and your home safe and comfortable throughout the process.
Preparing Your Home for Resurfacing Work
Preparing your home for resurfacing work is a crucial step that enhances both the efficiency and safety of the renovation process. Start by clearing the area of any personal belongings to minimize the impact of dust and debris that may arise from demolition activities during your bathroommakeover. Additionally, consider making temporary accessibility arrangements; this allows you and your family to navigate around your home comfortably while the project is underway and ensures that everything blends seamlessly once the work on your iron fixtures is complete.
Breaking Down the Costs: DIY vs Professional Bathroom Resurfacing
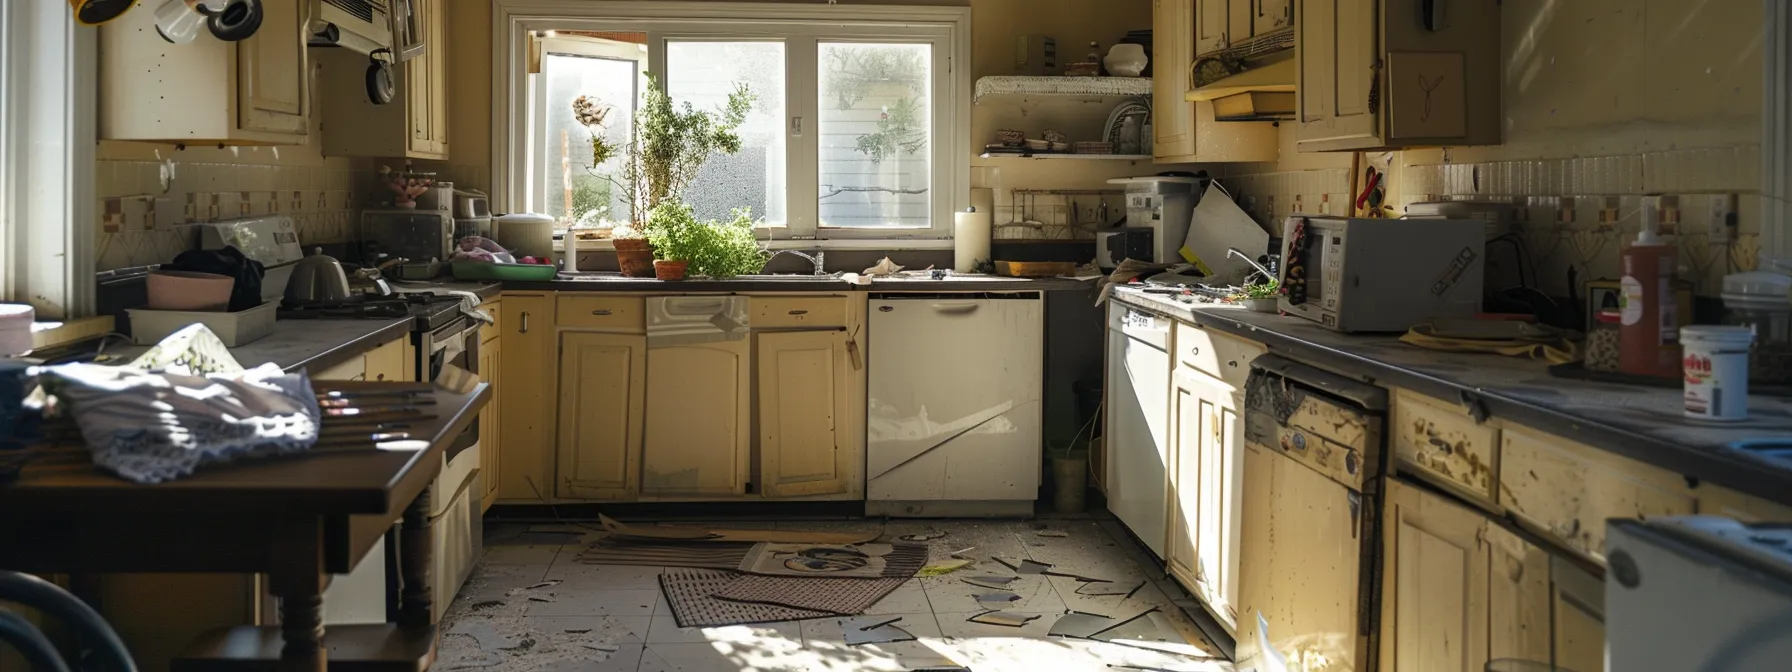
Bathroom and kitchen resurfacing can breathe new life into tired spaces, particularly in homes facing the inevitable dust and wear and tear that comes with time. Whether you’re considering a DIY approach or hiring a professional, understanding the nuances of resurfacing is essential. The Master Builders Association of Victoria highlights that proper techniques, such as effective caulking and surface preparation, directly influence the longevity and appearance of your renovations. Choosing the right path for your project can save you money or lead to unexpected costs. Keep reading to explore a detailed comparison between DIY and professional resurfacing, uncovering valuable insights to help you make the best choice for your home.
Key Takeaways
assess your bathroom‘s condition to determine the scope of resurfacing needed
consider the costs and materials required for a DIY versus professional project
hiring professionals ensures quality results and addresses underlying issues efficiently
evaluate your skill level and time availability before deciding on the approach
look for warranties and post-service support when choosing professional resurfacing services
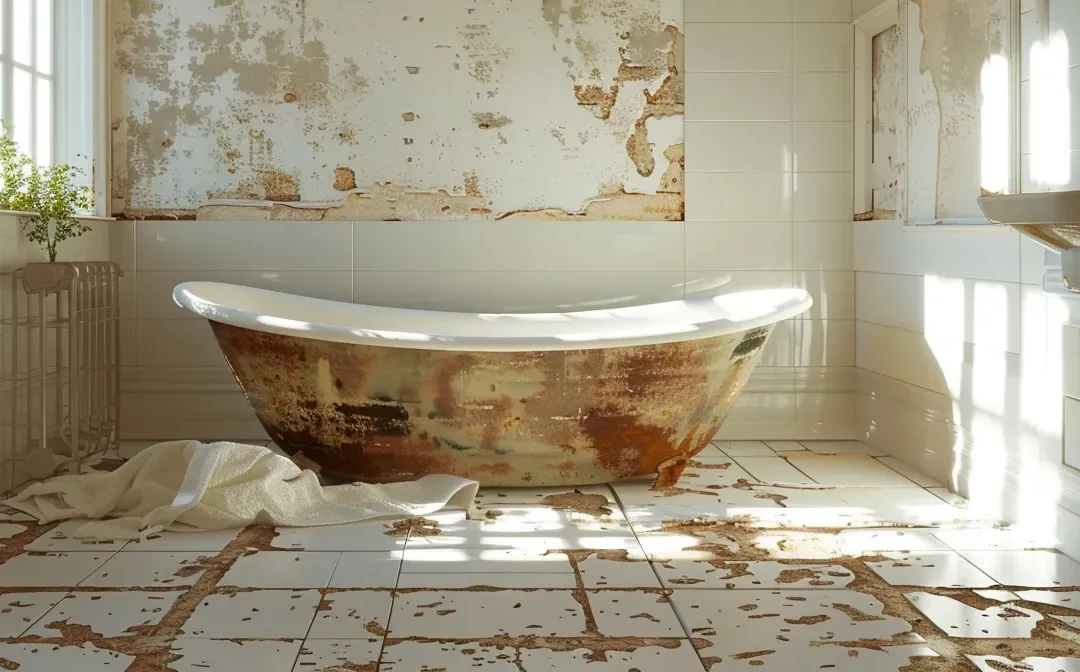
Initial Considerations for Bathroom Resurfacing: Setting the Stage
Before diving into your bathroom and kitchen resurfacing project, it’s vital to evaluate the current condition of your bathroom. Analyzing elements like the bathtub, tiles, and fixtures will guide you in deciding whether you need a simple coat of finish or a more extensive bathtub refinishing. Look for signs of wear, such as scratches or abrasions, and determine whether they compromise the functionality or safety of your space. Additionally, clarify the scope of your project—will you focus solely on aesthetic enhancements, or do you need to address deeper structural concerns? Be mindful of safety, as working with metal surfaces and abrasive materials carries a risk of injury if not handled correctly. Establishing these parameters early on will solidify your plan and ensure a successful renovation.
Assessing the Bathroom‘s Current Condition
Start by taking a close look at your bathroom and kitchen resurfacing, ensuring you identify all areas requiring attention. Use a brush to check for any stains, discoloration, or damage on surfaces, since these issues can affect your choice between a DIY project and hiring professionals. If your home insurance covers renovations, including resurfacing, this could influence your decision by potentially offsetting some costs.
Bathroom Element
Condition Assessment
DIY Potential
Bathtub
Scratches, stains
Possible resurfacing
Tiles
Cracks, loose tiles
Replace or repair
Fixtures
Rust, leaks
Replace recommended
Also, ensure you do a thorough inspection of the roof above your bathroom, as leaks can lead to mold and unnecessary damage. If issues arise, consider whether a DIY roof repair fits your skills and resources, or if hiring a professional Master Builders Association of Victoria makes more sense for your long-term safety and investment bathroom and kitchen resurfacing. Addressing these conditions accurately will help you allocate your renovation budget effectively:
Deciding on the Scope of Your Resurfacing Project
As you decide on the scope of your resurfacing project, it’s important to gear your approach based on both the condition of your bathroom and your budget. Understanding whether a simple update or a more comprehensive professional bathtub refinishing is necessary can help you navigate the expense effectively. By carefully assessing your needs, you can avoid unnecessary soil in your renovation journey and stay focused on the road ahead.
As you envision your dream bathroom, it’s crucial to understand the financial aspects of resurfacing. Let’s break down the costs of DIY bathroom resurfacing so you can make informed decisions on your project.
Breaking Down the Costs of DIY Bathroom Resurfacing
Understanding the costs associated with a DIY bathroom resurfacing project requires careful consideration of the essential materials and tools. Start by assessing what you need, including sandpaper, epoxy, and other supplies to ensure a smooth and durable finish. Make a comprehensive list that includes every item, from adhesives to protective gear, as these expenses will add up. Additionally, consider any moisture barriers that may be necessary to prevent future damage. By calculating the total expense of your resurfacing supplies, you can make an informed decision on whether or not to proceed with a do-it-yourself approach or to engage a professional contractor for the job. This evaluation will help you strike a balance between cost and quality, ensuring your bathroomrenovation remains on budget while achieving the desired results.
Listing Essential Materials and Tools Needed
To successfully carry out a DIY bathroom resurfacing project, you need to gather essential materials and tools. Adhesives, foam rollers, and resurfacing kits will enable you to achieve a professional finish, while safetygear protects against hazards, especially when dealing with fumes or potential flood situations during application. In your comprehensive comparison of DIY versus professional repair services, identify any troubleshooting concerns that arise, as this will assist you in making an informed decision about the best course for your renovation.
Calculating the Total Expense of DIY Resurfacing Supplies
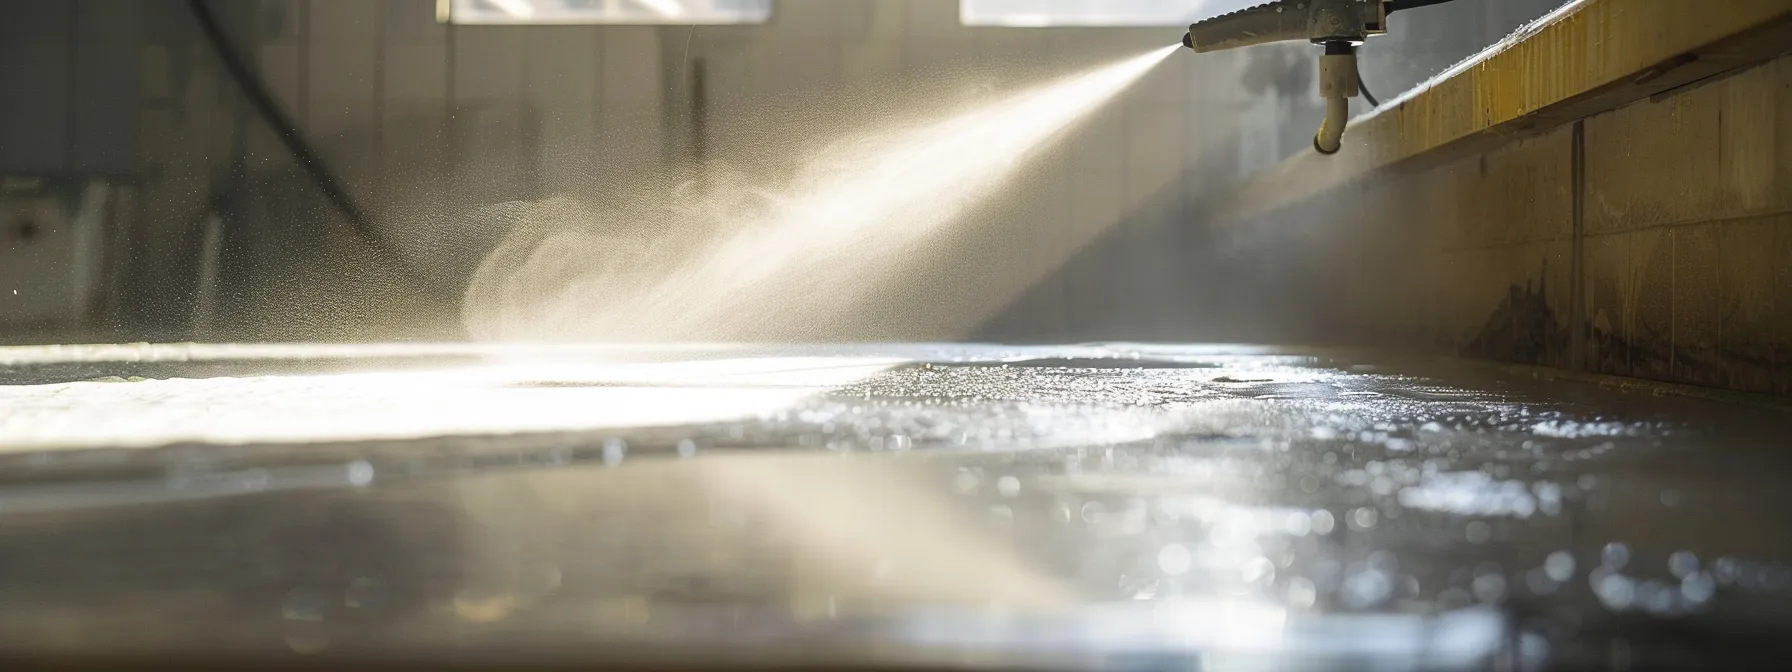
When calculating the total expense of DIY resurfacing supplies, keep in mind the various materials you will need, including grout, plastic sheeting for protection, and sand for surface preparation. Don’t overlook the importance of proper ventilation during the application process, as this ensures a safer working environment. By carefully considering each item’s cost and how they contribute to the overall effectiveness of your project, you can achieve a well-planned budget that delivers quality results.
DIY projects can seem cost-effective at first glance, but hidden expenses often emerge. Transitioning to professional resurfacing offers a clearer financial picture and expert guidance tailored to your needs.
Understanding the Financials Behind Professional Resurfacing
When considering professional bathroom resurfacing, it’s essential to understand what services these experts bring to your renovation project. Beyond simply applying a smooth spray finish, professional resurfacers often specialize in various materials like fiberglass, each requiring specific techniques and knowledge. They also typically provide a comprehensive cost structure that not only covers surface preparation but may include necessary repairs and guarantees on workmanship. It’s wise to inquire about the warranty offered, as this can significantly impact your long-term satisfaction with the results. By analyzing the cost structure and the services provided, you can make an informed decision that aligns with your renovation goals and budget.
What Services Do Professional Resurfacers Offer?
Professional contractors offer a range of valuable services that go beyond a simple resurfacing job. These experts provide detailed assessments of your bathroom‘s condition, allowing them to identify any underlying damages, such as issues with cement or drainage that might affect your property. With their understanding of various materials and techniques, professional resurfacers ensure a thorough and high-quality finish, enhancing both the aesthetic appeal and longevity of your bathroom.
Expertise in assessing underlying issues.
Provision of comprehensive surface preparation.
Application of specialized coatings tailored to your bathroom‘s materials.
Repair services for minor damages to ensure a smooth finish.
Warranty on workmanship for peace of mind.
Analyzing the Cost Structure of Professional Resurfacing
When hiring a professional for bathroom resurfacing, you gain access to their extensive knowledge and experience, which contributes to the overall effectiveness of the project. The cost structure typically includes comprehensive surface preparation, specialized materials, and any necessary repair services, ensuring that all aspects of the bathroom are in optimal condition before the resurfacing begins. This thorough approach often prevents potential issues, such as water infiltration or concrete damage, saving you from future expenses like roof repair.
Access to specialized knowledge and skills.
Cost structure covers surface preparation and needed repairs.
Prevention of future issues through thorough assessment.
Choosing between DIY and professional resurfacing can significantly affect your budget. Let’s dive into a direct cost comparison that highlights the key differences and helps you make the best decision for your home.
DIY vs Professional Resurfacing: A Direct Cost Comparison
As you analyze the option of DIY versus professional bathroom resurfacing, it’s essential to compare material and labor costs side by side. Determine what you’ll spend on supplies like epoxy, sandpaper, and protective gear for a DIY project against the package prices that professionals offer. Additionally, consider the value of your time; any home improvement project demands a significant investment, often more than you anticipate. Reflect on how many hours you can dedicate to this task, especially if your bathroom is located in a busy area of your home, such as the basement. The debris and disruption during resurfacing can impact your daily routine, making it crucial to weigh these factors before making a decision that aligns with both your budget and your schedule.
Comparing Material and Labor Costs Side by Side
When comparing material and labor costs for DIY and professional bathroom resurfacing, you must consider several factors that influence your decisions. DIY projects require you to invest in various equipment, such as sealants and brushes, along with protective gear to mitigate risks like mold growth. In contrast, hiring professionals includes their expertise, which addresses the complexity of the project efficiently and often saves you time that could otherwise be spent hauling materials in your vehicle.
Cost Category
DIY Costs
Professional Costs
Materials (Sealants, Equipment)
$150 – $500
$300 – $800
Labor (Your Time)
Time Investment
Included in Price
Complexity Handling
Varies by Skill Level
Expertise Provided
Potential Future Costs (Mold Issues)
Higher Risk
Minimized Risk
Evaluating Time Investment and Its Impact on Costs
Evaluating the time investment required for your bathroom resurfacing project is crucial, as it directly impacts the overall costs. While you’re busy managing the complexities of preparing the drainage system or addressing potential damage on the floor, hiring a professional can save you valuable time and effort. Ultimately, the price you pay for expert services reflects not just their skills but also the convenience of having peace of mind, allowing you to focus on enjoying your newly refreshed space without the stress of managing a DIY project.
The immediate savings of a DIY project can be tempting, but what happens down the road? Understanding the long-term value of professional resurfacing can reveal surprising benefits that impact your home’s aesthetic and functionality.
Long-Term Value: DIY Versus Professional Resurfacing Outcomes
As you evaluate the long-term value of your bathroom resurfacing options, comparing the outcomes of DIY versus professional work becomes essential. The lifespan of your refinished bathtub or tiled surfaces can significantly vary based on your skill level and the techniques employed. While a DIY project may initially seem cost-effective, the durability and finish could fall short compared to the expert craftsmanship offered by professionals. Additionally, consider the warranty and post-service support associated with each option. Professionals often back their work with guarantees, providing you peace of mind that any issues, including those stemming from roofing or flooring concerns, can be addressed promptly, ensuring that your investment remains protected for years to come.
Project Lifespan: DIY Results Compared to Professional Work
When comparing the project lifespan of DIY results versus professional work, a noticeable difference emerges in durability and quality. DIY resurfacing often carries a heightened risk of water damage due to less effective waterproofing measures, which can lead to costly repairs down the road. On the other hand, professional roofers bring essential attention to detail, ensuring that every aspect of the resurfacing process is conducted correctly and efficiently, thus extending the longevity of your bathroom‘s surfaces.
Aspect
DIY Approach
Professional Approach
Waterproofing
Variable effectiveness
Guaranteed quality
Risk of Water Damage
Higher risk
Minimized risk
Attention to Detail
Limited
Thorough
Project Lifespan
Shorter
Longer
Warranty and Post-Service Support: DIY vs Professional
When considering warranty and post-service support, it’s essential to recognize the advantages professionals offer compared to a DIY approach. Professionals often provide warranties that cover the integrity of their work, which gives you peace of mind similar to knowing that your garage door is securely installed. In contrast, DIY projects may lack such protection, leaving you vulnerable to potential issues like leaks that could arise from inadequate waterproofing, leading to further costs reminiscent of repairs needed for a malfunctioning oven or a crumbling driveway.
The decision between tackling a DIY resurfacing project and enlisting a professional can significantly impact your space. Let’s examine how to make the informed choice that best suits your needs and aspirations.
Making the Informed Choice: DIY or Hire a Pro?
As you consider whether to tackle your bathroom resurfacing project yourself or hire a professional, reflect on your personal skill level and the complexity of the task. Assessing your capabilities can clarify whether you can effectively manage the intricacies involved in resurfacing. Additionally, think about how much time you have available and any deadlines that may pressure your decision. Time management plays a crucial role in the project’s success, so recognizing your schedule will help you determine the most suitable approach for achieving your desired outcome.
Personal Skill Level and Project Complexity Considerations
Your personal skill level plays a crucial role in determining how you approach the resurfacing project. Assess your comfort and experience with tools and materials, as this will impact the quality of your work and the overall results.
Complex projects may require specialized knowledge and techniques beyond basic DIY skills. If you’re tackling intricate repairs or difficult surfaces, hiring a professional might be the more reliable choice for achieving a flawless finish.
Consideration
DIY Approach
Professional Approach
Skill Level
Varies; may lack experience
Experienced in various techniques
Project Complexity
Works well for simple tasks
Handles intricate repairs efficiently
Quality of Finish
May be inconsistent
Delivers high-quality results
Factoring in Time Availability and Project Deadline
When evaluating your bathroom resurfacing options, you must consider how much time you can allocate to the project and any deadlines that may influence your decision. A professional can typically complete the task more quickly and efficiently, freeing you from disruptions during the process. If your schedule is tight or you cannot afford to compromise on your daily routine, hiring an expert may be the most practical approach.
Assess your available time for the project.
Determine if you have upcoming deadlines that may affect your choice.
Consider the impact of time on your daily routine.
Evaluate the speed and efficiency of professional services.
Selecting the Right Local Kitchen Renovation Experts for Your Home
Kitchen renovations can breathe new life into a home, making it more functional and visually appealing. When embarking on a kitchen remodel, homeowners often seek local kitchen remodeling services that can turn their dreams into reality. From stunning marble countertops to custom cabinetry, the right expert can elevate a space significantly. For guidance in selecting these professionals, the HIA website serves as a valuable resource to help identify reputable contractors. Finding the best local kitchen renovation experts involves careful consideration and planning. Keep reading to discover the essential steps, questions, and tips that will ensure a successful kitchen remodeling project.
Key Takeaways
Conduct thorough research to identify reliable kitchen renovation experts in your area
Verify licenses and certifications to ensure compliance with local regulations
Review contractor portfolios to assess experience with similar kitchen projects
Clear communication with contractors helps align expectations throughout the renovation process
Establish a detailed contract outlining project phases, costs, and warranty details for transparency
Steps to Finding the Best Local Kitchen Renovation Experts
Finding the right local kitchen renovation experts requires a systematic approach to ensure a successful kitchen makeover. It begins with thorough research in the area, identifying professionals who specialize in remodeling with materials like granite, well-known for its durability and elegance. Evaluating online reviews and ratings on platforms such as Houzz can provide valuable insights into each company’s reputation. Recommendations from friends and family often lead to trusted sources. It’s important to verify licenses and certifications to ensure compliance with local regulations. Reviewing a contractor’s portfolio for projects similar to the envisioned makeover can showcase their expertise. Finally, scheduling consultations on the HIA website allows homeowners to articulate their vision while discussing fees and project details with potential experts.
Start With Research in Your Area
Conducting research within the local area is vital when selecting kitchen remodeling companies. Homeowners should seek professionals well-versed in cabinetry options and various materials, such as stainless steel, which are favored for their longevity and aesthetic appeal. Understanding the range of kitchen remodeling services available also allows individuals to assess potential expenses and align them with their budget and design aspirations.
Assess Online Reviews and Ratings
Online reviews and ratings serve as crucial indicators when evaluating remodelingcontractors for a kitchen update. Potential clients can navigate through the landscape of feedback on platforms like Yelp or Google Reviews, gaining insights into the experiences of past customers. This information often answers common FAQs about contractor reliability, craftsmanship, and the quality of materials used, such as steel, which is popular for its strength and appeal.
Seek Recommendations From Friends and Family
Asking friends and family for recommendations can prove invaluable in the search for local kitchen renovation experts. Their firsthand experiences with contractors can shed light on the quality of work and reliability, particularly when it comes to remodeling aspects like stove and cooktop installations essential for efficient cooking. Trustworthy referrals often lead to professionals who understand the intricacies of a kitchen remodel, ensuring a seamless renovation process.
Verify Licenses and Certifications
Verifying licenses and certifications is a critical step in selecting kitchen renovation experts, as it directly impacts the project’s success and outcomes. Licensed professionals often adhere to regulations that promote sustainability and the use of eco-friendly materials, such as tile, ensuring a higher standard of quality in the renovation. A contractor’s solid reputation within the community, bolstered by customer satisfaction, highlights their commitment to excellence, making them a reliable choice for comprehensive renovations, including basement remodeling.
Review Their Portfolio for Similar Projects
Reviewing the portfolio of kitchen remodelcontractors provides insight into their experience and quality of work. Analyzing past kitchen remodeling projects allows homeowners to gauge the contractor’s design capabilities, especially in the use of materials such as quartz, which is known for its durability and beauty. This assessment helps ensure the selected experts take pride in their craftsmanship and can deliver a result that aligns with the homeowner’s vision.
Conduct local area research
Assess online reviews and ratings
Seek recommendations from friends and family
Verify licenses and certifications
Review portfolios for similar projects
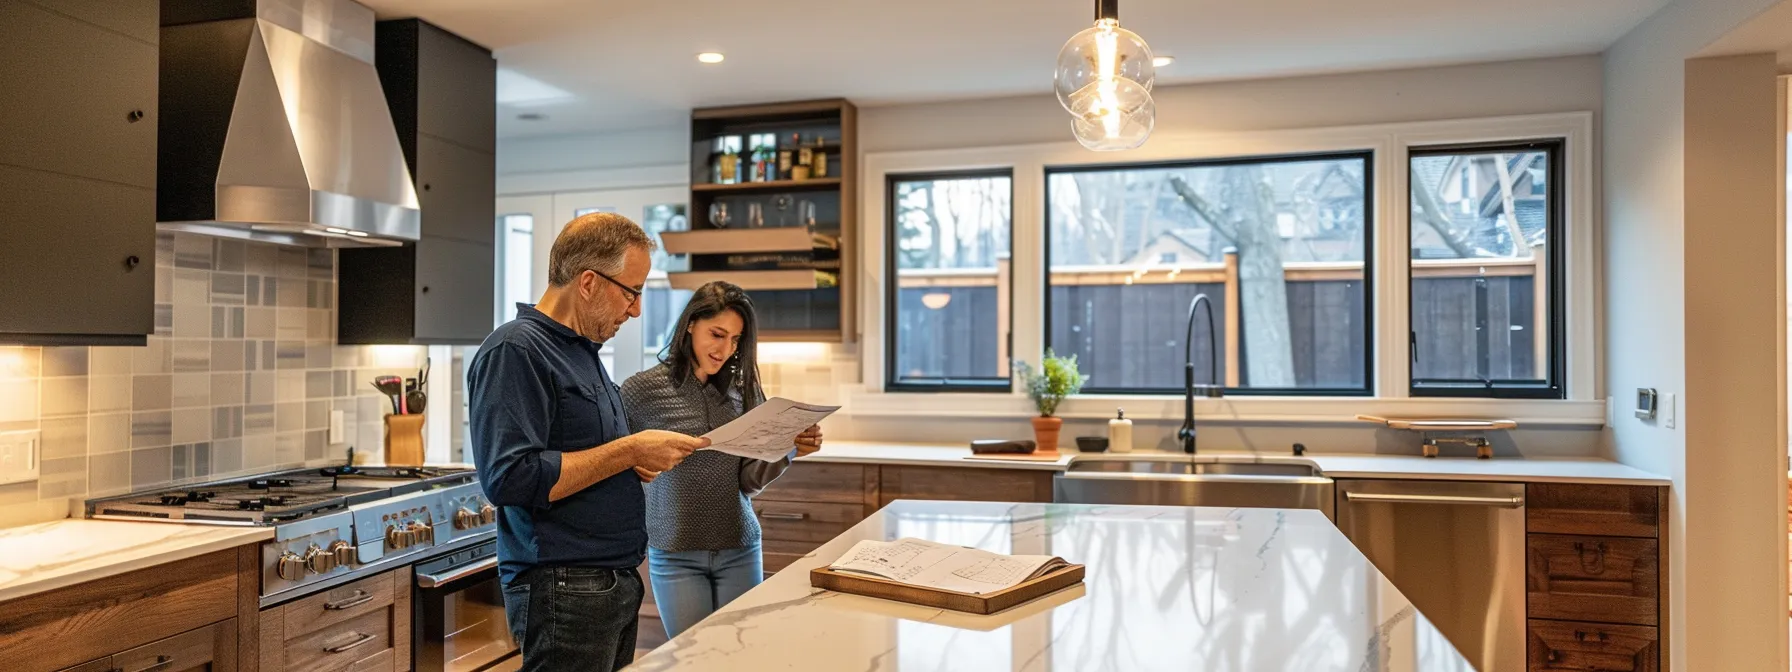
Schedule Consultations to Discuss Your Vision
Scheduling consultations with local kitchen remodeling experts is an essential step in the construction phase of any kitchen makeover. During these meetings, homeowners can articulate their vision and explore design options, which facilitates a deeper understanding of the kitchen remodeling process. Furthermore, discussing potential kitchen remodeling costs can provide clarity on budgeting, ensuring that accessibility and practicality remain priorities throughout the renovation journey.
After identifying the top local kitchen renovation experts, it’s time to dive deeper into your project. Asking the right questions will ensure that you find the perfect fit for your vision and needs.
Essential Questions to Ask Your Kitchen RenovationExpert
As homeowners embark on their kitchen remodeling journey, asking the right questions can be a determining factor in securing the best local kitchen renovation experts. Understanding their experience with kitchen renovations allows clients to gauge their proficiency in handling various materials such as drywall and cabinetry. Requesting references from previous clients offers insights into the quality of work and customer satisfaction. Inquiring about pricing structures and payment terms ensures transparency, essential for effective budgeting. Knowing the anticipated timeline for the project can help homeowners prepare for the duration of the remodel. Additionally, discussing how experts handle changes or unexpected issues provides reassurance that potential challenges will be managed professionally, maintaining the beauty and integrity of the renovating process, especially in unique locations such as Oregon.
What Experience Do You Have With Kitchen Renovations?
Inquiring about an expert‘s experience with kitchen renovations is fundamental to understanding their capability and knowledge in the field. A seasoned handyman should be able to showcase a portfolio of past projects, reflecting their familiarity with various materials such as engineered stone. Additionally, discussing how their pricing aligns with industry standards can provide clarity on the investment required for achieving a high-quality renovation.
Can You Provide References From Previous Clients?
Requesting references from previous clients offers homeowners a clear perspective on the quality of work delivered by renovation experts. Hearing firsthand experiences can confirm the contractor’s ability to manage various materials, such as solid surface and wood, and ensure that the kitchen renovation cost aligns with its perceived value. A focus on past projects provides insight into the return on investment homeowners can expect from their kitchen remodeling efforts.
Client Name
Project Description
Materials Used
Kitchen Renovation Cost
Return on Investment
John Doe
Modern Kitchen Upgrade
Granite, Wood Cabinets
$25,000
85%
Jane Smith
Traditional Kitchen Remodel
Quartz, Solid Surface
$30,000
80%
Mike Johnson
Open Concept Kitchen
Marble, Wood Flooring
$35,000
90%
How Do You Structure Your Pricing and Payment Terms?
Understanding the pricing structure and payment terms is essential for homeowners engaging kitchen contractors for a custom kitchen project. Kitchen remodelers should provide clear breakdowns of costs associated with materials and labor, ensuring that all aspects of the renovation are transparent and manageable. Homeowners must pay close attention to any potential additional fees that may arise, especially regarding flooring and installation, to avoid unexpected financial burdens during the remodeling process.
What Timeline Do You Anticipate for My Project?
Discussing the anticipated timeline for a kitchen renovation project is essential for any customer seeking clarity on their remodel. A skilled expert should outline key phases of the project, including the involvement of various trades such as electricians, which may affect overall scheduling. Understanding how the timeline integrates with other improvements, like basement waterproofing or outdoor living spaces, helps customers plan effectively and manage associated kitchen remodel costs.
How Do You Handle Changes or Unexpected Issues?
When discussing how a contractor manages changes or unexpected issues during kitchen renovation projects, transparency is key. A reputable local kitchen remodelexpert should outline their approach for addressing challenges, ensuring homeowners have confidence in their adaptability. This process may involve collaborating with various trades, such as plumbers for the bathroom or electricians during installations, to maintain progress and quality. For instance, if there are delays in sourcing materials or unforeseen structural concerns arise, the contractor should communicate those factors effectively to keep clients informed and adjust timelines accordingly:
Communication with clients regarding unexpected changes
Collaboration with various trades during renovations
Adjustment of timelines and materials as needed
Documentation of progress and changes for transparency
Additionally, utilizing platforms like Angi may provide insights into how different contractors handle such scenarios, helping clients make informed decisions. Homeowners appreciate when their contractor can manage challenges without compromising the overall vision, allowing them to focus on planning and preparing meals in their newly renovated space.
Having equipped yourself with crucial questions for your kitchen renovationexpert, it’s time to dive deeper into the array of services they provide. Understanding these offerings will empower you to make informed decisions for your dream kitchen project.
Understanding the Services Offered by Kitchen Renovation Experts
Exploring the range of services offered by kitchen renovation experts is essential for homeowners aiming to enhance their living spaces. These professionals specialize in various aspects of home improvement, starting from initial design and planning services that align with the homeowner’s vision. Their capabilities extend to demolition and construction, ensuring a seamless transition from old to new. Custom cabinetry and countertop solutions allow for tailored functionality and aesthetics, while electrical and plumbing updates keep the kitchen modern and efficient. Finally, finishing touches and cleanup services ensure that the renovated space is not only beautiful but also ready for immediate use. Organizations like the Better Business Bureau often list reputable contractors who can manage these intricate tasks, making it easier for homeowners to find trusted experts. Forbes recognizes the significance of such renovations, emphasizing the impact quality updates can have on property value and comfort, creating inviting spaces that can even incorporate features like a stylish fireplace.
Design and Planning Services
Design and planning services play a pivotal role in any kitchen renovation project. Expertcontractors utilize advanced techniques such as 3D modeling to provide clients with visual representations of their envisioned spaces, assisting in finalizing the design. Incorporating elements like durable ceramic materials and ensuring compliance with warranty specifications further enhances the overall quality of the renovation.
Utilization of 3D modeling for design visualization
Incorporation of durable materials such as ceramic
Emphasis on warranty specifications for quality assurance
Coordination of space plans, including potential basement options
Demolition and Construction Capabilities
Demolition and construction are critical components of any kitchen renovation project. Experts in this field take pleasure in executing these processes efficiently, ensuring that old structures are safely dismantled while preparing the space for a stunning makeover. They skillfully remove outdated materials and fixtures, including countertops, to make way for new installations, often incorporating modern elements such as durable concrete and elegant porcelain tile.
Efficient dismantling of existing structures
Safe removal of outdated materials and fixtures
Preparation for new installations
Incorporation of modern elements such as concrete and porcelain tile
Custom Cabinetry and Countertop Solutions
Custom cabinetry and countertop solutions cater to the specific needs of homeowners during the home remodeling process. Expert general contractors design these features to maximize functionality and style, incorporating various materials that complement the kitchen aesthetic, including options suitable for sinks. These tailored solutions not only enhance the usability of the space but can also create a seamless flow into adjacent areas like patios, reflecting inspirations seen on platforms such as HGTV.
Tailored designs to maximize functionality
Incorporation of materials that complement the kitchen aesthetic
Enhancement of usability in relation to sinks
Seamless flow into adjacent areas like patios
Inspiration drawn from platforms like HGTV
Electrical and Plumbing Updates
Electricity and plumbing play critical roles in the functionality of a kitchen. Renovation experts ensure that all electrical systems are updated to meet the latest safety standards, complemented by the appropriate licenses. Additionally, efficient plumbing solutions enhance the pantry‘s accessibility, while exemplary customer service ensures clients feel supported throughout the kitchen remodeling process.
Finishing Touches and Cleanup Services
Finishing touches and cleanup services are essential components of any effective home renovation, especially in kitchen and bathroom remodels. Kitchen remodelingcontractors ensure that all grout lines are neatly sealed, cabinets are polished, and surfaces are thoroughly cleaned to present a pristine final product. By engaging with reputable remodeling companies, homeowners can expect that each aspect of the renovation, down to the smallest detail, is handled with care and professionalism, creating an inviting atmosphere that showcases their transformed space.
With a clear understanding of the extensive services available from kitchen renovation experts, the next step is crucial. Selecting the right contractor can make all the difference in bringing your vision to life.
Tips for Choosing the Right Kitchen Renovation Contractor
Selecting the right local kitchen renovation contractor requires careful consideration to balance quality and budget effectively. Homeowners should seek professionals who understand the importance of integrating functional elements such as custom kitchen cabinets and dishwashers into their designs while staying within financial constraints. Clear communication is essential, as it establishes shared expectations and ensures the contractor comprehends the vision for every detail, including drawer layouts and overall aesthetics. Discussing warranty options and post-completion support can provide peace of mind, knowing the contractor is committed to maintaining the integrity of the work throughout the kitchen project. This comprehensive approach leads to a more satisfying renovation experience, bringing the homeowner’s dream kitchen to life.
Balance Between Quality and Budget
Homeowners often face the challenge of balancing quality with budget constraints during a kitchen renovation. Investing in quality materials, including solid carpentry, can significantly enhance the longevity and visual appeal of the kitchen. Allocating funds wisely not only ensures a beautiful finish but also maintains functionality, allowing for a rewarding renovation experience.
Aspect
Quality Considerations
Budget Strategies
Materials
Opt for durable materials, such as solid wood for cabinetry, ensuring longevity and beauty.
Mix high-end options with more affordable alternatives to maintain balance.
Labor
Hire skilled craftsmen with experience in carpentry to guarantee quality workmanship.
Request multiple quotes and compare services to find cost-effective solutions.
Design
Invest in custom designs that improve both aesthetic and functionality.
Consider pre-designed options for cost savings without sacrificing quality.
Ensure Clear Communication and Expectations
Clear communication lays the foundation for a successful kitchen renovation project. Homeowners must articulate their vision effectively while being open to feedback from contractors. This collaborative dialogue helps align expectations and minimizes misunderstandings throughout the remodeling process.
Establishing a detailed project scope and timeline is vital; it allows both parties to track progress and address any issues as they arise. Regular check-ins can ensure everyone remains on the same page, fostering trust and satisfaction with the ongoing work:
Element
Importance
Best Practices
Project Scope
Defines the boundaries of work and sets realistic goals.
Create a detailed written description of all tasks involved.
Establish milestones to track progress and make adjustments as needed.
Regular Updates
Ensures transparency and fosters ongoing collaboration.
Schedule consistent meetings to discuss progress and any concerns.
Consider Their Vision Compatibility With Yours
When selecting a kitchen renovation contractor, compatibility in vision is vital for a successful outcome. Homeowners must ensure that the contractor understands their design preferences, lifestyle needs, and overall aesthetic goals. A contractor who actively listens and incorporates these elements into their proposed plans demonstrates a genuine commitment to realizing the homeowner’s dream space.
Discuss Warranty and Post-Completion Support
Discussing warranty and post-completion support is essential when engaging local kitchen renovation experts. A reputable contractor should offer a warranty that covers workmanship and materials, providing homeowners with peace of mind about their investment. Additionally, understanding the available post-completion support ensures that any potential issues arising after the project is finished can be addressed promptly and efficiently.
Evaluate warranty details for coverage on workmanship and materials.
Inquire about the process for addressing post-completion concerns.
Ensure clear communication regarding the length and terms of the warranty.
Assess the contractor’s commitment to customer satisfaction following the project.
Selecting the ideal kitchen renovation contractor paves the way for a successful project. To protect your investment, it’s essential to focus on establishing a detailed contract with your contractor.
The Importance of a Detailed Contract With Your Contractor
A detailed contract serves as a crucial foundation in the relationship between homeowners and kitchen renovation experts, ensuring that all aspects of the project are clear and agreed upon from the outset. This document should outline each phase of the renovation, specifying timelines to provide a clear roadmap for progress. Furthermore, homeowners benefit from a comprehensive breakdown of costs and materials, which helps manage budgeting effectively. A well-defined change order process should also be included, allowing for any adjustments to be documented and approved without ambiguity. Additionally, warranty and guarantee policies should be articulated to safeguard the homeowner’s investment, offering peace of mind regarding the quality of workmanship and materials used throughout the renovation journey.
Outline of All Project Phases and Timelines
Outlining the project phases and establishing timelines are key components of the renovation process. By clearly defining each stage, homeowners can anticipate progress and ensure that expectations align with the contractor’s schedule. This clarity helps in managing deadlines and facilitates a smoother workflow throughout the renovation.
Understanding the breakdown of different phases provides homeowners with a clear structure for the upcoming work. This structure might include key tasks such as design approvals, demolition, installations, and final inspections. Outlining these steps fosters communication between the homeowner and the contractor:
A comprehensive breakdown of costs and materials provides clarity for homeowners throughout the kitchen renovation process. This detailed documentation outlines every expense associated with the project, from materials to labor costs, allowing clients to budget effectively and make informed decisions. By having a transparent view of where funds are allocated, homeowners can avoid unexpected financial surprises during the renovation journey:
Material Costs
Labor Costs
Permits and Fees
Contingency Funds
Payment Terms
Change Order Process and Approval
The change order process is a critical aspect of any kitchen renovation, as it allows for modifications to the project scope after work has commenced. Homeowners should discuss and establish a clear procedure for submitting requests for changes, ensuring that all adjustments are documented and approved by both parties. This proactive approach minimizes misunderstandings and keeps the renovation on track while accommodating any necessary changes that arise.
Warranty and Guarantee Policies Detailed
Warranty and guarantee policies are essential components of the contract between homeowners and kitchen renovation experts. These policies provide assurance regarding the quality of both workmanship and materials, allowing clients to trust that their investment is protected. Homeowners should thoroughly review these policies to understand the duration of coverage and the circumstances under which claims can be made.
The following table outlines key elements that homeowners should consider when evaluating warranty and guarantee policies with their kitchen renovationcontractors:
Element
Description
Workmanship Warranty
Coverage period for the quality of labor performed during the renovation.
Material Guarantee
Assurance regarding the quality and durability of materials used.
Claim Process
Steps required to submit a warranty claim and expected response times.
Exclusions
Conditions that may void the warranty, such as misuse or neglect.
A well-crafted contract sets the stage for a successful renovation. Now, let’s explore practical steps to prepare your home for a seamless kitchen transformation.
How to Prepare Your Home for a Kitchen Renovation
Preparing the home for a kitchen renovation involves several key steps to ensure a smooth and efficient process. Homeowners should start by securing and protecting areas that will not undergo renovation from dust and potential damage. Clearing the kitchen area of personal items, such as utensils and small appliances, aids both the contractors and the homeowner in maintaining an organized work environment. For those anticipating significant disruptions, setting up a temporary kitchen space is advisable, allowing for continued meal preparation throughout the project. Finally, discussing the daily work schedule and access needs with the contractor is vital; this dialogue helps in planning around construction activities, ensuring minimal interruptions to daily routines.
Secure and Protect Non-Work Areas
Prior to commencing kitchen renovations, homeowners should take proactive measures to safeguard areas of the home that will remain untouched during the project. Implementing protective coverings, such as plastic sheeting or drop cloths, helps to mitigate dust and debris from infiltrating neighboring rooms. Additionally, securing non-work areas by closing doors or using barriers can prevent accidental damage and maintain cleanliness throughout the renovation process.
Clear the Kitchen Area of Personal Items
Clearing the kitchen area of personal items is a crucial step in preparing for a renovation project. Homeowners should carefully remove utensils, appliances, and decorations to create a clean workspace, thus facilitating access for contractors. This proactive measure not only minimizes the risk of damage to belongings but also helps maintain an organized environment throughout the renovation process.
Set Up a Temporary Kitchen Space if Needed
Setting up a temporary kitchen space is essential for homeowners during renovations to ensure that meal preparation can continue with minimal disruption. This area should be equipped with basic cooking tools, a microwave, and essential dishes to maintain everyday functionality. By creating this makeshift kitchen, homeowners can navigate the renovation process without straying too far from their daily routines.
Identify an appropriate location in the home for the temporary kitchen.
Gather essential cooking equipment and utensils for immediate use.
Ensure adequate access to power sources for appliances.
Organize the space for easy navigation while cooking.
Discuss Daily Work Schedule and Access With Contractor
Establishing a clear daily work schedule with the contractor is vital to ensure that the kitchen renovation progresses smoothly. Homeowners should communicate their availability and preferences for work hours, allowing the contractor to coordinate tasks accordingly. This dialogue fosters mutual understanding and minimizes disruptions for everyone involved, making it easier to navigate daily routines during the renovation process.