Revitalize Your Space: Swift Kitchen Redesign via Resurfacing
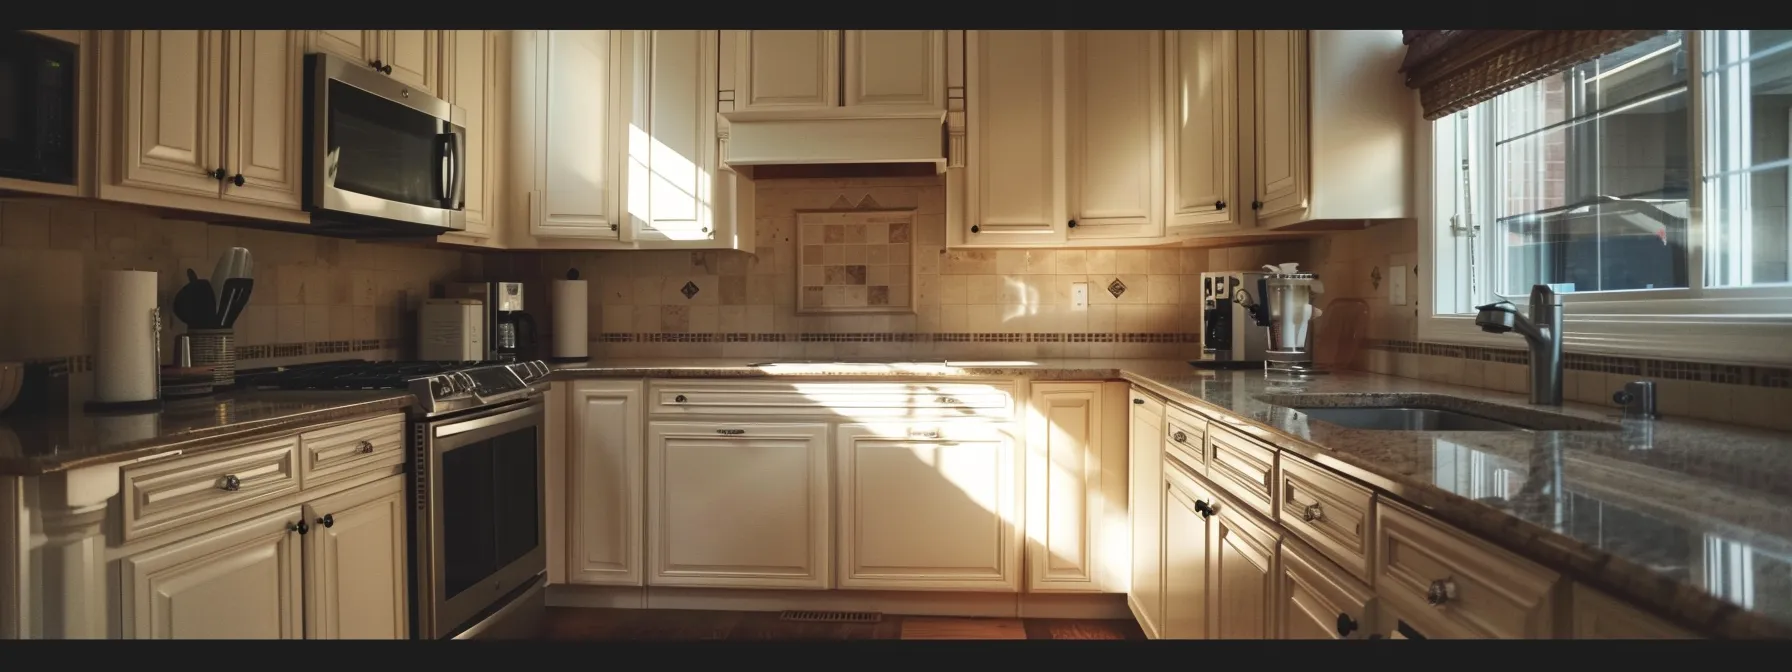
Revitalizing your space with kitchen renovations can seem overwhelming, but it doesn’t have to be. Thanks to the expertise of professionals like the Master Builders Association of Victoria, homeowners now have incredible options such as kitchen cabinet resurfacing. Using materials like foam for cabinetry can dramatically change the look and feel of your kitchen without the hefty price tag of a full remodel. Ready to breathe new life into your kitchen? Keep reading to explore how resurfacing can transform every aspect of your kitchen, from cabinets to countertops, while optimizing your budget effectively.
Discover the Basics of Kitchen Resurfacing
In my journey of kitchen renovations, I’ve often encountered the term “kitchen resurfacing,” and it’s essential to understand exactly what it entails. Essentially, resurfacing is the process of updating surfaces like cabinets and countertops without the expense or time commitment of a full remodel. This method allows homeowners to reface kitchen cabinets with a fresh coat or finish, transforming the space significantly. I appreciate how resurfacing not only enhances aesthetics but also increases durability, especially when materials like metal or laminate are utilized for countertops. For anyone considering a kitchen upgrade in New Jersey, exploring these options introduces both beauty and practicality to your culinary space. If you are in Victoria, you may consider looking into the Master Builders Association of Victoria for guidance and resources.
What Is Kitchen Resurfacing?
Kitchen resurfacing is an efficient way to achieve a fresh look without the hassle and expense of a complete renovation. It involves cabinet refinishing and updating surfaces, allowing me to refinish kitchen cabinets with new finishes that match my design vision. This method is particularly effective for plywood cabinets, offering a durable and stylish upgrade, which is invaluable for homeowners in Delaware looking to enhance their cooking spaces.
Understanding the concept of kitchen resurfacing.
Exploring the benefits of cabinet refinishing.
Learning about surface options for a renewed aesthetic.
Considering the practical advantages in durability and cost.
Connecting with experts for guidance and support.
Benefits of Choosing Resurfacing for Your Kitchen
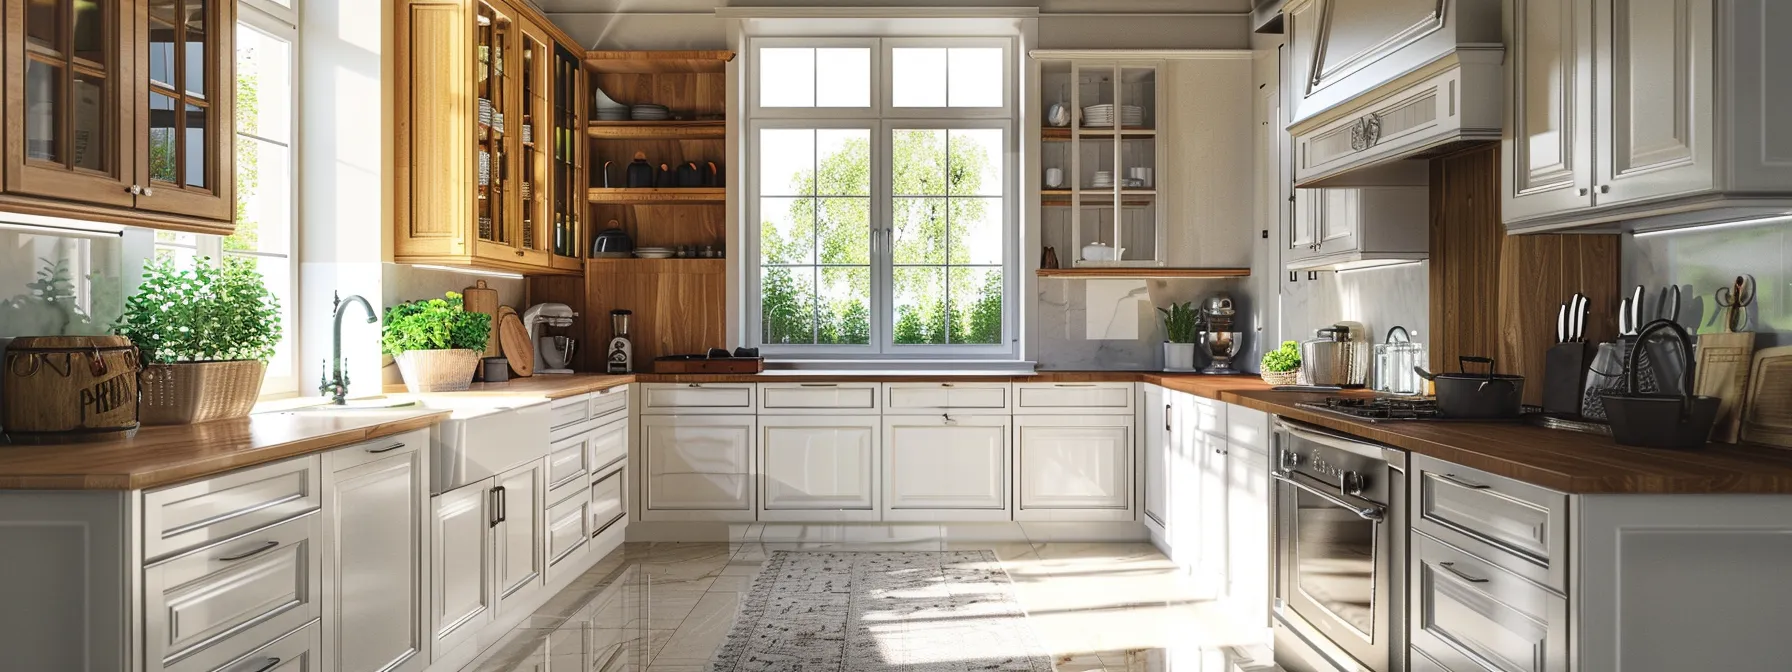
One of the standout benefits of opting for resurfacing in my kitchen renovation projects is the remarkable transformation it offers in a fraction of the time. With just a brush and a few high-quality materials, I can refurbish surfaces, such as cabinets and countertops, achieving a fresh appearance that harmonizes with my interior design vision. This approach not only refreshes the aesthetic but also represents a smart home improvement choice, as resurfaced areas are often more durable than their original finishes, allowing me to enjoy my updated kitchen for years to come.
Materials Commonly Used in Kitchen Resurfacing
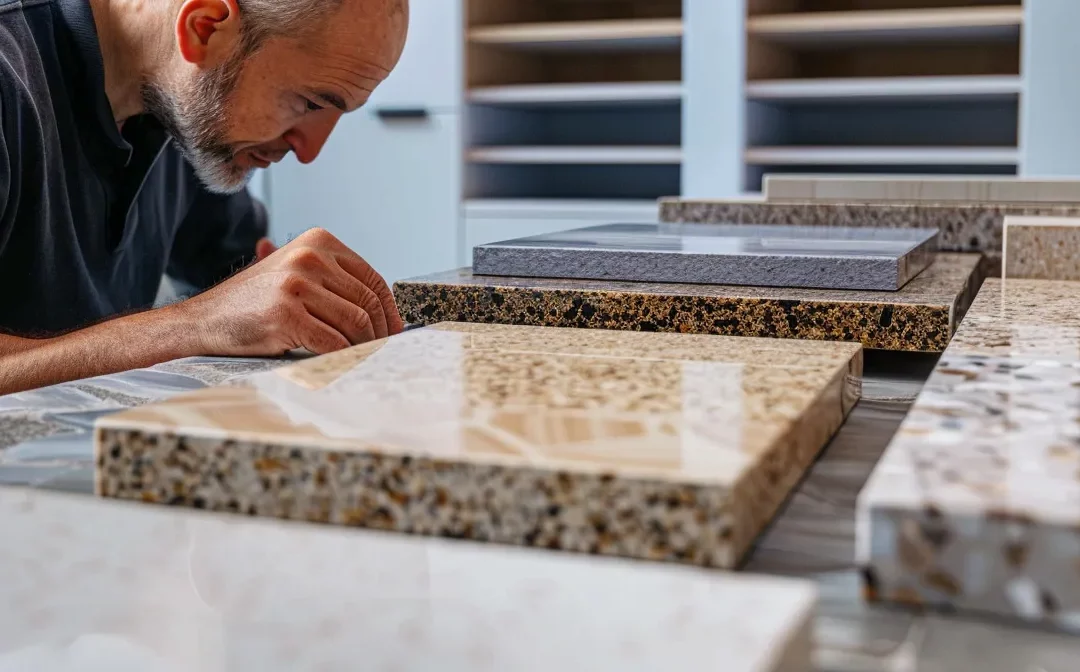
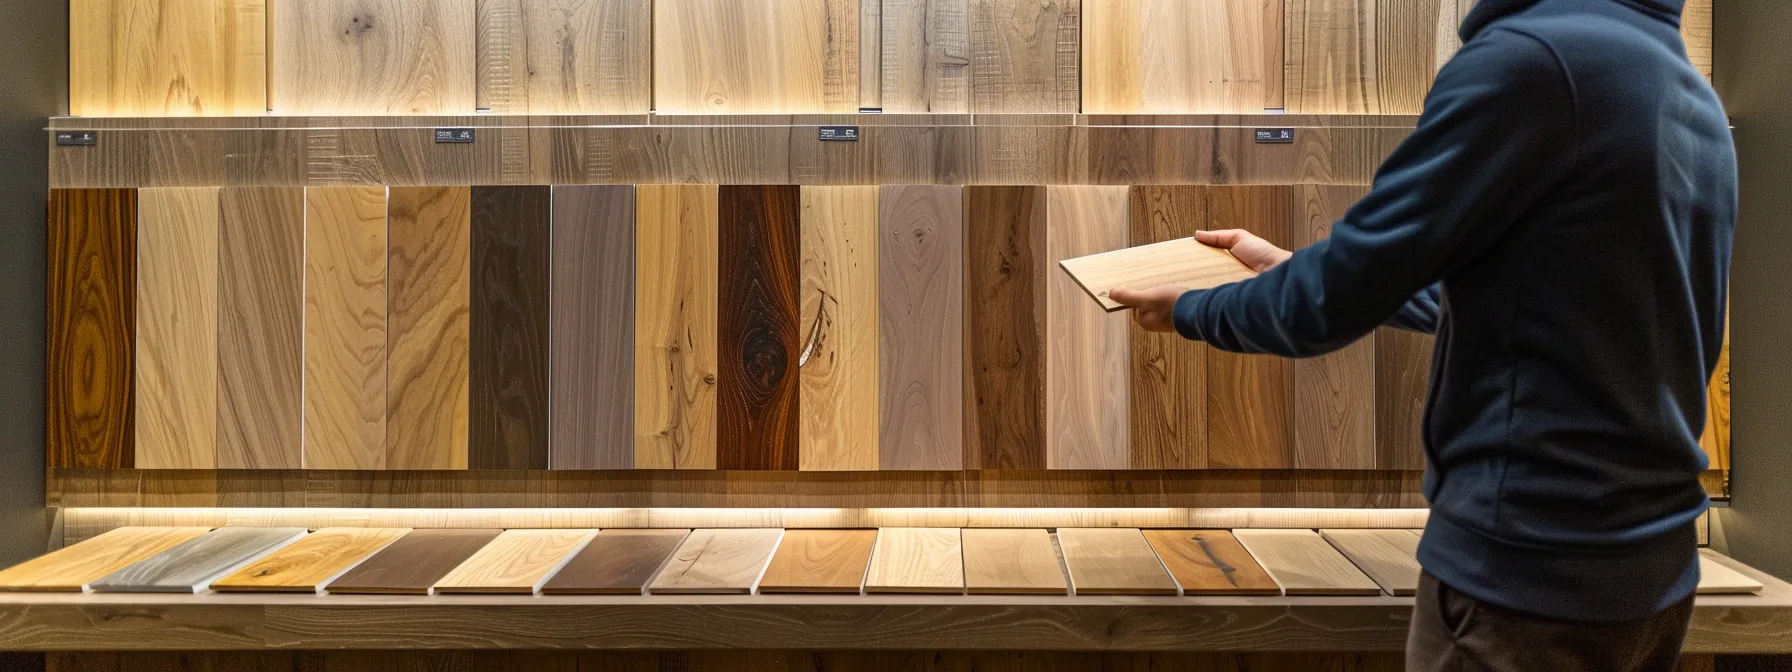
In my experience with kitchen resurfacing, I’ve found that a variety of materials can be utilized to achieve an impressive transformation. For cabinet refacing, options such as high-pressure laminates and wood veneers work exceptionally well, bringing a fresh look to both drawer fronts and cabinets. Additionally, solid surfaces like quartz or granite are popular choices for countertops, ensuring that not only the kitchen but also adjacent spaces like the bathroom and sink area integrate seamlessly in style and functionality.
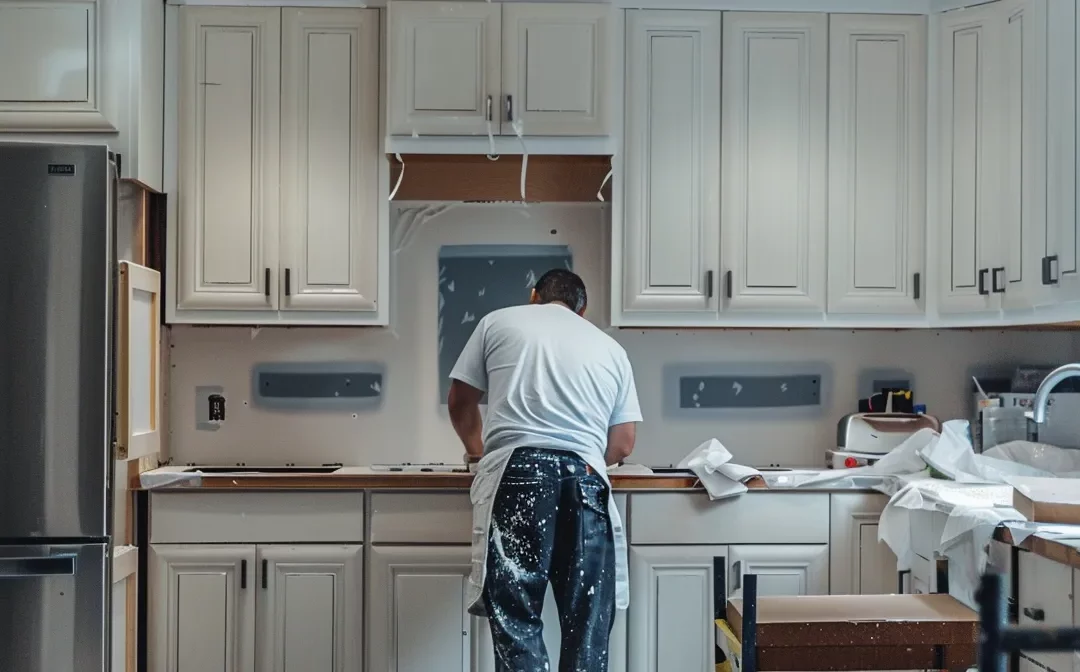
Step-by-Step Guide to Resurfacing Your Kitchen Cabinets
To embark on the journey of resurfacing kitchen cabinets, a clear plan is essential. I begin by preparing my cabinets meticulously, ensuring they are clean and free of any existing finishes that could interfere with the new surface. Choosing the right materials comes next; the options vary from rich wood grains to high-quality laminates, each offering a distinct look and feel that suits my design preference. The process culminates in applying the new surfaces, where I pay particular attention to details, such as crown molding, to achieve a polished finish. If you’re in an area where home renovations are key, don’t hesitate to reach out for a free estimate tailored to your zip code – it’s a straightforward way to kickstart your kitchen transformation.
Preparing Your Cabinets for Resurfacing
Before diving into my kitchen cabinet refacing project, I focus on preparation to set the stage for a successful makeover. I remove all contents from the cabinets, ensuring a clean slate free of any dust or mold, allowing the new finishes to adhere properly. This step is crucial for anyone aiming to create their dream kitchen, as a well-prepared surface significantly enhances the overall kitchen transformation.
Selecting the Right Materials for Cabinet Resurfacing
Selecting the right materials for cabinet resurfacing is crucial for achieving a stunning kitchen transformation. I often start by choosing a high-quality wood veneer or laminate that perfectly complements the overall design of my space. Additionally, once I’ve decided on the materials, I take care in sourcing sandpaper and stain that will ensure an appealing finish, elevating the look of my cabinets while updating my kitchen effectively.
Step
Description
1
Choose high-quality materials that suit your design vision.
2
Source sandpaper to smooth surfaces before refinishing.
3
Select an appropriate stain to enhance the natural beauty of the wood.
4
Apply the chosen materials to achieve a fresh and modern look.
Applying New Surfaces to Your Cabinets
When I apply new surfaces to my kitchen cabinets, precision and care play a crucial role in achieving a flawless finish. I start by meticulously laying the new material over the prepared surfaces, ensuring it aligns perfectly with the cabinet structure. A steady hand during this process ensures that every edge is crisp, resulting in a professional-grade appearance that elevates my kitchen’s overall look.
Step
Description
1
Lay out the new material carefully on each cabinet surface.
2
Ensure proper alignment with the cabinet structure.
3
Apply adhesive evenly for a secure bond.
4
Smooth out any bubbles or imperfections to maintain uniformity.
Transform Your Kitchen Countertops on a Budget
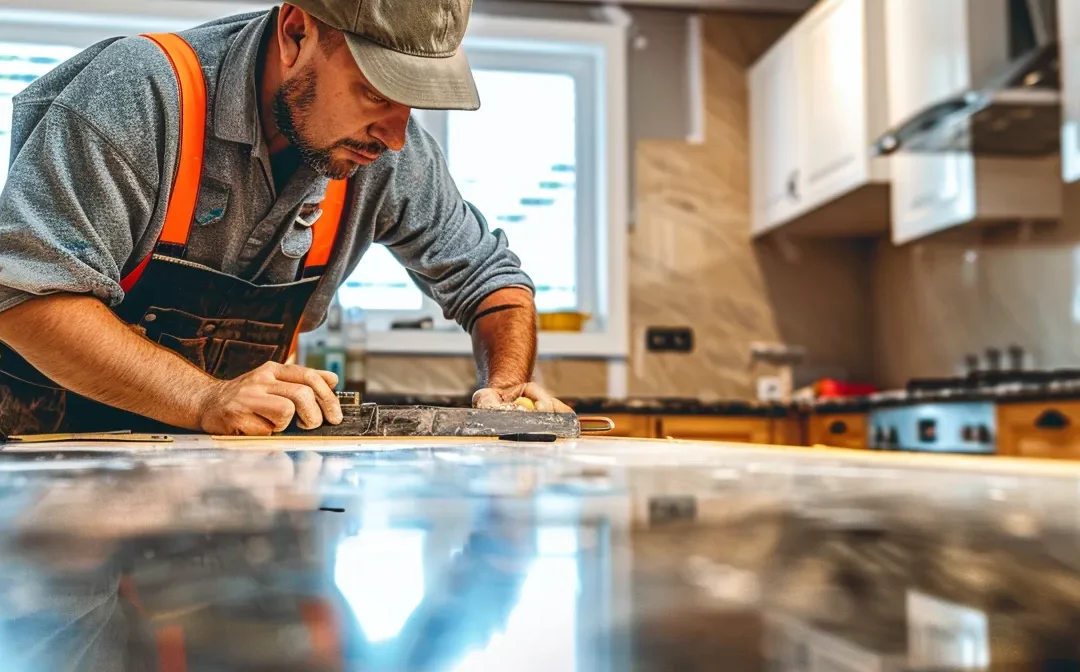
When enhancing my kitchen, updating the countertops often proves to be one of the most impactful decisions I can make. The variety of resurfacing materials available truly excites me, from stylish laminates to durable quartz options, each presenting a chance to elevate the entire space without overstretching my budget. Preparing the countertops properly is key to ensuring the new surfaces adhere well and look pristine. I follow a systematic approach, thoroughly cleaning and smoothing the existing surfaces before applying the new materials. This careful preparation lays the groundwork for a flawless finish that not only meets my aesthetic expectations but also enhances the functionality of my kitchen. The process of applying the new surface material is equally rewarding, allowing me to see the transformation unfold right before my eyes, resulting in a vibrant and modern kitchen that reflects my personal style.
Types of Countertop Resurfacing Materials
When considering countertop resurfacing, I have found a range of materials that help in achieving the perfect look while being budget-friendly. Laminate is a popular choice for its affordability and variety of styles, making it easy to mimic high-end materials without the cost. Meanwhile, quartz surfaces offer a blend of durability and elegance, providing a luxurious finish that stands up well to daily wear and tear.
Laminate surfaces: Affordable and available in numerous styles.
Quartz materials: Durable and elegant with a high-end feel.
Vinyl wraps: A cost-effective option that’s easy to install.
Wood overlays: Adding warmth and character to the kitchen.
How to Prepare Your Countertops for Resurfacing
Preparing my countertops for resurfacing begins with a thorough cleaning to eliminate any dirt or grease. I make sure to use a suitable cleaner that cuts through grime without damaging the existing surface. Once clean, I focus on smoothing out any imperfections by sanding the area gently, ensuring that the new material adheres properly and the finish looks impeccable.
After cleaning and sanding, I check for any loose or damaged parts of the countertop, making necessary repairs before applying the new surface. This step is crucial as it guarantees a solid foundation for the resurfacing process. Finally, I ensure the surfaces are completely dry and free from dust or debris, creating the perfect canvas for the transformation ahead:
Clean the countertops thoroughly to remove dirt and grease.
Sand the surfaces to smooth out imperfections.
Repair any loose or damaged areas before resurfacing.
Ensure surfaces are dry and free of dust for optimal adhesion.
Applying the New Surface Material
Applying the new surface material is an exciting phase in my kitchen resurfacing project. With careful attention, I lay down the chosen material over the countertops, ensuring even distribution of the adhesive for a secure bond. The satisfaction of seeing the transformation unfold as I smooth out bubbles and imperfections gives me a sense of accomplishment and assurance that my kitchen is well on its way to reflecting my style.
The steps I follow are clear and purposeful:
Gather all necessary tools and materials for the application.
Carefully apply adhesive to the countertop surface.
Align the new material and lay it down evenly.
Smooth the surface to eliminate air pockets or bubbles.
Allow the adhesive to set as per the manufacturer’s guidelines.
Quick and Effective Kitchen Backsplash Transformations
The kitchen backsplash often serves as a focal point, and when it’s time to refresh this element, I find that resurfacing offers a fantastic opportunity to elevate the entire space. Choosing the right resurfacing material is crucial; whether I opt for classic tiles, modern glass, or stylish laminate, each option can dramatically change the design and functionality. Once I’ve selected the ideal material, prepping the existing backsplash is my next step. This involves cleaning and smoothing the surface to ensure a seamless bond with the new layer. Finally, I move on to the installation process, applying the new surface with precision to create a stylish and cohesive look that enhances my kitchen’s aesthetic. Each step contributes to a transformative result, making the backsplash a true highlight of my culinary space.
Choosing a Resurfacing Material for Your Backsplash
When I choose a resurfacing material for my kitchen backsplash, I consider both functionality and aesthetics. A vibrant tile can add character, while glass allows for easy maintenance and reflects light beautifully. I always weigh my design goals against the practical aspects, ensuring that the material I select complements my overall kitchen theme while also standing up to daily wear and moisture.
Material
Features
Best For
Tile
Durable, wide range of colors, and patterns
Add character and style
Glass
Easy to clean, reflective surface
Sleek and modern aesthetics
Laminate
Cost-effective and versatile
Quick, stylish updates
Prepping Your Backsplash for Resurfacing
When prepping my backsplash for resurfacing, I prioritize a clean and smooth surface to ensure the best adhesion for the new material. I start by removing any old adhesive or tiles, followed by a thorough cleaning to eliminate residue and grime. Ensuring that the wall is dry and smooth afterward sets the stage for a flawless resurfacing process, allowing the new material to bond effectively and enhance the overall aesthetic of my kitchen.
Installing Your New Backsplash Surface
When it comes to installing my new backsplash surface, I make sure to approach the task with attention to detail. I apply adhesive evenly across the prepared area, ensuring a solid bond with the wall. With precise alignment, I lay down each piece carefully, taking the time to press firmly and check for any gaps, which ultimately results in a seamless and polished look that enhances the overall design of my kitchen.
Flooring Solutions: Resurface for a Brand-New Look
When considering a kitchen makeover, flooring often becomes a focal point that can greatly influence the overall ambiance of the space. I find that evaluating my kitchen flooring for resurfacing is a critical step, as it helps identify any damage or wear that needs addressing. Once I’ve assessed the condition, exploring suitable materials for resurfacing becomes essential. There are numerous options available that not only enhance the look but also provide durability for daily use. Finally, completing the resurfacing of my kitchen floor transforms the entire room, bringing a refreshed and inviting atmosphere that I can enjoy for years to come.
Evaluating Your Kitchen Flooring for Resurfacing
As I assess my kitchen flooring, I begin by checking for signs of damage, such as scratches, dents, or warping. Identifying these issues is crucial, as they not only affect the appearance of the floor but also its performance over time. I also consider the flooring material; some surfaces, like hardwood, may benefit from refinishing, while others might require replacement or resurfacing to achieve a fresh look:
Inspect for visible damage, such as scratches or warping.
Consider the material type and its suitability for resurfacing.
Determine the need for repairs before proceeding with resurfacing.
Materials Suitable for Kitchen Floor Resurfacing
In my experience with kitchen floor resurfacing, I’ve discovered a variety of materials that cater to both aesthetic appeal and functionality. For instance, vinyl flooring offers an affordable and versatile option, allowing me to select designs that mimic wood or stone without breaking the bank. Additionally, I find that polished concrete not only provides a modern industrial look but also enhances durability, making it an ideal choice for high-traffic kitchen areas.
Completing the Resurfacing of Your Kitchen Floor
Completing the resurfacing of my kitchen floor marks a significant achievement in my renovation journey. As I lay down the final materials, I take extra care to ensure everything lines up seamlessly, creating a uniform look that ties the space together. The satisfaction I feel when I see the finished surface shine underfoot reinforces my confidence in the decision to rejuvenate my kitchen with this effective method.
Maintaining Your Resurfaced Kitchen for Longevity
To keep my resurfaced kitchen looking its best, I prioritize a consistent maintenance routine. Daily and weekly cleaning habits, such as using gentle cleaners and avoiding abrasive materials, play a significant role in preserving the quality of the surfaces. I also remain vigilant about addressing any wear and tear that might arise over time, as prompt attention can prevent minor issues from escalating into major problems. Additionally, I assess the overall condition of my kitchen periodically, allowing me to determine when it might be necessary to consider a resurfacing refresh. By staying proactive in my maintenance efforts, I ensure that my kitchen remains both beautiful and functional for years to come.
Daily and Weekly Maintenance Tips
To maintain the appeal of my resurfaced kitchen, I focus on a few essential cleaning practices. I make it a habit to wipe down surfaces daily with a gentle cleaner, which helps prevent the buildup of grime and keeps everything looking fresh. On a weekly basis, I dedicate time to deeper cleaning, ensuring I tackle any stubborn spots and keep my kitchen vibrant and inviting.
I also remember to check the cabinets and countertops regularly for any signs of wear or damage. By addressing minor issues promptly, I can preserve the integrity of my resurfaced surfaces, ensuring they remain as stunning and functional as the day they were completed. This routine not only prolongs the life of my kitchen but also enhances my enjoyment of the space.
Addressing Wear and Tear on Resurfaced Surfaces
To tackle wear and tear on resurfaced surfaces, I take the time to inspect each area regularly. Any scratches or signs of wear I find are addressed quickly to prevent them from worsening. By applying touch-up paints or finishes, I maintain the beauty of my revitalized kitchen and ensure it remains inviting.
Staying on top of routine maintenance is crucial for prolonging the life of resurfacing. I focus on effective cleaning techniques and protective coatings to guard against everyday wear:
Perform regular inspections for scratches or damage.
Use touch-up finishes to restore minor imperfections.
Implement proactive cleaning routines to preserve surfaces.
When to Consider a Resurfacing Refresh
I encourage myself to consider a resurfacing refresh when I notice signs of wear that detract from my kitchen’s overall appeal, such as fading colors or noticeable scratches on surfaces. Regular assessments have taught me that addressing these issues promptly not only rejuvenates the look but also prevents more significant problems down the line. By remaining attentive to my kitchen’s condition, I can ensure it continues to reflect my style and function effectively for years.
Conclusion
Revitalizing your kitchen through resurfacing offers a practical and cost-effective solution for transforming your space. This approach not only enhances aesthetics but also improves the durability of surfaces like cabinets and countertops. By selecting the right materials and following meticulous preparation and application steps, you can achieve a modern look that reflects your personal style. Regular maintenance ensures that your resurfaced kitchen remains beautiful and functional for years to come.
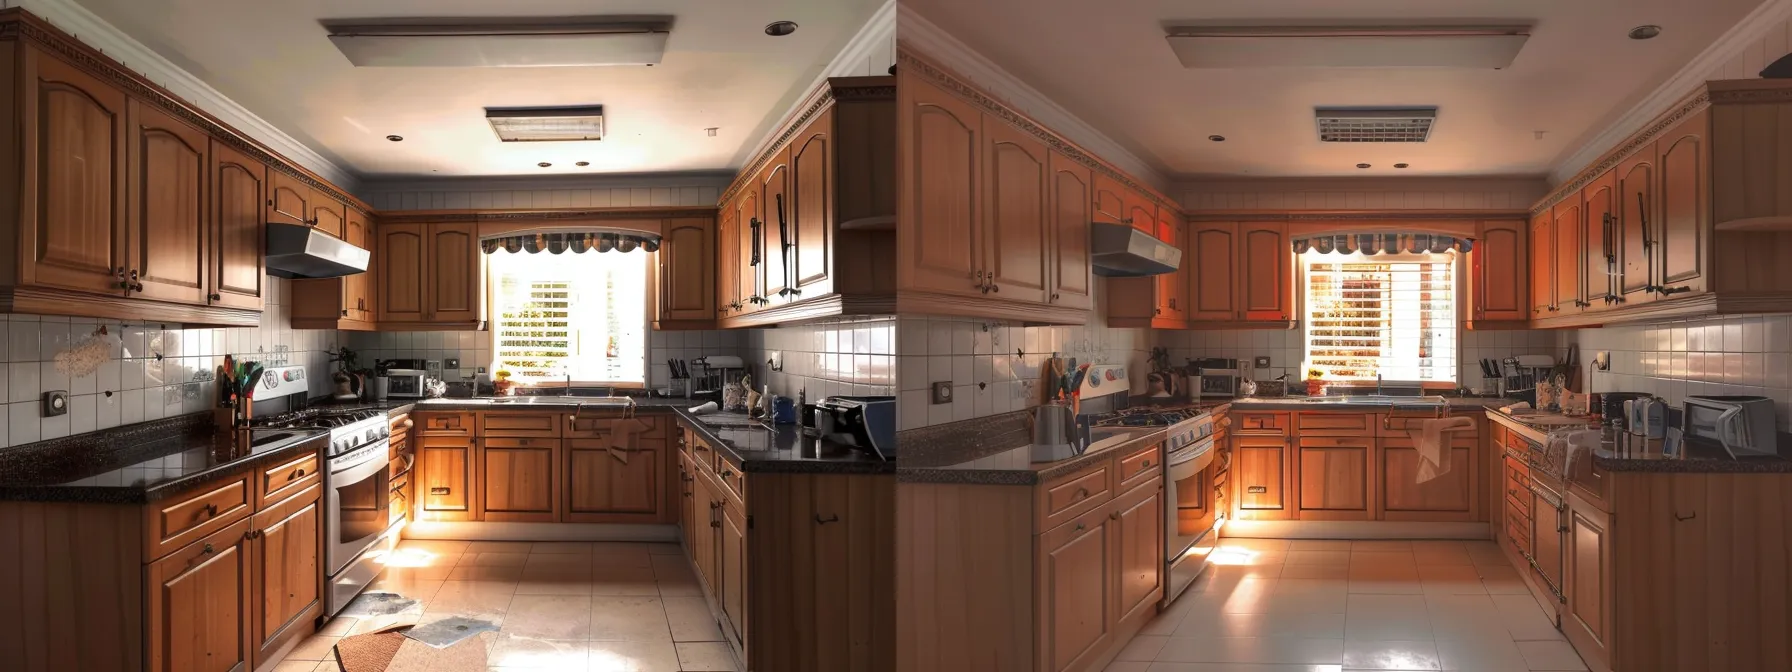
Minimizing RemodelingDebris Through Kitchen Resurfacing
Kitchen renovations can often lead to excessive debris and waste, a concern for both homeowners and the environment. With insights from Master Builders Australia, it’s clear that options like resurfacing can significantly minimize unwanted materials while still achieving a transformed space. By using efficient methods like caulk and incorporating heat pumps, we can not only improve aesthetics but also lead the way for sustainable practices in our homes. Let’s uncover the fundamentals of kitchen resurfacing and explore why it’s a smart alternative to complete renovations. From eco-friendly materials to the role of professionals, there’s a lot to learn that can help create a greener kitchen environment. Keep reading to discover how you can remodel wisely while reducing debris.
The Fundamentals of Kitchen Resurfacing
Kitchen resurfacing is a practical solution that transforms existing surfaces without the need for a complete remodel. I find it essential to understand what kitchen resurfacing entails, as it allows homeowners to rejuvenate their spaces efficiently. Identifying areas eligible for resurfacing, such as countertops, cabinets, and backsplashes, can significantly cut down on both time and costs. Additionally, I appreciate the environmental benefits of this approach, as resurfacing minimizes air pollution and reduces hazardous waste typically associated with traditional remodeling. Materials like brick and metal can often be refinished rather than replaced, making it a sustainable choice for those looking to enhance their kitchen aesthetics while being mindful of their environmental impact.
Understanding What Kitchen Resurfacing Entails
When I explore kitchen resurfacing, I discover a process designed to minimize waste and enhance functionality. By choosing to resurface rather than replace, I directly contribute to reducing municipal solid waste and carbon emissions that come with traditional remodeling. This eco-friendly choice not only revitalizes my kitchen but also helps improve market value, making it appealing for potential buyers and supporting initiatives like Habitat for Humanity Master Builders Australia.
Process
Benefits
Environmental Impact
Resurfacing
Increases market value
Reduces municipal solid waste
Refinishing cabinets
Enhances aesthetics
Decreases carbon emissions
Updating countertops
Improves functionality
Supports sustainability initiatives
Identifying Areas in the Kitchen Eligible for Resurfacing
When considering kitchen resurfacing, I find it crucial to identify specific areas that can benefit from this approach. Countertops often show signs of wear from daily consumption, while cabinets may suffer from erosion over time. By focusing on these elements, I can tackle potential environmental issues and contribute to a healthier climate while potentially reducing tax burdens associated with disposing of debris from a full remodel.
Eligible Areas
Common Concerns
Resurfacing Benefits
Countertops
Wear and tear from daily use
Revitalizes appearance
Cabinets
Erosion due to age
Improves durability
Backsplashes
Stains and damage
Enhances visual appeal
The Environmental Benefits of Opting for Resurfacing
By choosing kitchen resurfacing, I significantly reduce the amount of debris generated during construction projects. This method minimizes the strain on soil by keeping waste out of landfills, which contributes positively to the environment. As a general contractor, I recognize the importance of reusing existing materials; it not only cuts costs but also helps maintain the quality of our planet’s resources.
Resurfacing leads to reduced constructionwaste.
Less debris means less impact on soil health.
Reusing materials conserves resources like energy and raw materials.
This approach contributes to healthier living environments for homeowners.
Why Choose Resurfacing Over Complete Renovation
In my experience, opting for kitchen resurfacing instead of a complete remodel offers numerous advantages that directly address the issue of debris generation. When comparing the debris created during a traditional remodeling project versus resurfacing, the difference is remarkable. Less demolition means fewer materials end up in landfills. I also appreciate the cost-effectiveness that resurfacing brings—alleviating the financial burden while still achieving a stunning transformation. Moreover, resurfaced materials often exhibit impressive longevity and durability, standing up to the daily wear and tear that kitchens endure. Whether it’s the cabinets or countertops, using high-quality finishes and techniques, such as careful sanding with sandpaper where needed, ensures lasting results. By considering these factors, I can implement practical tips that not only boost aesthetics but also align with a sustainable approach to renovations.
Comparing Debris Generation: Resurfacing vs. Traditional Remodeling
When I compare debris generation from kitchen resurfacing to that of traditional remodeling, the difference becomes strikingly clear. Traditional renovations often involve significant demolition, leading to a heap of waste—including old kitchen cabinets, doors, and various materials—which negatively impacts indoor air quality. In contrast, resurfacing focuses on reusing existing structures, like applying foam overlays or refinishing surfaces, thus significantly minimizing waste and creating a healthier habitat for everyone in the home.
The Cost Effectiveness of Kitchen Resurfacing
In my experience, kitchen resurfacing proves to be a cost-effective choice that often surprises homeowners. By avoiding the extensive costs associated with materials like lumber and the labor involved in complete renovations, I keep expenses manageable. Additionally, resurfacing reduces waste and the need for adhesives used in new installations, contributing to a smoother overall project and minimizing time spent on air conditioning adjustments due to disruptions in the home environment.
The financial benefits of resurfacing extend beyond immediate savings:
Less debris means fewer costs associated with landfill disposal.
Utilizing existing materials helps reduce investment in new supplies.
Resurfacing often narrows concerns around factors like soilerosion from extensive landscaping changes.
Overall, resurfaced areas increase durability and longevity, which translates to less frequent future expenses.
Longevity and Durability of Resurfaced Materials
When I consider the longevity and durability of resurfaced materials, I am often impressed by their ability to withstand the rigors of everyday use. Materials like hardwood and specially formulated plastics provide strength and resilience, ensuring that the surfaces maintain their functionality over time. This focus on energy conservation through long-lasting solutions allows me to plan renovations that not only look great but also support a more sustainable living environment.
Opting for hardwood enhances durability throughout daily use.
Renewable resource materials contribute to energy conservation.
Planning for longevity minimizes future renovation needs.
Materials and Methods for Eco-Friendly Resurfacing
In my pursuit of eco-friendly remodeling, I focus on selecting sustainable materials for resurfacing that align with my commitment to environmental protection. This approach isn’t just about aesthetics; it involves choosing resources that minimize waste and support long-term durability. Advanced techniques, such as precision cuts and refinishing, help me tackle every detail from cabinetry to countertops with minimal impact on the surrounding area. I find that incorporating green practices, like using low-VOC paints and finishes, not only benefits the planet but also enhances the overall quality of life in the room. With every home project I undertake, I keep in mind the goal of creating beautiful spaces while remaining mindful of the ecological footprint left behind, even down to the smallest drawer in the kitchen.
Selecting Sustainable Materials for Resurfacing
As I choose sustainable materials for resurfacing, I pay close attention to their impact on pollution and the environment. For instance, incorporating reclaimed wood not only adds character to spaces but also reduces the overall ecological footprint associated with new lumber production. Additionally, when resurfacing elements like the stove area or even drywall, I opt for eco-friendly finishes that maintain functionality while enhancing aesthetics, ensuring each choice contributes positively to our surroundings.
Advanced Techniques That Minimize Waste
In my experience with kitchen resurfacing, using advanced techniques can significantly minimize waste during the remodeling process. For instance, applying precision measurements allows me to cut materials with minimal excess, ensuring that every piece serves its purpose efficiently. I also prioritize using eco-friendly insulation materials that can help create better energy efficiency in the property while reducing the need for further renovations in the future, including areas like the shower.
Employ precision cutting methods to reduce excess material.
Utilize eco-friendly insulation options to enhance energy efficiency.
Focus on sustainable choices that contribute to lower environmental impact.
Incorporating Green Practices in the Resurfacing Process
Integrating green practices into the resurfacing process has become a priority for me, especially when selecting materials like bamboo for countertops. I often collaborate with architects to ensure that my designs not only meet aesthetic standards but also reduce waste by utilizing sustainable options. By minimizing scrap during the installation phase, I can oversee a more efficient project that respects both the environment and the needs of my clients.
Waste Reduction Strategies in Kitchen Remodeling
When I plan a kitchen remodeling project, I prioritize strategies that actively minimize demolition waste and emphasize sustainability. By carefully assessing the layout and existing structures, I can significantly reduce unnecessary materials that end up as waste. I focus on sourcing materials that align with recycling efforts and support eco-friendly initiatives, such as choosing products packaged in cardboard instead of plastic. Moreover, I believe in the importance of reusing existing materials when possible, whether it’s salvaging concrete or upgrading fixtures for continued use. I often recommend considering donation options for items that are still functional, as this not only benefits the community but also contributes to a more sustainable approach to renovations.
Planning Your Project to Minimize Excess
When planning my home renovation projects, I prioritize strategies that minimize my ecological footprint while effectively handling construction projects. I analyze every aspect of the remodel, from the materials chosen to the layout adjustments, ensuring that each decision contributes to reducing waste. In addition, focusing on renewable energy sources and recycling methods within the renovation process helps cultivate a more sustainable environment.
Assess existing structures and materials for potential reuse.
Source sustainable materials that align with recycling efforts.
Plan for efficient layouts to reduce unnecessary cuts and waste.
Incorporate renewable energy solutions wherever feasible.
Sourcing Materials That Support Recycling Efforts
As I embark on home improvement projects, I take a mindful approach to sourcing materials that actively support recycling efforts. By selecting reclaimed wood and recycled metals, I reduce debris and waste, promoting a more sustainable interior design. Whether I’m renovating a kitchen, a bathroom, or even a basement, each resource I choose contributes to minimizing the environmental impact of my work.
Reusing Existing Materials to Minimize Waste
In my approach to kitchen remodeling, I actively seek opportunities to reuse existing materials, which not only supports an environmentally friendly initiative but also saves resources. For instance, rather than discarding well-maintained cabinets or flooring, I find creative ways to incorporate these elements back into the design, reducing the amount of constructionwaste and minimizing demolition debris. This method not only enhances the project’s sustainability but can also provide a unique character to the space, proving that even items like carpet and cabinetry from previous installations can contribute to a beautiful and functional kitchen.
The Role of Professionals in Sustainable Kitchen Resurfacing
Selecting the right contractor for kitchen resurfacing is crucial to achieving a sustainable outcome. I have learned that professionals who prioritize eco-friendliness can act as a vehicle for minimizing waste throughout the renovation process. Their expertise plays a vital role in ensuring that techniques are employed to decrease debris generation, whether through effective planning or sourcing eco-friendly materials. These contractors often possess knowledge about alternatives to traditional resources, which can lead to a zero waste approach that aligns with my commitment to sustainability. Additionally, they can assist in reusing materials, whether it’s reconstituting countertops or safely disposing of unwanted items through garage sales instead of simply composting them. This collaborative effort not only supports my goals for reducing waste but also fosters a more environmentally responsible kitchen space.
Finding the Right Contractor With a Green Thumb
Finding the right contractor for my kitchen resurfacing project means focusing on their commitment to sustainability and their understanding of eco-friendly practices. I prioritize professionals who not only offer competitive prices but also demonstrate a clear strategy for minimizing greenhouse gas emissions. By selecting a contractor with a passion for the environment, I can ensure that even the details, like the treatment of my cabinetry or flooring materials, align with my eco-conscious vision.
Criteria
Considerations
Benefits
Price
Competitive quotes that reflect eco-friendly practices
Cost-effective solutions that don’t sacrifice quality
Expertise
Experience with sustainable materials like cotton
Knowledge on reducing waste and maximizing value
Commitment to Sustainability
Proven strategies for minimizing greenhouse gas emissions
Contributes positively to the environment
The Importance of Professional Expertise in Reducing Waste
The importance of professional expertise in minimizing waste during kitchen resurfacing cannot be overstated. I often find that skilled contractors can identify opportunities for reusing building materials, such as tile and plywood, which might otherwise contribute to landfillwaste. Their knowledge ensures that I can achieve my sustainable living goals without compromising on quality or aesthetics, effectively transforming my space while being environmentally responsible.
How Contractors Can Help in Sourcing Eco-Friendly Materials
When I work with contractors who specialize in green building, I find they possess valuable connections to suppliers who provide eco-friendly materials. These professionals understand how to source quality coatings made from sustainable resources that not only enhance aesthetics but also reduce the risk of harmful substances entering our homes. By carefully selecting materials that minimize transport emissions and encourage reuse, I can ensure my kitchen resurfacing project significantly lowers its impact on landfillwaste.
After Resurfacing: Maintaining a Green Kitchen
After completing the kitchen resurfacing process, I emphasize the importance of maintaining the newly enhanced areas to minimize future waste. By implementing a few simple strategies, I can help preserve the integrity of my kitchen while actively reducing greenhouse gas emissions associated with conventional cleaning and upkeep methods. I focus on using eco-friendly cleaning products that not only protect my renovated surfaces but also contribute to the sustainability of the architecture within my home. Choosing raw materials that are durable and easy to maintain further aids in reducing the need for replacement. As I navigate this post-renovation period, I remain committed to creating an eco-friendly environment that reflects my values, ensuring that my efforts in renovating my kitchen continue to yield benefits long after the project is complete.
Tips for Maintaining Resurfaced Areas to Reduce Future Waste
To maintain resurfaced areas and minimize future waste, I emphasize the importance of regularly auditing my kitchen inventory. Keeping track of what I have not only helps prevent unnecessary purchases but also encourages me to utilize existing items, such as my sink, efficiently. This practice contributes positively to ecology by reducing the demand for new manufacturing, thereby lessening my carbonfootprint.
How to Keep Your Kitchen Eco-Friendly Post-Resurfacing
To keep my kitchen eco-friendly after resurfacing, I prioritize choosing Energy Star appliances that consume less power during use. By selecting sustainable building materials, I reduce the need for frequent replacements, thus minimizing waste associated with future kitchen renovations. Regular maintenance of these surfaces allows me to extend their lifespan and avoid unnecessary demolition down the line.
Here are a few steps I take to ensure my kitchen remains environmentally friendly:
Opt for Energy Star-rated appliances to conserve energy.
Use eco-friendly cleaning products to maintain surfaces.
Regularly assess existing materials and furnishings to prevent unnecessary purchases.
Eco-Friendly Cleaning Products and Practices for Your Kitchen
To maintain the cleanliness and sustainability of my kitchen after a remodel, I prioritize using eco-friendly cleaning products that are free from harsh chemicals. I find that these alternatives effectively clean surfaces without compromising the environment, ensuring that my countertops and cabinets remain in excellent condition. By adopting practices like using reusable cloths and natural cleaning solutions, I can reduce waste and keep my kitchen looking pristine while being mindful of my ecological footprint.
Conclusion
Minimizing remodelingdebris through kitchen resurfacing plays a crucial role in promoting sustainability and preserving the environment. By focusing on reusing existing materials, I can significantly reduce waste and lessen the impact on landfills. This approach not only enhances the kitchen’s aesthetics but also supports eco-friendly initiatives and resource conservation. Ultimately, resurfacing offers a practical solution that combines functionality with environmental responsibility.
Selecting the Right Professional Kitchen Resurfacing Service
Renovating your kitchen can significantly enhance both functionality and style, making it an essential investment for any homeowner. With options such as resurfacing kitchen cabinets, changing the floor plan, or even revamping the shower space, the possibilities are endless. Working with a service provider recognized by the Master Builders Association ensures quality and compliance with industry standards. Selecting the right professional for your kitchen resurfacing project is crucial to achieving your desired results. Keep reading to discover the best options and tips that can guide you through this transformative journey.
Understanding Kitchen Resurfacing Options
In my experience, assessing your kitchen’s needs is the first step in determining the most suitable resurfacing options. Whether it’s the cabinetry, floor, or countertop that requires attention, understanding the unique aspects of your space can make a significant difference. I often explore the various types of resurfacing services available, such as refinishing or replacement, which can radically transform the appearance and functionality of your kitchen. Additionally, I weigh the pros and cons of major resurfacing materials—like laminate, wood, or stone—against the latest trends in kitchen remodeling, including innovative lighting solutions that enhance the overall aesthetic. Each decision I make reflects not only my vision but also the durability required for everyday living. As a member of the Master Builders Association, I strive to uphold the highest standards in kitchen renovations.
Assessing Your Kitchen’s Needs
When I assess my kitchen’s needs, I consider both functionality and design. For instance, if I’m managing commercial kitchen repairs, I prioritize high-traffic areas that require durable materials. Understanding the HVAC requirements is also essential to maintain an efficient cooking environment, ensuring that all aspects align with the standards of my postal code for both safety and compliance.
Different Types of Resurfacing Services
In my journey of selecting kitchen resurfacing services, I have encountered various options that cater to different needs. One of the most popular choices is tile resurfacing, which provides a fresh look while also being durable. Many customers prefer this approach for its aesthetic versatility and ease of maintenance, making it an excellent option for both homes and businesses.
I often recommend clients consider repair services that include refinishing countertops or re-facing cabinets. These options can rejuvenate their space without the need for a complete overhaul, saving both time and resources. A skilled handyman can make significant improvements by addressing specific areas that require attention, enhancing both functionality and style.
When deciding on resurfacing services, I ensure that the solutions align with the client’s vision while providing lasting quality. Understanding these types of services helps in making a well-informed decision that fits within their budget and meets their expectations. Consider the following options:
Tile Resurfacing
Countertop Refinishing
Cabinet Re-facing
Floor Resurfacing
Pros and Cons of Major Resurfacing Materials
When I evaluate the pros and cons of major resurfacing materials, I consider how each choice impacts overall aesthetics and durability in kitchen remodeling services. For instance, laminate offers affordability and a wide range of styles but may lack the longevity of stone options, which are celebrated for their durability yet can be more expensive. As I consult with technicians or a cabinet refinishing contractor, I emphasize the importance of selecting materials that not only fulfill the immediate renovation goals but also contribute to a lasting home improvement solution.
Latest Trends in Kitchen Resurfacing
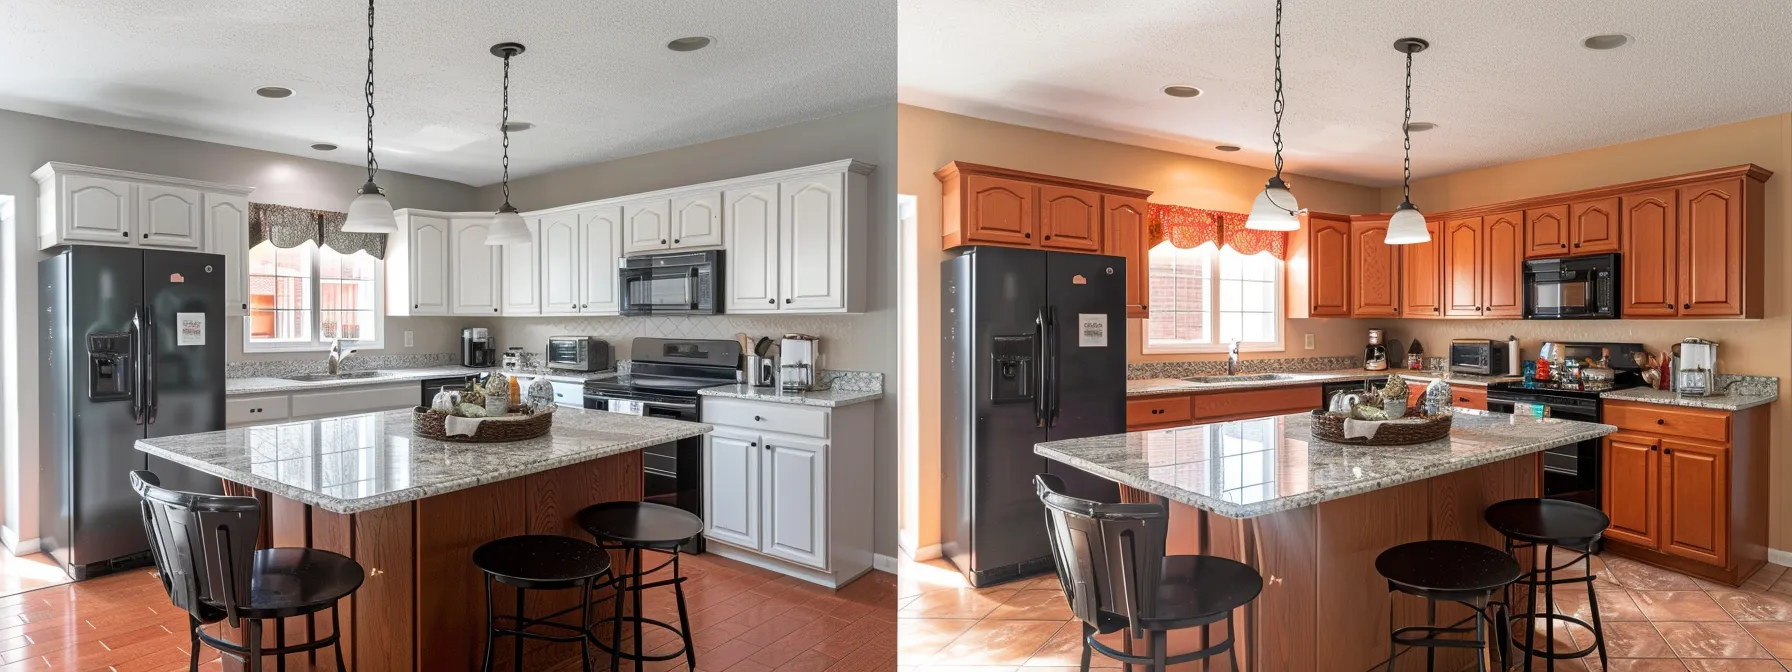
As I navigate the latest trends in kitchen resurfacing, I’ve noticed a growing emphasis on incorporating unique interior design elements that reflect a client’s personality. Cabinet refacing has gained traction as a popular choice, allowing homeowners to give their kitchen a fresh brand look without the extended downtime associated with complete renovations. This approach not only enhances the kitchen’s visual appeal but also garners the attention of potential buyers, ultimately adding value to the home.
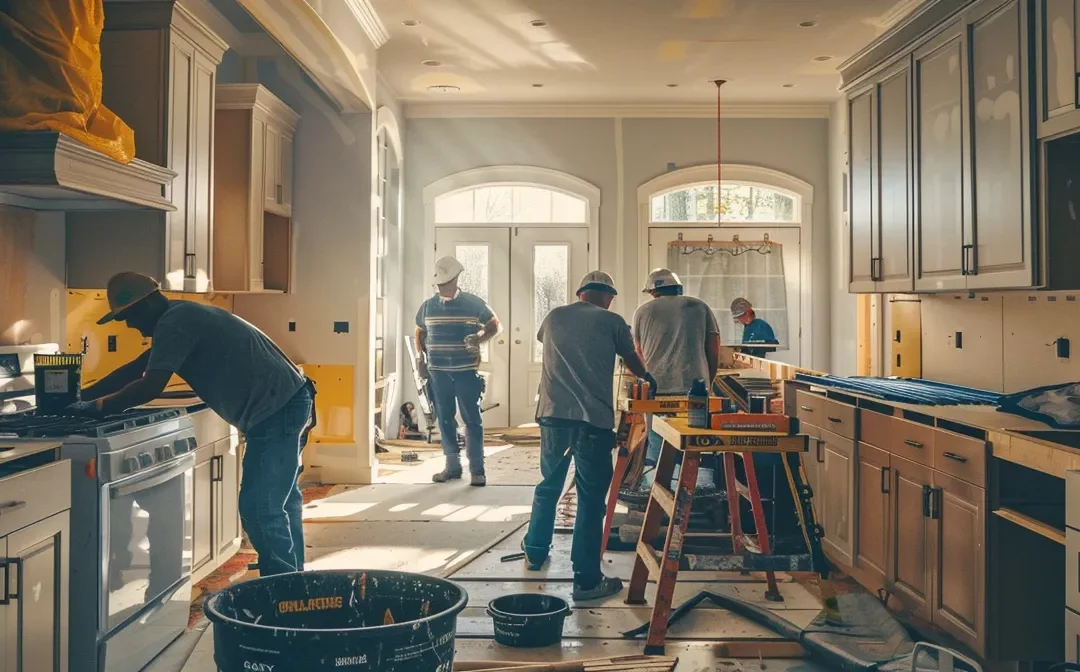
Reasons to Choose Professional Resurfacing Over DIY
Choosing to hire a professional kitchen resurfacing service rather than pursuing a DIY approach can significantly impact the outcome of your project. With a depth of expertise in the field, professionals bring invaluable knowledge that ensures every aspect, from refinishing kitchen cabinets to properly installing your sink, is managed efficiently. I always emphasize the advantages of professional work—particularly in terms of longevity and durability. The quality of materials and craftsmanship offered by seasoned experts often outweighs the initial savings of a DIY project. Additionally, considering the cost-benefit analysis reveals that investing in professionals translates to fewer long-term expenses, especially when you factor in planned maintenance. Lastly, the peace of mind that comes with warranties and after-service support cannot be overlooked; knowing that you have a reliable team to address any post-renovation concerns can make all the difference. If you’re curious about how to take the next step, feel free to reach out via my email address for guidance tailored to your specific needs.
Expertise Matters in Resurfacing
In my experience, professionalism in kitchen resurfacing can truly transform a space. The expertise that trained specialists bring to the table ensures that each kitchen remodel aligns with specific standards, which is essential for compliance in any given zip code. I’ve witnessed firsthand how skilled workers adeptly manage equipment repair and installation, ensuring that everything functions seamlessly while enhancing both style and durability.
Longevity and Durability of Professional Work
The longevity and durability of professional kitchen resurfacing work have become evident throughout my experience in the field. For instance, I’ve worked closely with clients in Indianapolis who appreciated that hiring experts came with a warranty, ensuring that their investment is protected over the years. Unlike DIY attempts, where shortcuts can lead to future repairs or issues—like those often encountered with rooter plumbing problems when incorrect installations affect the dishwasher—professional work provides long-lasting results that withstand the rigors of everyday use.
The Cost-Benefit Analysis of Hiring a Professional
As I evaluate the cost-benefit analysis of hiring a professional for kitchen resurfacing, the financial implications become evident through the lens of my experiences in Indiana. Investing in expertremodeling services often proves to be more economical in the long run, especially within the foodservice industry where efficiency is paramount. The upfront costs may seem higher than a DIY approach, but the reassurance of quality craftsmanship ensures that your kitchen withstands the rigors of cooking and everyday use, ultimately providing better value for your investment.
Warranty and After-Service Support
The warranty and after-service support that comes with professional kitchen resurfacing service is a compelling reason to opt for their expertise. I often find reassurance in knowing that my clients are covered if unforeseen issues arise after a project’s completion. This ongoing support not only builds trust but also ensures that their investment remains protected in the long term.
Finding the Right Service Provider for Your Project
Finding the right service provider for kitchen resurfacing is a critical step in ensuring the success of your project. I begin by researching local kitchen resurfacing companies, focusing on those that have established a solid reputation in the community. Evaluating online reviews and testimonials helps me gauge the experiences of previous clients, allowing me to form a better understanding of the quality of work delivered. In addition to this, I make it a point to ask for before and after photos to visualize the transformations these providers have accomplished. Lastly, comparing quotes and the specific services offered allows me to make an informed choice that aligns with my budget and project expectations. This thorough approach ensures that I select a provider who can meet both my aesthetic goals and functional needs effectively.
Researching Local Kitchen Resurfacing Services
As I search for local kitchen resurfacing services, I prioritize companies with a strong presence in the community and a history of successful projects. I take the time to delve into online resources, such as review platforms and social media, where past clients share their experiences and satisfaction levels.
I also reach out to friends and family for recommendations, as their insights can be invaluable in narrowing down reliable options. By compiling this information, I create a shortlist of potential providers, ensuring I choose a team that aligns with both my vision and expectations.
Evaluating Online Reviews and Testimonials
When I evaluate online reviews and testimonials, I look for patterns in feedback to understand the strengths and weaknesses of each service provider. Positive reviews often highlight attention to detail and customer service, while negative ones can point out potential issues to watch for. I find it particularly useful to read recent testimonials, as they provide insight into the company’s current performance and reliability.
To make my decision process more efficient, I analyze the following aspects:
Overall star ratings and review counts
Specific comments about types of services rendered
Responses from the service provider to customer feedback
These elements offer a comprehensive view of a provider’s track record and help me gauge whether they align with my project needs.
Asking for Before and After Photos
Requesting before and after photos has proven to be an effective way for me to assess the capabilities of a kitchen resurfacing service. These images provide clear evidence of a provider’s skill and attention to detail, helping me visualize the potential results of my own project. By studying the transformations carried out on previous jobs, I can better gauge whether a service aligns with my aesthetic and functional expectations.
Comparing Quotes and Services Offered
Comparing quotes and services offered by different kitchen resurfacing providers is essential to making an informed decision. I carefully analyze each proposal, looking beyond just the price to understand what is included in the service. Factors such as material quality, warranty terms, and timelines can significantly impact the overall value of each offer.
Gather multiple quotes for a comprehensive view.
Assess the scope of services included in each quote.
Evaluate the quality of materials proposed.
Review warranty and maintenance offerings.
Compare timelines and project completion estimates.
This thorough evaluation helps me identify which provider aligns best with my needs and budget, ensuring I select the right team for the job.
Questions to Ask Before Hiring a Resurfacing Service
As I prepare to hire a resurfacing service, I find it essential to ask the right questions that ultimately shape the success of my kitchen project. I start by inquiring about the materials and techniques used, as understanding these choices adds confidence to the quality of the outcome. Clarifying the project timeline is another critical aspect; knowing how long the work will take helps me manage my schedule and expectations. I also prioritize understanding the warranty and maintenance advice provided, as this can significantly influence the longevity of the results. Lastly, discussing any potential disruption and kitchen accessibility during the resurfacing process ensures that I can plan accordingly while the work unfolds. Each of these inquiries can provide clarity and peace of mind as I embark on this renovation journey.
Inquiring About Materials and Techniques Used
When I inquire about the materials and techniques used by a resurfacing service, I focus on understanding their approach to selecting high-quality products. Knowing the specifics of the materials helps me gauge their durability, maintenance requirements, and overall suitability for my kitchen’s style. I often ask how their techniques minimize disruption during the resurfacing process, ensuring that I receive a professional finish without the hassle of lengthy downtime.
Understanding the Project Timeline
Understanding the project timeline is crucial for managing expectations during the kitchen resurfacing process. I find that discussing the estimated duration with the service provider helps ensure that all parties are aligned and prepared for the workflow. Having a clear timeline allows me to plan around disruptions and coordinate any necessary arrangements during the renovation.
Here’s a breakdown of what I typically consider when discussing project timelines:
Phase
Description
Estimated Duration
Initial Consultation
Discuss needs and preferences with the resurfacing service.
1-2 days
Material Selection
Choose finishes and materials suitable for the kitchen.
2-3 days
Preparation & Planning
Plan the renovation process and prepare the space.
1 week
Resurfacing Work
Conduct the actual resurfacing activities.
1-2 weeks
Final Inspection
Review work with the provider and address any concerns.
1 day
Maintaining open communication throughout each phase of the timeline helps ensure a smooth renovation process and addresses any potential challenges that might arise along the way.
Clarifying Warranty and Maintenance Advice
As I clarify warranty and maintenance advice with a resurfacing service, I focus on understanding what the warranty covers and for how long it remains active. This knowledge is vital, as it informs me about the protection for my investment and any potential long-term care I may need to consider. I also inquire about recommended maintenance practices to ensure that the resurfaced surfaces remain in optimal condition, extending their lifespan while preserving their appearance.
Discussing Disruption and Kitchen Accessibility During the Project
As I prepare for a kitchen resurfacing project, I prioritize discussing potential disruptions and how accessible my kitchen will remain during the work. Understanding the extent of the disruption helps me plan meals and navigate around the space efficiently. I often ask the resurfacing service how they manage accessibility and if they have strategies in place to minimize inconvenience throughout the renovation process:
Disruption Level
Impact on Kitchen Use
Accessibility Strategies
Minimal
Kitchen remains partially usable
Designated work areas while maintaining essential access points
Moderate
Limited use of appliances and surfaces
Alternative cooking options provided by the team
Significant
Complete use of the kitchen restricted
Temporary kitchen setup suggested outside the working area
These insights from the resurfacing team guide me in creating a feasible plan, ensuring the project proceeds smoothly while my daily routine remains as uninterrupted as possible.
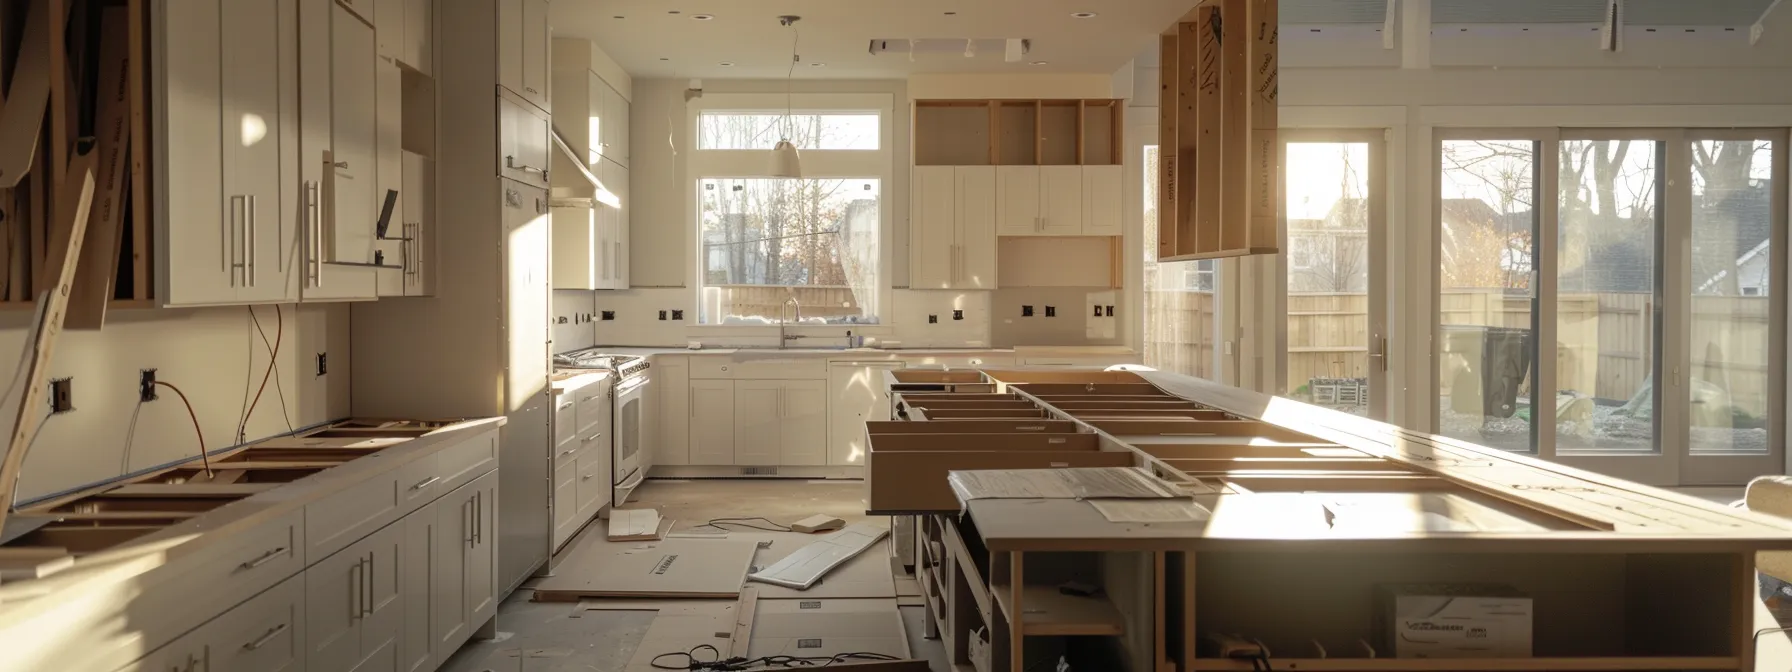
Preparing Your Kitchen for Resurfacing
As I prepare for the kitchen resurfacing process, ensuring a smooth transition is my primary focus. I start by carefully considering what items to remove from the kitchen ahead of time to clear space for the contractors and minimize potential risks. Dust and damage are common concerns during resurfacing, so I implement strategies to protect my home and keep the work area tidy. Establishing a temporary kitchen space allows me to maintain some level of functionality while the project takes place. Throughout this process, I prioritize keeping communication open with my contractor, as clear discussions help address any questions or concerns that arise, ensuring that the project stays on track and aligned with my expectations.
What to Remove From Your Kitchen Ahead of Time
In preparation for the resurfacing process, I make it a priority to clear out items that could hinder the work. This includes removing all cookware, utensils, and small appliances from countertops and cabinets to provide easy access for the professionals. I also take down decorations and any items hanging on walls to prevent damage during the renovation.
In addition, I recommend clearing out the pantry and any food items stored in the kitchen to avoid contamination or spoilage. Preparing in advance allows the work to proceed smoothly and enables me to have a tidy environment for the renovations:
Cookware and utensils
Small appliances
Decorations and wall hangings
Food and pantry items
Tips for Minimizing Dust and Damage
To minimize dust and damage during the resurfacing process, I take proactive measures ahead of time. Covering furniture and floors with protective sheets safeguards my belongings from debris and dust particles that might arise. Sealing off the kitchen with plastic sheeting helps contain the mess, providing a barrier between the work area and the rest of my home.
Prioritizing ventilation is another essential step; I ensure that windows are open and fans are strategically placed to promote airflow. This not only helps manage dust but also aids in the drying process of materials used during resurfacing:
Preparation Step
Purpose
Cover Furniture and Floors
Protect against debris and dust
Seal Off the Kitchen
Contain mess and dust
Ensure Proper Ventilation
Improve airflow and drying
By implementing these strategies, I create a cleaner environment that minimizes potential disruptions throughout the resurfacing project.
Establishing a Temporary Kitchen Space
As I prepare for the resurfacing project, creating an effective temporary kitchen space is essential for maintaining functionality while the work unfolds. I strategically designate an area in another room where I can set up my cooking essentials, ensuring it’s easily accessible for meal preparation. This setup allows me to continue my daily routines with minimal disruption during the renovation.
To achieve an organized temporary kitchen space, I take the following steps:
Identify a location in the home for cooking and food storage.
Set up essential appliances like a microwave and coffee maker.
Organize utensils, cookware, and non-perishable items for easy access.
Keep a supply of paper plates and disposable cutlery for convenience.
Keeping Communication Open With Your Contractor
Throughout the kitchen resurfacing process, I prioritize keeping the lines of communication open with my contractor. Regular check-ins help me stay informed about the project’s progress and any potential challenges that arise. By fostering this transparent dialogue, I can express my concerns promptly, ensuring that the final result aligns with my vision and expectations.
Aftercare and Maintenance Post-Resurfacing
After completing the resurfacing of my kitchen, I quickly realized that proper aftercare and maintenance are crucial for preserving the beauty and functionality of the newly upgraded space. Implementing best practices helps extend the life of resurfaced surfaces, ensuring they remain in top condition. I’ve learned the importance of using recommended cleaning agents and techniques tailored to various materials, as the wrong products can cause damage. Recognizing the signs that indicate when it’s time to call in professionals for maintenance prevents minor issues from escalating into costly repairs. Additionally, updating my home insurance to reflect the enhancements made to my kitchen safeguards my investment and provides peace of mind. By following these guidelines, I can enjoy my resurfaced kitchen for years to come.
Best Practices for Prolonging the Life of Your Resurfaced Kitchen
To ensure my resurfaced kitchen maintains its appeal and functionality, I prioritize regular cleaning and proper maintenance. I carefully select the right cleaning solutions suitable for each material, as harsh chemicals can damage surfaces over time. Additionally, I create a routine to inspect for wear and tear, addressing issues before they escalate.
Use gentle cleaning agents tailored to specific materials.
Establish a regular cleaning schedule to maintain surfaces.
Perform routine inspections for wear and tear.
Address any minor repairs promptly to prevent further damage.
By following these guidelines, I can enjoy the beauty of my kitchen for many years.
Recommended Cleaning Agents and Techniques
In my pursuit of maintaining the beauty of my resurfaced kitchen, I focus on using cleaning agents that are gentle yet effective for the specific materials involved. I have found that pH-balanced cleaners work well for various surfaces without causing damage, and I always avoid abrasive scrubs that could scratch the finish. Additionally, I prefer microfiber cloths for their ability to capture dirt and dust without leaving scratches, ensuring that my kitchen remains pristine while prolonging the life of the freshly resurfaced areas.
When to Call in Professionals for Maintenance
Recognizing the right moment to call in professionals for maintenance has been vital in my journey of preserving the beauty of my resurfaced kitchen. If I notice unusual wear, such as scratches or stains that don’t respond to regular cleaning methods, I make it a priority to consult an expert. Moreover, any signs of structural defects, like peeling finishes or loose fixtures, prompt me to seek professional help to address the issue before it escalates further.
Updating Your Home Insurance to Reflect Your Kitchen Upgrade
Updating my home insurance after a kitchen upgrade is a critical step I prioritize to ensure that my investment is fully protected. I reach out to my insurance provider to discuss any changes in value that come with the new renovations, ensuring they reflect the upgraded kitchen’s worth accurately. By doing this, I gain peace of mind knowing my insurance coverage is aligned with my home’s current market value, safeguarding against potential losses or damages.
Conclusion
Selecting the right professional kitchen resurfacing service significantly impacts the outcome and longevity of your renovation project. By thoroughly researching providers, assessing their expertise, and comparing quotes, you can ensure that your selected team aligns with your aesthetic goals and functional needs. Prioritizing professionals not only enhances the quality of workmanship but also provides valuable warranties and after-service support. Ultimately, investing in the right service can lead to a beautifully transformed kitchen that stands the test of time.
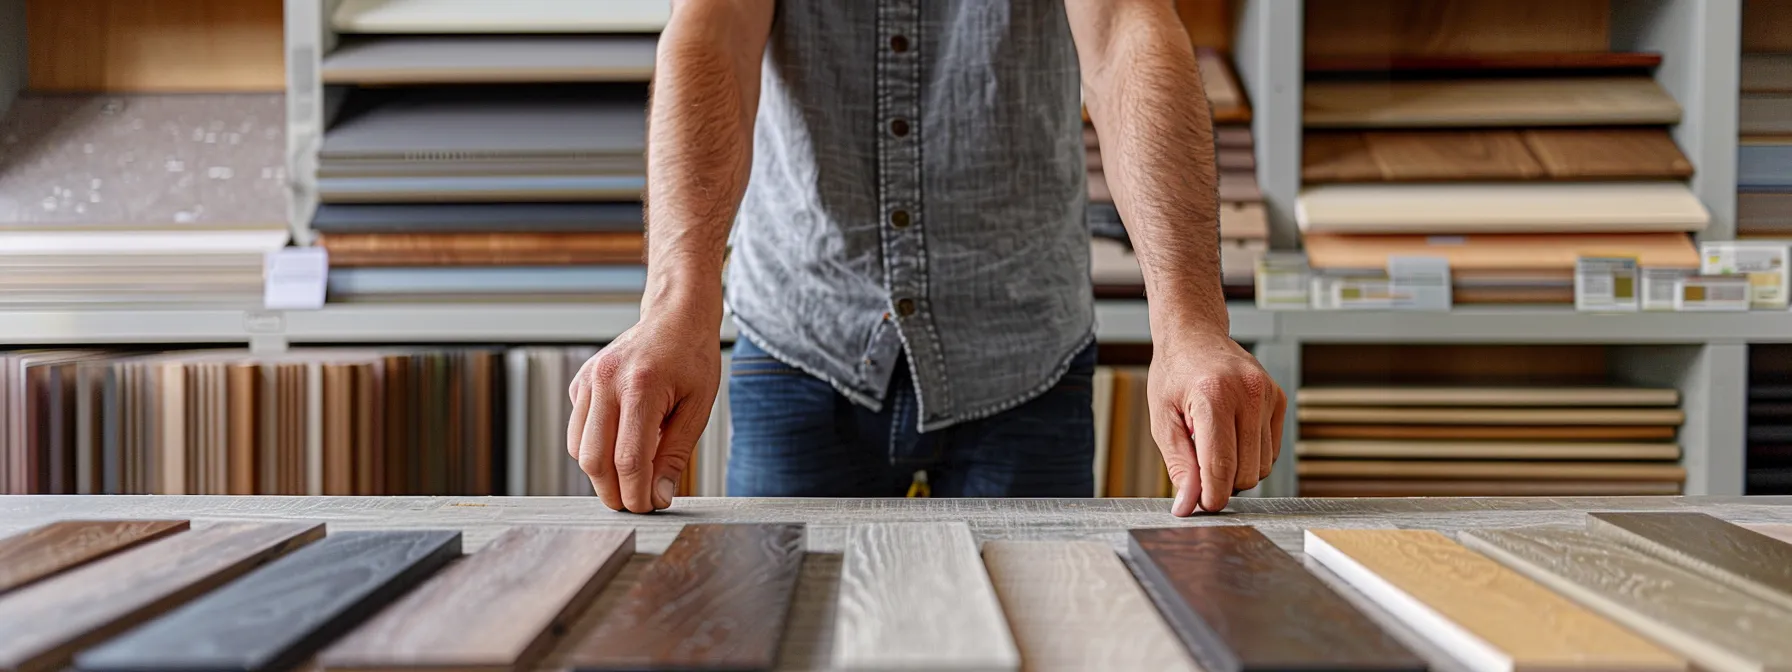
Kitchen renovations offer homeowners a chance to elevate their space while improving functionality. When budget constraints come into play, seeking affordable kitchen cabinet refinishing services can be a game changer. By understanding prices and the return on investment, you can make informed decisions, ensuring that your kitchen not only looks stylish but also gains value. Collaborating with professionals, like those from the Master Builders Association of Victoria, can guide you in choosing the right approach tailored to your needs. As you navigate through your options, it’s essential to grasp the intricacies of cabinet refinishing and how to achieve excellent results without overspending. Keep reading to uncover the key aspects that will help you select the best services for your kitchen transformation.
When I set out to find affordable kitchen cabinet refinishing services in Oklahoma, I knew that thorough research would be my guiding principle. I began by delving into local refinishing companies, gathering as much information as possible on their offerings. Comparing pricing and the specific services they provided helped me understand where I might find the best value. I also took the time to read customer reviews and testimonials from the Master Builders Association of Victoria, which gave insight into the quality of their work and customer satisfaction. As I explored their portfolios of past projects, I could visualize how each company approached cabinet refacing, especially with wood veneer, and whether their style resonated with my vision. Scheduling consultations allowed me to obtain accurate quotes and ask pertinent questions, and I kept an eye out for special deals or seasonal discounts that could enhance my home improvement project while keeping costs manageable.
Research Local Refinishing Companies
As I embarked on my search for local refinishing companies, I focused on those that specialized in kitchen cabinet refinishing and offered a range of options, including features for my pantry and patio areas. I discovered that many businesses showcase their expertise in tackling wear and tear on cabinets, transforming them into stunning focal points. I was particularly drawn to companies that used quality materials, such as quartz, in their renovations, ensuring a beautifully finished product that matched my overall design aesthetic.
Compare Pricing and Services Offered
While comparing pricing and services offered by various contractors, I made sure to look beyond just the cost. I focused on what each service included, especially when it came to refinishing cabinets around my custom kitchen and matching the granitecountertop. This attention to detail helped me evaluate the value provided, particularly in terms of quality materials and craftsmanship, which are essential for completing a successful home renovation.
Read Customer Reviews and Testimonials
Reading through customer reviews and testimonials was an eye-opening experience for me during my search for affordable kitchen cabinet refinishing services. I came across feedback that highlighted not just the quality of cabinet painting services, but also how well these companies addressed renovations across different areas, such as matching cabinets to the sink aesthetics or ensuring harmony with ceiling designs in adjacent rooms. Many clients shared their satisfaction, particularly in how the refinishing process transformed their kitchens, and some even mentioned improvements in their bedrooms and living spaces as a result.
Assess Their Portfolio of Past Projects
As I assessed the portfolios of various refinishing companies, I was keen on understanding their versatility and craftsmanship in refinishing cabinets. I specifically looked for examples that showcased their work with wood and thermofoil materials, as this would give me an idea of how they handle different styles and finishes. I noticed some projects highlighted not only kitchen renovations but also related services like floor refinishing, which illustrated how well they could coordinate a cohesive design across different elements of my home, minimizing potential waste and maximizing aesthetic appeal.
Schedule Consultations for Accurate Quotes
Scheduling consultations with potential refinishing services gave me the opportunity to discuss my vision for a kitchen makeover that would harmonize with the overall design of my home, including the bathroom and basement areas. I appreciated how these discussions allowed me to receive accurate quotes while also learning about any warranties they offered, giving me peace of mind as I invested in transforming my living space. This proactive approach not only helped clarify costs but also deepened my understanding of how each company could fit within my renovationlandscape.
Check for Special Deals or Seasonal Discounts
While searching for affordable kitchen cabinet refinishing services, I made it a point to check for special deals or seasonal discounts that could significantly reduce costs. Many companies often run promotions, especially for refinishing custom cabinets, which can include discounts on services like molding or upgrading cabinetry materials, including solid wood options. Taking advantage of these opportunities not only enhanced my renovation budget but also allowed me to achieve a higher-quality finish without breaking the bank.
Understanding the Different Aspects of Cabinet Refinishing
Delving into the different aspects of cabinet refinishing, I quickly realized how crucial it is to consider various refinishing techniques that can dramatically influence the outcome of my kitchen cabinet makeover. I explored options like staining, painting, and glazing, each offering unique aesthetics and functional advantages. Understanding material choices was equally important, as I discovered that oak is a popular selection for both cabinetry and even accents like a fireplace surround. Additionally, exploring costs associated with different finishes and materials allowed me to budget effectively while keeping durability in mind for the long term. I also looked into the typical timeframes for refinishing projects, ensuring I had realistic expectations throughout the process, especially if coordinating with other home improvements like updating my garage door simultaneously.
Explore Various Refinishing Techniques
In my journey of exploring refinishing techniques, I found that the choice between staining, painting, or glazing can have a significant impact on the kitchen’s overall appearance, especially when considering the ambient lighting. I learned that skilled painters in Minneapolis can provide tailored finishes that enhance the natural textures of the wood while complementing the rest of my home decor. Their expertise ensures that the cabinets not only look stunning but also align with the aesthetic themes in rooms where plush carpet and vibrant colors create warm, inviting spaces for family and guests.
Learn About Material Options and Costs
During my research into kitchen cabinet refinishing, I discovered the importance of understanding material options and associated costs. Different brands offer a variety of materials, from solid wood to laminate, each impacting the overall quality and aesthetic of the finished product. Engaging with experienced cabinet refinishers helped me get an accurate picture of the expenses, including considerations like the construction of drawers and the choice of finishes that fit my budget.
Material Type
Cost Range
Durability
Finish Options
Solid Wood
$$$
High
Staining, Painting
Laminate
$$
Moderate
Painting
Thermofoil
$$
Moderate
Painting
Veneer
$$$
High
Staining
This breakdown allowed me to weigh my options effectively while ensuring my kitchen cabinet refinishing project met both my aesthetic needs and budget constraints.
The Importance of Durable Finishes
As I engaged in my kitchen remodeling project, I quickly realized the significance of durable finishes for my cabinets. Living in Brooklyn, where the climate can be unpredictable, I needed options that would withstand wear and tear while complementing my style. With concrete accents in my design plan, I focused on kitchen cabinet refacing materials that promised longevity, ensuring that my doors not only looked great but also stood up to everyday use.
Timeframes and What to Expect During the Process
As I navigated the process of kitchen cabinet refinishing, clarity on the timeframe became essential. Typically, I learned to expect the initial assessment and planning stage to take a few days, as I coordinated with a handyman to discuss my vision and desired finishes. Once the work began, the actual refinishing could range from a few days to a week, depending on the complexity of the job, and I appreciated the importance of choosing environmentally friendly materials during this phase.
Initial assessment and planning stage lasts a few days.
Coordination with a handyman to finalize vision and finishes.
Refinishing process takes anywhere from a few days to a week.
Consideration of environmentally friendly materials is crucial.
Implementation of pest control measures if necessary.
Tile installation can be coordinated alongside refinishing.
Factors Influencing the Cost of Cabinet Refinishing
Understanding the various factors that contribute to the cost of cabinet refinishing is essential for making informed decisions. Firstly, the size and scope of the project significantly influence pricing; a larger kitchen with many cabinets naturally requires more time and resources than a simpler setup. Additionally, I learned that material choices play a crucial role, as quality wood or specialized finishes can cause expenses to climb. Labor costs also factor in, particularly when working with expert refinishing professionals in urban centers like New York City, where rates might differ from those in Kansas. The condition of my cabinets before refinishing impacted prices as well; damaged or worn-out cabinets would likely require more intensive work. Lastly, I remained vigilant about potential hidden costs that could arise during the process, such as unexpected repairs or additional materials needed, which could affect my overall project budget, similar to planning for a renovation in a shower space alongside kitchen updates.
How Size and Scope Affect Pricing
The size and scope of my cabinet refinishing project had a considerable impact on the pricing I encountered. A sprawling kitchen with multiple cabinets meant more extensive labor and higher material use. I had to weigh the pros and cons of investing in quality materials, such as premium stains and finishes, knowing that customer satisfaction hinges on achieving a beautiful and durable result.
Factors
Impact on Pricing
Project Size
Larger kitchens require more materials and labor, increasing costs.
Scope of Work
Complex refinishing tasks need more time and skilled labor, affecting the overall budget.
Material Choice
Higher-quality stains and finishes can elevate the price but ensure better durability.
Material and Labor Costs Explained
In my quest to understand the costs associated with cabinet refinishing, I quickly learned that both material and labor expenses play significant roles, particularly influenced by the room layout and size. The cost of living in my area also affected these rates, as local labor might demand higher wages amidst fluctuating expenses. I became aware that factors like cabinet painting and the need to control dust during the refinishing process could add to the overall investment, but I kept my eyes peeled for discounts and even gift cards to help alleviate some financial burdens.
The Impact of Cabinet Condition on Price
The condition of my cabinets significantly influenced the refinishing price I encountered. When I examined my kitchen in Oklahoma City, I realized that cabinets with extensive damage or wear would naturally require more intensive repairs before refinishing, thereby escalating costs. By consulting platforms like Angi, I gained insights into how variations in cabinet condition could affect overall expenses and recommended maintenance tips, ensuring I approached my project with a clear financial plan.
Hidden Costs to Be Aware Of
While budgeting for kitchen cabinet refinishing, I quickly learned to be vigilant about potential hidden costs that could surprise me. Unexpected expenses can arise from repairs needed to address damage not initially visible or from the removal and reinstallation of hardware that might not fit properly after the refinishing process. I found it essential to have open discussions with the refinishing professionals about any additional charges to ensure my financial plan remained intact throughout the project.
Questions to Ask Before Hiring a Refinishing Company
As I moved forward in my search for affordable kitchen cabinet refinishing services, I needed to gather information that would help me make an informed decision. I began by inquiring about the company’s experience and any specializations they might have, as this would provide insight into their expertise. Understanding their refinishing process and typical timelines was also essential for setting realistic expectations. I made sure to ask about warranties and satisfaction guarantees offered, ensuring confidence in my investment. Furthermore, clarifying payment terms and conditions helped me navigate potential costs smoothly and maintain control over my budget throughout the project.
Inquiry About Experience and Specializations
When I reached out to potential refinishing companies, I prioritized understanding their experience and specializations. I wanted to know how long they had been in the business and if they had specific expertise in refinishing different cabinet types, such as those made from solid wood versus laminate. This clarity helped me gauge their ability to meet my needs effectively, ensuring a seamless alignment with my vision for the kitchen makeover.
Discuss Their Process and Timelines
When discussing the process and timelines with refinishing companies, I emphasized the importance of understanding their typical workflow. I wanted to know how they planned to assess my cabinets, prepare them for refinishing, and apply the final finishes. Gaining insights into their expected timelines for each phase helped me set realistic expectations and prepare my home for the changes ahead.
Warranty and Satisfaction Guarantees Offered
As I considered various refinishing companies, I knew that understanding their warranty and satisfaction guarantees was paramount. I asked each potential contractor about the specific coverage they provide, ensuring I would be protected should any issues arise post-refinishing. Knowing that a reliable guarantee was in place offered me peace of mind, reinforcing my confidence in the quality of work they promised.
Payment Terms and Conditions
When I approached refinishing companies, I made it a priority to clarify their payment terms and conditions upfront. Understanding how payments would be structured, such as deposits versus final payments, helped me gauge the financial commitment involved and maintain control over my budget. I also inquired about any financing options available, which could provide flexibility as I invested in my kitchen project.
Aspect
Details
Deposit Required
Percentage necessary to secure the service
Final Payment
Due upon project completion or specific milestones
Payment Methods
Options available, such as credit card or financing plans
Refund Policy
Conditions under which refunds may be granted
How to Negotiate for Better Rates With Refinishing Services
When it comes to getting the best value for my kitchen cabinet refinishing project, I realized the importance of negotiating effectively with service providers. I found that being upfront about my budget constraints can actually open up fruitful discussions about what I can afford without compromising quality. It’s essential to establish a rapport with the refinishing company, allowing me to gauge their flexibility on pricing. Furthermore, exploring available payment plans or financing options not only adds convenience to the financial aspect but also shows companies that I am genuinely invested in their services. By approaching these conversations thoughtfully and with clear objectives, I can position myself for a successful negotiation that aligns with my vision and budget.
Tips for Getting the Best Value for Your Money
To ensure I received the best value for my kitchen cabinet refinishing project, I focused on being transparent with refinishing companies about my budget. This open communication often led to discussions about tailored options that could meet my financial needs. Additionally, I asked for a breakdown of costs, which allowed me to understand the project better and identify areas where I might save without sacrificing quality.
I also researched seasonal promotions or referral discounts, which often provided added savings. By taking the time to compare quotes from multiple service providers, I could leverage competitive pricing, creating an opportunity for me to negotiate more effectively. Ultimately, my proactive approach empowered me to secure the best deal that aligned with my vision.
When and How to Discuss Budget Constraints
When discussing budget constraints with refinishing services, I’ve found it beneficial to initiate the conversation early in the process. This transparency establishes a collaborative atmosphere where both parties can explore options that align with my financial needs while maintaining the project’s integrity. By clearly communicating my budget from the start, I open the door for possible adjustments in materials or services that fit within my constraints without compromising on the desired outcome.
Exploring Payment Plans or Financing Options
While searching for affordable kitchen cabinet refinishing services, I recognized the importance of exploring payment plans or financing options. Many refinishing companies offer flexible payment structures, allowing me to spread the cost over time, making the investment more manageable without straining my budget. By discussing these possibilities upfront, I was able to find solutions that suited my financial needs while ensuring quality workmanship for my kitchen renovation.
Payment Option
Description
Benefits
Installment Plans
Paying in several smaller payments over time.
Reduces immediate financial burden while allowing flexibility.
Zero Interest Financing
No interest charged if paid within a certain period.
Allows for full value of services without accruing extra costs.
Deferred Payment
Start payments after a specific period or project completion.
Gives time to adjust finances post-renovation.
Ensuring Quality and Durability With Affordable Services
Prioritizing quality and longevity in my kitchen cabinet refinishing project became essential as I navigated options. I understood that the materials used could significantly impact not just the aesthetics but also the durability of the cabinets. Recognizing the importance of verifying the credentials and certifications of the refinishing professionals I chose guided my decision-making process. Additionally, I committed to learning about long-term maintenance and care tips to ensure my refinished cabinets remain stunning and functional for years to come. This proactive approach allowed me to maximize the value of my investment while safeguarding the beauty of my kitchen.
Importance of Using High-Quality Materials
During my search for affordable kitchen cabinet refinishing services, I quickly realized that opting for high-quality materials is non-negotiable. Investing in superior materials not only ensures the aesthetics of my cabinets remain elevated but also significantly improves their resistance to wear and tear over time. I learned that using top-notch finishes would yield a stunning appearance, providing both beauty and longevity, which ultimately protects my investment in the long run.
Verifying Credentials and Certifications
As I sought out affordable kitchen cabinet refinishing services, verifying the credentials and certifications of potential contractors became a priority. I wanted to ensure that the professionals I was considering were not only skilled but also adherent to industry standards. Checking for relevant certifications helped me feel more confident in their abilities, knowing that they had trained extensively and received the necessary qualifications to execute high-quality work.
In my research, I found that many reputable companies proudly display their certifications and affiliations with professional organizations. This transparency reassured me that these contractors would follow best practices and maintain a commitment to customer satisfaction. I made it a habit to cross-check reviews and ratings from hardware stores and other suppliers, which served as an additional layer of trust in my decision-making process.
Prioritize verifying credentials of potential contractors.
Confirm relevant certifications that ensure quality work.
Check for affiliations with professional organizations.
Cross-check reviews and ratings from reputable sources.
Long-Term Maintenance and Care Tips
To keep my refinished kitchen cabinets looking their best over time, I learned the importance of regular cleaning and maintenance. Using gentle, non-abrasive cleaners is key to preventing damage to the finish, while soft cloths help avoid scratches. I also scheduled periodic inspections for any wear or damage, allowing for timely repairs to maintain the cabinetry’s appearance and functionality.
Tip
Description
Use Gentle Cleaners
Always opt for non-abrasive, mild detergents to preserve the finish.
Regular Wiping
Keep surfaces clean by regularly wiping them down with a soft cloth.
Inspect Periodically
Conduct regular assessments of your cabinets for any early signs of wear.
By incorporating these practices into my routine, I ensured that my kitchen cabinets not only remained beautiful but also stood the test of time, giving me lasting satisfaction from my investment.
Conclusion
Selecting affordable kitchen cabinet refinishing services is crucial for achieving a stunning kitchen makeover while staying within budget. By conducting thorough research, I discovered the right techniques, materials, and skilled professionals to ensure quality results. Understanding costs, negotiating effectively, and verifying credentials helped me make informed decisions. Ultimately, this careful selection process allowed me to enhance my kitchen’s aesthetic and functionality without compromising on quality.
Selecting the Right Local Kitchen Resurfacing Contractor
When embarking on kitchen renovations, selecting the right local kitchen resurfacing contractor is paramount. Whether you’re refreshing your kitchen cabinets or updating fixtures, finding a skilled contractor backed by the Master Builders Association of Victoria can make all the difference. Additionally, coordinating with other professionals, like an electrician, ensures a seamless transformation of your space. Ready to dive deeper into the selection process? Keep reading to find out how to evaluate contractors, the services they offer, and the essential questions to ask before making your final choice.
Understanding Kitchen Resurfacing Before You Start
Before diving into a kitchen resurfacing project, it’s crucial to grasp what kitchen renovations entails. This process involves updating surfaces like countertops, cabinets, and floors without the need for a full remodel. I have found that resurfacing not only improves the aesthetics but also saves time and money compared to traditional renovations. Using project management software like Houzz can streamline your experience and help you stay organized while you choose from various kitchen remodeling companies. Ensure that the contractor you select has a proper license, as this signifies compliance with local regulations Master Builders Association of Victoria and contributes to a smooth and successful transformation of your space.
What Is Kitchen Resurfacing?
Kitchen resurfacing is a method to revitalize your cooking space by renewing key elements such as cabinetry, countertops, and other surfaces. This approach allows homeowners like me to achieve a fresh, modern appearance without the extensive investment and upheaval of full-scale kitchen remodeling. I’ve learned that this process can extend to various features, including lighting, ultimately enhancing the entire ambiance of the kitchen.
Element
Benefits
Cabinetry
Refinishing cabinets can transform their look and increase functionality.
Countertops
Updating surfaces with durable materials adds style and longevity.
Lighting
Improving lighting creates an inviting atmosphere for cooking and entertaining.
Basement Waterproofing
This ensures moisture does not damage your kitchen renovations.
Benefits of Choosing Resurfacing Over Full Remodeling
Opting for resurfacing instead of a complete remodel can be a game-changer for homeowners like me. By choosing kitchen resurfacing, I not only keep my costs manageable but also benefit from faster turnaround times, allowing me to enjoy my newly updated space sooner. Collaborating with local remodeling contractors to enhance my countertops while utilizing expert advice ensures that my custom kitchen truly meets my needs without the massive disruptions full remodels can bring.
Choosing the right contractor for kitchen resurfacing involves more than just picking a name from a list; it’s a process that can significantly impact the outcome of your project. I find that verifying licenses and certifications is an essential first step, as it ensures that the contractor adheres to local regulations and industry standards. Additionally, reviewing their experience and portfolio has provided me with insights into the quality of their work. When looking at past projects, I pay attention to how they handle different materials like masonry and tile, as well as any specialized installations such as fireplace surrounds. This level of scrutiny not only confirms their expertise in kitchen and bathroom renovations but also highlights their commitment to accessibility and design that caters to varied needs. All these factors contribute to making an informed decision when selecting a contractor for my resurfacing project.
Verifying Licenses and Certifications
Before I commit to a kitchen resurfacing contractor, I always ensure they possess the necessary licenses and certifications. This verification process not only reassures me of their professionalism and compliance with industry regulations but also reflects their dedication to quality in services like waterproofing. I appreciate working with contractors who have demonstrated their expertise through previous home remodel and bathroom renovation projects, ensuring that my investment translates into a beautiful and functional space.
Reviewing Their Experience and Portfolio
As I evaluate potential contractors for my kitchen resurfacing project, reviewing their experience and portfolio becomes essential. Observing their past work not only gives me a clear idea of the quality of kitchen remodeling services they offer, but it also helps me gauge their capability in managing various renovation styles. I make sure to consider the contractor‘s understanding of home improvement trends and their compliance with terms of service, as this reflects their commitment to delivering reliable results that align with my expectations.
Services Offered by Kitchen Resurfacing Contractors
In my search for a skilled kitchen remodelingcontractor, I’ve discovered a diverse range of services that cater specifically to kitchen resurfacing projects. These services often include refinishing cabinetry, upgrading countertops, and refreshing flooring options, all aimed at enhancing the overall appearance of the room. Additionally, I have found plenty of opportunities for customization, allowing me to select colors, textures, and materials that align with my vision. This attention to detail is crucial, especially when considering how these updates can complement adjacent spaces, including the bathroom or even the basement. With the right contractor, I can transform my kitchen into a personalized space that not only meets my practical needs but also reflects my style preferences.
Overview of Common Resurfacing Services
In my journey to find the right local kitchen resurfacing contractor, I’ve learned that various services can significantly enhance kitchen remodeling projects. Common offerings include refinishing cabinetry, updating countertops, and replacing or resurfacing the sink, each designed to breathe new life into my cooking space. Understanding these services helps me make more informed decisions about the transformations I want for my kitchen.
Refinishing cabinetry
Updating countertops
Replacing or resurfacing the sink
Refreshing flooring options
Customizing colors and materials
Customization Options in Kitchen Resurfacing
When selecting a remodeling contractor for my kitchen resurfacing project, I prioritize customization options that suit my style and functional needs. This includes choosing the perfect finishes for my cabinetry, selecting durable materials for countertops, and deciding on flooring that complements the overall ambiance of my home. I’ve learned that thoughtful customization can also extend to elements like drywall and even the garage door, ensuring a cohesive look throughout my property, particularly during kitchen remodels that create a seamless flow between spaces.
Preparing to Hire a Kitchen Resurfacing Contractor
Before I hire a local kitchen resurfacing contractor, I focus on setting clear goals for my project. Understanding what I want to achieve helps steer the entire process. I consider factors like layout changes, desired styles, and materials that excite me. Alongside this, preparing a budget becomes essential. I gather insights on kitchen renovation costs, weighing potential expenses against my vision, ensuring I remain realistic yet ambitious. Researching estimates from general contractors and analyzing various construction quotes allows me to make informed financial decisions, paving the way for a successful renovation journey that meets my needs.
Setting Your Kitchen Resurfacing Goals
As I embark on my kitchen renovation journey, I prioritize setting clear and achievable goals that reflect my vision and aspirations for the space. I take pride in defining what I want to accomplish, whether it’s a modern aesthetic, increased functionality, or both. This practice provides direction when discussing my project with kitchen remodelcontractors and helps me establish a realistic budget, allowing me to navigate kitchen remodeling costs effectively while ensuring my expectations are met.
Budgeting for Your Kitchen Resurfacing Project
Establishing a realistic budget for my kitchen remodeling project is key to a successful outcome. I take the time to assess the price of various remodeling services in my area, ensuring I understand what I can expect for different updates and renovations. This thorough budgeting process helps me align my vision with my financial capabilities, setting the stage for a smooth collaboration with my local kitchenremodeling contractor.
Questions to Ask During the Selection Process
As I navigate the process of selecting a local kitchen resurfacing contractor, I find it essential to ask the right questions that address both project timelines and material quality. Understanding how long the project will take helps me manage my expectations and plan accordingly. I believe that discussing the quality of materials and the contractor’s relationships with suppliers can give me a clearer picture of what to expect for my investment. These discussions not only clarify the scope of work but also reveal the contractor‘s level of commitment to delivering a durable and aesthetically pleasing outcome for my kitchen.
Inquiring About Project Timelines and Expectations
As I engage with potential contractors for my kitchen resurfacing project, I make it a priority to discuss the expected timelines. Knowing how long the project may take allows me to coordinate my schedule and plan for any temporary disruptions in my daily routine. Clear communication about timelines helps ensure that both my expectations and the contractor’s commitments align, leading to a smoother renovation experience.
Discussing Material Quality and Supplier Relationships
When I engage with potential kitchen resurfacing contractors, I always prioritize discussions about material quality and their relationships with suppliers. Understanding the types of materials they use gives me confidence in the durability and aesthetics of the final outcome. Additionally, asking about their connections with suppliers can reveal valuable insights into the sourcing process, ensuring I receive quality products at competitive prices.
Making the Final Decision on a Kitchen Resurfacing Contractor
As I approach the final decision on selecting a kitchen resurfacing contractor, I focus on a couple of essential factors: analyzing quotes and understanding payment terms while trusting my instincts. Carefully reviewing the quotes allows me to compare the costs, scope of work, and included services, ensuring I fully grasp what each contractor offers. This step is crucial in making a sound financial decision that aligns with my budget. Alongside this, I pay attention to the payment terms, as they provide valuable insights into the contractor‘s professionalism and reliability. Once I feel confident with the quotes, I remind myself to trust my gut feeling about the contractor, paving the way for finalizing the agreement and ensuring I’m comfortable moving forward with my kitchen resurfacing project.
Analyzing Quotes and Payment Terms
As I review the quotes from potential kitchen resurfacing contractors, I carefully assess the details to understand the full scope of what is being offered. I look for clarity in the pricing and ensure that all necessary services and materials are included, as this helps me avoid unexpected costs down the line. Equally important are the payment terms; I want to ensure they align with my budget and that I feel comfortable with the payment schedule before moving forward.
Trusting Your Instincts and Finalizing the Agreement
After reviewing all the details and quotes from potential contractors, I find it vital to trust my instincts as I finalize my decision. A strong gut feeling about a contractor‘s professionalism and reliability often guides me in making the right choice, ensuring I feel comfortable with the partnership. Once I have resolved my concerns, I am ready to proceed with signing the agreement, marking the beginning of my kitchen resurfacing project.
To assist in my decision-making process, I also consider various factors that contribute to my final choice:
Factor
Importance
Communication
Clear and open dialogue indicates a trustworthy contractor.
Previous Work
Quality of past projects showcases their craftsmanship and reliability.
Transparency
Honesty in pricing and timelines fosters confidence in the agreement.
These factors serve as a guide to ensure I’m making an informed decision that aligns with my vision for the project.
Conclusion
Selecting the right local kitchen resurfacing contractor is pivotal to achieving a successful renovation. By verifying licenses, reviewing experience, and ensuring clear communication, I can build trust and confidence in my contractor’s abilities. Discussing project timelines and material quality further clarifies expectations and enhances the overall experience. A thoughtful decision ultimately leads to a beautifully transformed kitchen that aligns with my vision and needs.
Cabinet Refinishing vs Resurfacing: Exploring the Key Differences
When considering kitchen renovations, it’s essential to weigh your options carefully. Cabinet refinishing and resurfacing are two popular solutions that can breathe new life into your kitchen cabinet while minimizing dust and disruption, especially if you’re also updating other elements like the shower. Both methods have their merits and understanding the key differences can help you make a more informed decision. As members of the Master Builders Association of Victoria, we recognize how these choices can impact the final look and feel of your kitchen. Keep reading to gain insights into the pros and cons of each method, helping you choose the best approach for your unique space.
Understanding the Basics of Cabinet Refinishing and Resurfacing
When considering updates for your kitchen renovations, it’s vital to understand the distinction between cabinet refinishing and resurfacing. Cabinet refinishing involves stripping down the existing finish, addressing any wear and tear, and applying a fresh coat to restore the wood’s original beauty, which pairs beautifully with materials like maple for a stunning appearance. On the other hand, resurfacing entails applying a new veneer or laminate over the existing cabinets to give them a completely new look without the need for intensive labor. Both processes address the wear of cabinetry over time, but the approach and results can differ significantly, impacting the overall aesthetic and functionality of your space.
Defining Cabinet Refinishing
Cabinet refinishing is an effective method for revitalizing tired cabinetry without complete replacement. This process, recommended by the Master Builders Association of Victoria, involves stripping away old varnish to expose the natural wood underneath, allowing for a fresh coat of cabinet painting that highlights the inherent beauty of the timber. It creates a seamless appearance that can beautifully complement other elements in your space, such as your countertop or even your bathtub, while using techniques that work well with wood veneer for durable results.
Cabinet Refinishing Process
Description
Stripping
Removing the existing finish and varnish to reach the bare wood.
Repairing
Fixing any damage or wear to ensure a smooth surface.
Painting
Applying a new coat of paint or stain to restore aesthetics.
Sealing
Finishing with a protective layer to enhance durability.
What Does Resurfacing Entail?
Resurfacing involves applying a new layer of material over your existing cabinetry, transforming its look while bypassing the need for intensive renovations. I often recommend this method to clients with hardwood or fiberboard cabinets; it’s a practical approach that can address issues like water damage effectively. The process typically includes using a brush to smooth out the new veneer or laminate, ensuring a professional finish that enhances the overall appearance of your kitchen or bathroom, while also allowing us to provide top-notch customer service throughout the project.
Key Differences Between Cabinet Refinishing and Resurfacing
Understanding the differences between cabinet refinishing and resurfacing is essential for making informed decisions during your home improvement journey. Each method follows a distinct process, requiring different materials and techniques to achieve the desired outcome. For refinishing, you might utilize sandpaper, solvents, and paints, while resurfacing often involves veneer or laminate, particularly suitable for materials like particle board. Furthermore, the duration and potential for disruption to daily life can vary greatly between the two. By considering these factors, along with the terms of service provided by your renovation contractor, you can choose the right approach that aligns with your vision and lifestyle.
Process Involved in Refinishing vs. Resurfacing
When I guide clients through the process of cabinet refinishing, I emphasize the importance of careful preparation. It begins with removing the drawers and any hardware, ensuring every nook and cranny can be addressed. This approach allows us to create a stunning finish that enhances the room’s overall interior design while being environmentally friendly by using low-VOC paints from trusted brands.
In contrast, resurfacing offers a distinct method that captures my attention for its efficiency. This process involves applying a new veneer or laminate over existing cabinetry, which often requires less disruption in the room. I find that it produces a fresh look without the intensive labor, making it a popular choice for those wanting to quickly elevate their kitchen or bathroom’s interior design.
Materials Needed for Each Technique
When I consider the materials required for cabinet refinishing, I often recommend high-quality paints, solvents, and sandpaper to ensure a flawless finish. The selection of these materials is vital, especially when working on bathroomcabinetry where moisture resistance is crucial, particularly around the sink area. For clients specifically choosing to work with thermofoil, I ensure they’re aware of the unique application techniques needed to achieve the best results while still complementing elements like crown molding.
Paints and solvents for refinishing
Sandpaper and prep tools for a smooth finish
Veneer or laminate for resurfacing
On the other hand, resurfacing requires fewer materials, primarily depending on the type of veneer or laminate chosen to overlay the existing cabinets. Each option can effectively transform the appearance of spaces, often with minimal disruption to your daily life, making it an appealing choice for those of us considering an upgrade.
Duration and Disruption of Daily Life
When discussing cabinet refinishing and resurfacing with clients, I often highlight the timeline and potential interruptions that each method entails. Refinishing typically requires more extensive work, which can lead to a longer process that temporarily affects daily routines, especially in high-traffic areas such as the kitchen or even the bedroom. Conversely, resurfacing is generally quicker and allows for a smoother transition, enabling families to enjoy a fresh look without significant disruption, ultimately contributing to a greater return on investment considering their zip code and local market trends.
Pros and Cons of Cabinet Refinishing
When considering cabinet refinishing, it’s essential to weigh both the advantages and potential drawbacks. I often find that refinishing can breathe new life into oakcabinetry, providing a stunning wood finishing that showcases its natural beauty. This method can be particularly appealing because it allows for customization while also being budget-friendly. However, it’s crucial to be aware of some challenges, such as the possibility of mold in moisture-prone areas, which may affect the longevity of the finish. At our company, we always encourage potential clients to request a free estimate to assess their specific situation, ensuring that they understand the warranty that backs our work and can make an informed decision.
Advantages of Choosing to Refinish
Opting for cabinet refinishing is a financially savvy choice for homeowners looking to achieve a beautiful makeover without a hefty expense. With the right techniques—using sandpaper to prepare surfaces and applying a quality stain—the transformation can be both striking and cost-effective. In my experience, the price of refinishing often falls significantly below that of complete replacements, making it an ideal solution for rejuvenating the appearance of your cabinetry.
Advantages of Cabinet Refinishing
Details
Cost-Effective
Refinishing offers a beautiful result at a reduced price compared to full replacements.
Customization
Homeowners can select colors and finishes that suit their style without extensive remodeling.
Minimal Disruption
Refinishing often takes less time than a full remodel, allowing families to maintain their routines.
Potential Drawbacks to Consider
While cabinet refinishing offers many benefits, it’s important to consider some potential drawbacks. One challenge I’ve encountered is that, if not done correctly, the finish can wear off more quickly in high-moisture areas, like kitchens or bathrooms, leading to additional maintenance down the line. Additionally, the prep work required can be time-consuming, and if you’re not careful with your design choices, the results may not align with your vision for the space.
Pros and Cons of Cabinet Resurfacing
As I guide clients through the decision-making process regarding cabinet resurfacing, I often emphasize its distinct advantages and limitations. The primary benefit of resurfacing lies in its ability to provide a fresh aesthetic at a fraction of the cost of a complete remodel. This method effectively transforms outdated cabinetry with minimal effort, making it an appealing option for those desiring quick and impactful updates. However, it’s equally important to recognize the limitations; resurfacing may not adequately address underlying issues such as structural damage or severe wear. Understanding these elements allows homeowners to make informed choices that align with both their budget and intended outcomes.
Benefits of Opting for Resurfacing
Choosing to resurface cabinets can be an excellent decision for homeowners seeking a quick and effective solution to update their space. It’s a streamlined process that allows me to help clients achieve a fresh look without the extensive labor involved in a full remodel. This approach not only enhances the aesthetic appeal of cabinetry but also significantly reduces the project timeline, ensuring less interruption to daily life.
Limitations of Cabinet Resurfacing
While cabinet resurfacing can provide a fresh look with minimal effort, it has its limitations. This method often falls short in addressing deeper issues like structural damage or significant wear that may not be visible at first glance. As I assess cabinetry for resurfacing, I remind clients that if the underlying material is compromised, simply applying a veneer may not resolve the problem in the long run.
It’s essential to consider the following limitations:
Does not fix underlying structural issues.
May not last as long if existing materials are damaged.
Less suitable for extensive renovations requiring comprehensive updates.
Cost Comparison: Refinishing vs. Resurfacing Cabinets
When weighing your options between cabinet refinishing and resurfacing, understanding the cost involved is essential. I’ve seen that the average cost for refinishing typically ranges significantly based on factors like the size of the cabinetry, the condition of the wood, and the specific finish chosen. On the other hand, estimating the expense of resurfacing may vary depending on the type of veneer or laminate selected and the extent of the work required. By reviewing both methods’ financial aspects, homeowners can make informed decisions that align with their budgets and expectations for their space.
Average Cost Range for Refinishing
In my experience, the average cost for cabinet refinishing usually falls between $1,500 and $5,000, depending on several factors such as the size and condition of the cabinetry, as well as the specific materials used for the finishing. I’ve found that larger spaces or intricate designs may drive costs higher, but the investment can be worthwhile given the significant aesthetic improvement and longevity it can bring. By evaluating your cabinetry‘s current state and consulting with a professional, you can get a more tailored estimate that aligns with your project goals.
Estimating the Expense of Resurfacing
When estimating the expense of resurfacing cabinets, I typically consider factors such as the type of material chosen for the veneer or laminate and the size of the cabinetry. Costs can vary widely, with basic laminates offering a budget-friendly option, while higher-end veneers can elevate the overall project investment. It’s a good idea to review your specific project details and consult with a professional to better gauge the financial commitment involved.
Cost Factors for Resurfacing
Details
Material Type
Basic laminates are generally more affordable compared to premium veneers.
Cabinet Size
Larger cabinets or intricate designs will increase overall costs.
Labor Costs
Professional installation fees may vary depending on the complexity of the project.
Making the Right Choice for Your Kitchen
Choosing the right method for your kitchen cabinets involves a few key considerations that can significantly impact the outcome of your renovation. First, I always recommend assessing the overall condition of your cabinets; identifying any existing issues is crucial in determining whether refinishing or resurfacing is more appropriate. Next, understanding your aesthetic goals is essential. Do you want to maintain the classic look of your wood or are you ready for a modern twist? Equally important is your budget, as both options come with different financial implications. By carefully evaluating these factors, you can make an informed decision that aligns with your vision and enhances your kitchen’s functionality and style.
Assessing Your Cabinets’ Condition
When I’m evaluating cabinets for a renovation project, I pay close attention to their overall condition to determine the best approach. I often check for signs of water damage, warping, and structural integrity, as these factors will influence whether refinishing or resurfacing is appropriate. This assessment helps me to provide tailored recommendations that align with both my clients’ aesthetic desires and the functional needs of their space.
Considering Your Kitchen’s Aesthetic Goals
When guiding clients in selecting cabinetry finishes, I focus on the overall aesthetic goals for their kitchen. Determining whether they prefer a traditional, rustic look or a modern, sleek design sets the stage for the decision between refinishing and resurfacing. By understanding these visual aspirations, I can help them choose a solution that not only meets their needs but also enhances the atmosphere of the space.
Aesthetic Preferences
Recommended Approach
Traditional Wood Look
Refinishing to restore the natural beauty of the wood.
Modern Design
Resurfacing with sleek veneers or laminates for a contemporary finish.
Customized Color Schemes
Refinishing allows for tailored paint or stain choices to match personal style.
Understanding these preferences can be pivotal for homeowners, as the right choice directly influences the aesthetic appeal and overall functionality of their kitchen space. Making informed decisions can turn a renovation into a cohesive design statement that resonates with their individual tastes and lifestyle.
Budgetary Considerations
Considering your budget is a crucial step when deciding between cabinet refinishing and resurfacing. I’ve seen clients benefit from refinishing as it often requires a lower financial investment while delivering stunning results, yet resurfacing can also be a smart choice when aiming for a quick and impactful update. By evaluating quotes from professionals and considering the long-term benefits of each approach, you can make an informed decision that fits both your aesthetic goals and financial plans.
Conclusion
Understanding the differences between cabinet refinishing and resurfacing is crucial for making an informed decision regarding your kitchen or bathroomrenovation. Each method offers unique benefits and limitations, impacting both the aesthetic outcome and the overall cost. By assessing the condition of your cabinets, considering your design goals, and evaluating your budget, you can select the most suitable option for your needs. Ultimately, this knowledge empowers you to create a space that reflects your vision while maintaining functionality.